Circle to Land Approaches

When I was doing my instrument and multi-engine training, we did a lot of circle to land approaches.  As a student, I could never figure out why these types of approaches would ever be practical when you could an approach straight in to another runway.  But, as a good student, I never asked my instructors the purpose of them, I just did them to the best of my ability.

Now, having been flying in the IFR system for almost a decade, I’m finally beginning to fully understand the practical purpose of a circle to land approach.  I have actually elected to do an approach where I had to circle to land on several occasions in actual IMC conditions.

One important note to remember on circle to land approaches is that the minimum descent altitude (MDA) is always higher than on a straight in approach.  The reason for this is that you are basically joining the pattern for a different runway and you have to be able to visually keep yourself clear of towers and other obstacles.  So, you need a higher visibility and a higher ceiling than if you were just lining up to come straight in.

Here are a couple of practical circumstances where it would make sense to do a circle to land approach.

Airports with only 1 straight in approach

This one is easy.  There are a number of airports scattered around the US that have only 1 straight in instrument approach published for it.  Around my part of Texas, the first one that pops into my mind is the RNAV 31 at T85 in Yoakum, TX.  Most of the year, the prevailing wind is out of the south, so 13 is the favored runway at T85.  During the winter is when most of the IMC weather happens in South Texas, so that is why the approach is for 31.

Of course, especially this year during the summer, there are some IMC days where an approach to T85 would be necessary.  When there is a strong wind out of the south, landing on 31 is impractical, so a pilot would fly the approach to 31, then circle to land on 13.

Approaching from the opposite direction

Take a look at the RNAV 19 at KBMQ, Burnet, TX.  The two initial approach fixes (IAF) are IXANY and JIBAJ.  If a flight is approaching BMQ from the west or north, this is an easy approach to join.  If a flight is coming from Austin (directly the the east and a little south) or San Antonio (almost directly south), it would be a bit of extra flying to get configured properly for the approach.  Especially coming from Austin, because the degree of turn to join at JIBAJ wouldn’t make the approach practical.

Well, how about vectors?  Unfortunately, Houston Center doesn’t have this approach depicted so vectors aren’t a possibility.  Center can give you vectors north to make the angle a little easier to join at JIBAJ, but they can’t vector you onto the approach.

Direct DLORA to join is another option, but again, if you are approaching from the southeast, the angle is wrong.

Insert the RNAV 01 approach with a circle to land.  AMUSE is right on V163, so it’s really easy to join the approach there coming from the south.  Coming from Austin, joining the approach at SUBIE works out great. Fly down to the MDA, join the left downwind for 19, and everyone is happy.

VOR Circle to Land Approaches

Every instrument pilot has had an instructor “force” them to do a VOR A or VOR B approach and no one enjoys them.  I personally think they are good practice.  With the number of RNAV systems and RNAV approaches out there, though, VOR approaches are becoming a bit archaic.

They do have a place in this discussion, though.  A VOR approach is given an A or B designation when the angle of the final approach course is greater than 30 degrees to the runway (VOR A KLZZ), or the final approach course is lined up with the runway, but the MDA is too high to practically descend and land (VOR A KGRK or the VOR/DME C KASE).

So, there are practical uses for a Circle to Land approach.  The next time you do some IMC work with an instructor, ask him/her if you can include one.

Similar Posts

  • Preventing Gear Up Landings

    baron
    Image credit: Aviation Consumer

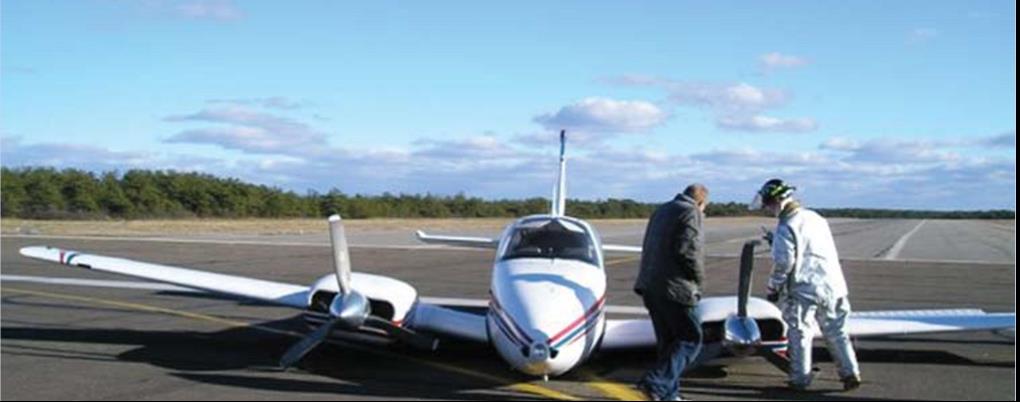
    On the evening of November 3rd, 2015, I was returning to my home airport of Lancaster from Pittsburgh in my company’s Aerostar, after being out on charter all day. It was dark out as I entered the traffic pattern at Lancaster. After an uneventful approach, I was cleared to land behind a Mooney. The spacing looked good as I turned final, but, as I was nearing the threshold, I started to become concerned that the Mooney wouldn’t be clear of the runway in time for me to land. At that moment, over the radio I heard an uncomfortable transmission from the Mooney pilot: “Tower, Mooney ABC has landed gear up.”

    It took the tower controller a minute to grasp what was going on, and I was on about a 1-2 mile final when I was instructed to go around. Thankfully, the Mooney came to a stop in such a position that I was able to use the other intersecting runway, and was on the ground only a few minutes later. I can assure you, however, that I’ve never checked my “3 green” so many times in one traffic pattern as after that incident. Thankfully, no one was hurt, but there sure was an impressive amount of emergency equipment on the runway as I taxied back to my hangar.

    In aviation, there’s a saying that goes: “There are two types of pilots. Those who have landed with their gear up, and those that will.” I don’t like that saying. The potential of a gear up landing (as a result of pilot error) is something that has always been a risk that I have worked hard to avoid. Not only is a gear up landing embarrassing; but it’s also an extremely expensive black mark on any pilot’s career.

    image
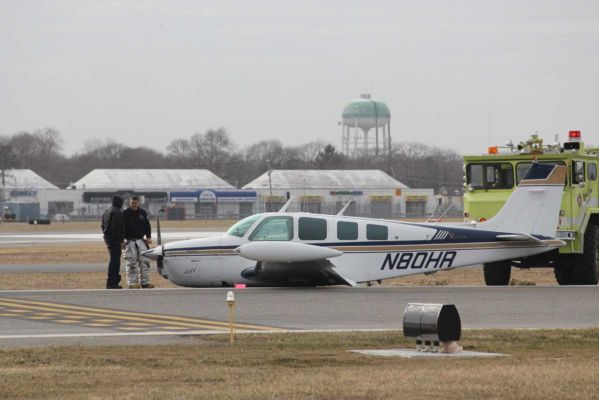
    Not a good day. (Photo credit: http://www.newsday.com/long-island/suffolk/plane-lands-at-republic-with-no-wheels-1.2735131)

    According to a July 2006, article in Aviation Consumer, the estimated cost of repairs following a gear up landing for an A-36 Bonanza would be about $27,000 and about 3 weeks of down time. 25 years ago, even my beloved E33 Bonanza was the victim of a gear up landing. While it was neither me nor my dad flying our airplane that day, the event stays in its history and reduces its value should the time ever come to sell it.

    That incident in 1990 resulted in approximately $25,000-30,000 in repairs. The cause of the incident was classic: the pilot put the gear down at the normal time, but then had his downwind extended by tower. He brought the gear back up to fly the longer downwind, but forgot to put it back down later when he was cleared to land. Like many pilots, he had a set routine time when he normally put the gear down, and when his routine was changed, he didn’t remember to lower the gear once more.

    Unfortunately, no matter what experience level one may be at, no pilot is immune to the possibility of such a mistake. The following are 5 tips that I have learned in my time flying that have helped myself and others minimize the chance of a gear-up landing occurring:

    1. Know your aircraft systems: What are the operating perimeters on your airplane’s gear warning system? Most airplanes have a designated speed or power setting at which the gear warning horn will sound in the event that the gear isn’t down and locked. In the Aerostar that I was flying, the gear horn was supposed to come on at 15” of manifold pressure with the gear up, but in practice, it didn’t come on until much lower than that. It has since been adjusted, but at the time it was important for me to know that if I had left the gear up, the horn wouldn’t have sounded in a timely enough manner for me to go around, much less lower it prior to touchdown. Most likely it would have just added to the noise of metal on concrete as I pulled the power all the way back in the landing flare.
    2. Don’t override gear-up warning systems: They were put there for a reason! Even if you’re out doing maneuvers and the horn is blasting in your ear for half an hour, resist the temptation to simply pull the circuit breaker or push the warning silencer to make it shut up. If a pilot disables the gear-up warning horn and then later forgets to put the gear down on landing, he or she will have a much worse headache on their hands than the one that the horn would have given them.
    3. Use your checklists and memory items: It doesn’t matter how much a pilot knows about his or her airplane, or the procedures for it. Distractions happen. Mistakes Happen. Always consult the checklist for confirmation that you’ve accomplished all the essential tasks before landing. Additionally, if you haven’t already, work on developing call outs which you perform out loud regardless of whether you are alone in the airplane or not. Whenever I’m landing an airplane, I start with my flows, go through my GUMPS (Gas-Under carriage- mixture- props- seat belt) checks, then do the printed checklist, and finally when on short final I call out “short final, cleared to land, three green.” I’ve had several passengers tease me about doing the “three green” call out while I was flying aircraft that didn’t have retractable landing gear. But, I’d much rather be in the habit of checking every time regardless of what I’m flying than forgetting to check when it is necessary.
    4. Use your available resources and develop healthy habits: If I have someone riding with me, I generally ask them to confirm that there are 3 green lights glowing on the instrument panel. Even if that person isn’t a pilot, they will probably enjoy the opportunity to be involved, and it’s a good way for me to stay in the habit of checking the gear lights to ensure that everything is properly down and locked. I’ve also found that intentionally leaving your hand on the gear lever until you have gear safe lights is a good idea. Forcing yourself to keep your hand on the handle until you have the all important lights obligates you to actually observe the indications instead of simply throwing the lever and moving onto something else. This way, if you only get an indication of 2 greens you’ll be aware of it right away and have more time to respond appropriately. It also helps you to learn the normal length of time it takes for the gear to extend or retract, which will be helpful to you to be aware of any abnormalities in the gear system.
    5. Upgrade your aircraft’s gear-up warnings: There’s a variety of ways you can improve your aircraft’s ability to warn you of a potential gear-up landing. For student pilots or pilots new to complex aircraft, it could be something as simple as a red post-it note on the panel to remind you to verify the gear position prior to landing. Or, if you own an aircraft that doesn’t have an effective way to warn the pilot of a gear-up landing, consider investing in an aftermarket gear-up warning system – surely the extra price of such an upgrade is a small amount next to the cost of repairing the damage from a gear-up landing!
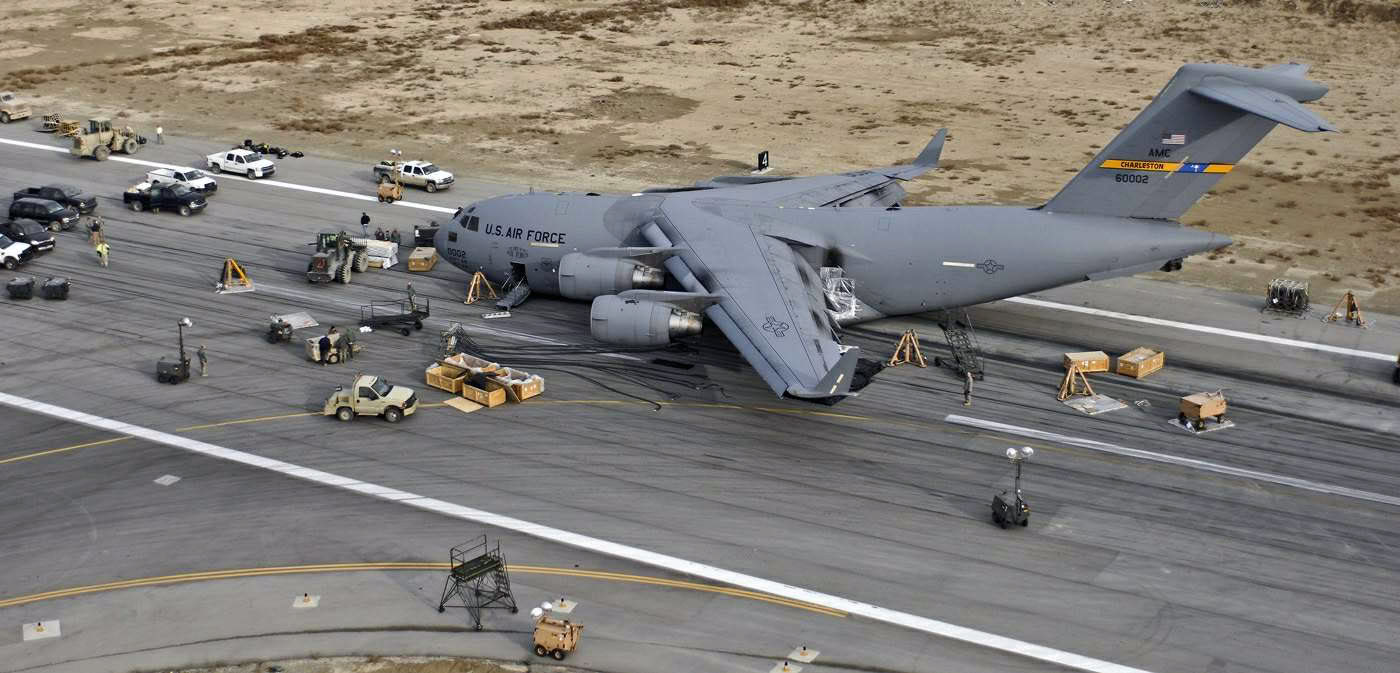
    Crash recovery and emergency management crews survey a C-17 Globemaster as it rests on Bagram Air Field's active runway Jan. 31 after landing with its landing gear still up. More than 120 Airmen, Defense Department civilians and contractors successfully removed the crippled aircraft from the runway Feb. 2 and restored full air operations shortly thereafter. The "belly up," or no landing gear, recovery effort that began here Jan. 30 was the first time in the airframe's 16-year Air Force history. (U.S. Air Force photo)
    It can happen to anyone! The gear handle in this C-17 was in the “UP” position. (Photo Credit:https://theaviationist.com/2009/02/09/c-17-gear-up-landing-in-bagram-images/)

    Always remember, regardless of experience, no pilot is immune to the possibility of a gear up landing. The best way to safeguard yourself is to discipline yourself in the use of flows, checklists, and call outs. Things like gear warning horns, visual reminders, and other systems are a useful back up, but they shouldn’t be relied upon to save your bacon if you don’t get the gear down at the proper time. Fortunately, in most gear up landings, the pilot and passengers are able to walk away uninjured – but that doesn’t lessen the embarrassment or financial burden of the event. So, keep your chin up, your gear down, and remember….THREE GREEN

  • The RDD LX7

    Have a Lancair IV-P?

    Want to make it better than a Cirrus or a Cessna TTx?

    Meet the team at RDD creating the LX7.  Just make sure you are sitting down as you are about to be blown away.

    RDD (Research. Design. Development) is a professional building company for the Lancair line of experimental aircraft (Lancair unveiled the Mako at Osh Kosh this summer, which performs slightly less than the advertised values of the LX7, but is available as a new kit).  For those unfamiliar with the experimental world, when an experimental kit is bought, the owner/builder can build the entire aircraft himself, partially build it then send it to a completion center, or have a professional build company put it together.  This last option is what RDD did with Lancair aircraft before Lancair moved from Oregon to Uvalde, TX.

    Once Lancair was sold, RDD started thinking on how to make the IV-P better.  Boy, did they.  What resulted is the LX7.

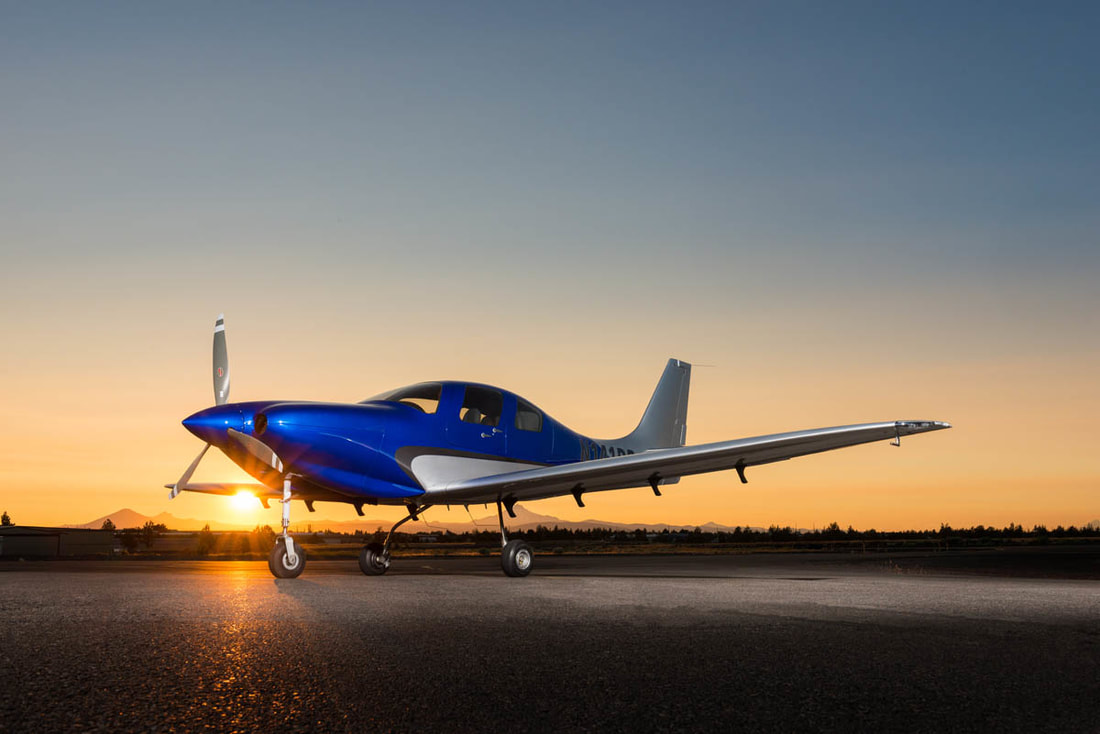
    The LX7 is a retractable gear, single engine piston, pressurized aircraft that sits 4.  See it on the ramp and it looks like a Lancair or a Columbia.  Sit in the cockpit and you’ll know something is different.

    Starting with the power plant, RDD put a Continental TSIO 550-E engine in the IV-P airframe, giving the airplane 350 HP.  They redesigned the wing to hold 180 gallons of usable fuel and a much better stalling envelope (anyone who has looked at a Lancair IV or IV-P wing knows that there isn’t much wiggle room with angle of attack on those airplanes), lowering the stall speed to 62 knots dirty.

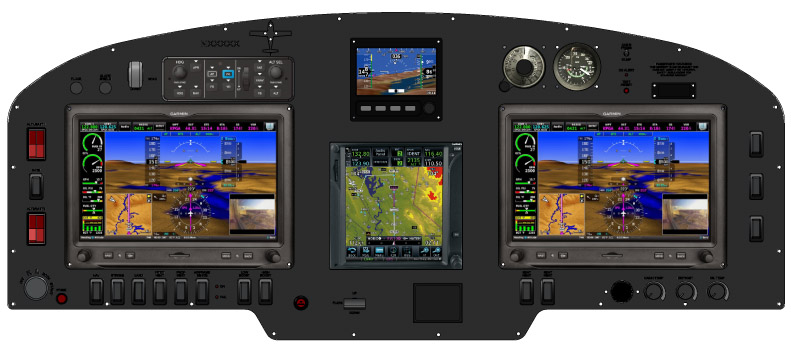
    The cabin is roomier and the panel is beautiful.  Equipped with 2 or 3 Garmin G3X Touch panels (the experimental equivalent of the G2000), plus a GTN 750 and a fully digital backup flight instrument from Grand Rapids, plus ESP technology built in to the autopilot, this plane seems like a pilot’s dream.

    I haven’t even gotten to the best part:  the speed.  Being pressurized, the LX7 has a 25,000 foot service ceiling where it can achieve cruise speeds of 260 knots at best power (24 GPH) and 250 knots at best economy (18 GPH).

    Yes, I did just say 250 knots at 18 GPH in a single engine piston.

    With 180 gallons of fuel.

    Make sure you bring a Travel John.

    Worried about an experimental?  The airframe is equipped with a full BRS system similar to the Cirrus SR22, keeping everyone safe and sound.

    There is one flying LX7 currently and RDD is working on 3 more.  The price tag for the full conversion is $550,000.  The kicker is, the owner has to provide the Lancair IV-P airframe.  There are currently 10 Lancair IV-Ps for sale on Controller, varying in price from $200,000-$400,000, bringing the total price of the project to $750,000-$950,000.  Owners who already have a IV-P or a IV-P kit can send it on over to RDD to get started on their project.

  • Cirrus Approach

    Earlier this year, Cirrus debuted it’s new Learning Management System (LMS), Cirrus Approach. For several years, Cirrus has led the way in online systems training while using several different platforms for it’s LMS. Cirrus Approach is the culmination of lots of sampling and tinkering, and boy, did Cirrus knock it out of the park.

    For those of you unfamiliar with the Cirrus training program, here is the quick rundown. When a pilot who has no Cirrus time buys a Cirrus aircraft, initial transition training is required to familiarize the pilot with the aircraft systems, speeds to fly, power settings, etc. The Cirrus Transition Course is a 3 day that gets a VFR pilot up to speed in the airplane. Under the Cirrus Embark program, those 3 days of training are covered by Cirrus and free to the new owner.

    If the pilot is an IFR pilot, then the 5 day Cirrus Advanced Transition Training Course is required. If the pilot has Cirrus experience, but with a different engine or avionics configuration, there are courses for that too. The Cirrus Embark program covers 3 days of training for most courses for a new Cirrus owner.

    As part of the aforementioned courses, there are systems to learn about and procedures to understand. This is where the Cirrus Approach LMS excels. Cirrus has done a great job of putting together lots of good videos (that are actually interesting but not annoying) on the airplane, systems, how to fly it, etc. for each course. It cuts down greatly on the time that the training instructor has to spend on the ground with the pilot since the pilot has already compiled knowledge through Cirrus Approach.

    Cirrus Approach is accessible online at learning.cirrusapproach.com. To get access to the courses, create an account, then select the Learning Catalog. The courses are categorized based on the type of training (Transition, Advanced Transition, Avionics Differences, Airframe & Powerplant Differences, Recurrent, and Specialty), then further broken down into the type of airplane, engine and avionics (eg. SR22T G6 Perspective+). Make sure the correct engine and avionics configuration is selected! Notice, there is a difference between the SR22T and SR22 (Turbo & Non-Turbo).

    Anyone can do the specialty courses. I would highly recommend for everyone to take the Engine Management course as well as the Icing Awareness Course for you TKS and FIKI operators. The Takeoff & Landing course is a good refresher course for a pilot who hasn’t done any training in a while.

    The Recurrent Training courses are encouraged for all Cirrus pilots. There is an IFR Refresher, a VFR Refresher, and a Skills Refresher. These are recommended to rotate through with a CSIP (Cirrus Standardized Instructor Pilot) on a yearly basis. With a little extra ground, a Flight Review and an IPC can be accomplished yearly using these courses.


    Interested in Initial or Recurrent training in your Cirrus using Cirrus Approach? Contact Texas Top Aviation today!

  • The Aunt Betty Directive: PFD Failures

    Glass panel displays, ballistic parachute aircraft recovery systems, portable tablet computers enabling paperless cockpits, and widely available three axis autopilot systems have changed the way we fly, the way we train, and the way we are expected to perform on check rides. Our training and testing paradigms have tried to stay in synch, yet always seem to be catching up to the latest levels of technology.

    This is very apparent when we instructors are preparing a student for an FAA practical test. When training aircraft had no autopilots, no GPS, and certainly no parachutes, the general philosophy was that during training, the student should have the lowest level of technology available. This was also the expectation on the check ride. This theory has changed over the years and now the Practical Test Standards require that an applicant integrate all available technology while demonstrating mastery of his or her aircraft. This raises numerous questions from instructors and students about what technology will be available for each task.

    One example of this dilemma is found when contemplating an instrument airplane practical test in a Cirrus SR20/SR22. The test requires the task “Instrument Approach without Primary Flight Display”, which has taken the place of what was the partial panel approach, accomplished without use of gyroscopic heading and attitude indicators. In the Cirrus, the standby attitude indicator, standby airspeed, and standby altimeter are available, as is the Multi-Function Display. Guidance from the FAA has us shooting a GPS approach using the moving map display on the MFD after disabling the PFD. Those of us who trained and tested in steam gauge aircraft think that this task should be fairly easy. With a fully functional Attitude Indicator and a nice big moving map display showing our course, a reasonably competent instrument pilot should have little trouble adapting to this setup and flying a good approach.

    But, in the Cirrus specifically, and perhaps in other aircraft as well, another question comes up. Can the applicant use the autopilot (which still works just fine after a display failure) during the approach without the PFD? A rather famous DPE who writes for a national magazine says “yes”, opining that not to allow its use would be introducing simultaneous multiple systems failures, which is strictly forbidden in the minds of some. If we follow this logic, we would not test simulated engine failure emergencies in these aircraft either, because to do so would imply failure of not only the engine, but the CAPS parachute system as well. In my former role as a pilot examiner, I always said no, that the approach should be hand flown. Here is my logic.

    I was amazed that flight instructors and examiners would accept the substitution of autopilot technology for the skill required to fly an approach without the PFD. I would argue that the intent and the well described emphasis of the PTS is that the applicant must demonstrate the ability to control the airplane after a loss of the primary flight display, not observe and monitor the autopilot controlling the airplane! This argument was generally unpersuasive, so I approached from a different point of view, that of a concerned family member.

    “Aunt Betty” represents a future passenger flying with the soon to be rated instrument pilot. Here is the question posed to Aunt Betty: “When we train and test pilots for instrument proficiency, we require them to demonstrate the ability to safely and skillfully fly the airplane without their primary instruments. Now, Betty, in this airplane, we can test this task in one of two ways. We would like your input on which way you would prefer, seeing as you will be a frequent passenger with your nephew. We can either have the pilot (might be your son, brother, husband, or nephew) demonstrate that he can fly the airplane by hand without the PFD, which does require a little more skill and a slightly different technique, or, we can require the pilot to perform this task using the autopilot so that the pilot basically monitors the airplane flying itself on the approach.

    “Now, Aunt Betty, a pilot allowed to use the autopilot system on this approach may not have the skill or technique to fly the approach by hand in the clouds should the autopilot shut down due to turbulence or mechanical failure. Should this happen to a pilot without the skill and practice normally required, the odds of a fatal accident occurring would be quite high.

    “So what do you think, Aunt Betty? Would you feel more comfortable flying with this fellow if he has demonstrated mastery of the aircraft (sans PFD) without the autopilot or only with its assistance?”

    This leads us to a larger discussion about the use of other technology, iPad, GPS moving map, and more. If technology is used as a replacement for pilot proficiency during training and testing, we end up with less skillful, less competent and ultimately less safe pilots. But, if we require that our students demonstrate mastery with the lowest available level of automation and technology (which, by the way, implies excellent fundamental aircraft control skills) then, when technology is added into the equation, we have a safer pilot.

    Technology can be a value added safety multiplier, or it can be a crutch needed to make up for lack of fundamental and advanced skills. Crutch or Safety Multiplier, which one will you choose? I know which one Aunt Betty prefers.

    Charles McDougal is a flight instructor, corporate pilot, and former DPE ‎who offers basic and advanced flight instruction in the San Antonio area.  To find out more information about Charles or to contact him, visit his website, www.flighttrainingcoalition.com.

  • Cirrus SR22 Owner Completes First Solo


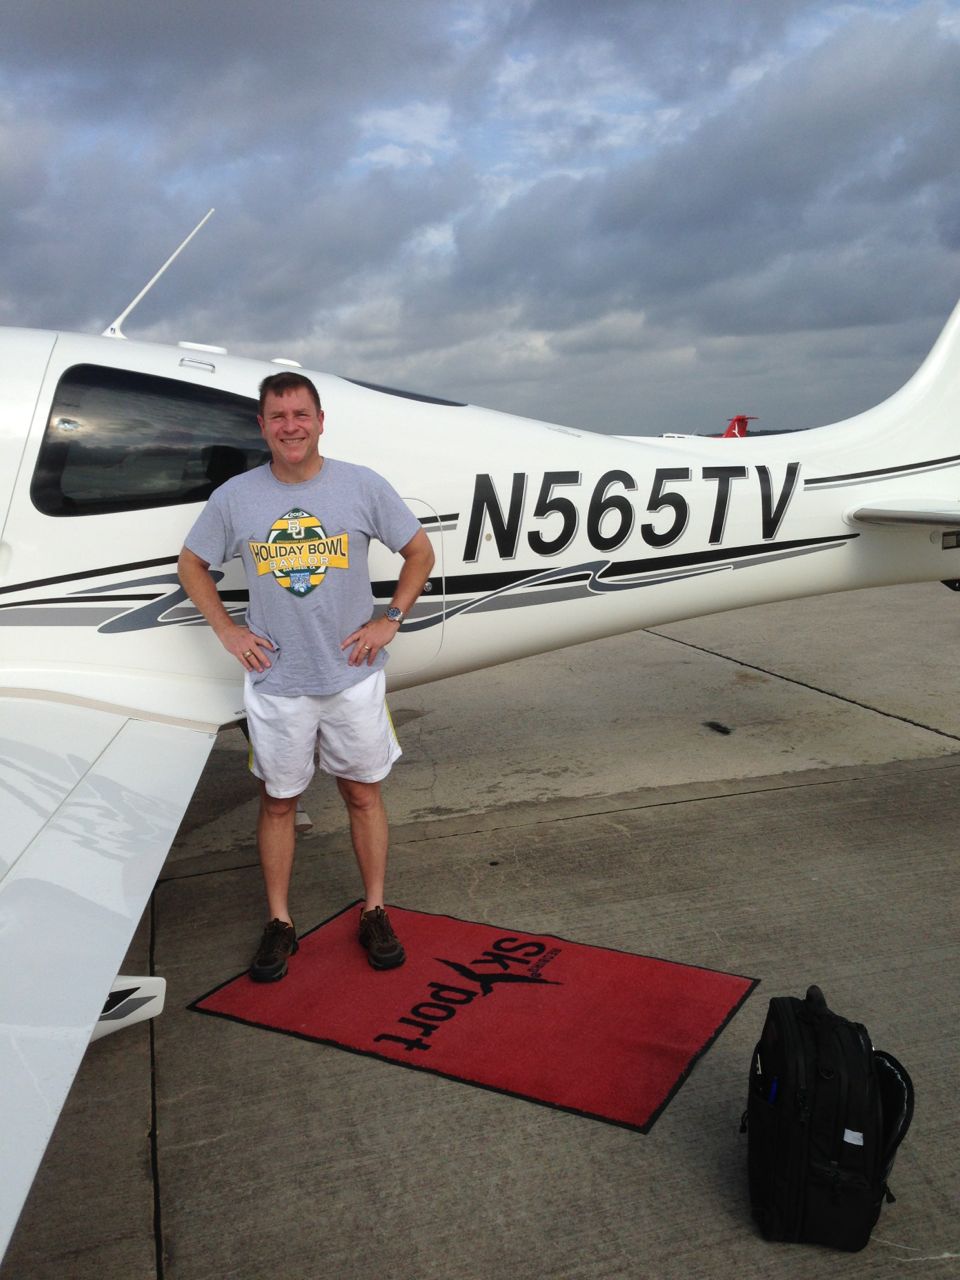
    Monte and N565TV

    Congratulations to Monte James who, on July 31, 2014, completed his first solo flight!  Monte is the owner of N565TV, a 2007 Turbonormalized Cirrus SR22.  N565TV is a G3 model with an Avidyne panel.  Monte was very excited to complete his solo flight.  He reported very good landings during the flight (he even said the last landing, which was probably his best yet, caused him to break into laughter!).  Texas Top Aviation’s Hank Gibson, Monte’s instructor, took pictures and continued the tradition of cutting Monte’s shirt tail to commemorate the flight.

    Congratulations to Monte!


  • Free iPad Webinar

    Are you thinking of buying an iPad and going to a paperless cockpit?  Have you just recently purchased an iPad and are unsure of how to use Foreflight to it’s fullest extent?  Check out this free webinar on Monday, January 19th.  Gary Reeves, a Master CFI from California, will be hosting the 90 minute seminar, which begins at 1800 Z.  He will be able to point you in the right direction for what type of iPad to purchase, how to set up your Foreflight account, and the basics of using the App.

    You can finally get rid of those paper charts, saving clutter in the cockpit.  Just make sure you bring along a charger for those extended flight in case your battery dips low!

    To sign up for this webinar, click here.  There is no cost associated with the webinar.

Leave a Reply

Your email address will not be published. Required fields are marked *