EAA Airventure at Osh Kosh always draws great innovators every year, leading the aviation consumer to discover something new and different. Flying cars have always been a dream for the everyday pilot. Why not fly to work? Why not park the plane in the parking lot? Why not drive from the runway onto the freeway? All excellent questions!
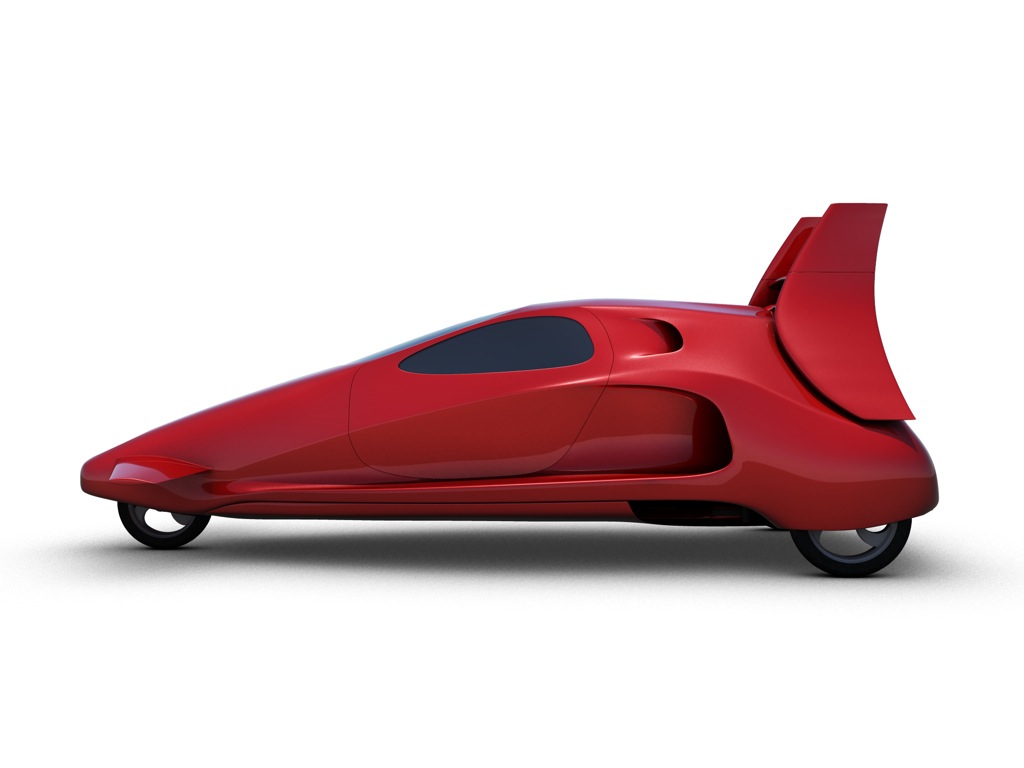
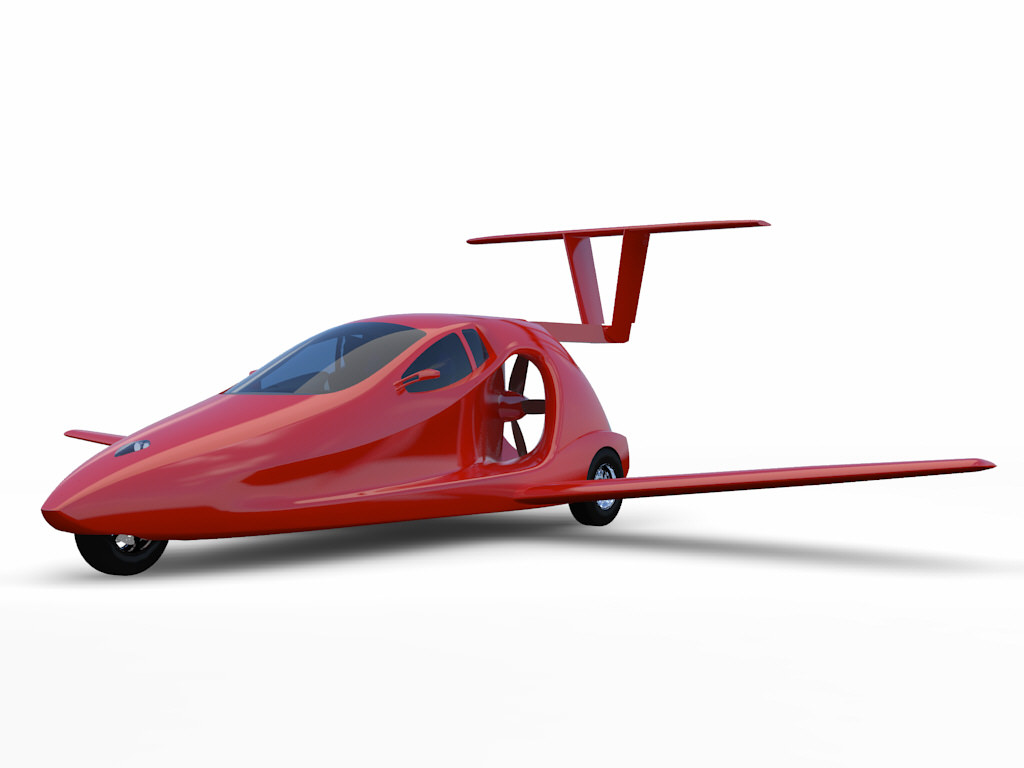
Well, Samson Motorworks is trying to make those dreams a reality. Samson’s Switchblade flying car is in the (hopefully) finally stages of development this summer. The company expects to be able to conduct test flights early next year, then begin selling the experimental kit.
The Samson Switchblade will be in the Experimental category, but Samson has a builder assist program that only adds $20,000 to the final cost of the kit. The total price of the kit, which comes 49% completed and only takes 3 weeks to complete with the builder assist program, comes in at $140,000. That includes the engine, avionics (it’s equipped with Dynon’s 7″ Skyview glass panel display, a Dynon radio and transponder, a Dynon intercom, a Dynon AOA, an iPad mini, and an ADS-B GPS), and the builder assist program. Similar to a Cirrus, it is also equipped with a Ballistic Parachute Recovery system.
The Samson Switchblade has several different engine options, including a supercharged, liquid cooled, V-4 similar to a Corvette engine that will produce 190 HP. Max cruise in the air should be around 170 knots. The Switchblade will hold 30 gallons of mogas, burn 9 GPH in the air, and get 35 mpg on the ground. The gross weight will be 1,750 pounds.
How does the car to plane transition happen? Samson has developed a fly by wire system to retract the rudder down while the car is in drive mode. The wings use a mechanical linkage to fold up into the belly.
There are several different packages for the Samson Switchblade: the Snowbird, the Aurora, and the Trek options. Details can be found on Samson’s website.
I, for one, will be keeping an eye on the freeways next summer to keep an eye out for cars sprouting wings. No more traffic jams!
A brand-new event for Lancair owners, the 2018 Great American Lancair Rally will be a multi-stage “grand tour” of the Western US. Starting and ending in Central Texas, the Rally will take place September 24th through October 5th 2018.
The Rally will begin in Uvalde, TX (KUVA) on September 24th at the Lancair headquarters. There will be 6 legs, with stops at:
Sedona, Arizona (KSEZ)
Paso Robles, California (KPRB)
Redmond, Oregon (KRDM)
Spanish Fork, Utah (KSPK)
Taos, New Mexico (KSKX)
San Marcos, TX (KHYI)
At each stop, there will be food, drinks, and fun for everyone.
Lancair plans on making instructors available to pilots who would like any kind of training along the way. Hank Gibson from Texas Top Aviation will be one of the instructors available.
Lancair plan to make the Great American Lancair Rally an annual event, with the 2019 Rally spanning the eastern half of the country.
The Great American Lancair Rally is open to all Lancair owners, potential owners and interested aviators. Fly a different airplane? All makes and models are welcome!
For more information & to register, check out the 2018 Great American Lancair Rally’s website.
A brand-new event for Lancair owners, the 2018 Great American Lancair Rally will be a multi-stage “grand tour” of the Western US. Starting and ending in Central Texas, the Rally will take place September 24th through October 5th 2018. The Rally will begin in Uvalde, TX (KUVA) on September 24th at the Lancair headquarters. There…
We spend time training for them, but real-world emergencies are rare enough that it’s easy to get complacent. They don’t always happen to “other pilots,” though, and preparation can make a big difference when things don’t go as planned:
• What if you lose 500 rpm during takeoff, but the engine is running smoothly?
• What if the ammeter drops to zero during a flight in IMC?
• What if your left aileron develops a strong vibration in flight?
Our new seminar is full of expert tips on handling those “up here, but wishing you were down there” scenarios. We focus on how to keep abnormal situations from becoming full-blown emergencies, offer advice on keeping critical problems under control, and give our best advice on off-airport landings.
Find an AOPA Emergency Seminar near you!
Monday January 11, 2016-The Woodlands Waterway, 7pm-9pm
1601 Lake Robbins Drive, The Woodlands, TX 77380
Tuesday January 12, 2016-Wyndham Houston West, 7pm-9pm
14703 Park Row Blvd., Houston, TX 77079
Wednesday January 13, 2016, Holiday Inn San Antonio Airport, 7pm-9pm
77 NE Loop 410, San Antonio, TX 78216
Thursday January 14, 2016, Omni Austin Hotel at Southwark, 7pm-9pm
4140 Governor’s Row, Austin, TX 78744
Courtesy AOPA.org We spend time training for them, but real-world emergencies are rare enough that it’s easy to get complacent. They don’t always happen to “other pilots,” though, and preparation can make a big difference when things don’t go as planned: • What if you lose 500 rpm during takeoff, but the engine is running…
For years, Cirrus owners who have the Avidyne Entegra PFD and MFD have been clamoring for Avidyne to come up with some sort of upgrade. The Entegra, or EX 5000 system, is late ’90s technology and, though it still works, there will be a certain point in the future when it gives up the ghost. Avidyne still supports the Entegra system, but it’s hard for a Cirrus owner to see all this new technology coming on the market while not being able to upgrade the original Avidyne screens.
Avidyne gave it a go in the late 2000s with a panel upgrade known as the R9. The R9 was a good system, but Avidyne was very slow on the release (rumors were the company wanted it to be absolutely perfect before releasing it, which frustrated Cirrus, who then switched to the Garmin Perspective panel, leaving Avidyne behind) which led to the R9 only being available as a very expensive retrofit to the Entegra system ($80,000-$90,000 for the system and install). Needless to say, there weren’t that many takers.
Late in 2020, Garmin announced it had received certification to retrofit Avidyne Entegra equipped Cirrus Aircraft with the company’s G500 TXi displays, which gave new hope to G1, G2, and G3 Cirrus owners. The price tag wasn’t outrageous, coming in at $16,000 apiece for each display. The G500 TXi works with any possible GPS that can be installed in a Cirrus (GNS 430Ws, GTN 650s, GTN750, or the Avidyne IFD 540/440) and with the DFC 90 Autopilot (if the Cirrus is still equipped with an STEC 55x, the Autopilot would need to be changed to either a DFC 90 or a Garmin GFC 500).
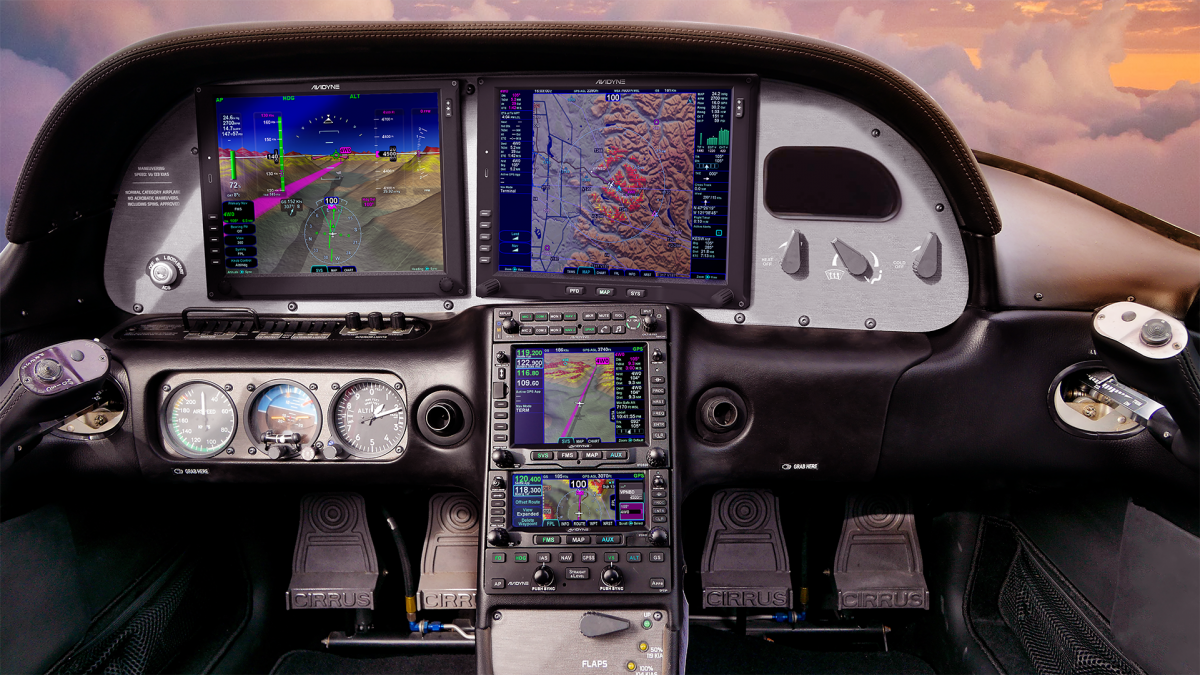
Fast forward to June of 2021 and Avidyne re-enters the game with the Avidyne Vantage. After the R9 debacle, Avidyne has opted this time to go for a more simple approach. The Avidyne Vantage system changes out the Entegra PFD and MFD with bigger screens (12″; Garmin’s TXi units are only 10.6″) with high quality pixelation, synthetic vision, engine gauges, checklists, charts, a hybrid touch interface, and all the other information that was offered on the Entegra system, just all more modern and updated. The best news is that the system provides redundant reversionary mode, which was one of the biggest complaints about the Entegra system.
The price tag comes in lower than Garmin, with each screen being priced at $12,500. The units will work seamlessly with the Avidyne IFD Series GPS units, though, as of this writing, it isn’t clear if the Avidyne Vantage will work with Garmin GTN 430Ws or the GTN 750/650. I would assume that the integration would be there, but I haven’t found any documentation stating that yet. DFC 90 Autopilot integration would be seamless, but not sure the integration with the STEC 55x or Garmin GFC 500.
Avidyne says the Vantage will be fully certified in early 2022, but the company is taking orders now. Visit the Avidyne Website for more information.
For years, Cirrus owners who have the Avidyne Entegra PFD and MFD have been clamoring for Avidyne to come up with some sort of upgrade. The Entegra, or EX 5000 system, is late ’90s technology and, though it still works, there will be a certain point in the future when it gives up the ghost….
Austin Executive Airport opened a control tower on Friday, February 23rd 2018. The airport is now officially Class D airspace. The charts and A/FD are not updated yet to reflect the tower, but there is a NOTAM with the tower and ground frequency information. The tower hours are from 6am to 10pm. The weather frequency remains the same.
Make sure you check those NOTAMs if you are headed to KEDC anytime soon!
KEDC Tower Frequency: 120.3
KEDC Ground: 119.45
Austin Executive Airport opened a control tower on Friday, February 23rd 2018. The airport is now officially Class D airspace. The charts and A/FD are not updated yet to reflect the tower, but there is a NOTAM with the tower and ground frequency information. The tower hours are from 6am to 10pm. The weather frequency remains…
The Pilatus Jet, the PC-24 Super Versatile Jet, is nearing certification. Pilatus expects the Pilatus Jet to receive European and US certification by December. The first delivery may even take place before the end of the year.
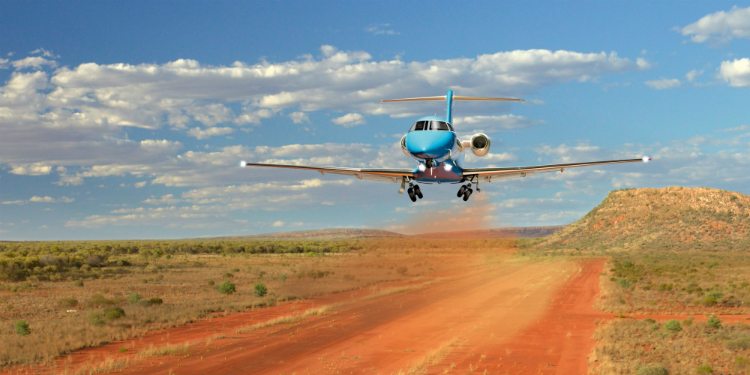
In developing the PC-24 Pilatus Jet, Pilatus, based in Switzerland, has taken the same approach as they did with the PC-12, their insanely successful single engine turboprop. Versatility is the key, with their mindset being to make the PC-24 Pilatus Jet the first flying Suburban jet. Pilatus emphasized STOL and unimproved strip operation in their design.
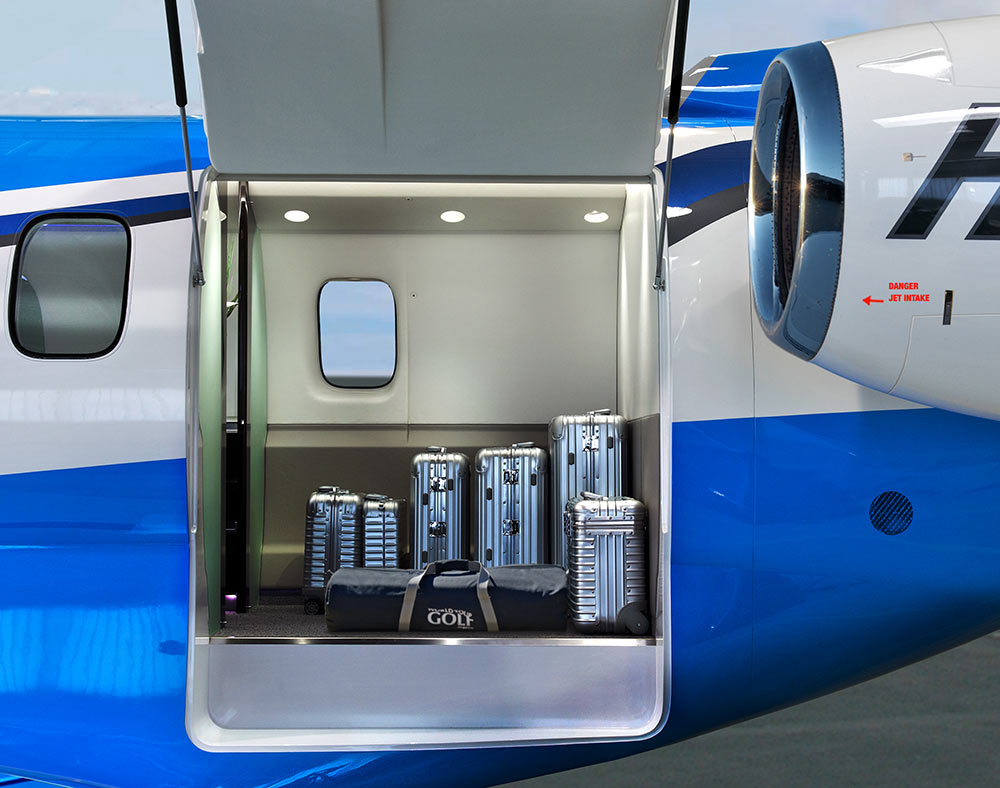
The huge cargo door so familiar on the PC-12 has been crafted into the PC-24 Pilatus Jet giving access to a massive cargo area. According to Pilatus’ website, the jet has a takeoff distance of only 2,690 feet, which is unheard of for a a business jet. There is seating for 11 + a pilot (yep, it’s a single pilot airplane!), so the whole family can come along. With a max cruise of 425 knots and a range of almost 2,000 miles, it’s a get somewhere airplane.
The price tag for a new PC-24 Pilatus Jet will be $8.9 million, which is just under what a new Phenom 300 costs. There is a 90 order wait list, so if you get on it now, you can get one faster than a Cirrus Vision Jet!
The Pilatus Jet, the PC-24 Super Versatile Jet, is nearing certification. Pilatus expects the Pilatus Jet to receive European and US certification by December. The first delivery may even take place before the end of the year. In developing the PC-24 Pilatus Jet, Pilatus, based in Switzerland, has taken the same approach as they did…
You are hand-flying an in-the-weather descent, power back, heading for the FAF. You start a 30 degree banked turn at your lead point to cross the FAF, when your passenger behind you gasps. Looking over your shoulder, you see he has spilled his drink into his lap…too bad for him! However, when you turn your head back to your panel, your inner ear tumbles and you see 45 degrees of bank, 15 degrees nose low, airspeed increasing.
Congratulations! You have managed to get distracted and sucked into an unusual attitude recovery. By the book, you should roll wings level, pull to the horizon, and adjust power as necessary to keep the airspeed within limits. In this scenario, if you had not experienced vertigo, you might have been able to roll to less than 30 degrees of bank, recover your turn, pull the nose up to less than the original descent attitude, pulled a bit of power to slow back to your desired penetration speed and then resumed your desired ground track. However, this would only be appropriate if you had full situational awareness as to the deviations caused by the look over your shoulder, plus full confidence that the moderate corrective actions would put you back on your desired flight path.
As a military aviator, I learned unusual attitude recoveries based upon hard maneuvering at extreme pitch and bank angles. In the hard-maneuvering environment, an unusual attitude could be 90 degrees straight up, airspeed decreasing below 120 kts…or 80 degrees nose low, 135 degrees of bank, airspeed increasing through 500 kts… etc. In these cases, understanding angle of attack, or AOA, is critical to maintaining controlled flight and returning to a normal attitude.
In an extreme nose-high attitude, a military aviator is trained to roll the aircraft to 90 degrees of bank, ease off the back-stick pressure to reduce AOA, add power as required, and allow the nose to slice back towards level, rolling to wings level as the nose approaches the horizon. If nose low, the recovery procedure is to roll rapidly, within asymmetric g limits, until wings level, then to pull at optimum g loading to recover to level flight. For the nose-low recovery, power was normally reduced until airspeed could be assessed and brought under control. However, when doing the nose-low pullout at 7-9 gs, pulling the power for too long would leave you much to slow to resume combat.
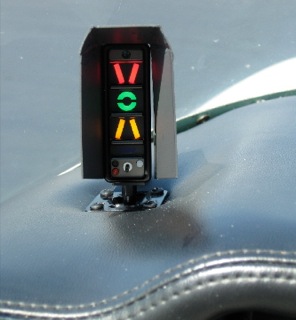
The AOA gauge on a fighter’s glare shield is a primary reference during hard maneuvering and for landing. The AOA for optimum maneuvering is 13 degrees, displayed as the green circle or “green donut” on the gauge. The red chevron on top represents a slow condition of 15 degrees or more and the yellow lower chevron represents 11 degrees or less.
For normal landing in the F-16C, the pilot slows to 220 kts and configures abeam the touchdown point while mentally computing the final approach airspeed of 136 kts plus 4 additional knots for each 1000 lbs of fuel. When rolling off the perch and flying the final turn, the pilot would usually only glance once at the airspeed once to ensure final turn airspeed of 180 kts while using the AOA sight gauge as the primary indicator of a best performance turn. As long as the AOA was green donut (13 degrees) or less, you would not stall. If on speed and 13 degrees wasn’t going to get you around the turn to line up with the runway, you knew you were going to overshoot. You never wanted to see the red chevron of 15 degrees or more as that meant you were too slow, pulling too hard, and in danger of building an un-recoverable sink rate!
Few GA aircraft are currently equipped with AOA indicators, though there are several after market devices available for retrofit. However, knowing the impact of AOA and how to manage it is vital to safe aviating, even without an AOA gauge. The bottom line is, as long as you don’t ask the wing to produce more angle of attack than it can handle, you won’t stall.
Practicing final turn stalls, to know what the wing feels like as you get too slow or pull too much on the controls, increasing AOA past the critical point, will keep you safe when you encounter that unexpected overshooting wind or you find yourself inadvertently on too tight of a downwind leg. Better to overshoot or take it around to try again, than to pull too hard and exceed critical AOA.
Mike Hostage is a retired USAF pilot with 37 years of experience, flying a wide variety of aircraft. An instructor pilot for more than half of his 4800 flight hours, Mike is currently qualified in a Cirrus SR-22T and regularly flies his two homebuilt sailplanes.
You are hand-flying an in-the-weather descent, power back, heading for the FAF. You start a 30 degree banked turn at your lead point to cross the FAF, when your passenger behind you gasps. Looking over your shoulder, you see he has spilled his drink into his lap…too bad for him! However, when you turn your…