The Pilatus Jet, the PC-24 Super Versatile Jet, is nearing certification. Pilatus expects the Pilatus Jet to receive European and US certification by December. The first delivery may even take place before the end of the year.
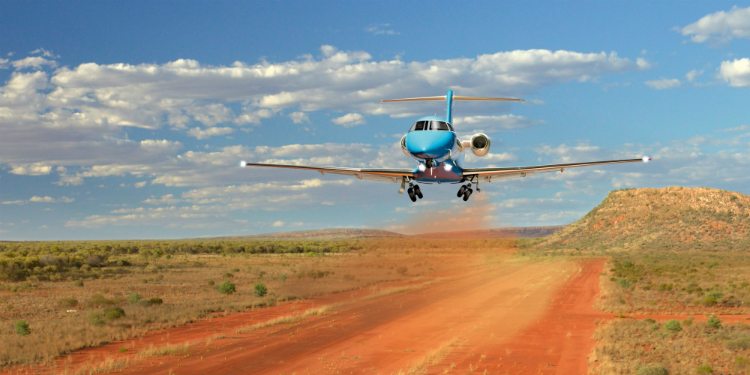
In developing the PC-24 Pilatus Jet, Pilatus, based in Switzerland, has taken the same approach as they did with the PC-12, their insanely successful single engine turboprop. Versatility is the key, with their mindset being to make the PC-24 Pilatus Jet the first flying Suburban jet. Pilatus emphasized STOL and unimproved strip operation in their design.
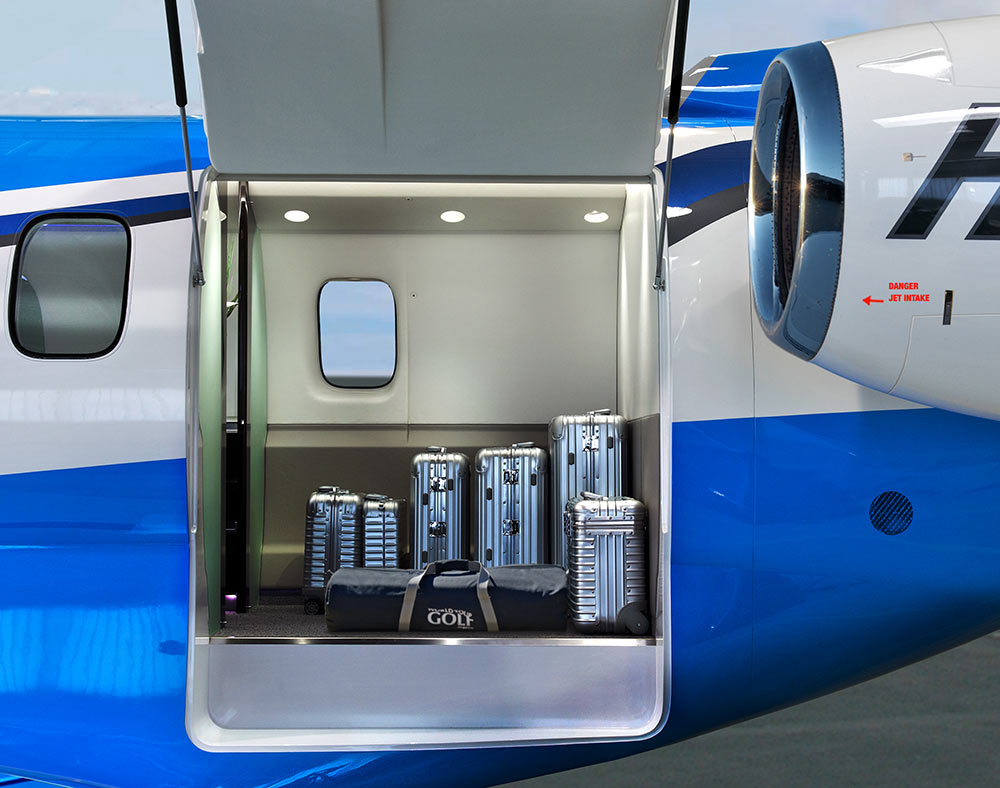
The huge cargo door so familiar on the PC-12 has been crafted into the PC-24 Pilatus Jet giving access to a massive cargo area. According to Pilatus’ website, the jet has a takeoff distance of only 2,690 feet, which is unheard of for a a business jet. There is seating for 11 + a pilot (yep, it’s a single pilot airplane!), so the whole family can come along. With a max cruise of 425 knots and a range of almost 2,000 miles, it’s a get somewhere airplane.
The price tag for a new PC-24 Pilatus Jet will be $8.9 million, which is just under what a new Phenom 300 costs. There is a 90 order wait list, so if you get on it now, you can get one faster than a Cirrus Vision Jet!
This is a Press Release from Daher’s website, the maker of the TBM 960.
Sun ‘n Fun Aerospace Expo, Lakeland, Florida, April 5, 2022 – Daher today unveiled the latest high-end version of its TBM pressurized single turboprop aircraft family – the TBM 960 – which incorporates Pratt & Whitney Canada’s advanced PT6E-66XT engine and a fully digital e-throttle, along with a digitally-controlled cabin that incorporates an all-new environmental control system, LED ambience lighting and electrically-dimmable windows.
The TBM 960 was introduced at the Sun ‘n Fun Aerospace Expo in Lakeland, Florida, where Daher is exhibiting the first production airplane (exhibit stand #MD-22B).
“The TBM 960 is the quintessential TBM, representing the fifth evolution of our very fast turboprop aircraft family since the TBM 900-series’ introduction in 2014,” commented Nicolas Chabbert, the Senior Vice President of Daher’s Aircraft Division. “It takes the maximum advantage of today’s turboprop technology to provide digital control of the engine and the propeller.”
The TBM 960 retains the rapid speed of Daher’s TBM family while enabling lower fuel consumption. At Daher’s recommended cruise setting of 308 kts., the fuel consumption is only 57 U.S. gallons per hour, which is a 10% fuel economy compared to maximum cruise setting for more sustainability.
At the heart of this latest TBM version is the intelligent PT6E-66XT powerplant and Hartzell Propeller’s five-blade RaptorTM composite propeller, both of which are linked to the dual-channel digital Engine and Propeller Electronic Control System (EPECS).
With the EPECS, the PT6E-66XT’s startup is fully automated after a single-switch activation. The cockpit’s power lever is an e-throttle, using a single forward position from takeoff to landing – with the EPECS optimizing powerplant performance throughout the flight envelope while
Daher unveils the TBM 960 at Sun ‘n Fun Aerospace Expo
reducing pilot workload by integrating all functions and protecting the engine’s life. Analysis of engine parameters is driven by 100-plus smart data inputs.
The RaptorTM propeller is fully integrated into the propulsion system. It is specifically designed to reduce overall weight and improve the TBM 960’s takeoff distance, climb and cruise speed. Turning at 1,925 rpm during maximum power output, the Raptor contributes to limiting noise and vibration. Its sound level during takeoff is just 76.4 decibels, meeting the most stringent international noise standards.
With its G3000® integrated flight deck, the TBM 960 retains Daher’s e-copilot® concentration of technological innovation and safety systems in the TBM, which can be compared to an “electronic copilot.” This includes an icing protection system, flight envelope monitoring through the Electronic Stability and Protection (ESP) and the Under-speed Protection (USP) systems, the Emergency Descent Mode (EDM) function, as well as the game-changing HomeSafeTM emergency autoland system.
New to the TBM 960 is the Garmin GWXTM 8000 doppler weather radar with advanced surveillance features such as lightning and hail prediction, turbulence detection, zero blind range for close-in returns, and ground clutter suppression. The TBM 960 also is the first application of Garmin’s GDL® 60 next-generation data transmitter for automatic database upload and interconnection with mobile devices.
The TBM 960’s Prestige cabin extends Daher’s use of digital power inside the aircraft, featuring an all-new environmental control system, LED ambience strip lighting integrated into both sides of the overhead ceiling panel, and electronically-dimmable windows – all controlled by a PassengerComfortDisplay(PCD). Enhancementsinthecabin’sstyleandcomfortalsoinclude new ergonomically enhanced seats, USB-A and USB-C power plugs, individual cupholders and headset hangers for each occupant.
For the TBM 960, a fifth TBM paint scheme – called Sirocco, based on the creativity of French designer Alexandre Echasseriau – has been added to the aircraft’s style customization possibilities.
The TBM 960 has been certified by EASA (the European Union Aviation Safety Agency); with certification by the U.S. FAA (Federal Aviation Administration) currently underway. Deliveries will begin in the first half of 2022.
With the new aircraft’s launch, Daher’s TBM family is now offered in two versions: the TBM 960 and TBM 910.
The Cirrus Pilot Proficiency Program is once again returning to Houston, TX the first weekend in November. Henrickson Jet Center at the Houston Executive Airport (KTME) will be the host FBO this year. If you are a Cirrus owner in the South Central US, the Houston CPPP weekend is definitely worth your while.
What is it? The Houston CPPP is a combination ground and flight training weekend. With ground classes ranging from engine management, to loss of control prevention, to avionics best practices, an attendee will not lack a better Cirrus education by the time he or she leaves.
The flight training side of the weekend gives an attendee several options. A Houston CPPP attendee can do 1 or 2 flights with a highly qualified Cirrus Standardized Instructor Pilot (CSIP), one on Saturday and one on Sunday (if the 2 flight option is selected). The Cirrus Owner’s and Pilot’s Association (COPA) brings in exceptional instructors for each of the CPPP events, so the training is top notch. Folks who want to take in more ground school, but still want to fly a little bit have the option of just doing 1 flight, either Saturday or Sunday, in order to increase their Cirrus knowledge.
The Houston CPPP event will be November 2nd, 2018-November 4th, 2018, a Friday through a Sunday. The weekend kicks off with a welcome dinner Friday night, then ground sessions and flying on Saturday and Sunday, plus a dinner on Saturday night.
For those who want to challenge themselves, there are simulator sessions available with a challenging instrument approach that doesn’t quite meet up with the normal, ho-hum type of approach.
The Houston CPPP also provides a Partner in Command course for those right seaters out there wanting to learn more about what to do in an emergency situation.
Hank Gibson of Texas Top Aviation will be at the Houston CPPP as a flight instructor. For more information and to sign up, please click here.
It was a rainy Thursday afternoon and I was eating lunch with my family when my phone rang. My wife and I had just been discussing how miserable the weather was, so it was only natural that about 30 minutes later I was soaking wet and sitting in one of our Aerostars getting ready to take off for Ohio. I didn’t have much information about who I would be flying, or why, but I knew that I was going to pick someone up to fly them home; something about a missing airplane. So off I went into the muck. My biggest concern at that point being whether or not my clothes would ever dry out.
I arrived uneventfully and walked happily into the FBO, but found myself quickly in a very different atmosphere. It turned out I had two passengers to pick up, a husband and wife, and they had arrived at the FBO before me. As I walked in the door, the wife received a phone call. The person on the phone told her that search teams had found her father’s airplane crashed in the woods and that he was dead. I learned the rest of the details quickly and it was hard to stomach.
She was travelling home that day to be with family until they were able to locate her father. She was pregnant with her first baby and was in her third trimester. The baby was to be her dad’s first grandchild. He’d owned a Lake Amphibian for years and had stayed at home to work while his wife was out of town. He was last seen leaving work on Tuesday of that week and was reported missing on Thursday by his co-workers. Airport security footage showed him pulling the airplane out and taking off at 20:48 (after sunset) on Tuesday night.
After a few minutes we loaded the Aerostar and took off. It was the saddest flight I’ve ever done. Understandably, my passanger sobbed on and off from the time she got off the phone until we landed a couple of hours later. The weather seemed appropriate as we flew along through the rain and were greeted at our destination by a grief stricken family and a few reporters.
I said a sad goodbye and left, but I couldn’t help but think about their situation. It really hit close to home with me as it was easy to draw parallels between my family and theirs: she was very close in age to me and pregnant with her first child. My wife and I were new parents. Her dad had owned his airplane for about the same length of time that my dad has owned his Bonanza. Additionally, it isn’t uncommon for my parents to go a couple days without being able to reach each other because they both travel.
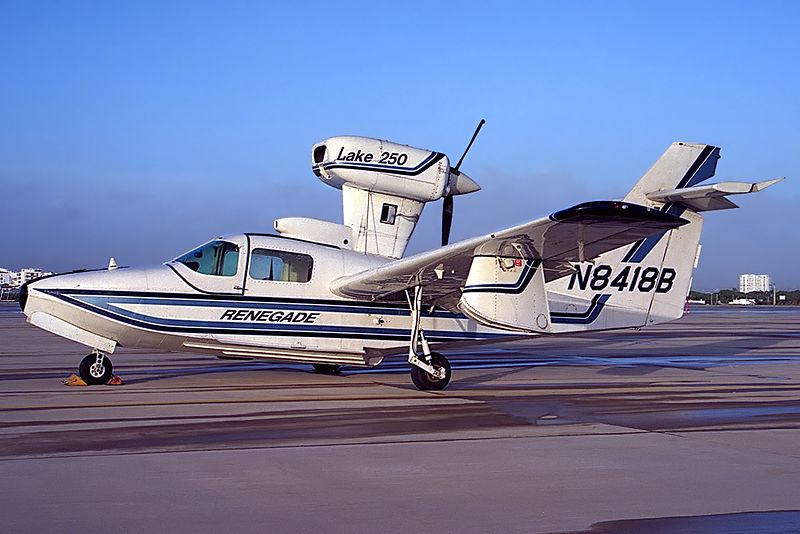
A Lake 250, the same type of aircraft involved in the accident.
But what happened..?
In the time since the accident, the NTSB has published their findings and unfortunately, it makes the situation sadder. It was completely avoidable.
Airport security cameras showed that after removing the airplane from the hangar, the pilot did not complete a preflight inspection or even a walkaround of any kind. He simply climbed in and left. The investigators were unable to find any traces or odor of fuel in the wreckage, nor any mechanical abnormalities with the airplane. In fact, according to the report, the engine was put on a test stand and ran perfectly. It would seem that the pilot simply never checked the fuel quantity and took off. The airport cameras captured the take off and a bright flash about 30 seconds after the aircraft departed.
Here is an excerpt from the report:
The National Transportation Safety Board determines the probable cause(s) of this accident as follows: The pilot’s attempted 180-degree return to the runway immediately after takeoff in dark night conditions, which resulted in collision with trees and terrain. Also causal was the pilot’s inadequate preflight inspection, which resulted in a takeoff with little-to-no fuel on board the airplane.
Interestingly, the report also details their ability to use logbook information and fuel receipts to show the airplane was taken on a long cross country on its last flight and likely not fueled again.
Another thing which stuck out in my mind upon learning the details of the crash was how important it is to let someone know when you’re going flying. Having another person know roughly when a flight is leaving, where it’s going and and when to expect it back could potentially save the lives of the people on board. In the case of this accident, the pilot didn’t alert anyone that he was going flying and therefore, no one realized he was missing for 2 days.
From reading the NTSB report I don’t get the impression that he survived the crash, but I can’t help thinking about the possibility that he, or others in similar circumstances, could survive a crash and then die from their injuries because no one knew to look for them. When I flew charter, we weren’t legally allowed to take off VFR without letting someone at the company know the details of the flight. I’ve adopted this as my personal policy as well. One text message could be the difference between being rescued or not.
Finally, every pilot should ensure that a proper walk around is completed! It’s easy to assume everything is okay with an airplane, especially one that no one else has access too. In addition to a thorough preflight, I like to walk all the way around the airplane and visual check fuel caps, doors, chocks, ropes, etc., immediately before getting in to ensure that everything is ready. I know a couple of pilots who have taken off with various panels and compartments open simply because they got distracted during their walk around and never closed them. (A good policy is to never walk away and leave something open). Perhaps even more mind boggling is that he apparently didn’t look at the fuel gauges after start up and before take off. I also have to wonder how much fuel he had remaining upon completion of the previous flight.
“Aviation in itself is not inherently dangerous. But to an even greater degree than the sea, it is terribly unforgiving of any carelessness, incapacity or neglect” is likely a familiar quote to just about every pilot. It is often written on a poster with a picture of an old timey bi-plane hanging out of a tree, but I think that it is absolutely on point. Carelessness in the preflight and neglecting basic pilot responsibilities (in this case fuel planning) cost this father his life and his opportunity to meet his first grandchild.
I know this article is a real downer, but it’s supposed to be. Its tragic that accidents take place which are completely avoidable. Obviously this case was beyond the normal realm of carelessness and neglect, but, we as pilots need to be extremely careful not to get so comfortable with an airplane that we stop doing the things which are so basic and important to safety. One of my professors in school used to say “aviation is fun, but it plays for keeps,” which is an effective way to remind myself how important it is to do it right.
*Out of respect to the family, I have not included any specific names, tail numbers or airports in this article.
Two pilots walk into an FBO. “Nice airplane,” Pilot 1 says to Pilot 2. “What kind of panel do you have in it?”
“I just went all glass,” Pilot 2 says. “Put in the Garmin G500 TXi, a GTN 750, and upgraded to the GFC 600 Autopilot. Even put in the Mid-Continent standby instruments. It’s a pretty sweet set up. What about you?”
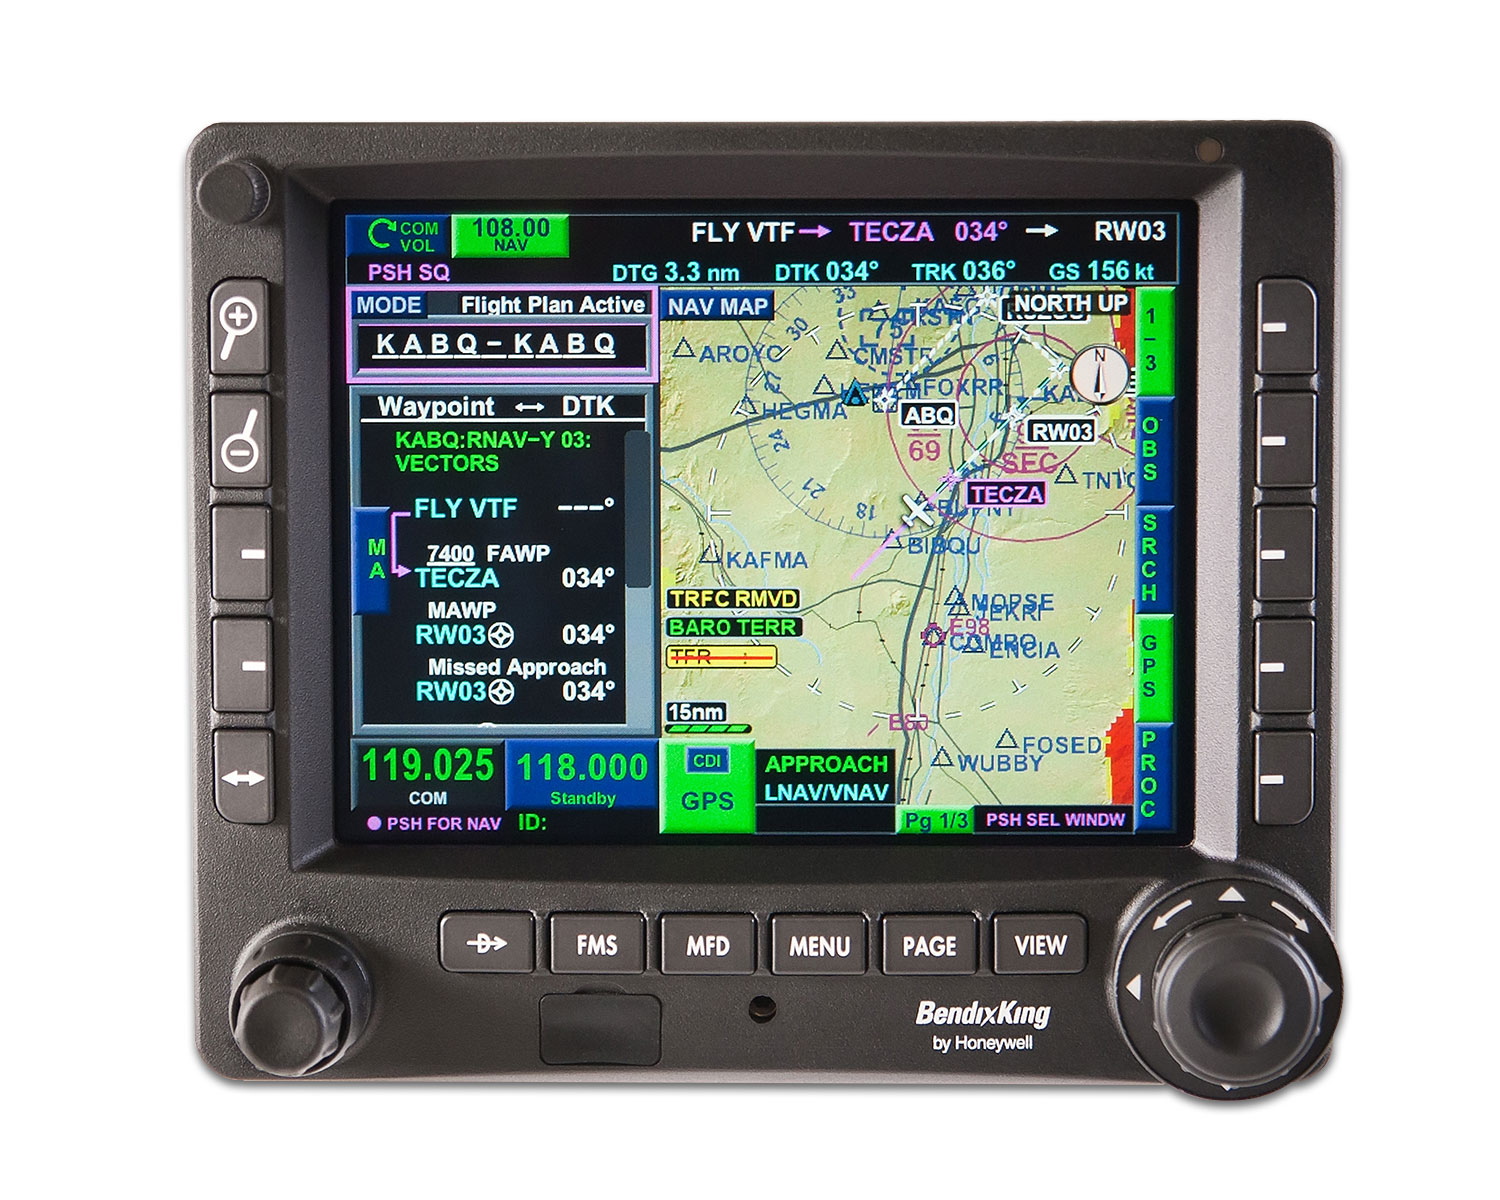
“Wow, sounds like it!” Pilot 1 responds. “I went a different route. I liked all my old BendixKing instruments, so I stuck with the company. I put in a BendixKing AeroVue Touch panel, a BendixKing KSN 770 touch screen GPS, kept my KFC 225 autopilot, got the ADS-B out compliant BendixKing KT 74 transponder, and finished it off with a King AeroFlight KI 300 Digital Backup instrument.”
Wait, what? BendixKing?
Yes, my friends, BendixKing is still around.
We are all used to the latest and greatest Garmin products these days. Don’t get me wrong, Garmin and Aspen make great retro-fit products for your instrument panel, while Garmin and Avidyne are at the top of the touch-screen GPS market, but don’t forget about BendixKing. They are staying in the game too.
BendixKing announced in April the xVue Touch for experimental aircraft, with the STC for the AeroVue Touch for certified aircraft coming later this summer. The xVue and AeroVue touch are pretty nifty units, comparable in features to what Garmin is doing with the G500 TXi and G600 TXi. It will be difficult to claw back into a competitive market share with Garmin, but BendixKing might find a niche market of followers.
Let’s take a look at the unit.
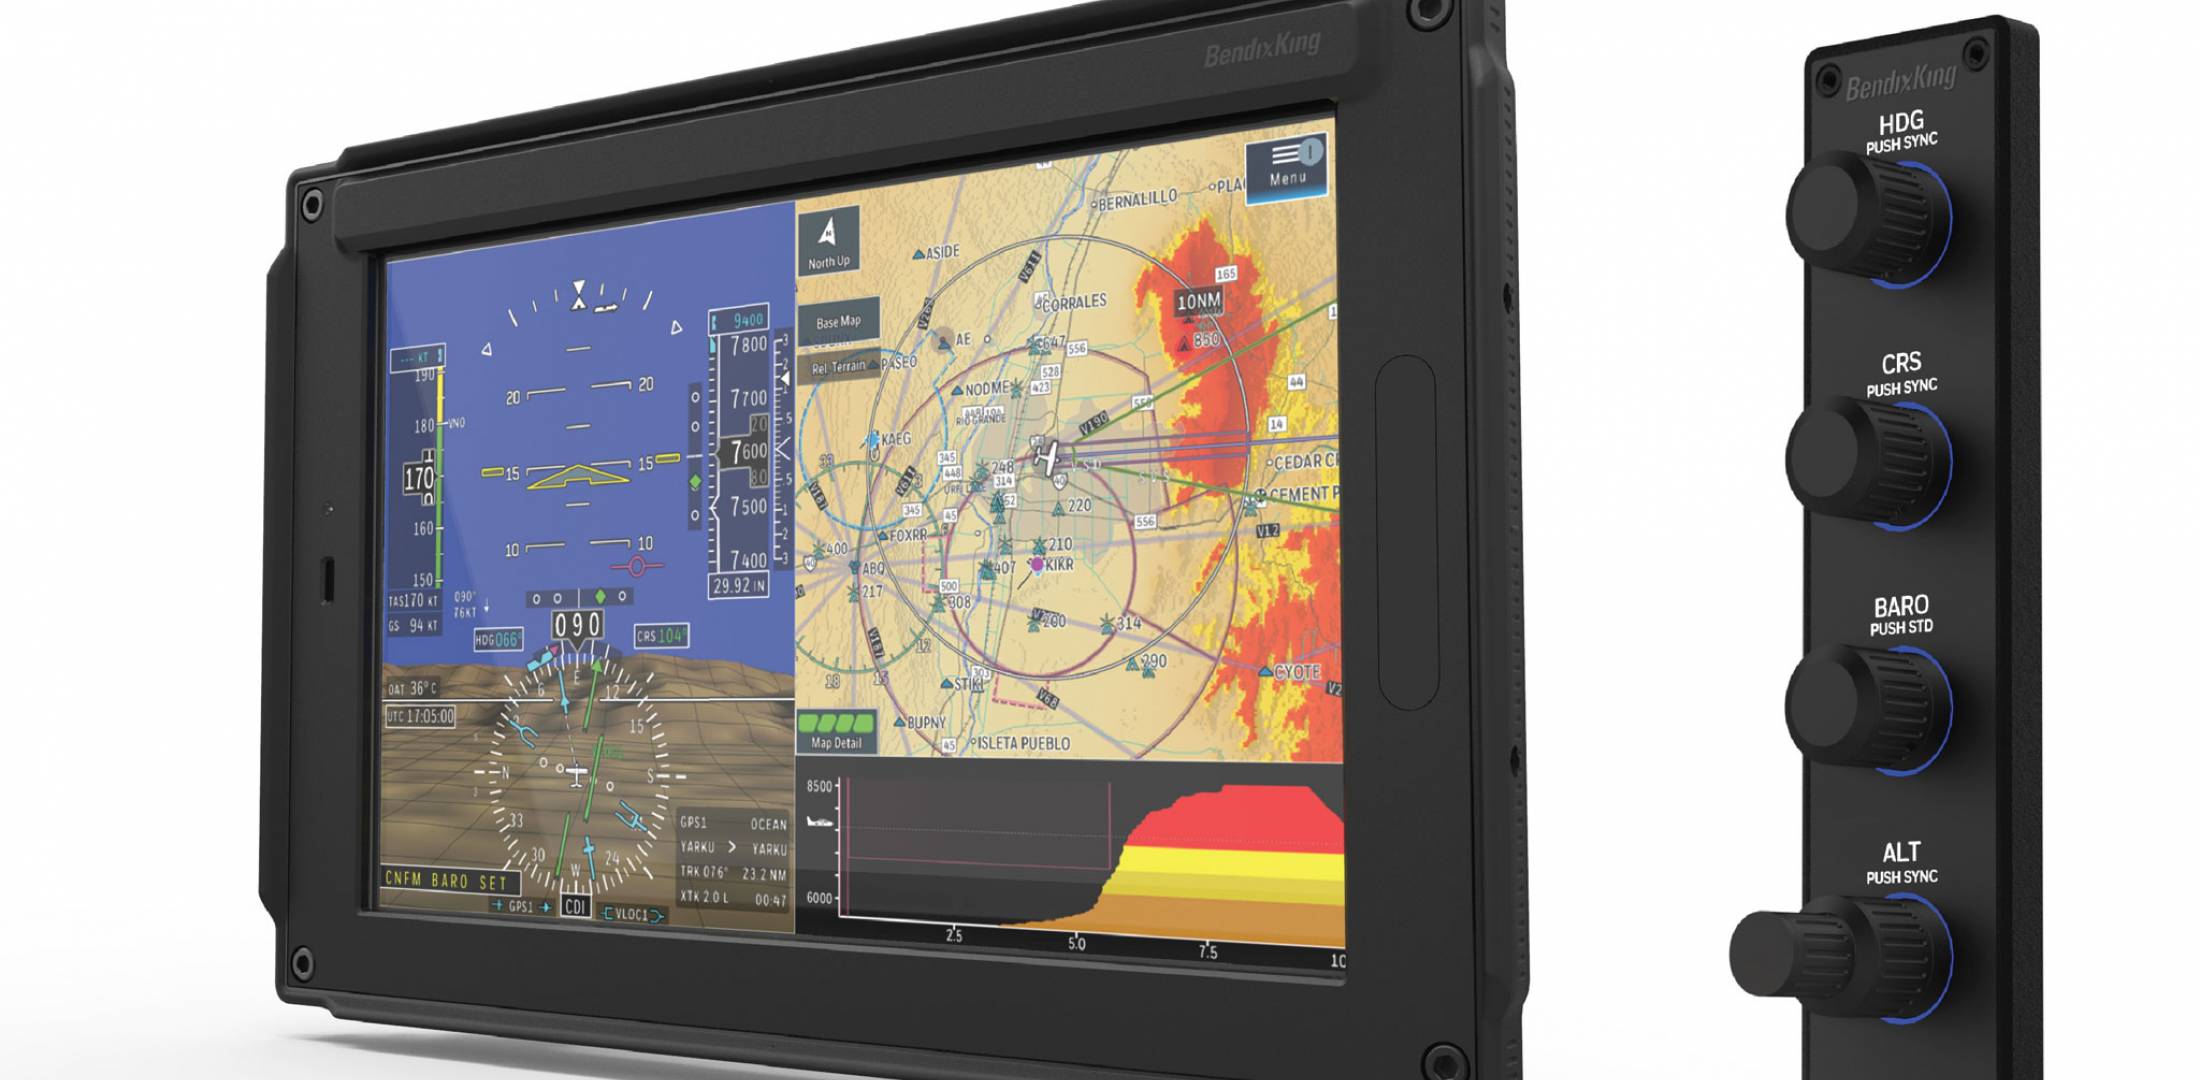
BendixKing AeroVue Touch
Now, I have not used the BendixKing AeroVue Touch or the xVue Touch, only read about them. But, what I’ve read sounds pretty cool. The display has really good resolution (BendixKing brags it is the highest screen resolution available), synthetic vision that comes standard (Garmin & Aspen charge extra for synthetic vision), plus VFR Sectional Charts & IFR High and Low Enroute charts, making paper charts even more obsolete.
The display is 10.1 inches and can be easily swapped between a full screen instrument mode or a split screen setup as seen above. Apparently, BendixKing has 3-D moving maps available on the AeroVue Touch too, which is standard.
The one thing Garmin has on the BendixKing AeroVue Touch right now is engine information. The G500TXi has a full complement of engine gauges available; the AeroVue Touch doesn’t, yet. BendixKing says it’s in the works, as well as radio information and autopilot control. I’m assuming the future autopilot control software would mean you could remotely mount an autopilot controller and input all functions from the AeroVue Touch display. The nice thing about these future upgrades is all the software updates are free through BendixKing.
The sticker price for the forthcoming unit is going to be about $12,600. Garmin’s 10.5 inch G500 TXi is $16,000, while Aspen doesn’t offer anything quite that big.
BendixKing KSN 770
I’ve been keeping my eye on the BendixKing KSN 770 Touchscreen WAAS GPS for a few years now. It never really has caught on quite like the Garmin GTN 750 or the Avidyne IFD 540. BendixKing took the same route that Avidyne did in creating a hybrid touch GPS (or mini-MFD if you want to look at it that way) where a pilot can perform functions either using the touch screen or utilizing soft keys on the edges. I like the hybrid touch approach as I have been bounced around in turbulence while trying to tap something into a Garmin GTN 750 and it can prove difficult.
Similar to the AeroVue Touch, BendixKing utilized split screen technology in the KSN 770. It’s a full WAAS unit that is already certified. It’s sticker price is $14,200, compared to the Garmin GTN 750 at $17,200 and the Avidyne IFD 540 at $15,000.
Other BendixKing Gadgets
Here are some other BendixKing Gadgets both available now and in the works:
KFC 230 AeroCruz Touchscreen Digital Autopilot-2 or 3 axis options. Will be the only touchscreen digital autopilot available on the market. Also able to utilize the servos from older KFC autopilots. Should be available late fall or winter ’18.
When is the last time you talked to the Flight Service Station?
Believe it or not, FSS is still in existence. Over the past 10 years, they went from FAA run, the being bought by Lockheed Martin, to now being privately run by a company called Leidos. 1-800-WX Brief will get you connected with a weather briefer, but you’ll hear “Leidos Flight Service Station” now when the briefer picks up.
Since the advent of Foreflight, most pilots these days get their weather briefings digitally on the iPad. Foreflight has come a long way since it’s inception. The briefing part of their Flights page is quite comprehensive, with lots of information, and counts as a legal weather briefing (which pilots are still required to get before a flight).
Why does a pilot even need to call Flight Service? Well, when’s the last time you tried to interpret everything the Briefing on Foreflight told you? As I said before, it’s a lot of information and a lot of it can be confusing. Pilots are not fully trained on interpreting Prog Charts and getting an overall weather picture for a flight. A weather briefer is.
I have over 5,000 hours and I still call a weather briefer before almost every flight. On the way to the airport is a great opportunity to get a weather briefing. I get a great picture of what’s going on in my area or over my route, frontal movement, bad weather areas, and whether or not it’s a good idea to even take off. Calling in the car alleviates the main complaint I hear about calling the Flight Service Station, which is it’s inconvenient and causes a delay since you have to call them on the phone.
I don’t do much private pilot training anymore, but when I do, I always teach my students how to get a weather briefing from the Flight Service Station. I’ll show them how to get the briefing on Foreflight too, but usually their eyes bug out of their heads when they start trying to read everything. A breathe of relief is released when I tell them there is a trained professional just a phone call away who can clear everything up.
The other thing that the Flight Service Station provides that is important to a lot of folks are PIREPs. It’s vital in sketchy weather areas for the FSS to get a report of what’s actually going on in the air. This helps other pilots out greatly as they are getting information about icing, cloud bases and tops, turbulence and a myriad of other things from airplanes who are actually in the conditions.
Finally, the most used portion of the Flight Service Station is the Clearance Delivery line (888-766-8267). At airports without a tower or a clearance delivery frequency, with IFR conditions present, the only way to get your IFR clearance is to call Clearance Delivery. Yes, it can take a little time sometimes, but you will get a clearance every time, unlike taking off and trying to dodge the clouds without hitting anything, while trying to call Center on the radio (which isn’t safe or legal).
Been a while since you’ve talked to the Flight Service Station? Give them a call, either on the phone or on the radio. Odds are, they are bored and just wanting someone to talk to, just like you are on that long cross country flight!
Checkout 1800WXBrief.com to see all the cool stuff the Flight Service Station does.
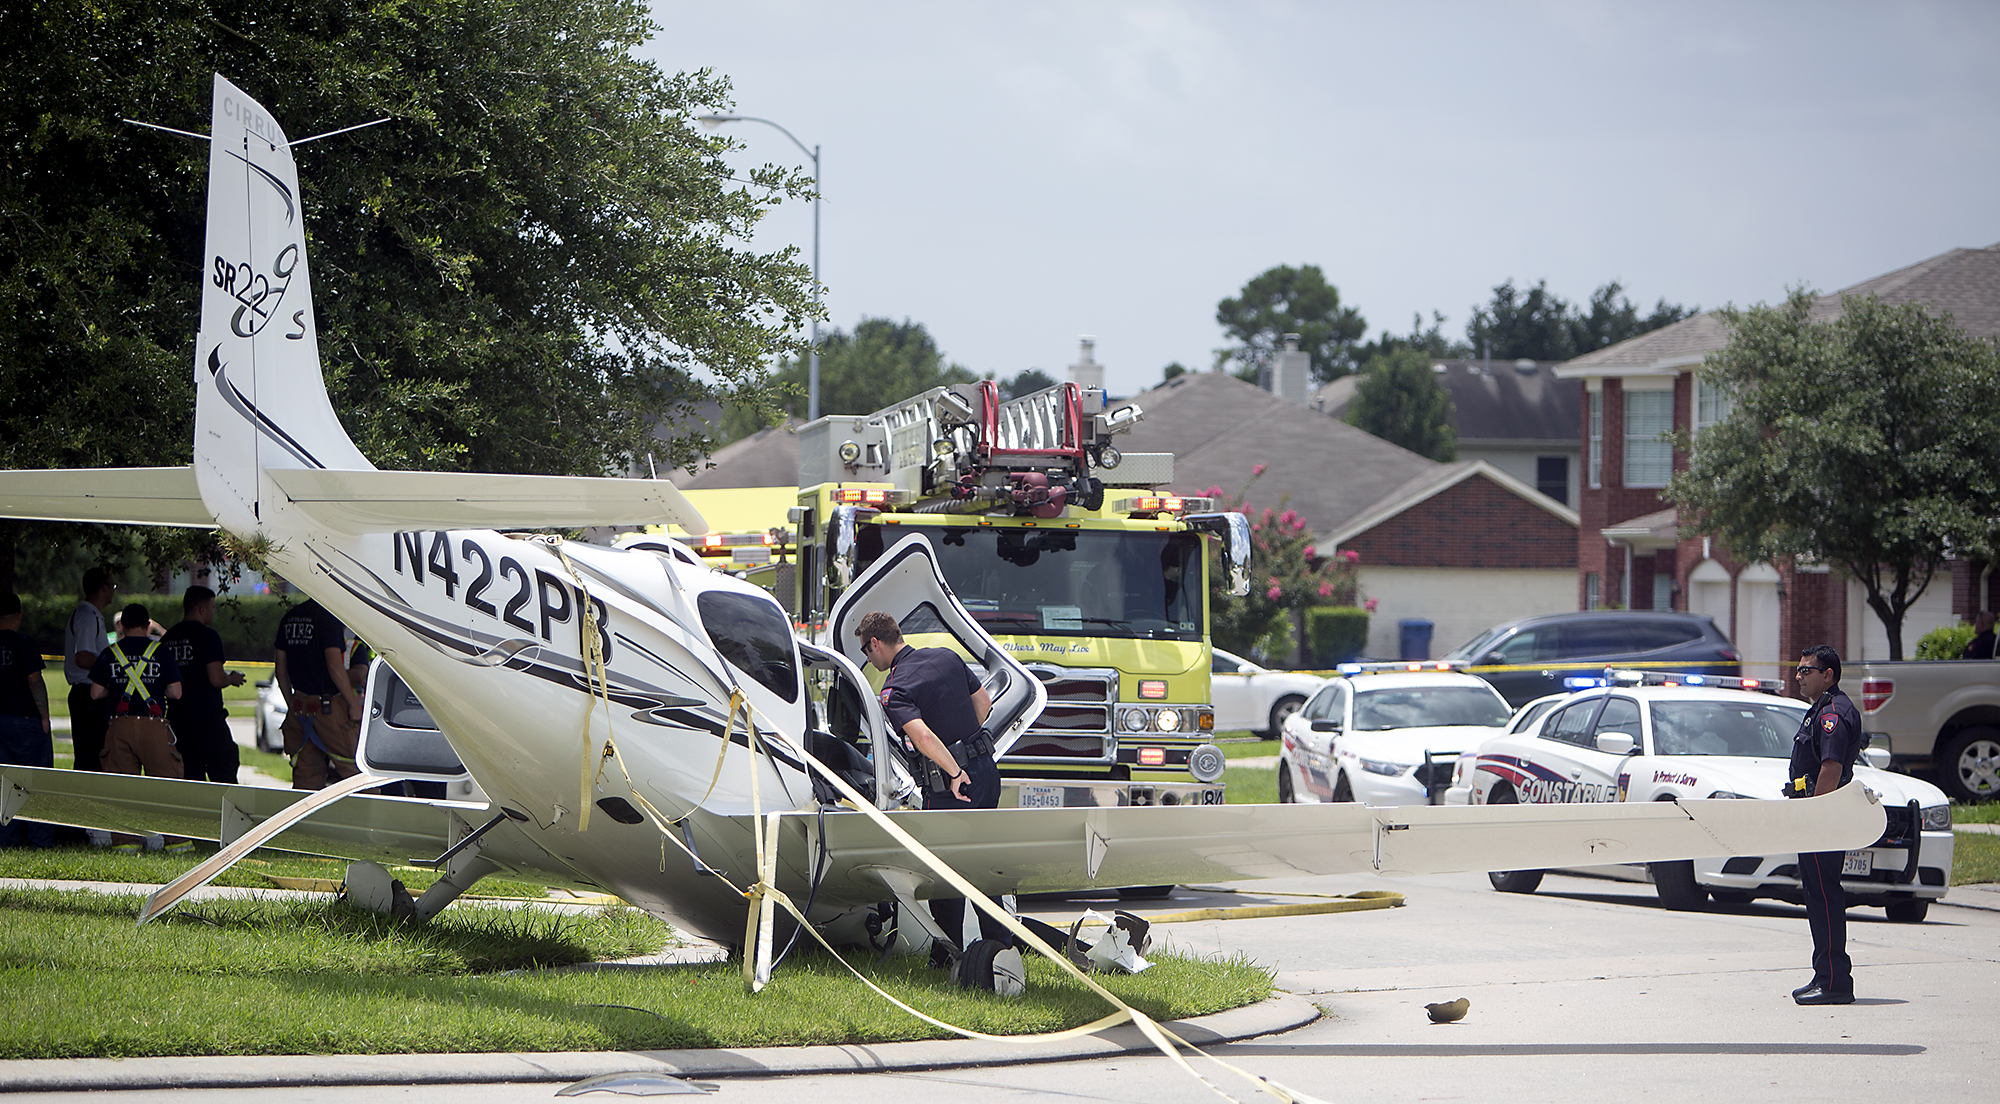
In July, a Cirrus SR22 suffered an engine failure in Houston after departing KIAH. The CAPS system was deployed and the airplane came to rest in a neighborhood on the north side of Houston. This makes CAPS save number 53 for Cirrus and no fatalities. The initial NTSB report is below.
14 CFR Part 91: General Aviation
Accident occurred Tuesday, July 07, 2015 in Houston, TX
Aircraft: CIRRUS DESIGN CORP SR22, registration: N422PB
Injuries: 2 Minor.
This is preliminary information, subject to change, and may contain errors. Any errors in this report will be corrected when the final report has been completed. NTSB investigators may not have traveled in support of this investigation and used data provided by various sources to prepare this aircraft accident report.
On July 7, 2015, about 1137 central daylight time, a Cirrus SR-22 single-engine airplane, N422PB, descended under the canopy of the cirrus airframe parachute system (CAPS) and landed in a residential neighborhood at Houston, Texas. The pilot and passenger sustained minor injuries, and the airplane was substantially damaged. The airplane was registered to and operated by AIRCCS, LLC; Humble, Texas, as a 14 Code of Federal Regulations Part 91 business flight. Day visual meteorological conditions (VMC) prevailed and a flight plan had not been filed. The airplane departed George Bush Intercontinental/Houston Airport (IAH), Houston, Texas, at 1133 and was destined for Austin Bergstrom International Airport (AUS), Austin, Texas.
The pilot reported that during initial climb, he noticed the engine temperatures began increasing and he reduced power in an attempt to lower the engine temperatures. When the airplane was about 900 feet above ground level (agl) the engine began detonating, and soon after there was a complete loss of engine power. With no suitable forced landing areas the pilot deployed the CAPS ballistic parachute system and the airplane impacted terrain and came to rest upright next to a residence.
An initial on-scene wreckage examination showed there was adequate fuel on-board. At the facility where the airplane had most recently been refueled, refueling unit records and a review of security camera video showed that the airplane had been refueled with aviation gasoline and not with jet fuel. Postaccident fuel quality checks of that fuel facility were satisfactory.
The wreckage was moved to a different location and will be further examined. Several avionics components containing non-volatile memory (NVM), including engine performance data, will then be removed from the wreckage for examination and an extraction of useful data is expected.
At 1053 the Automated Surface Observation System at IAH reported wind from 160 degrees at 15 knots gusting to 20 knots, visibility 10 miles, scattered clouds at 3,000 feet agl, broken clouds at 25,000 feet agl, temperature 31 degrees Celsius (C), dew point 24 degrees C, and an altimeter setting of 30.03 inches of Mercury.