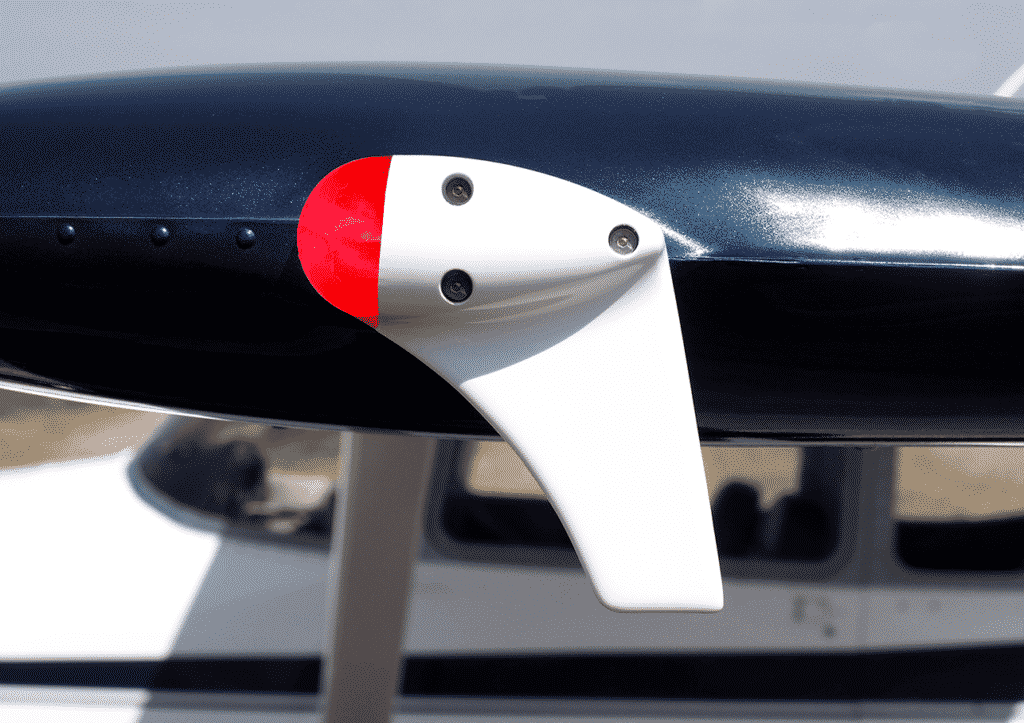
The Dual Garmin G5 Glass Panel Solution

What’s the most cost effective glass panel retrofit?  There are several options out there (and it seems like more coming each Sun ‘N’ Fun or Osh Kosh event), but the consensus is the Aspen EFD 1000 or 1500, right?  At $12,000 installed, it’s about $8,000-$10,000 cheaper than the Garmin G500 (though you can make the argument that when you add a second screen and SVT to the Aspen, the price is about the same).

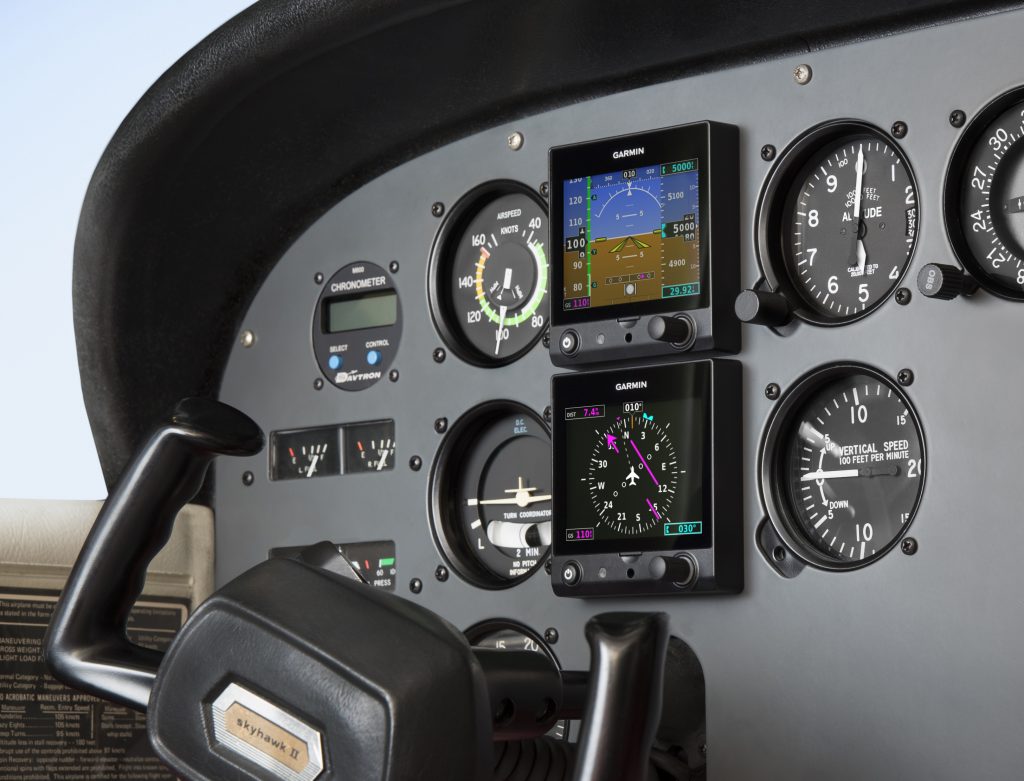
I am here to blow your mind.  What if you could get a glass panel retrofit that is a complete AHRS system with airspeed and altitude, plus a slaved HSI that auto slews to your GPS and a 4 hour backup battery so you can throw your steam attitude indicator away, for only $4,600, plus installation?

I am not crazy.

The Garmin G5 debuted last year when the FAA relaxed it’s regulations to allow more experimental avionics into certified airplanes.  The single G5 was a big hit.  The 3.5 inch screen fit nicely into the hole that the traditional attitude indicator left, giving pilots a glass attitude, airspeed and altimeter options for less than $2,500.

In March, Garmin brought out the HSI version of the G5.  Equipped with a low cost magnetometer, the DG/HSI version is a complete replacement for the traditional DG/HSI.  The unit also displays ground speed and distance (received from the GPS information), while auto-slewing to the GPS flight plan, so the CDI needle will move on it’s own, eliminating the annoying need for the pilot to set the course on the HSI (and ridding the GPS of the message that pops up reminding the pilot to set the course).

The dual units provide a complete backup Attitude in the case of a display failure.  The reversionary mode you get with the Garmin G1000 and the Garmin G500 is also present in the dual G5s.  This eliminates the need for a backup steam gauge attitude indicator, freeing up panel space for an engine monitor or some other toy.  The G5 units can also be equipped with 4 hour backup batteries in case of electrical failure.

The price for the dual G5 setup is very reasonable at just under $4,600 plus installation (which, according to Garmin, should be pretty simple as the units act as plug and play instruments).  The AHRS unit is available stand alone for under $2,200 while the DG/HSI unit standalone runs just under $2,600.

For more information, check out Garmin’s website.

Similar Posts

  • Cessna TTx Production Ceases

    Sadly, in January, a pretty great airplane was put out to pasture.  Textron (the conglomerate that now owns Cessna, Beechcraft, Hawker, and Lycoming) announced it was ceasing production of the Cessna TTx.  With the end of the Cessna TTx production, an airplane that was the main “competitor” to Cirrus (if you can call it competition; Cirrus consistently outsold the Cessna TTx by a wide margin each year), it leaves the SR series to stand alone atop the High Performance piston single market.

    I got to go through Cessna’s FITS Accepted Instructor (CFAI) course back in 2012 and have flown in the Cessna 350 and 400 (which is what they were known as at the time; the Cessna TTx name came around in 2011) for about 120 hours.  I really like the airplanes.  I’m partial to the Cirrus, but the Cessna 350 & 400 are fast airplanes and great for 1-2 people.  I flew a 350 (the non-turbo charged version) from New York to San Antonio last fall and routinely saw 170 knots at 12 GPH.

    Columbia started out making the 350 & 400 (the turbo-charged version) in the early 2000s, but went bankrupt in 2007.  Lancair started Columbia to make a certified version of their popular kit planes.  If you see a Lancair ES floating around, you would swear it’s a Columbia with only 1 door.  Cessna bought the design from Columbia in 2007 to begin manufacturing the airplanes themselves.

    Cessna then made a huge mistake as they moved the production facility from Bend, Oregon to Mexico. Production completely halted in 2009 as the planes coming out of Mexico were found to have defective composite work.  The sales never really recovered, even though Cessna put the Garmin G2000 panel in the Cessna TTx, complete with a touchscreen key pad.  A FIKI system was added as an option in 2012.

    A prospective buyer can still get a great value on a used 350, 400, or TTx, as they are valued a little lower than a Cirrus.  The 350, 400 or TTx all make excellent single pilot or two person speedsters with very comfortable amenities.

    Information for this article was taken from Flying Magazine’s website.

  • The Go Around Button

    Back in the old days, when flying an approach in an early Cirrus SR22 (circa 2004; yes, in airplane technology, those were the old days), performing a missed approach procedure was a lot of work.  You were low to the ground and weren’t able to see the runway.  Then, you had to start climbing so you don’t hit the ground, then push a lot of buttons in order to get the GPS and autopilot set fly the missed approach procedure.  It was very easy to get distracted with button pushing, then forget to fly the airplane, putting yourself and passengers in very unsafe circumstances.  The go around button has changed all that.

    Going Missed the Old Fashioned Way

    Let’s stick with our example of the 2004 Cirrus.  The SR22 in 2004 was equipped with the Avidyne Entegra system, complete with dual Garmin 430 GPS units, and an STEC 55x Autopilot.  A very capable IFR flying machine (we could use the same example of a 2004 or 2005 Lancair Columbia 350 or 400 that was equipped the same way, except the screens were vertical instead of horizontal).

    Avidyne Cirrus Go Around Button

    We’ll use the ILS 15 at the Temple airport, KTPL, for our example.  You pass TPL, the outer marker at 1,683 with the glide slope already centered.  Everything is going well so far.  The number 1 Garmin 430 is set to VLOC and the autopilot is showing NAV and APR for the lateral guidance and GS on the vertical, tracking the glide slope.  The last weather report stated the clouds were Broken at 500 feet, so it appears like you’ll be able to get in on the approach.

    As you get closer to the Decision Altitude, the clouds aren’t letting up at all.  You hit 1,000 feet on your altimeter, 120 feet above the minimums, and you still can’t see a thing.  Another 100 feet lower doesn’t change anything, so you elect to proceed with the missed approach.  This means things are about to get busy.

    Here’s the process:

    • Fly the airplane first, meaning shut off the autopilot, pitch the nose up to about 7 degrees, TRIM, add full power, retract the flaps, and step on the right rudder
    • The Garmin 430 is now in SUSP mode, meaning the missed approach point is locked in as the active waypoint.  So, you have to press the OBS button to cause the GPS to cycle over to the missed approach procedure
    • You have to press the VLOC button on the Garmin 430 in order to change the CDI back to GPS
    • You have to re-engage the autopilot by pressing NAV twice (which engages GPS Steering mode)
    • You have to reset your altitude bug (if you hadn’t set it for the missed approach altitude previously)
    • You have to press VS and ALT on your autopilot to have the STEC continue the climb

    That’s a lot of work, isn’t it?  Plus, that’s an extensive amount of head down time in the cockpit, with your eyes looking elsewhere other than the instruments while hand flying.  All very low to the ground, I might add.  Can you see how this can be dangerous?  (Note:  The Avidyne IFD 550 has made this a little easier with automatically switching from VLOC to GPS and automatically engaging the missed approach procedure in the flight plan)

    The advent of the Go Around Button has streamlined the process, leading to safer operations where it matters most.  The functions of the Go Around Button vary based on the airplane, but here are three examples, the Garmin G1000 Cessna Corvalis TT, the Garmin G1000 Piper Mirage, and the Garmin Perspective Cirrus SR22.

    Cessna Corvalis TT

    We’ll take the above situation and swap out the airplanes.  Gone is the 2004 Cirrus SR22.  Insert a 2008 Cessna Corvalis TT, equipped with the Garmin G1000 suite and the GFC 700 autopilot.  The go around button is positioned directly above the twist in throttle.

    Cessna Corvalis G1000 Go Around Button

    When you push the Go Around Button, here’s what the system does:

    • Disconnects the Autopilot
    • Sets the Flight Director for 7.5 degrees pitch up (which is about your normal climb angle) and wings level
    • Switches the CDI back to GPS
    • Takes the GPS out of SUSP mode and cycles the flight plan to the first waypoint on the missed approach procedure

    Here’s what you have to do:

    • Follow the flight director by pitching the nose up and TRIM
    • Add full mixture, prop and throttle (prop & throttle should be full already)
    • Retract the flaps
    • Step on the right rudder
    • Re-engage the autopilot, then press NAV and VS (or FLC) and set your altitude bug if it isn’t already set

    Not too bad, eh?  Makes the whole situation streamlined and safer.

    Piper PA46-350P Mirage

    Same situation, different airplane.  You’ll notice the procedure for the Piper Mirage is almost exactly the same as the  Corvalis procedure.  The difference between the two airplanes is where the autopilot controller is.  In the Corvalis, the autopilot controller is positioned on the left side of the MFD, making it easy to scan back and forth while pushing buttons on the autopilot.

    The Piper Mirage autopilot controller is positioned below both screens and in front of the power quadrant. With this positioning, the pilot’s eyes have to go a lot further to see which autopilot button he is pushing. In this case, it becomes very important to get the airplane climbing and trimmed before going down to engage the autopilot.

    As in the Corvalis, here is what the Go Around button does:

    • Disconnects the Autopilot
    • Sets the Flight Director for 7.5 degrees pitch up (which is about your normal climb angle) and wings level
    • Switches the CDI back to GPS
    • Takes the GPS out of SUSP mode and cycles the flight plan to the first waypoint on the missed approach procedure

    And here’s what you have to do:

    • Follow the flight director by pitching the nose up, then TRIM
    • Add full mixture, prop and throttle (prop & throttle should be full already)
    • Retract the flaps
    • Step on the right rudder
    • Re-engage the autopilot, then press NAV and VS (or FLC) and set your altitude bug if it isn’t already set

    Cirrus SR22
    Cirrus Perspective Go Around Button

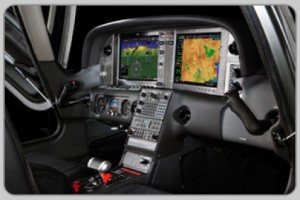
    This time, we’ll use the 2010 Cirrus SR22T with the Garmin Perspective and GFC 700 Autopilot. One thing I really like about how Cirrus configured their system is where the Go Around button is.  It’s actually on the throttle itself, making it much more intuitive.  This way, you can press the Go Around button while adding full throttle.

    There is one major difference between the Garmin Perspective in the Cirrus and the G1000 in the Corvalis. When you press the Go Around button in the Cirrus, the autopilot actually stays on.

    Here’s what happens when you press the Go Around button in the Cirrus:

    • Flight Director pitches to 7.5 degrees pitch up and wings level
    • AP Mode switches to Go Around mode, following the flight director
    • GPS comes out of SUSP mode
    • CDI switches back to GPS

    All the pilot really has to do is add power, take the flaps up, then press NAV on the GFC 700 to get the autopilot following the missed approach procedure.

    If you aren’t familiar with the Go Around button or haven’t used the one in your plane lately, it’s good to go up with a knowledgeable instructor and fly a couple of approaches where you perform the published missed approach afterward.  That way, he or she can assist you through the first missed approach, then give you pointers until  you get comfortable with the Go Around button.

  • Keeping Your Margin

    Just south of the equator in the mountains of Papua, Indonesia on the island of New Guinea, pilots spend their days carrying food, building supplies, doctors, pigs, and passengers into some of the most remote and extreme airstrips on the planet. That’s where I fly.

    Each morning I load my Cessna Grand Caravan with 2,600 lbs of (insert strange cargo here) and depart my home base of Wamena just after the sun sends its first rays of light across the waking skies above. I spend my day winding through narrow valleys and crossing high altitude mountain passes with building clouds and poor communication, only to land on short, narrow airstrips with steep slopes and little room for error. Most of these one-way in, one-way out runways require me to commit to landing well before touchdown due to terrain that is too close to allow for a safe go-around. Everything better be right when I cross that decision point or I could be in for some excitement.

    DCIM100GOPRO

    The need to keep wide margins of safety might seem obvious in environments like mine, but that doesn’t make them any less important where you fly. You may be a new pilot or an old timer, but keeping your margin should always be on the top of your priority list.

    Let’s unpack this further. Margin is not just maintaining the regulatory requirements for cloud clearances or minimum altitudes. It’s more than planning for an alternate airport or carrying the required fuel reserve. Margin is breathing room. It is that extra maneuvering room, the Plan C, the well thought out options that provide you multiple “outs” in any given situation. Margin is what gets you home when things take a turn for the worse.

    Margin comes in all shapes and sizes. For myself it includes maintaining double my required turn radius in narrow valleys or choosing not to land when my groundspeed is just 1 knot too high at a short and slippery airstrip. For you, it could be determining a ceiling or visibility minimum requirement that is more conservative than the legal ones or setting a wind limitation that you know is reasonable. When it comes down to it, keeping your margin means you don’t push to the ragged edge of your skill or the aircraft’s capability.

    Margin can also refer to your mental or emotional capacity. Are you mentally prepared to divert and miss that important event because the weather is getting bad? Are you ready to handle the disappointment of passengers when you arrive over your airstrip and choose not to land due to approaching rain or a factor that is difficult for a non-pilot to understand? Are you willing to cancel a flight on an important client because you are coming down with a cold or didn’t get adequate sleep? As the PIC of your flying machine, you alone are responsible for the safety of the aircraft and the people on board and those are the tough calls that only you can make.

    Fatigue, overconfidence, and complacency are the biggest obstacles to keeping your margin. They are all very subtle dangers and you may be experiencing them without even recognizing it. Fatigue can slow down your thought process leaving you behind the plane and backed into a corner before you know it. Overconfidence might cause you to push weather or commit to a course of action that has no favorable alternatives. Complacency will lead you to believe that, because you have 2000 hours in a particular make and model, you don’t need to do a thorough preflight or complete the pre-landing checklist.

    Regardless of experience level, operating environment, fancy avionics, and level of proficiency, margin is something that we all need plenty of. So as you go about your upcoming flights, be asking yourself what you can do to build in more margin. It just might be what gets you home.

    Pete Greenwald is a transplant to Atlanta, Georgia who has fallen in love with all things Southern, including his wife, Ashley.  As a pilot and A&P with Mission Aviation Fellowship, he flies the Cessna Grand Caravan in Papua, Indonesia serving people who live in isolation. In his spare time he is on the hunt for the best burger around.

  • PIREP: IFR Clearances at Uncontrolled Airports

    There is great news coming for all IFR pilots who utilize the multitude of uncontrolled airports across the US.

    From the beginning of aviation time, the process of getting an IFR clearance at an uncontrolled airport has been arduous. For airports under Center controlled airspace, you had to dial the Clearance Delivery line, which ported you to Flight Service. Then you sat on hold till someone picked up, gave them your information, then sat on hold again while they called the Center. Finally, after what seemed like an eternity, the briefer came back with your clearance and departure instructions.

    On a busy day, this could take ten to fifteen minutes, which can be really annoying when a pilot is trying to take off and get somewhere.

    In my opinion, this also led to a lot of unsafe (and probably illegal) VFR departures when conditions were either clearly IFR or unsafe if buzzing around at low altitudes and high speeds in Class G airspace.

    RCO’s (Remote Communications Outlet, 2nd column, halfway down) and Clearance Delivery Frequencies are in place at some airports, but by and large, the above process was how you got your clearance.

    Departing from a TRACON controlled airport usually was easier and quicker. The TRACON has a direct line that is available for pilots to call to speak directly with a controller, but not all these phone numbers are published.

    As of June 20th, the FAA is implementing this at all uncontrolled airports. On the chart supplement for all IFR charts across the US (not including Alaska), the FAA will publish the Center phone numbers and remaining TRACON phone numbers for pilots to call directly to receive their IFR clearances and departure instructions, and to cancel their IFR flight plans (A lot of TRACONs already have their phone number published).

    Flight Service will no longer be taking IFR flight plan cancellations. Pilots will still be able to cancel with Center or TRACON in the air, but will now need to call the number on the chart supplement on the ground for cancellation.

    Now that the FAA is modernizing this process, hopefully more pilots will decide to call on the ground for their clearance on a MVFR or IFR day instead of taking off and trying to pick it up in the air.

    Finding the Chart Supplement on Foreflight

    Where is the Chart Supplement? I’m so glad you asked.

    Before iPads, everyone carried around the green book, officially known as the Airport/Facilities Directory, or A/FD. With the advent of Foreflight & Garmin Pilot & others, all the information in the A/FD is now easily accessible in each of the Apps.

    Foreflight may integrate the clearance delivery phone number for each airport into their airport information page, but in the meantime, here is how to find the Chart Supplement.

    On Foreflight, go to Documents along the bottom of the App. In the Catalog on the left, tap FAA. Chart Supplement will be about 1/3 of the way down the page. Tap that, then tap the region you need and it will download into your Documents Library.

    Once it is downloaded, check the Table of Contents for FAA Telephone Numbers and NWS. Go to that page and scroll through to find the Center or TRACON you are needing, then dial the number.

    Happy Flying!

  • HondaJet Nears Production

    We have all been hearing about the HondaJet for quite a while now.  It’s been in testing for a number of years, but it sounds like certification and deliveries will commence early in 2015.  Honda says they expect FAA certification in the first part of 2015 and deliveries will commence soon thereafter.

    For those of you in the San Antonio area, if you’d like to get a glimpse of the first production HondaJet, it will be at Landmark Aviation at KSAT on Wednesday, October 29th.  Cutter Aviation is hosting the event, as they will handle the regional sales for Honda.  No flights will be conducted, but folks are welcome to walk around the airplane, climb inside, and give it a good once over.

    For those planning on attending, RSVP is required.  Contact Lisa Harris at Cutter to RSVP either by phone (602-267-4054) or by email (lharris@cutteraviation.com).  Drinks and snacks will be served.  The event runs from 5:30pm-8:00pm.

    HondaJet

  • An Innovative ADS-B Solution from uAvionix

    The closer we get to 2020, the more innovative companies are getting with ADS-B out solutions.  There are a myriad of transponders out there that have been released in to meet the ADS-B out requirement and to offer ADS-B in options.  L3 has the Lynx transponder line (and hardware to upgrade an already installed GTX 327 or GTX 330), Garmin has the GTX 345 and offers upgrades to the GTX 330, Appareo has it’s Stratus ESGi ADS-B out transponder, and Avidyne offers it’s AXP340 transponder, among others.

    Most of the ADS-B solutions require some kind of panel work, whether it’s pulling out the Garmin GTX 330 to send off, or making panel modifications to fit the L3 Lynx in.  Very few are actual slide in replacements, so there is some labor involved in swapping transponders.

    Want a simpler and more innovative solution?  uAvionix, a Montana based company that makes the recently released Scout portable ADS-B In solution, has a product for you.  Meet the SkyBeacon.

    What is it?  The uAvionix SkyBeacon is simply a navigation light replacement that bolts on your wing with a fin that hangs down.  All the ADS-B out transmitting equipment is placed behind the nav light on the device.  It has an integrated WAAS GPS unit, can work with any Mode C or Mode S transponder wirelessly, and it mounts directly in to where the original nav light was, same screws and everything.  No additional hardware needed.  uAvionix claims installation should take 10 minutes.

    Configuration is super easy too, as it is all done on a smart phone on the uAvionix app.

    Right now, the uAvionix SkyBeacon is only approved for experimental aircraft, but, according to their website, uAvionix expects FAA certification in early spring.  With a price tag of only $1,500 and a strobe light to be added as well, this is your simplest and easiest ADS-B compliance solution.

Leave a Reply

Your email address will not be published. Required fields are marked *