Density Altitude: Pressure Altitude corrected for non-standard temperature.
That’s the book definition of density altitude. The problem is, that definition leaves a lot of general aviation pilots scratching their heads. What really is density altitude?
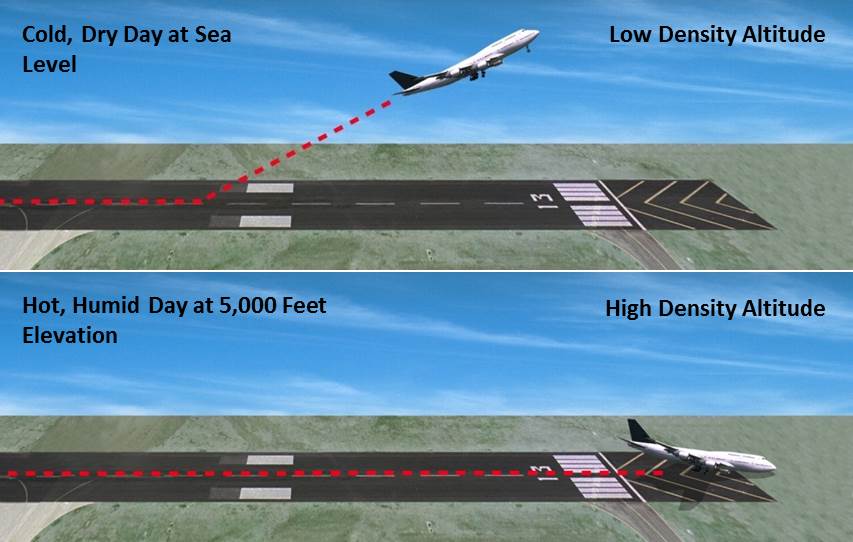
All airplane engines rely on air and fuel mixing together, then that mixture is ignited to create combustion. Normally aspirated piston engine airplanes get their best performance at sea level, where the air is nice and thick, allowing plenty of air molecules to get sucked in the engine intake. As a normally-aspirated airplane climbs, the ambient air pressure drops with an increase in altitude (the air gets thinner, less dense), thereby reducing airplane takeoff, climb, and landing performance. There just isn’t as much air at higher altitudes, to put it simply.
Turbo charged piston engines assist with this air density problem. A turbo charger boosts the air coming into the engine and fools the engine into thinking it is at sea level pressure all the time. The higher the altitude, the faster the turbo charger spins, spinning the compressor faster, which compresses more air to continue to give the engine sea level pressure air. This gets faster cruise speeds the higher you go.
Both normally aspirated & turbo charged engines do experience longer takeoff rolls and reduced climb rates at higher airport elevations & higher altitudes.
How does this all relate to density altitude?
When the outside air temperature rises, the air becomes thinner, less dense. This means that when an airport elevation is 1,000 feet, but the density altitude is reported as 3,000 feet, the airplane engine thinks it is at 3,000 feet. It won’t accelerate as fast. The airplane’s climb rate will also be reduced. That means that the normal climb pitch attitude a pilot is used to seeing won’t be accurate at higher density altitudes. It will lead to slower indicated airspeeds, slow enough to potentially lead to a stall if a pilot isn’t paying attention.
Where does this get dangerous? High elevation airports. Whenever the OAT creeps above 85 or 90 at an airport that is higher elevation (I would classify higher elevation as 2,500 feet or higher), the corresponding density altitude sky rockets. If a pilot isn’t paying attention to airspeed or angle of attack (if the airplane is equipped with an AOA), a stall can come very quickly on climb out.
What to take home from this? Monitor your climb speed and angle of attack, especially right after takeoff, when you hear density altitude on the ATIS or AWOS.
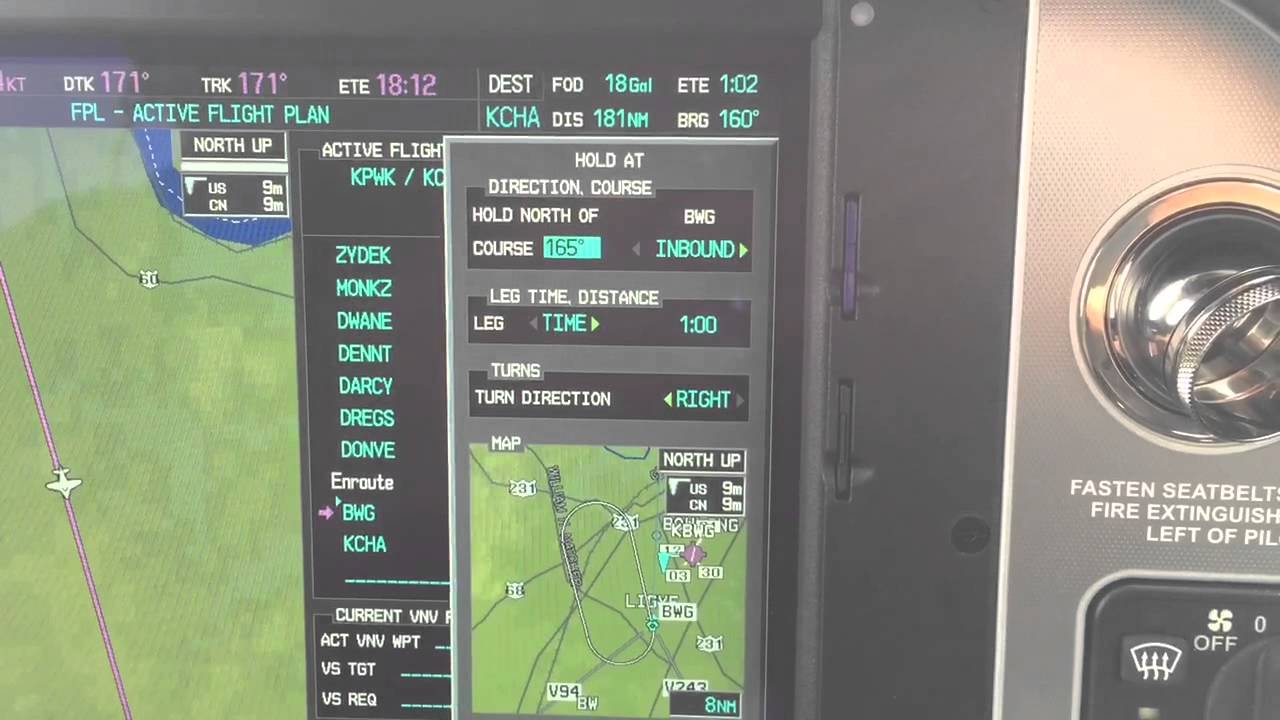
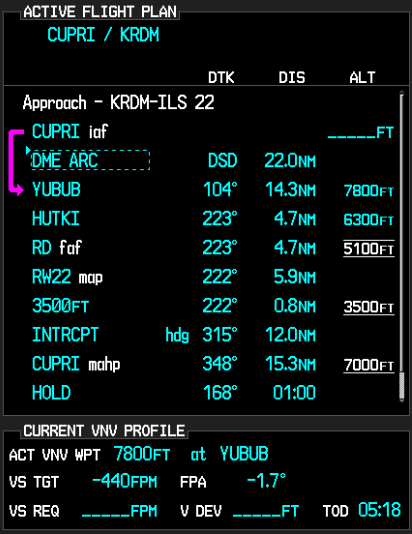
The latest Garmin software version on the Garmin G1000 and Cirrus Perspective by Garmin has a really neat feature. It gives the pilot the ability to create a hold at any fix, VOR, NDB, or even airport. If the point is in the GPS database, a hold can be created over it.
How does it work? Here are the steps.
Let’s say ATC tells you to hold over an intersection on a Victor Airway that you are already on. Since you are tracking the airway already, the airway should be in your flight plan complete with all the waypoints on it.
Bring up your flight plan and highlight the waypoint to hold at. Press the menu key. Using the big knob, scroll down to highlight the hold at waypoint option at the bottom of the bottom of the menu. Press enter.
Now you can build the hold. You select what the inbound or outbound course will be. Select a timed hold or a distance hold. Then select left or right hand turns. You can even input your expect further clearance time. Press enter and now you have a hold as a waypoint in your flight plan. Assuming you have a WAAS unit, the autopilot will fly the hold for you.
If you are ever told to “Hold Present Position,” Garmin has you covered. Simply press menu on the flight plan page, scroll down to Hold Present Position, then follow the prompts on the screen to build a hold at your present position.
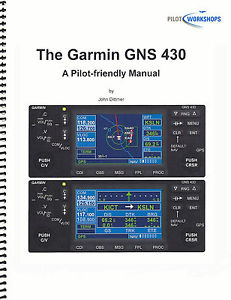
Are you still trying to master the Garmin 430 in your airplane? Is it giving you fits because you keep twisting the big knob instead of the small knob? Would you like a step-by-step guide to each and every part of the Garmin 430?
Pilot proficiency website PilotWorkshops.com has published a very thorough, step-by-step manual on how to use the Garmin 430. Want to load a flight plan? There’s a section for that. Want to load an approach? There is a section for that as well.
The Pilot-friendly Garmin 430 manual is a great reference to have for Garmin pilots. Pilot Workshops offers a guide for the Garmin 430 and the Garmin 430W, depending on if you have WAAS or not.
The hard copy guides are $44.95, but you can also download the PDF version of each for $19.95.
To get more information on the guide or to order one, you can visit the Pilot Workshops website. (Have another Garmin or King GPS unit? Pilot Workshops has guides for a variety of different GPS units)
A couple of months ago, I had a life-threatening experience while flying. Thankfully, with my flight training, along with a lot of luck, I am here to talk about it.
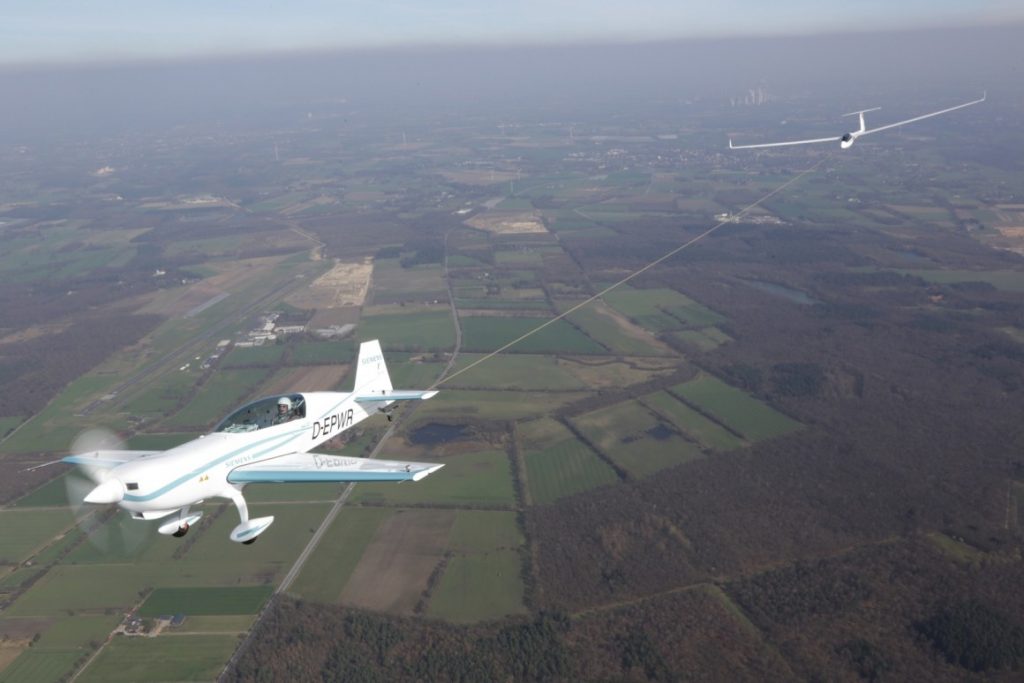
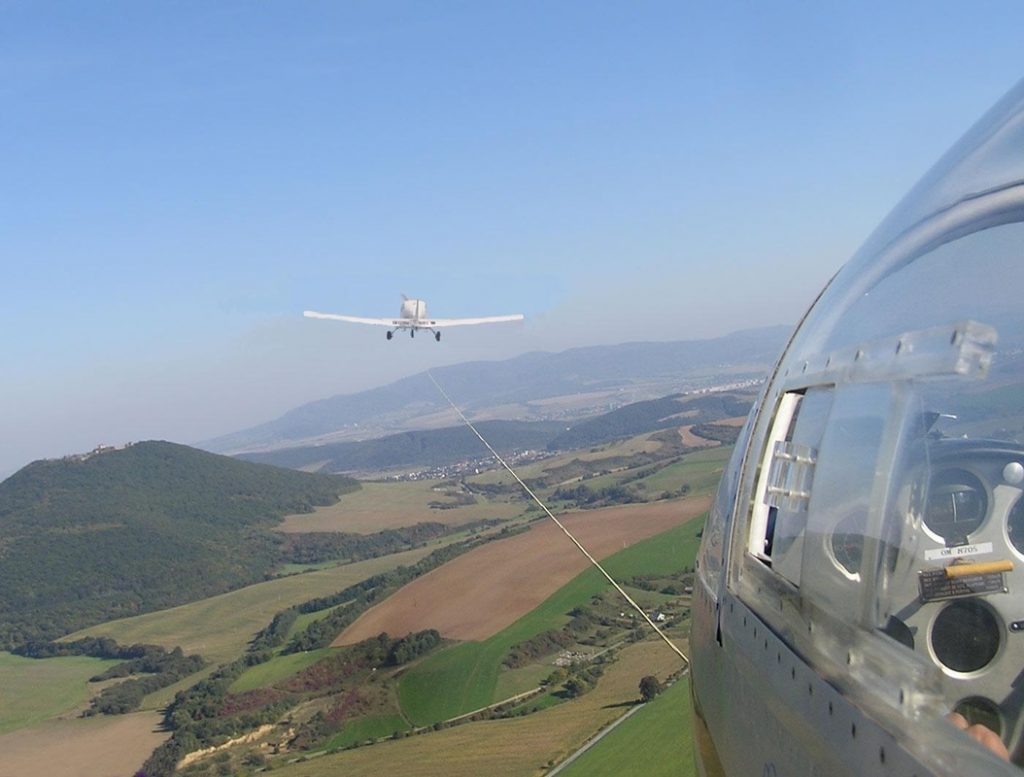
One of my many piloting jobs is as a glider tow pilot. For those not familiar with gliding, since a glider doesn’t have an engine, every time a glider pilot goes and flies, it’s a team effort. A powered airplane (anything from a Super Cub to a turbine powered Air Tractor) is attached to the glider via a tow rope, which is about 200 feet long. Once the glider pilot gives the go ahead over the airport’s CTAF, then the tow plane begins it’s takeoff roll, pulling the glider along behind it.
The glider becomes airborne prior to the tow plane, then the tow plane will circle the airport environment till it get’s to the pre-determined altitude to release the glider. Some tows are pattern tows and some are higher (not usually above 3,000 AGL), depending on the request from the glider pilot. Once the altitude is reached, the glider pilot pulls a handle in the glider to release the tow rope, then begins his glide. The rope stays attached to the tail of the tow plane, which in turn descends back down to the runway and lands. The tow plane also has a tow rope release handle in case of emergency.
On this particular tow, the plan was to tow the glider up to 3,000 AGL. Upon reaching 2,500 AGL, the glider pilot called me on the radio and stated that his rear canopy had opened up. I looked over my shoulder and sure enough, the rear canopy was fully opened while he was still in level flight behind me. I asked him if he wanted me to tow him closer to the field, but he didn’t reply.
Now, as an experienced tow pilot, I know a glider canopy popping open should not be an emergency situation. It’s definitely abnormal, but would be similar to a door or window popping open in a powered airplane. Not a big deal. If too much force from the relative wind is applied to the canopy, it would snap off; however, a glider can easily land without a rear canopy.
About 5 seconds after I radioed the pilot (and received no reply), I felt my tail instantaneously lift up into a completely vertical position, which caused my nose to go straight down. The next thing I knew, a whole lot of earth suddenly filled my windscreen and I was in what’s known as a graveyard spiral.
A graveyard spiral (as defined from the Airplane Flying Handbook pg 4-23), “is a descending turn during which airspeed and G-load can increase rapidly….the airplane is flying very tight circles, in a nearly vertical attitude and will be accelerating since it isn’t stalled.” It’s also known as a spiral dive.
Back to the story. At this point, I tried to reach for the glider release handle. Unfortunately, due to the shoulder straps holding me against the seat, plus the g’s, and also the quart of oil and tow bar that flew forward and hit me in the back of the head, I couldn’t reach it. I was semi-upside down at a certain point, which dislodged the oil and tow bar from the floor of the baggage compartment. They sailed over the seat and nearly gave me a concussion.
At this point, 2,500 feet above the ground, I had a choice to either fight for my life at a very low altitude or to sit back and become part of a big explosion.
I decided to fight for my life.
As I was spiraling to the ground, I felt the tow rope snap. Up to this point, I had still been attached to the glider. The rope snapping was a good thing, as my airplane was now under my control, not attached to, and being affected by, a glider (more on that later). I now had a lifeline, no pun intended.
After I felt the rope snap, my instincts and training kicked in. I initiated the spin recovery procedure using the PARE acronym. This task was difficult to do as I had a lot of debris flying from the rear of the plane to the front, blocking my view out of the windshield. There was also debris around my feet, hampering my ability to use the rudder pedals. The spiral finally stopped and I recovered approximately 500 feet above the tree tops. It took my heart a lot longer to stop spinning.
After barely regaining my emotions, I tried to evaluate the condition of the plane. Were all the pieces of the plane still there, was the engine damaged, did my control surfaces still work?
Once I advanced the throttle and saw an increase in my engine RPM, I started an immediate climb to give me altitude to get back to the airport. I had engine power but I wasn’t sure how long it would last if I had damage. Now, what they don’t teach you during spin training is that when this happens unexpectedly, you will become very disorientated. You have just been spiraling unexpectedly and your equilibrium will be out of whack. As I leveled out just over the tree tops, I was too low to visually see any landmarks, nor could I see the airport. Once I was able to climb, I was able to orient myself and figure out where the airport was.
I had to be very careful getting back to the airport and landing without radio communication, since my radio was knocked out with all of the FOD from the baggage area. Thankfully, the landing was uneventful. After I landed, I saw the glider limp in over the trees. The rear canopy was totally gone, while the front canopy and other parts of the glider had suffered major damage. Miraculously, my airplane wasn’t damaged, except for the wire from the radio which came loose during the spiral.
So, how did all this happen, you ask? Well, the glider pilot made 2 huge mistakes. First, in gliding, the moment the glider pilot loses visual sight of the tow plane, you are supposed to release the tow rope. He did not do that and almost killed both of us.
Second, as pilots we are taught to always fly the airplane first. Everything else, no matter what it is, always comes after flying the airplane. As I stated previously, the loose canopy is not an emergency situation, but since the glider pilot did not aviate first and was distracted, it was almost a fatal day for 2 people and 2 airframes.
So, what caused this chain of events? By getting distracted by the open canopy, the glider pilot inadvertently pulled back on the stick while trying to close the canopy. Then, by not releasing the glider from the tow plane, the glider pilot climbed rapidly with an excessive rate of climb while still being attached to me. The rapid climb is what pulled my tail up, causing my nose to drop and put me into the spiral. The tow rope snapping set into motion my recovery, since up till that point, I literally had no control. An extremely high lift wing was attached to my tail, pulling it up, and there was absolutely nothing I could do about it.
We all spend time practicing and demonstrating emergency maneuvers during our flight training and during flight reviews. Many times you might think, I’ll never need to use this stuff. Thankfully, some of the procedures I learned in the past kicked in at a time of need, even though my heart was beating out of my chest.
At some point in every pilot’s career, some type of spin training or Upset Recovery Training would be highly recommended. Then, when things go wrong, remember to always aviate first, then handle all the other things that need to be handled.
Interested in spin training or Upset Recovery Training (UPRT)? Check out the list of Malibu & M-Class Owner’s and Pilot’s Association (MMOPA) approved UPRT vendors and schedule UPRT training today.
The 2022 Fly In Season kicks off March 4th-5th with the US Aircraft Expo at the Addison, TX Airport (KADS). Cutter Aviation at KADS will be the host for the event. All the major and minor aviation manufacturers will have static aircraft displays. Come see all the new Cirrus innovations, the Piper M600, and the Diamond DA62. All the latest and greatest technology will be available for your viewing enjoyment.
If you are planning on flying in, the FBOs at ADS are Million Air and Atlantic.
The event will run from 10am-3pm on both days, March 4th and March 5th.
An 8 seat, cabin class, single engine turboprop is set to come to market in 2018 from the new aviation conglomerate Textron Aviation (Textron owns Cessna, Hawker, and Beechcraft). Details were announced last week at the European Business Aviation Conference and Exhibition. The as yet unnamed aircraft will be equipped with Garmin’s G3000 avionics and will be outfitted with a GE 1,240 Shaft Horsepower engine.
The GE engine will be equipped with a FADEC (Fully Automated Digital Engine Control) computer that will allow the pilot to make all necessary power adjustments using just one lever.
Range will be about 1,600 miles at 285 knots, giving the airplane the same legs as a PC12 at slightly faster speeds, but a smaller cabin. The cabin will be equipped with a belted lav if desired.
The Garmin G1000/Perspective combined with the Garmin GFC 700 Autopilot can be a great tool in descent planning. When you want to end up at pattern altitude a certain distance from the airport or you get a clearance to cross a fix at a certain altitude, Garmin VNV is a great tool. Here’s how to use it.
VFR Garmin VNV Use
Let’s say you want to end up at pattern altitude 3nm from your destination, but you don’t want to descend down into the bumps before you have to. Here’s how to set it up:
Go to the Flight Plan page on the MFD
Press the ATK OFST soft key on the bottom of the MFD. It stands for Along Track Offset, which, in laymen’s terms, means you are setting a point along your track a certain distance from your destination. In this case, it will be 3nm
Input the distance using either the keypad or the small FMS knob and press enter
Select the altitude you want to be at (in this case pattern altitude) and press enter
You will see a point 3nm before you destination appear on your magenta line and a Top Of Descent (TOD) appear where you need to start your descent
1 minute before the Top Of Descent, an indicator will appear next to your altimeter
To have the GFC 700 Autopilot fly the descent for you, you have to do two things
Set the Altitude bug for the desired altitude
Press VNV on the autopilot
All you have to do now is manage power
IFR Garmin VNV Use
Let’s say you are told to cross a fix at a specific altitude. Here’s how to use Garmin VNV to plan it out.
Go to the Flight Plan page on the MFD
Turn the cursor on and highlight the altitude blank next to the fix in the flight plan
Input the desired altitude
You will see a Top Of Descent (TOD) point appear along your course where you need to start your descent
1 minute before the Top Of Descent, an indicator will appear next to your altimeter
To have the GFC 700 Autopilot fly the descent for you, you have to do two things