From the time I started flying, I have always had the dream to learn how to fly a seaplane. As I learned in November, it’s actually learning to land a seaplane, and the veterans call them floatplanes.
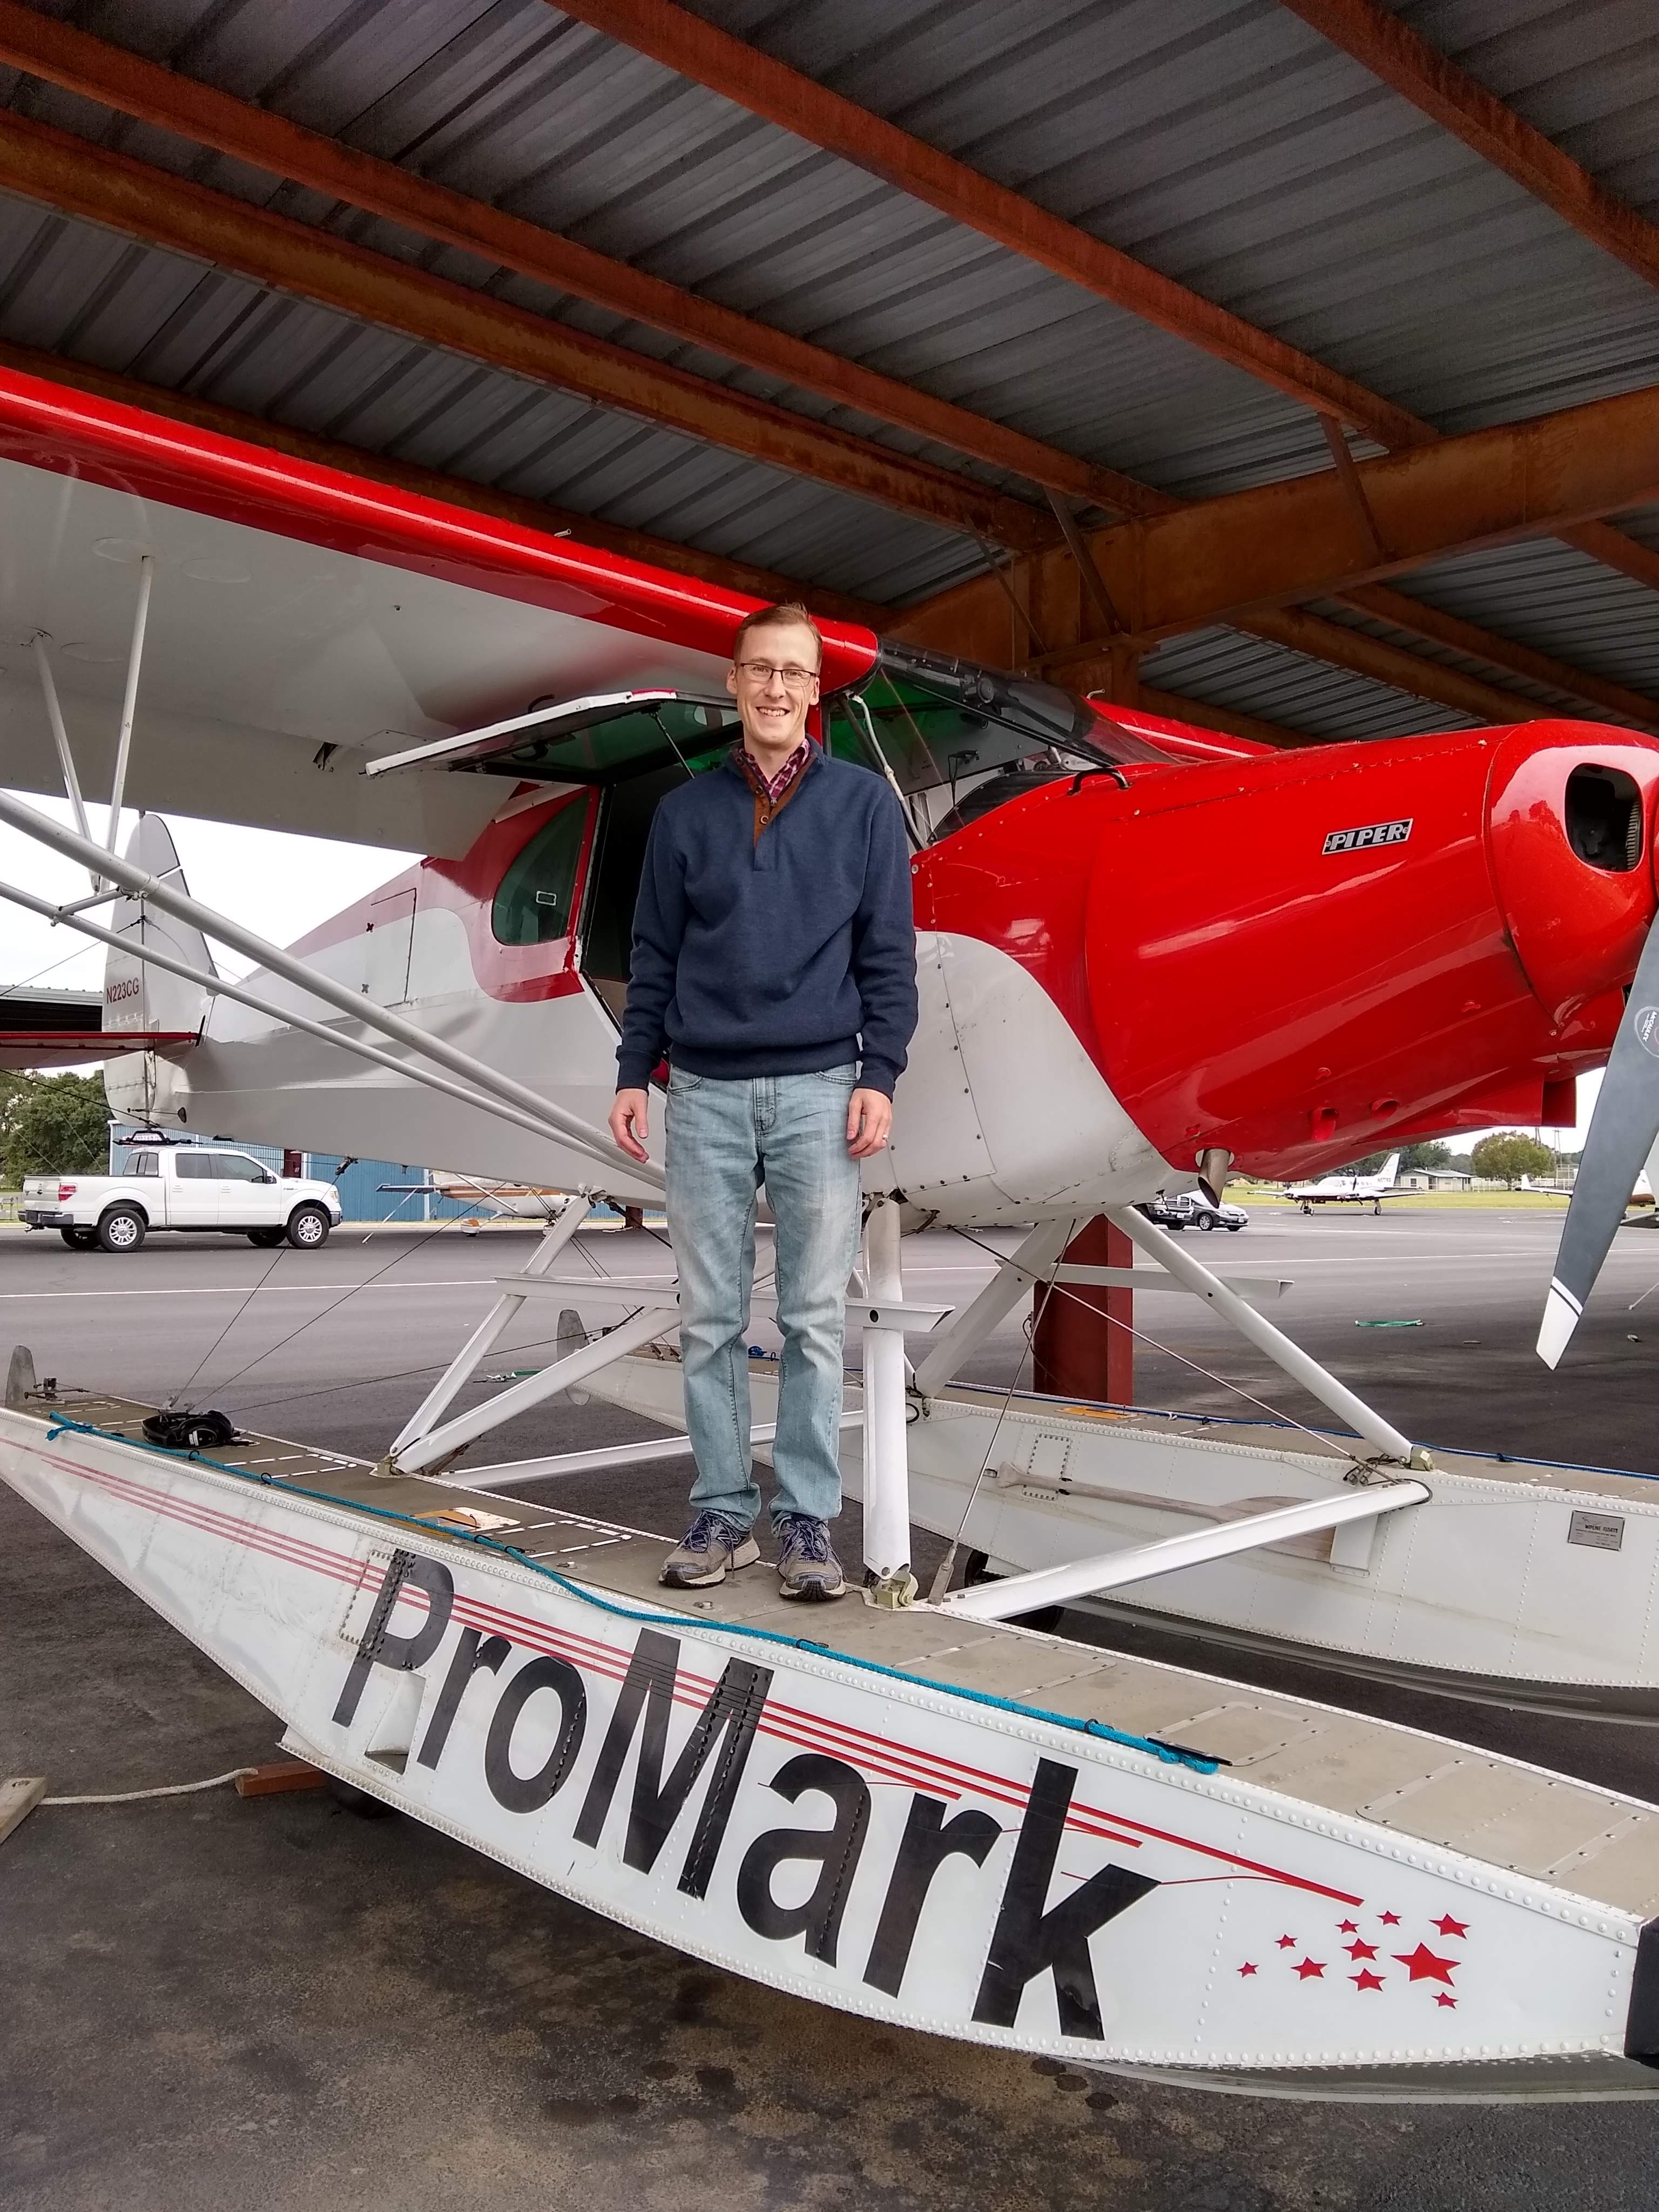
ProMark Aviation at the Burnet Airport (KBMQ) offers a weekend float plane course that is high on fun and low on stress. The school has a Piper PA12 Super Cruiser on amphibious floats (amphibs as I was corrected at one point. I mean, if you’re going to fly a seaplane, er, floatplane, you have to know the lingo) that will land and takeoff on water, but does little else with ease and grace. At 150 HP with those big floats and all the associated rigging hanging underneath the airplane, you are lucky to get to 500 feet before you get to your destination.
We weren’t working on setting any speed records. I was learning the lay of the water. I learned about the step, the keel, pumping the floats, how to read the water, currents, ducks (yes, ducks and birds are important to know about when you are flying low on the water), buoys, docking, and ditching. Step taxiing was fun as you are basically at 3/4 throttle screaming across the top of the water just below flying speed. It’s the best way to taxi a seaplane (truly, it is. You get more air in your engine, you can see better, and you are moving. Just don’t try and turn sharp).
Floatplanes also don’t have any shock absorbers, so the higher the wave, the more you get knocked around, so wind velocity and, in turn, wave height is very important.
A very important nuance of an amphibious floatplane compared to a straight floatplane (one that doesn’t have wheels that come out of the floats), is at one point, you want to make sure your gear is down for landing (runway landing) and at another, you want to make absolutely sure your gear is up for landing (water landing). If you land wheels down in the water, you will capsize, 100% of the time. Thankfully from my good instruction, I did not capsize.
Ken Wittekiend, my instructor, and I spent the majority of the weekend landing and taking off on Lake Buchanan (I was informed by locals it is pronounced “Buk-cannon”, not “Bue-cannon”), which is more open and therefore has more waves. We did one landing on Inks Lake so my kids could see me land, which they thought was the best thing since cheese sticks.
There is a check ride at the end of the training, but, as Ken reassured me, it’s the most fun check ride you’ll ever have. I still hate check rides, but that one I think I hated least of all.
I hope someday I can put my floatplane skills to practice, but for now, I can vouch that I now speak seaplane!
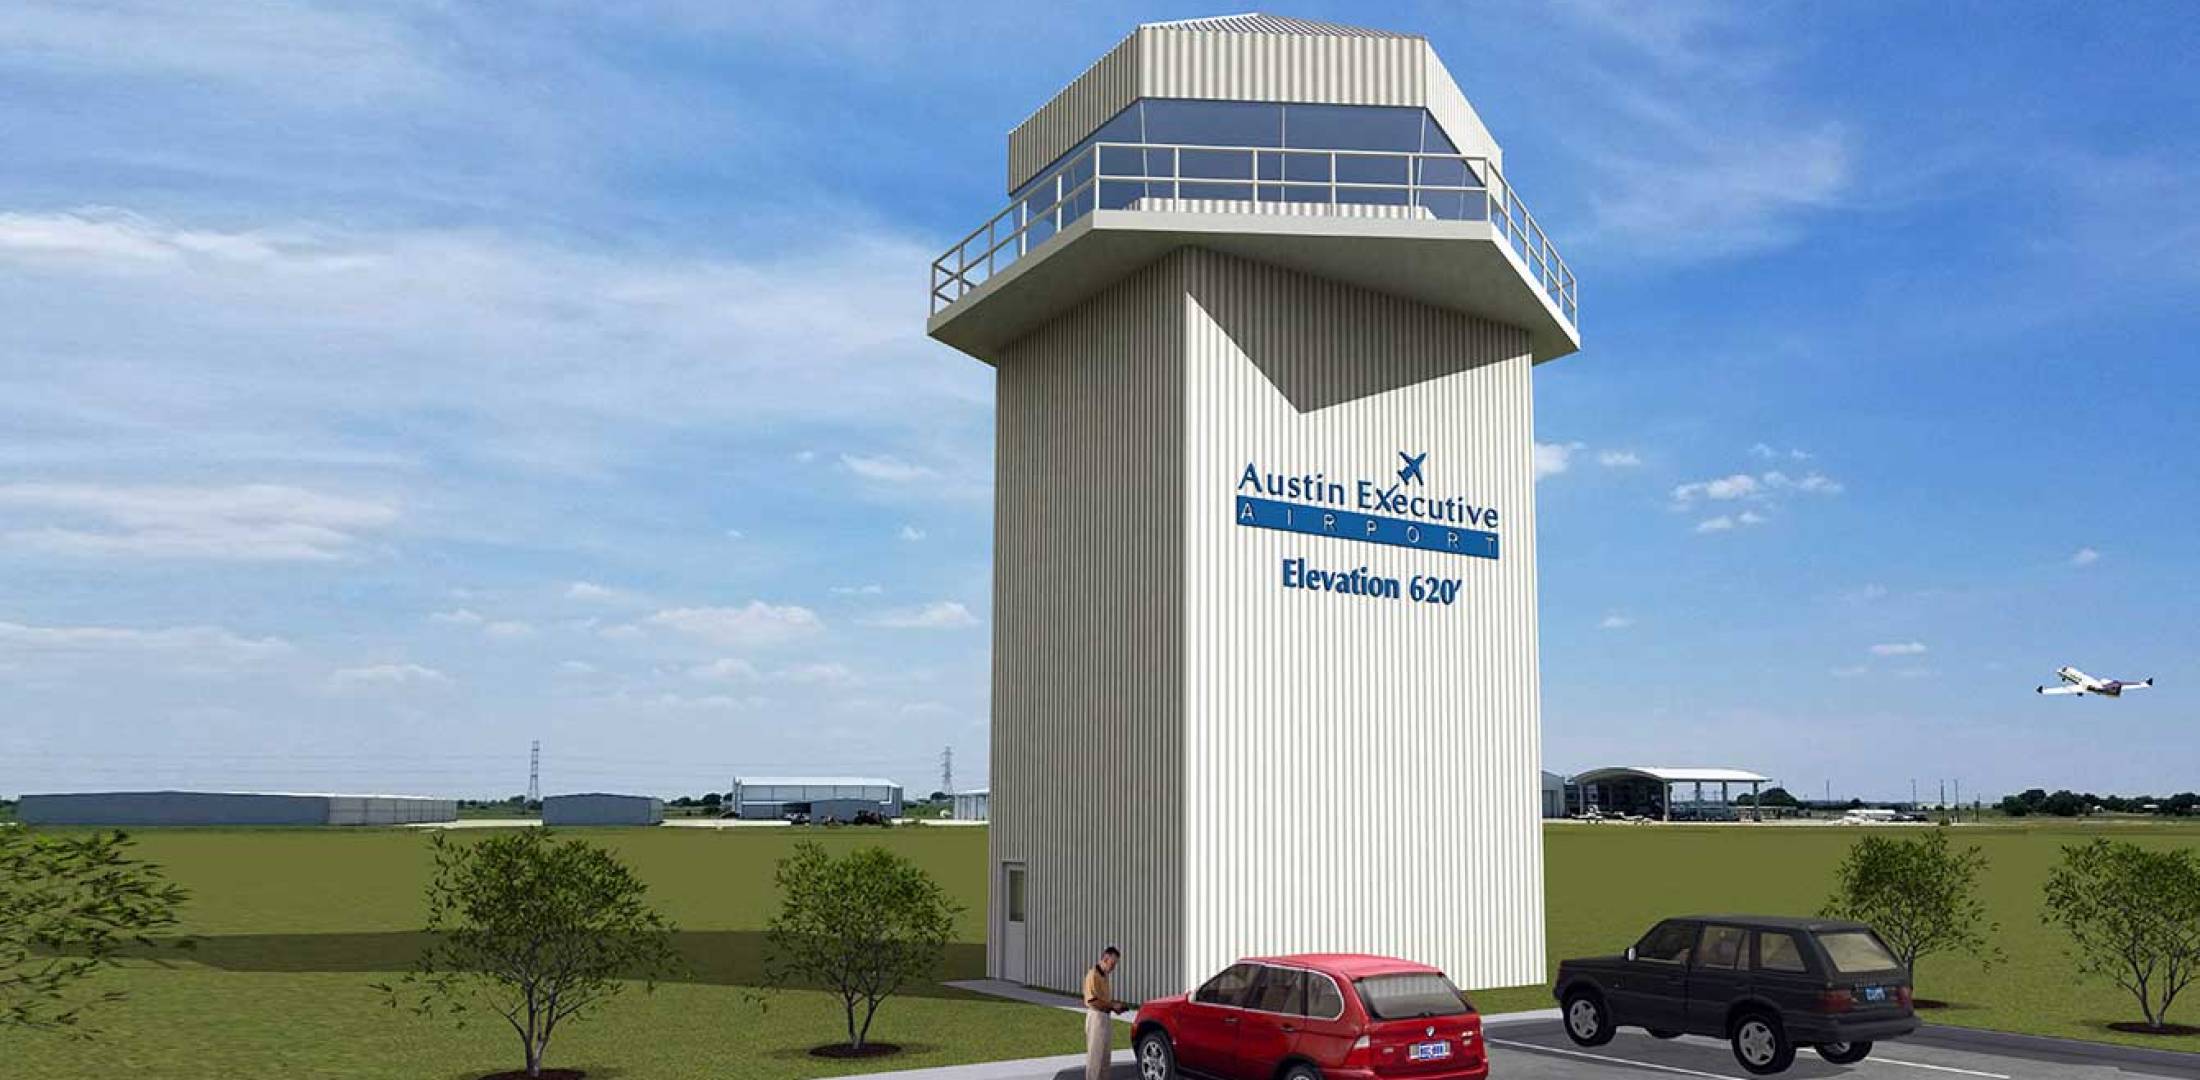
Austin Executive Airport opened a control tower on Friday, February 23rd 2018. The airport is now officially Class D airspace. The charts and A/FD are not updated yet to reflect the tower, but there is a NOTAM with the tower and ground frequency information. The tower hours are from 6am to 10pm. The weather frequency remains the same.
Make sure you check those NOTAMs if you are headed to KEDC anytime soon!
In the fall of 2021, Garmin announced the long awaited confirmation that the Garmin GFC 600 autopilot is now certified for the Piper Meridian. The Garmin GFC 600 autopilot has been certified for all other types of the Piper PA46 line of aircraft, but the Meridian was last in line. The airplane has to have been manufactured prior to 2009 and have Avidyne avionics, Meggitt, or have been retrofitted with a Garmin G500 (no G1000 aircraft since those already have the GFC 700 autopilot).
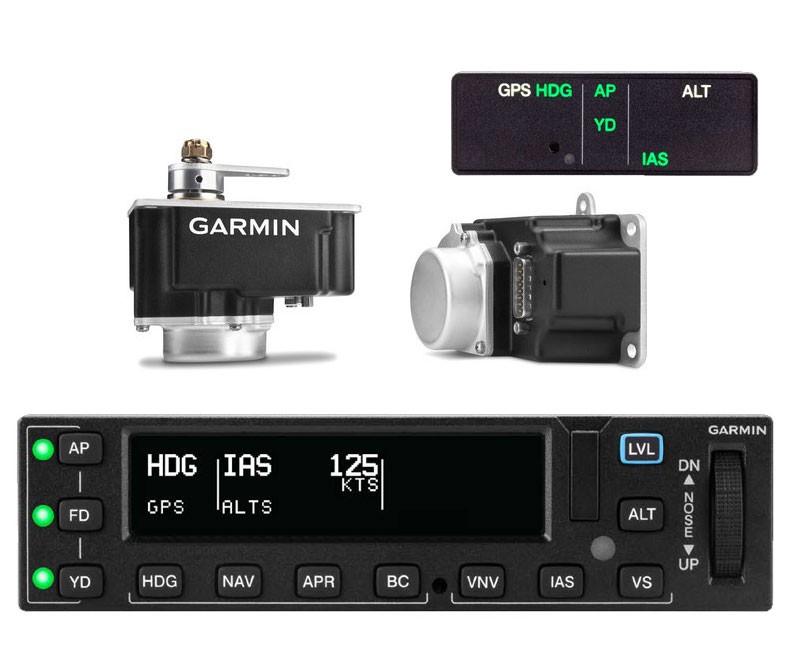
The Garmin GFC 600 autopilot is the ultimate digital autopilot. The integration with the Garmin G500, GTN 750 and GTN 650 units is a beautiful thing. The autopilot communicates with all the heading and altitude bugs, flies approaches smoothly, and even has a level button.
In the latest technological marvel from Garmin, Garmin Safe Glide, the GFC 600 autopilot is critical in reducing pilot workload in an engine failure situation. It flies the airplane for you and takes you to the nearest airport, reducing the stress and allowing the pilot to troubleshoot the situation.
Texas Top Aviation recommends Abilene Aero in Abilene, Texas for any and all avionics installs. They have worked with several of our customers in the last year, are extremely knowledgable and do excellent work. Call them for a quote on a new Garmin GFC 600 autopilot in your Piper Meridian.
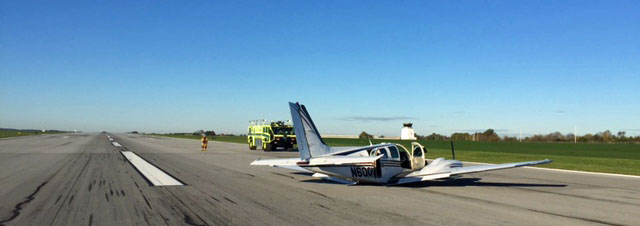
As far as I knew when I woke up, October 26, 2016 would be an ordinary day for me. It was a Wednesday, and I was scheduled to fly our Company’s BE58 Baron on a charter from Wings Field (KLOM), a non-towered airport just north of Philadelphia, to Pittsburgh International Airport (KPIT) and spend the day there waiting for my 3 passengers to finish up their meetings. The plan was to fly them back to Wings that evening and then make the short hop back to home base at Lancaster, PA. (KLNS).
It was a flight that I had done countless times, and I was comfortable with the airports, the passengers, and the airplane. Everything went smoothly that morning and my short flight from Lancaster to Wings was uneventful. I even made it there in time to spill coffee all down the front of my pants before my passengers arrived. The weather was clear, calm and beautiful as we loaded into the Baron and the sun was just starting to come up as I taxied toward runway 24 for departure. I was departing VFR and had an IFR plan on file which I intended to pick up with Harrisburg Approach once we were airborne. According to my calculations, I was on schedule to be drinking my coffee at the Pittsburgh FBO right around 8:30.
At 7:05, I advanced the throttles for departure. A few moments later, I received a very unpleasant surprise. I was quickly approaching rotation speed when 2 deer ran onto the runway directly in front of the aircraft. It was still dark enough that I was relying on my landing/ taxi lights to illuminate the runway for take-off. As a result, I was unable to see the animals before it was too late. I don’t remember making a conscious decision to pull back on the yoke, but it was that or plow directly into them at about 85 knots. I pulled up as quickly as I could and the airplane rotated immediately. A fraction of a second later I heard and felt a sickening THUD.
There was no doubt that I had hit one of them, but, somewhat unbelievably, the airplane was climbing as though nothing had happened. I put the nose down to get the airspeed back up and began to try and piece together what damage the airplane had sustained. Based on the noise and the feeling of the impact, my suspicion was that I had hit the deer with the left main landing gear. A review of the instrumentation showed no abnormalities and the airplane was behaving normally, so I didn’t suspect any damage to the airframe/ flight controls. I couldn’t see anything out the windows that looked unusual, and somewhat unbelievably I still had 3 green lights.
After gaining a safe amount of speed and altitude, I turned around and told the passengers that we had hit a deer. It was obvious that we had hit something and I was sure that they wanted to know what was going on. Then, I checked all my indications again and satisfied with what I was seeing, tried to bring up the landing gear. No dice. When I pulled the gear lever to the up position, the master “GEAR UP” warning light came on and I got a horn. There was never any change in the 3-green indication and the gear motor never came to life at all.
At this point it was obvious that, minimally I was going to have to divert to Lancaster and have the maintenance guys look at the airplane to see if anything was broken. I figured that they would either give me the green light to continue or I would just jump into one of our PC12s and complete the trip while they worked on the Baron.
The landing gear’s refusal to come up was my first indication that there was substantial damage. I set course for Lancaster and called our Chief Pilot. After explaining the situation to him, we agreed that KLNS was the best option and that he would let the maintenance guys know that I was coming.
The logic was that proceeding to Lancaster would allow a visual check of the landing gear by maintenance people as well as the tower and result in the safest outcome if an emergency landing were required. Lancaster would likely have better services available in terms of emergency responders and, not to mention, I was fairly certain that there was a dead deer on the only runway at Wings that I didn’t feel like hitting for a second time. In addition, the relatively long runway at Lancaster combined with light traffic at that time of day made it the ideal option to divert to.
I again turned around to brief the passengers. I told them that we were going to have to make precautionary landing before continuing to our intended destination and that I would be performing a few low passes for the tower.
Due to the drag from the landing gear, the flight to Lancaster seemed to take forever. The long cruise home, however, gave me time to try and reach someone on the ground at Wings in hope of having the runway inspected and cleaned off before other traffic tried to use it. After several attempts to raise anyone on the Unicom/ CTAF frequency, I called Philadelphia Approach for help instead. Philly answered right away and I explained to them what had happened. I requested that they call over to Wings on the phone or send someone out to check the runway. They told me that they would get it done and asked if there was any other way that they could assist me. I told them I was headed to Lancaster and that I appreciated their offer, but didn’t require any further assistance. I then switched over to Lancaster Tower and let them know that I was about 15-20 minutes out, but I would need to perform a couple of passes to have them check my gear. The tower cleared me for a low approach over runway 26.
I arrived at LNS at about 7:30. I performed my first low pass by the tower, not really expecting anything to appear out of place. I figured I had bent something or damaged the squat switch, but not much more. I climbed to pattern altitude and awaited the good word. Shortly after the fly-by, Tower reported that the left main gear didn’t appear to be down and locked. They suggested that I make another pass. The airport maintenance personnel chimed in, reporting the same. We had just started discussing whether cranking the gear a little by hand might help when Philly approach called the Lancaster tower on the phone.
Philly informed Lancaster that someone had inspected the runway at Wings and found the left main strut and wheel in the grass. I quickly concluded that cranking the gear down probably wouldn’t help!
This was found in the grass by the runway at Wings Field
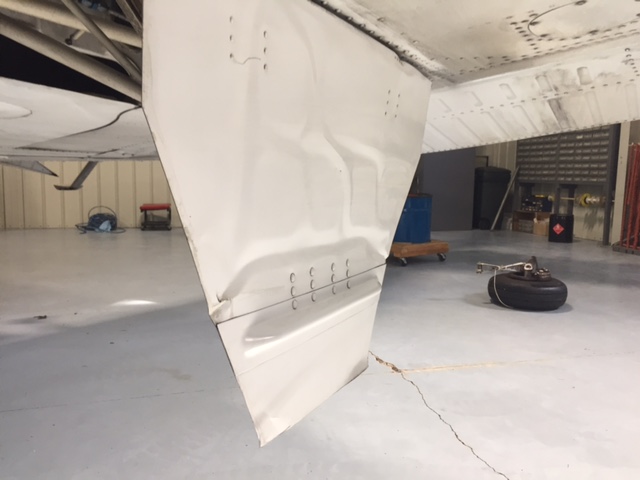
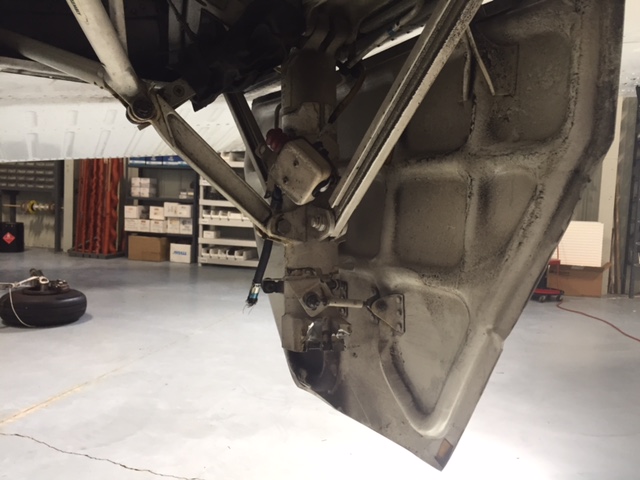
The gear door and strut after the accident.
If you think about the fact that I hit the deer with the wheel, but it didn’t hit the gear door, it becomes apparent just how close the airplane was to clearing the animal completely.
Andrew Robinson is an airline pilot for Piedmont Airlines. He is a former 135 Charter Pilot and flight instructor who lives with his wife and 2 daughters in Pennsylvania. He instructs in Beechcraft Bonanzas.
For years, Cirrus owners who have the Avidyne Entegra PFD and MFD have been clamoring for Avidyne to come up with some sort of upgrade. The Entegra, or EX 5000 system, is late ’90s technology and, though it still works, there will be a certain point in the future when it gives up the ghost. Avidyne still supports the Entegra system, but it’s hard for a Cirrus owner to see all this new technology coming on the market while not being able to upgrade the original Avidyne screens.
Avidyne gave it a go in the late 2000s with a panel upgrade known as the R9. The R9 was a good system, but Avidyne was very slow on the release (rumors were the company wanted it to be absolutely perfect before releasing it, which frustrated Cirrus, who then switched to the Garmin Perspective panel, leaving Avidyne behind) which led to the R9 only being available as a very expensive retrofit to the Entegra system ($80,000-$90,000 for the system and install). Needless to say, there weren’t that many takers.
Late in 2020, Garmin announced it had received certification to retrofit Avidyne Entegra equipped Cirrus Aircraft with the company’s G500 TXi displays, which gave new hope to G1, G2, and G3 Cirrus owners. The price tag wasn’t outrageous, coming in at $16,000 apiece for each display. The G500 TXi works with any possible GPS that can be installed in a Cirrus (GNS 430Ws, GTN 650s, GTN750, or the Avidyne IFD 540/440) and with the DFC 90 Autopilot (if the Cirrus is still equipped with an STEC 55x, the Autopilot would need to be changed to either a DFC 90 or a Garmin GFC 500).
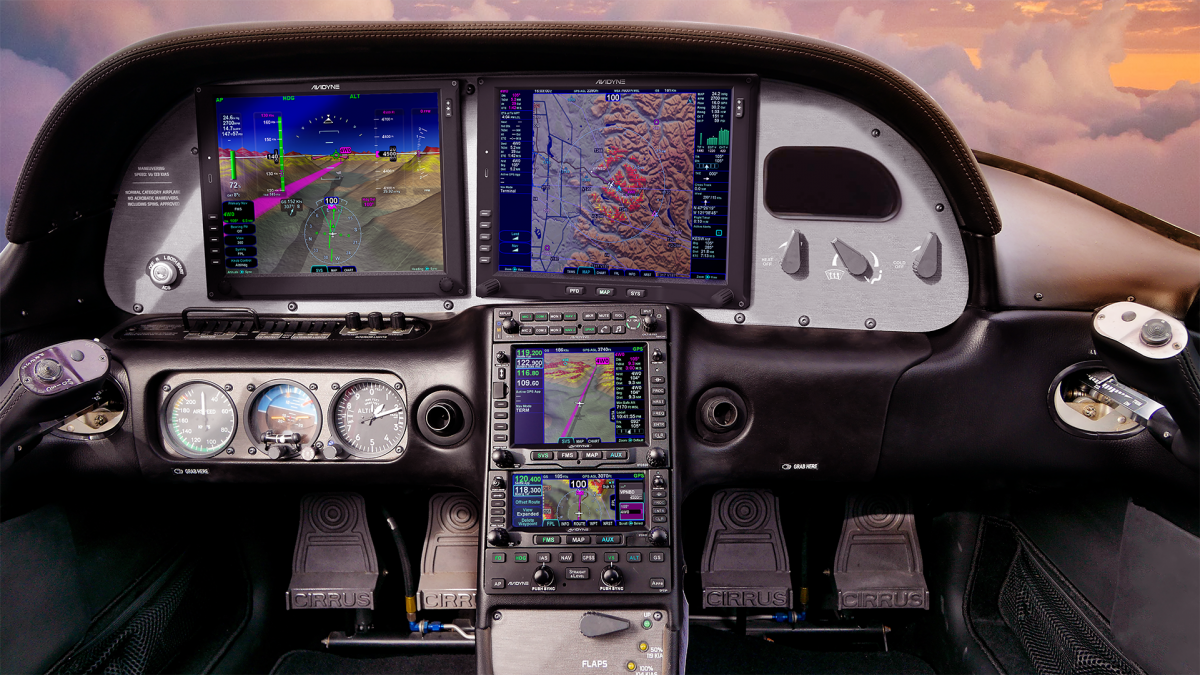
Fast forward to June of 2021 and Avidyne re-enters the game with the Avidyne Vantage. After the R9 debacle, Avidyne has opted this time to go for a more simple approach. The Avidyne Vantage system changes out the Entegra PFD and MFD with bigger screens (12″; Garmin’s TXi units are only 10.6″) with high quality pixelation, synthetic vision, engine gauges, checklists, charts, a hybrid touch interface, and all the other information that was offered on the Entegra system, just all more modern and updated. The best news is that the system provides redundant reversionary mode, which was one of the biggest complaints about the Entegra system.
The price tag comes in lower than Garmin, with each screen being priced at $12,500. The units will work seamlessly with the Avidyne IFD Series GPS units, though, as of this writing, it isn’t clear if the Avidyne Vantage will work with Garmin GTN 430Ws or the GTN 750/650. I would assume that the integration would be there, but I haven’t found any documentation stating that yet. DFC 90 Autopilot integration would be seamless, but not sure the integration with the STEC 55x or Garmin GFC 500.
Avidyne says the Vantage will be fully certified in early 2022, but the company is taking orders now. Visit the Avidyne Website for more information.
Want to make it better than a Cirrus or a Cessna TTx?
Meet the team at RDD creating the LX7. Just make sure you are sitting down as you are about to be blown away.
RDD (Research. Design. Development) is a professional building company for the Lancair line of experimental aircraft (Lancair unveiled the Mako at Osh Kosh this summer, which performs slightly less than the advertised values of the LX7, but is available as a new kit). For those unfamiliar with the experimental world, when an experimental kit is bought, the owner/builder can build the entire aircraft himself, partially build it then send it to a completion center, or have a professional build company put it together. This last option is what RDD did with Lancair aircraft before Lancair moved from Oregon to Uvalde, TX.
Once Lancair was sold, RDD started thinking on how to make the IV-P better. Boy, did they. What resulted is the LX7.
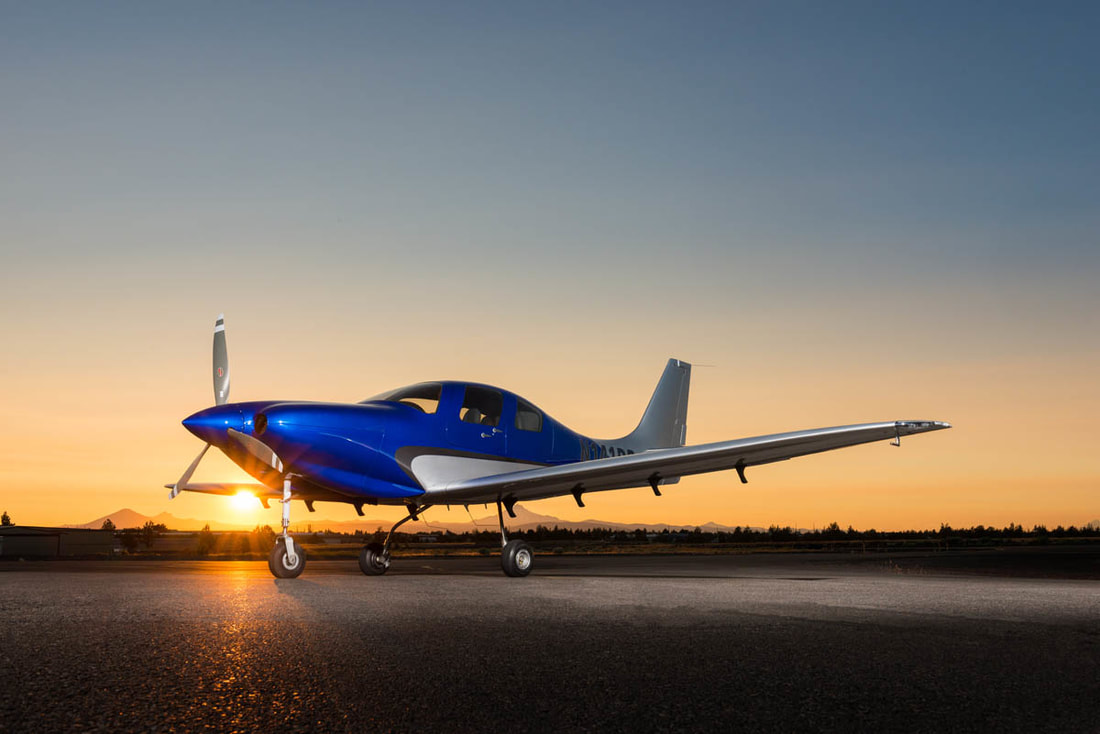
The LX7 is a retractable gear, single engine piston, pressurized aircraft that sits 4. See it on the ramp and it looks like a Lancair or a Columbia. Sit in the cockpit and you’ll know something is different.
Starting with the power plant, RDD put a Continental TSIO 550-E engine in the IV-P airframe, giving the airplane 350 HP. They redesigned the wing to hold 180 gallons of usable fuel and a much better stalling envelope (anyone who has looked at a Lancair IV or IV-P wing knows that there isn’t much wiggle room with angle of attack on those airplanes), lowering the stall speed to 62 knots dirty.
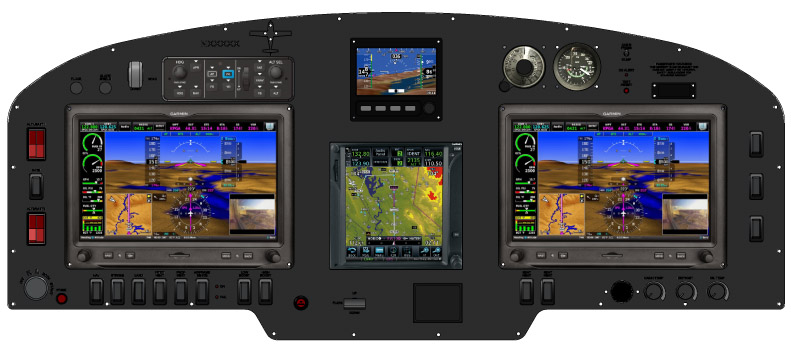
The cabin is roomier and the panel is beautiful. Equipped with 2 or 3 Garmin G3X Touch panels (the experimental equivalent of the G2000), plus a GTN 750 and a fully digital backup flight instrument from Grand Rapids, plus ESP technology built in to the autopilot, this plane seems like a pilot’s dream.
I haven’t even gotten to the best part: the speed. Being pressurized, the LX7 has a 25,000 foot service ceiling where it can achieve cruise speeds of 260 knots at best power (24 GPH) and 250 knots at best economy (18 GPH).
Yes, I did just say 250 knots at 18 GPH in a single engine piston.
Worried about an experimental? The airframe is equipped with a full BRS system similar to the Cirrus SR22, keeping everyone safe and sound.
There is one flying LX7 currently and RDD is working on 3 more. The price tag for the full conversion is $550,000. The kicker is, the owner has to provide the Lancair IV-P airframe. There are currently 10 Lancair IV-Ps for sale on Controller, varying in price from $200,000-$400,000, bringing the total price of the project to $750,000-$950,000. Owners who already have a IV-P or a IV-P kit can send it on over to RDD to get started on their project.
For years, there has been clamoring for airplanes to get rid of lead in piston engine Avgas. In the early 2000s, Thielert created a Jet A burning piston engine for Diamond Aircraft that gained some traction, but Thielert had internal issues and ended up declaring bankruptcy. Several other Jet A piston engines have come down the line since then to some success (Diamond is currently using 2 Austro manufactured Jet A piston engines on it’s DA62 and a Continental manufactured Jet piston on the new DA50).
The problem with a Jet A burning piston engine, though, is that those engines would be very expensive to put on existing airplanes, not to mention the cost of the STC alone.
Insert GAMI (General Aviation Modifications, Inc.), the famed Ada, Oklahoma company that championed turbo normalization, balanced injectors, and lean of peak operations. For those that have been to GAMI’s engine class, you know that these guys are at the very top of their game in engine knowledge.
In 2010, GAMI started the process of creating an Unleaded form of Avgas, terming it G100UL (the irony of traditional Avgas, 100LL, is the LL starts for low lead, but the lead levels in 100LL are actually quite high. UL stands for UnLeaded). Just before Osh Kosh in 2021, GAMI revealed that it’s work has come to fruition, gaining an STC for G100UL for Lycoming powered Cessna 172s.
The amazing thing about GAMI’s product is that it is able to mix with 100LL and not cause any issues. This means fuel trucks, fuel lines, fuel pumps, and aircraft fuel tanks don’t have to have any modifications to them to use G100UL. Plus, pilots will see longer engine life using G100UL because of the simple elimination of the lead. In tests, combustion chambers in cylinders burned cleaner, so theoretically, cylinders and engines will last a lot longer.
According to the company, GAMI has a few more tests to run and, assuming those go well, G100UL will be available for a whole lot more airplanes. An STC will still be required for the use of G100UL in a specific airplane, but the hope is, eventually, 100LL will be completely replaced by G100UL. The only downside is that G100UL is expected to cost about $1/gallon more than 100LL.
GAMI has partnered with Avfuel, so expect to see 100UL showing up at all Avfuel FBOs in the next year or two.
To read more, check out the press release on AOPA’s website.