| |

Setting Standards

Type Clubs Lead By Example with Standard Operating Practices

This article appeared in the May 2019 edition of EAA’s Sport Aviation Magazine. It is used with permission. For other articles by Charlie Precourt, please visit EAA.org and join for a full subscription.

Imagine a year when there are no fatal accidents in general aviation. Does that seem impossible? The airlines achieved that many years ago, and so can we if we focus on the right things in our safety pro- grams. In fact, the overall trend in GA accident rates over the last few years is very encouraging. AOPA’s Air Safety Institute published its annual GA Accident Scorecard recently (see www.EAA.org/ extras), revealing fatal accidents from 2008 to 2017 are down more than 30 percent. Nevertheless, there were 185 fatal accidents in 2017, so we still have a long way to go. But, there are many developments in safety programs across GA that can keep the trend going.

One such development that I’ve advocated through a couple of type clubs is establishing standard operating practices (SOP). When I flew for both the U.S. Air Force and NASA, we had what we called standard operating procedures. They were the law for our flying. That is, we had to follow them procedurally because the folks that paid our salaries said so. The objective was to ensure we all used the same playbook, minimizing the risk that one of us might develop a bad in-flight habit that increased risk to the organization.

One way to think about SOPs is to recognize the difference between procedure and technique. For example, you have to follow the manufacturer’s pilot’s operating handbook (procedure)where it says to lower the landing gear before landing. If you don’t, you are in for a bad day. However, it does not tell you exactly when to lower the gear; that’s left to technique.

In the middle, between procedure and technique, is a best practice. In this example, lowering the gear just before the final approach fix is a “standard practice.” It is the generally accepted “best” place to lower the gear. In GA, however, aircraft owners don’t generally answer to a boss, so I prefer the term practices instead of procedures.

However, whether or not someone is paying us to fly, following best practices just makes sense. If you have a good set of practices, they enable you to do things the same way every time, leaving lots of brain cells to manage the unusual, the things that might go wrong. The safest approach to accomplishing a flight task is one that leverages consistency. On the other hand, if you are inconsistent, doing flight tasks differently each time, you’ll always be struggling to keep up. So, in my involvement with the safety committees for both the Malibu Mirage Owners and Pilots Association and the Citation Jet Pilots Association, there has been broad acceptance of recently developed standard operating practices.

The good news in this development is that a culture of safety is growing broadly across most sectors of GA through these type club initiatives. Perhaps more importantly, there is much to learn from each other about the effectiveness of these various initiatives. EAA has seen a four-year drop of 47 percent in fatal accidents among homebuilts! So, there must be something right going on there — a major focus on appropriate transition training before flying a new homebuilt (as a standard operating practice) is paying off.

So, what is covered in the SOPs these type clubs have developed? The following outlines the kinds of standard practices other type clubs have set up and represent SOPs you could establish for yourself regardless of the type of aircraft you fly. You just have to fill in the blanks for your particular type and commit to sticking to them in your flying. These are notional and are practices (not mandatory procedures). They don’t tell you how to fly your aircraft; they give you things to think about when you do. If you take a bit of time to set your own SOPs and then stick with them, you’ll be a far safer pilot. Here are some ideas:

Duty Day

Set the maximum number of hours of flight time during a calendar day and rest hours off between flying days. One example is a maximum of eight hours in the air and a minimum of 10 hours off until flying again.

Cargo

Establish best practices for what you will carry as cargo. One example is no lithium batteries in the baggage compartment.

Flight Planning and Preparation

What are your limitations for the types of flight you’ll take on? Consider SOPs such as designating a suitable alternate airport for all flights. Another might be for first flights after significant maintenance, such as no flight at night or in IMC until a day-VMC functional check flight has been done.

Runway Field Length Guidelines

Establish an appropriate minimum field length for your aircraft and commit to not going into shorter fields. Consider sea level operations and high-altitude airports as well.

Surface Operations

What should be your maximum wind conditions for taxi, takeoff, or landing? Maximum acceptable crosswinds on landing? Set them in your SOP and stick to them.

En Route

Consider establishing practices like no non-operationally necessary conversation below 10,000 feet MSL, during any segment of an approach procedure, or during the last 1,000 feet before leveloff during climb or descent. Also consider declaring “minimum fuel” when the fuel state becomes less than fuel to destination plus 45 minutes at current burn, even if flying day VFR.

Approach and Landing

Consider establishing personal minimums in your SOPs for things like visual approaches. Perhaps use a 1,500-foot ceiling and 3 miles’ visibility for day and 5 miles for night, even though these exceed the FAA’s requirements.

Pilot Limitations, Training, & Currency

FAR Part 91 rules allow us to fly with pretty marginal levels of currency. Consider setting your own SOP to something more appropriate for the kind of aircraft you fly and the kind of flying you do in it. For example, consider these ideas as SOPs:

  • If you have less than 100 hours of time-in-type or have not flown at least 15 hours as pilot in command in the last 90 days, use a minimum planned fuel reserve of one hour.
  • Also, if flying IFR in this situation, use a minimum visibility for takeoff of 1 mile.
  • On instrument approaches, increase the published minimums by one- half mile visibility and add 200 feet to the decision altitude or minimum descent altitude.
  • Perform landings at a weight that allows a full stop in 60 percent of available runway length.
  • Consider an SOP that establishes you will fly with a CFI on a refresher flight before flying as pilot in command if you have not logged at least an hour of flight time and one takeoff and landing in an aircraft of the same type within the preceding 45 days.

Maneuver Standards

Wherever there are “techniques” associated with things like takeoffs and climbs, cruise, use of autopilot, power settings, and approaches and landings, you can write down your preferred technique as your own SOP. Describe each maneuver in enough detail (speeds, altitudes, power settings, configurations, etc.) to define a routine you will use each time. This ensures you fly consistently each flight and leverage the power of the standard operating practice, that is, to give you the bandwidth you need should you encounter an unexpected event or an emergency.
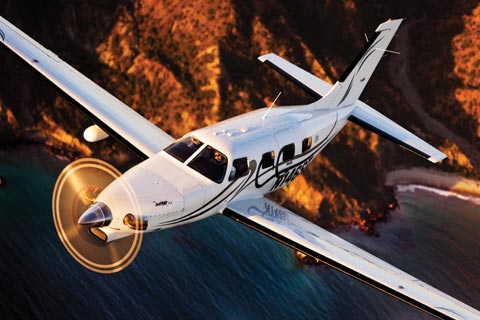
SOPs are among the exciting concepts underway to make safety programs work for us. Hats off to type clubs like MMOPA and CJP and many others that are taking the initiative. But even if you’re not in this kind of group, you can still set up your own SOPs. Let’s all look forward to our first year in GA without a fatal accident — and let’s make it soon!
Fly safe!


Charlie Precourt is a former NASA chief astronaut, space shuttle commander, and Air Force test pilot. He built a VariEze, owns a Piper JetPROP, and is a member of the EAA board of directors.

Similar Posts

  • The Flight Director as a Backup

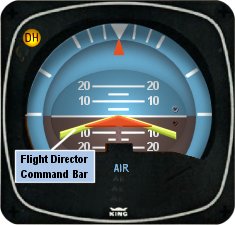
    I’ve noticed that a lot of general aviation pilots tend to ignore the flight director on the attitude indicator.  A lot of pilots don’t even know what it’s there for or how to use it.  Talk to any airline pilot, though, and he or she will tell you how important the flight director actually is.

    In most high performance airplanes, the flight director comes on when the autopilot comes on.  Essentially, the autopilot is following the flight director, which tells the autopilot where to go.  The flight director can also be used with the autopilot off, when hand flying an approach, for example.  By turning the flight director on, it will show you where you need to fly to stay on course and on glide slope.

    Flight Director

    The flight director is most often controlled by the autopilot controller.  The same buttons you use to put the autopilot in heading mode also tells the flight director to follow the heading bug when the autopilot is off.  When you move the heading bug (or change course on the GPS, depending on which mode you have selected), the flight director will show you when you need to turn and when you need to stop turning.  It directs your flight attitude, hence the name.

    I recently discovered it’s a great backup when you have some instruments on the fritz.  I went on a long flight in a steam gauge Piper Malibu and the attitude indicator started reading erratically.  While flying straight and level, it would randomly indicate that I was in a 10 degree bank to the right, swing back and show wings level, then show a 3 degree turn left.  This went on for a while.  We were in VMC conditions, so legality wasn’t a problem, but it was kind of disorienting.

    After a little while of this, the autopilot started acting up.  It would start oscillating the pitch up and down, making it seem like we were going through a moguls course in the air.  I ended up turning the autopilot off and hand flying the airplane.

    This led to a conundrum, since my attitude indicator was unreliable.  I could definitely look outside, since it was VMC, seeing when I was level and when I wasn’t.  That would create a higher workload for me, which on a long flight like I was on, would lead to an increase in fatigue.  The solution?  The flight director!

    I turned the autopilot off, but I left the flight director up.  It wasn’t referencing the bank angle that the attitude indicator was showing since the KFC 150 goes off of the turn coordinator.  So, if I just followed the attitude indicator, I could just keep scanning the instruments and relieve a little bit of my workload.

    It actually worked really well.  By just following the flight director, I was able to stay on course and on altitude with only minor attitude adjustments whenever we hit turbulence.

    So, if you’re attitude indicator and autopilot decide to stop working on you, then bring up the flight director, push the same buttons you would if you were using the autopilot, and it works as a great backup.

  • Flying the Hudson River Corridor

    Ever since I moved out to the Philadelphia area, the Hudson River corridor in New York City has become one my favorite places to fly. It’s hard to overstate the beauty of the city from low over the river. Every time I have a family member or friend come to visit, I try and take them over to see the city from the air.

    Each time I fly up the river I can’t believe that we are actually allowed to do so, flying below the tops of the buildings and close enough that you feel that you could reach and out touch them. The draw back to the Hudson River Corridor is that it can be busy, intimidating, and confusing. However, with some reading and preparation, the Skyline flight is easy to do and extremely rewarding.

    Having the right weather is an important first step. The second step is try to arrive during ideal lighting conditions. If possible, select a smooth, calm day to make it easier to maintain a track down the correct side of the river. I always try and target arrival at the city around sunset. The view is spectacular any time of day, but having the lights from the city while the sun is just setting gives the best viewing. I’ve also flown over and done the whole flight after dark, which is always spectacular.

    View of the World Trade Center

    The first method of flying the river is to utilize VFR flight following. If the controllers aren’t too busy, they will provide advisories to aircraft that request the Skyline. The nice thing about doing it this way is that the controller will clear you into the NY bravo airspace and keep you above the traffic flying the Skyline in the VFR corridor below. This is the method that I have always preferred as I enjoy the added benefit of the traffic advisories and it’s nice not to worry about position reporting on the radio.

    If you want to get flight following, head toward the corridor and request the Skyline route with NY Approach. (Remember to stay clear of the Bravo until you’re cleared in!) Once you’re cleared into the Bravo and approaching the corridor, they will hand you off to Newark/ LaGuardia Tower for traffic advisories over the river. I like to approach from the south and ask for a 180 over the George Washington Bridge. This allows me to fly past the city a second time before exiting the corridor over the VZ (Verrazano Bridge) and heading back toward home.

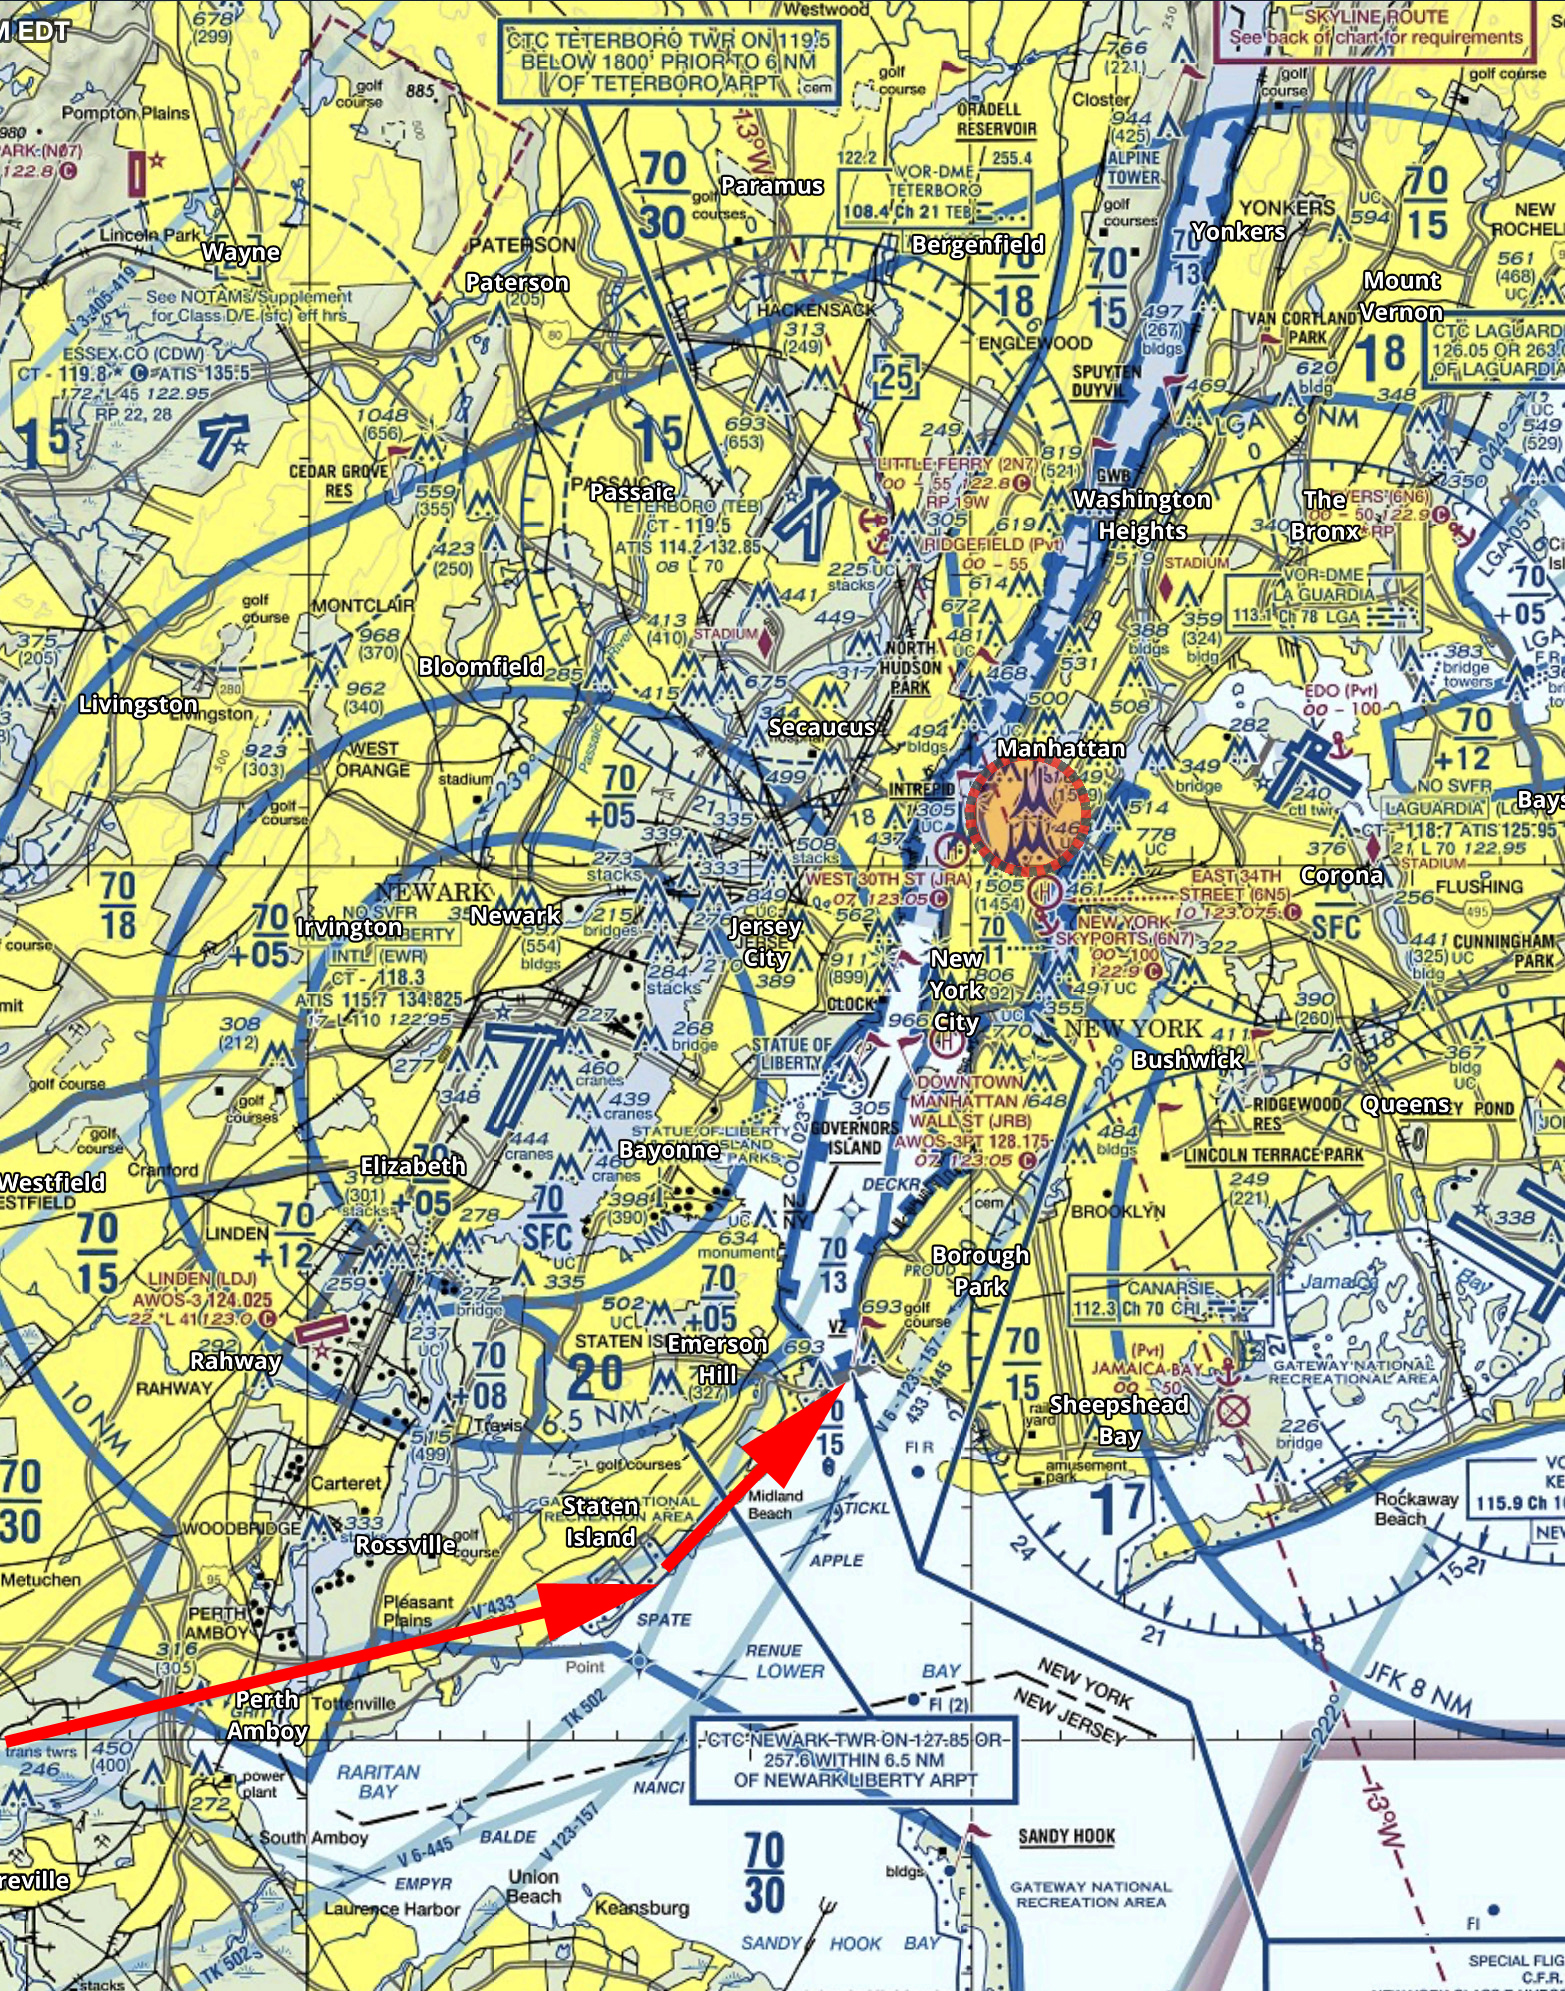
    In red is the path I typically fly. I descend to 1400’ and fly toward the APPLE intersection picking up the shoreline around Staten Island and hugging it until crossing the middle of the VZ. Newark normally clears me into the Bravo at 1400’ or 1500’ to fly up the corridor.

    Pros:

    • Better traffic Awareness
    • No position reports

    Cons:

    • Flying slightly higher reduces the view
    • If the controllers are busy, they may deny your request for advisories  
    • Can be intimidating to talk to NY Approach/ Newark/ LaGuardia 

    The other option is to fly in the VFR corridor. If you want to do it via this method there are just a few things you need to make sure you’re familiar with before you go. When in the VFR corridor you’ll need to make required position reports on a CTAF frequency. Make sure that you have the proper charts and have studied pictures of the landmarks so that you know what you’re looking for. I tend to plan on this as a backup in the event that the controllers won’t give me advisories.

    Pros:

    • Doesn’t require talking to controllers/ class B clearance
    • More freedom to select altitude and routing as desired

    Cons: 

    • Less traffic awareness
    • Required position reporting

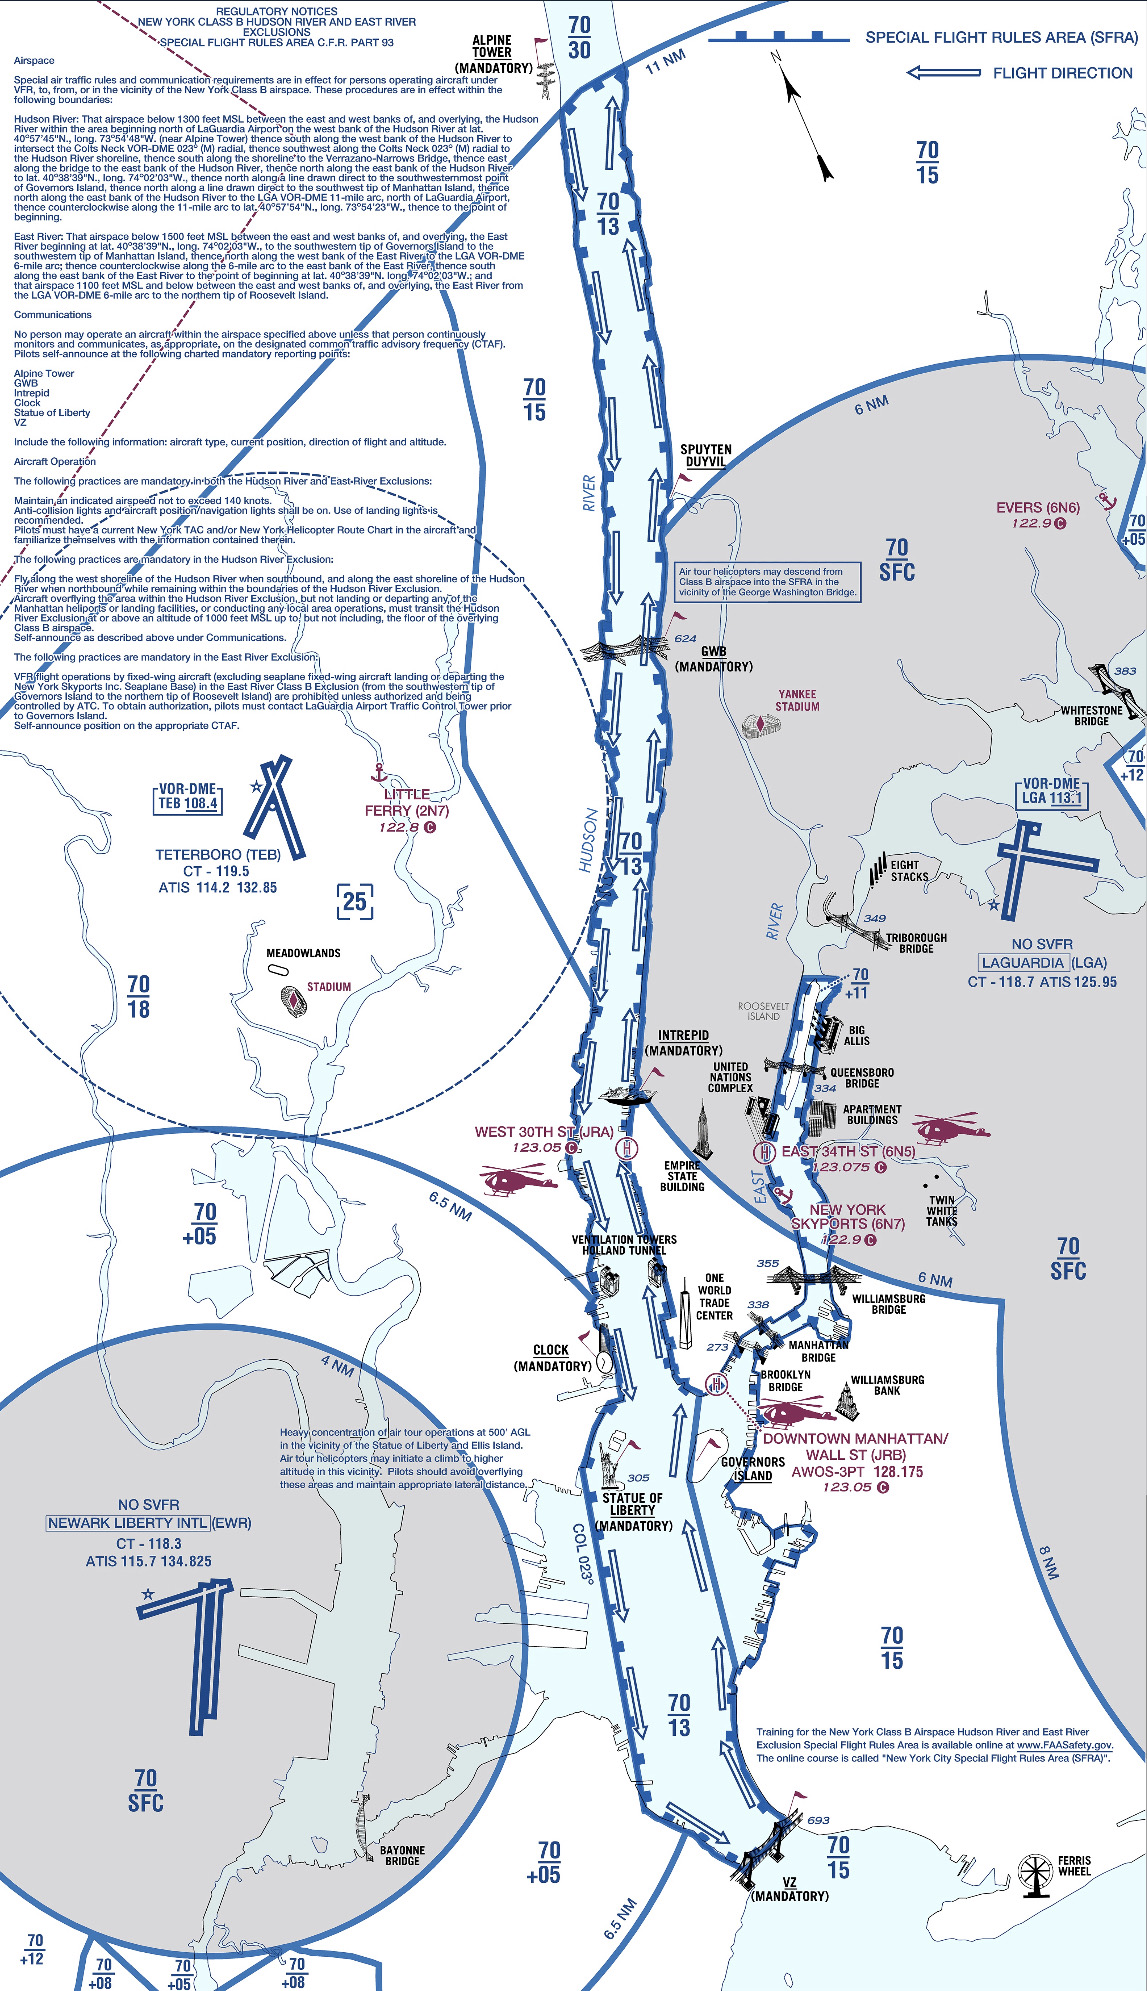
    All the requirements and guidelines for flying the corridor can be found on the back of the NYC TAC chart. Any pilot flying the river is required to have one of these or a NYC helicopter route chart on board. If you’re using Foreflight, look in the Documents section under FAA Fly Charts and select the NYC TAC chart in order to read the back of page.

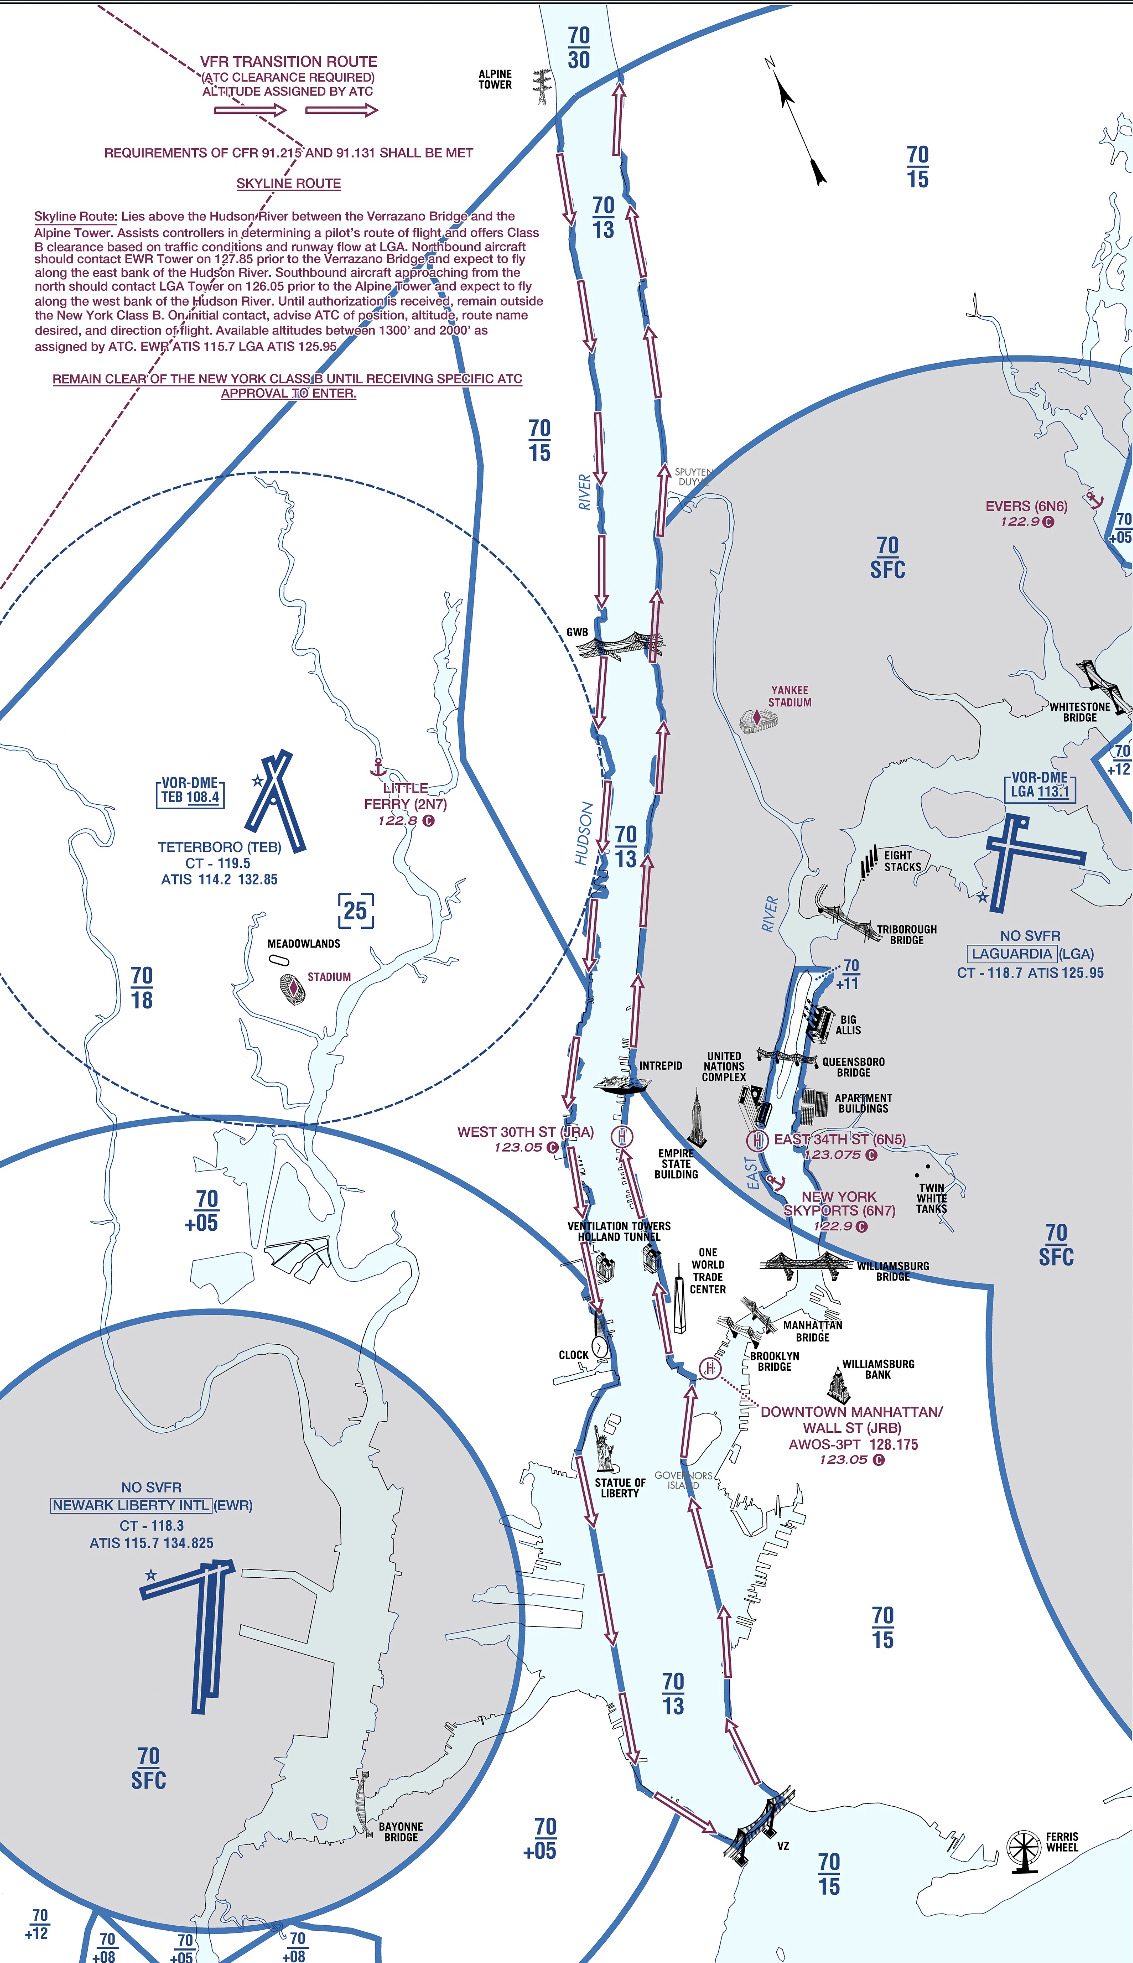
    Below you’ll find examples of the diagrams/ instructions printed on the back of the NYC TAC charts.

    You can see the traffic flow requires northbound airplanes to hug the east side of the river, while the southbound traffic stays on the west side. The VFR reporting positions (listed from North to South) are: Alpine Tower, George Washington Bridge, Intrepid aircraft carrier, Goldman Sachs (clock), Statue of Liberty, VZ (Verrazano Bridge). Each position report should include aircraft type, position, direction, and altitude.

    Other things to be aware of:
    NYC is always a hotspot for TFR’s. There are often TFR’s for baseball games or presidential movements so make sure to check before you head that way. Additionally, there is a speed restriction in place of 140 kts, though I’m not sure why anyone sightseeing would want to go that fast anyhow.

    I realize that all of the procedures and restrictions can be overwhelming, but with the proper preparation, the Hudson Skyline is one of the most incredible places in the world to operate an airplane. There are a lot of things that are easy to get excited about that don’t live up to expectation, but this isn’t one of them. I’ve never taken anyone to the river that wasn’t impressed by what they saw and that’s why I plan to keep going back.

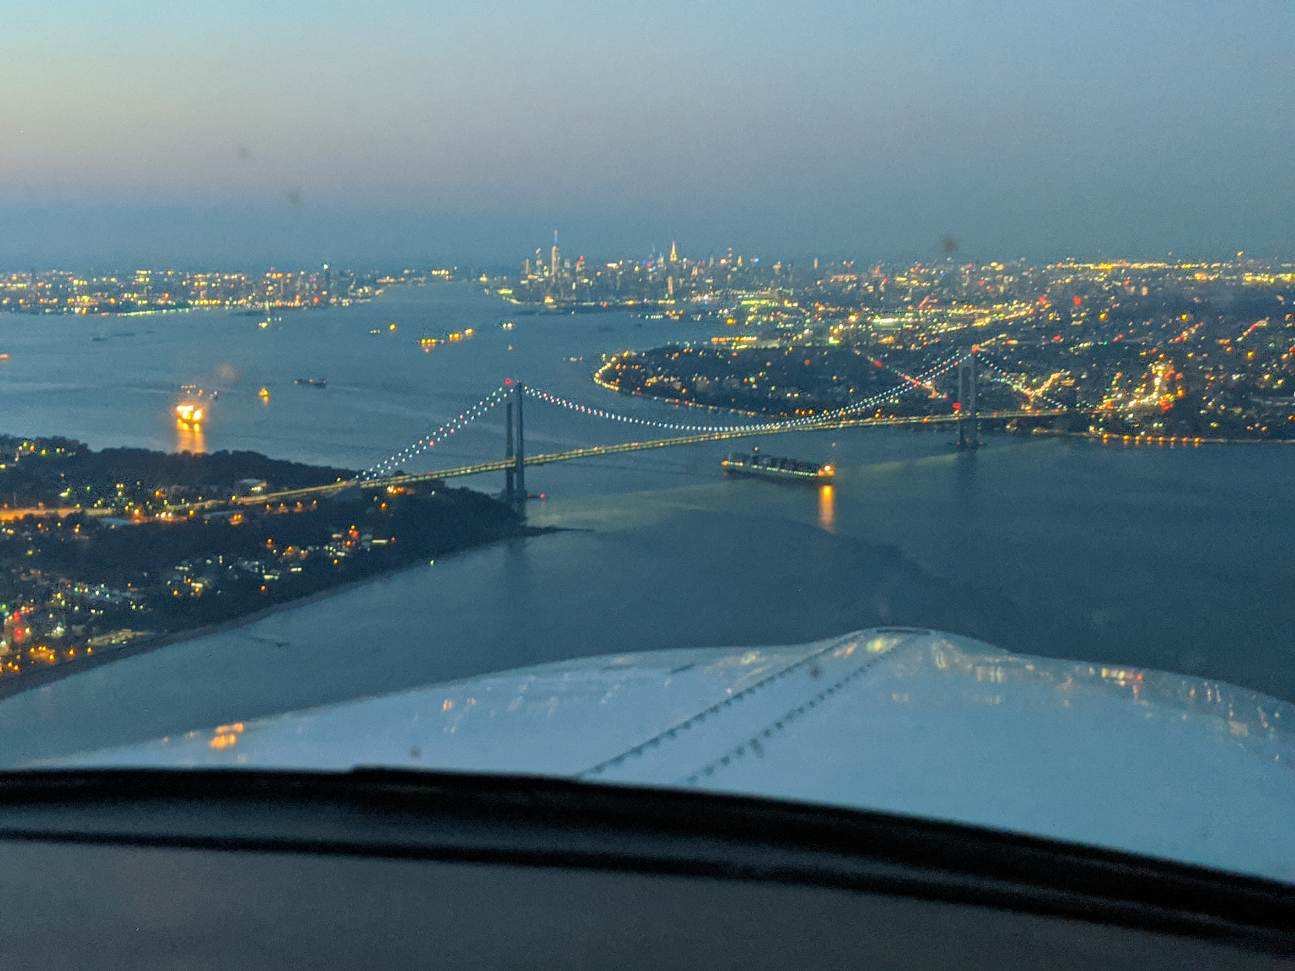
    About to cross the VZ looking north toward the city

  • Flying Eyes Sunglasses

    I am on a mission in flying for my head to be as comfortable as possible.  I’m currently going through the process of experimenting with different ANR headsets to see which ones squeeze my head the least (which I’ll be writing a future article about).  In the meantime, I decided to focus on sunglasses.

    I wear glasses (can’t do contacts anymore since they irritate my eyes), so anytime I have a headset on, I have frames running underneath my ear cups.  I had a pair of prescription sunglasses for years that were okay, but still caused soreness above my ears after more than 3 hours of flying.  I routinely fly 4-5 hours a day in training folks, so I had to find a better solution.

    I saw an ad in Flying Magazine one month for Flying Eyes sunglasses.  It was a relatively new company with a cool concept.  A pilot started the company with the goal to create as thin a pair of sunglasses frames as possible to increase the comfort and decrease the ANR loss when wearing sunglasses.  What the company came up with is pretty cool.

    The ultra-thin frames on the all the different Flying Eyes models are made out of Resilamide.  The material is so strong that the frames can be bent back and forth while not breaking.  The company even brags that the frames are virtually unbreakable.  I had to try these out.

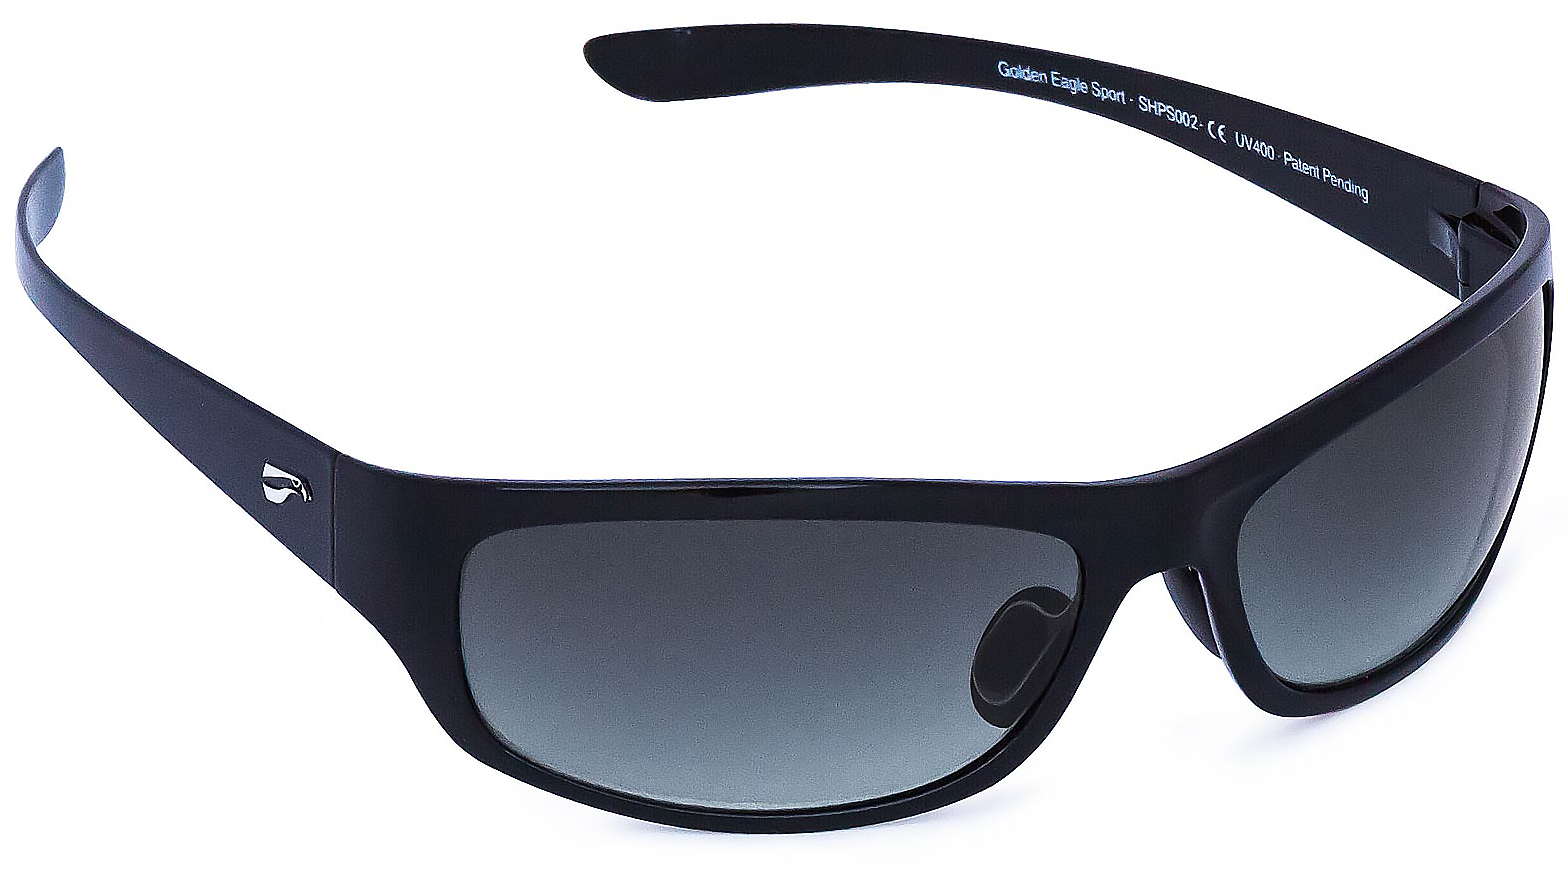
    I ordered a pair of the Golden Eagle Sport sunglasses.  The process of getting prescription lenses in them was no big deal and took about a week.  The eyeglasses shop initially thought the shape of the lens could be an issue, but it proved no problem at all.  The lens manufacturer even managed to chip the frames, but Flying Eyes sent a new set of frames for free, even though it was not at all their fault.

    In about a month and a half of flying with them, they are very comfortable.  Some squeeze on the side of my head after extended periods of wear underneath a headset, but I’m exploring headset options currently (see above).  Much improved over my last set of sunglasses.

    Flying Eyes offers several different frame models, some of which are prescription compatible and some which aren’t.  The Golden Eagle Sport frames run about $180.  Orders can be placed on the Flying Eyes website.

    Ordering new sunglasses from Flying Eyes?  Use this link to receive 10% off your order.

  • Texas Top Aviation Now Offers Piper PA46 Training

    Texas Top Aviation is proud to announce that we now offer Piper PA46 Training in the Malibu and Mirage.  Our Piper PA46 training is provided with the same excellent & professional approach that has become our hallmark.

    The four-day format of this course allows time to answer all of your questions about your new airplane.  The Texas Top Aviation Piper PA46 training course leaves you with a confidence and understanding that will help you enjoy your Malibu or Mirage even more.

    New avionics have you scratching your head in confusion? No problem. Texas Top Aviation is well versed in the latest Garmin and glass panel instrumentation.

    If you are in need of recurrent training in your PA-46, Texas Top Aviation would be proud to help with that as well. Consider us your one stop shop for Piper PA-46 training.

    For more information, check out our Piper Malibu/Mirage Training page.

    Contact us today to schedule your Piper PA46 Training!

  • MODAERO NextGen Aviation Festival

    Looking for something different to do this Spring Break week?

    Modaero

    Consider checking out the First Annual MODAERO NextGen Aviation Festival in Conroe, TX.  It’s a fly in event, complete with camping opportunities, at the Lone Star Executive Airport, KCXO.  The festival itself is being held right next door to the airport at the Lone Star Convention Center.

    What’s the draw, do you ask?  Not only are there going to be representatives from all the major aircraft manufacturer’s (along with tons of airplanes), there will be a multitude of speakers and live music.  There are even drone races!  The live music sets the event apart from the well known national fly in events like Osh Kosh and Sun N Fun.  It’s a different type of Festival, geared toward the younger generation of pilots.

    For more information or to register, check out MODAERO’s website.  The festival runs from Wednesday through Saturday, March 16-19.

  • Cirrus Alternator Failure

    A Cirrus is an electric airplane.  There are no vacuum pumps and therefore no vacuum driven instruments. The Klapmeier brothers did this on purpose, trying to make it a modern airplane.  No vacuum systems means no vacuum pump failures, hence there is a lower likelihood of instrument failures in IMC.

    What Cirrus did instead was put a lot of electricity producing and storing devices in the airplane.  All SR20 and SR22s are equipped with 2 engine driven alternators and 2 backup batteries.  Alternator 1 is a 28 volt alternator (the amperage varies based on whether or not you have an air conditioner) while Alternator 2 is a 28.5 volt alternator.  There are 2 24 volt backup batteries, as well.  Battery 1 is also used for starting.

    In traditional airplanes that have 1 alternator, an alternator failure can affect a lot of things.  Depending on how many electronics are in the airplane, the battery can get depleted quite quickly.

    The Cirrus electrical system is quite ingenious.  It’s a little bit different based on whether you have an Avidyne Cirrus or a Garmin Perspective Cirrus.  I will discuss that further below.

    The main goal of this article is to talk through what happens in the event of a #1 Cirrus Alternator Failure (an Alternator 2 failure actually isn’t a big deal at all, though Alt 2 is required for IFR flight), the procedure for trying to fix it, and a technique I have developed that makes the pilot’s job easier.  First, let’s go through the #1 Cirrus Alternator Failure procedure.

    Alternator 1 Failure

    In either avionics configuration, the Cirrus Alternator Failure procedure is the same.

    • Check and reset the circuit breaker for Alternator 1 (Reset only once)
    • Cycle the Alternator 1 master switch
    • If Alternator 1 doesn’t come back online, leave the Alternator 1 master switch off and shed load on the battery

    Avidyne Entegra

    The Avidyne Entegra has 2 busses, the Main Bus and the Essential Bus.  Alternator 2 isn’t set to come on until the engine RPM reaches 1700.  While on the ground, Alternator 1 runs both the Main and Essential Buses.  In the air, Alternator 1 runs the Main Bus and Alternator 2 runs the Essential Bus.  Since Alt 2 is 28.5 volts, the higher voltage won’t allow the power from Alt 1 to cross over and run the Essential Bus.  There are also 2 one-way directional diodes that prevent the voltage from Alt 2 to cross over and run the Main Bus.

    Having said all that, when Alternator 1 fails, Battery 1 is now running the items on the Main Bus.  There are a significant number of items on the Main Bus which causes the 24 volt battery to quickly lose it’s charge. This precipitates the need for shedding load.  Items like GPS 2, the air conditioner and aircraft lights can all be turned off.

    In the above scenario, Alternator 2 is running the Essential Bus still that has all the Essential items on it.  Those include:

    • The PFD
    • Flight Instruments and associated Avidyne computers
    • Engine Instruments and associated Avidyne computers
    • GPS 1
    • Com 1
    • Nav 1
    • Autopilot
    • Stall Warning
    • Charging Battery 2

    Note 2 important items that are not on the Essential Bus:  the flaps and the landing light (which is very handy at night).  Those two are only on the Main Bus, which Battery 1 is now powering.

    Let’s further enhance our scenario.  You are flying over Nevada (quite remote and not a lot of airports) at night, 30 minutes from the nearest airport when your Alt 1 fails.  When you get to the airport you are planning on landing at, you want to have your flaps and your landing light, but we don’t know how long Battery 1 will last.

    The solution (this is where my technique comes in):  Turn off the Battery 1 master switch.  This is an easy solution to ensuring you have battery power to use your flaps and landing light.  Instead of going through and shedding load, simply turn off the source.  You’ll still have all the above items on the Essential Bus, which is all you need to keep safely flying.  Then, when you get to your landing airport, turn Battery 1 back on to utilize your flaps and landing light.

    Garmin Perspective

    Cirrus wired the Garmin Perspective plane a little bit differently.  There are now 2 Main Buses along with the Essential Bus.  Alternator 1 runs Main Bus 1, while Alternator 2 runs Main Bus 2 and the Essential Bus. Both Alternators are running all the time.  The Alternator 1 Failure procedure remains the same.

    The cool thing that comes along with the second Main Bus in the Perspective is the amount of items you still have available to you in the event of an Alternator 1 failure.  The only items you lose will be:

    • Yaw Damper
    • Landing Light
    • Air Conditioner and associated components
    • EVS Camera
    • 12 Volt power supply in armrest

    Everything else is powered off of Alternator 2.  That’s not much.  The only item you really want on the above list is the landing light if you are going to be landing at night.

    Follow the Alternator 1 Failure procedure, then do my technique again.  Turn off Battery 1 to save the battery power in order to use the landing light when needed.

    Cirrus did a great job creating an all electric airplane with plenty of backups in case something fails.  I focused mainly on the Alternator 1 failure here.  If Alternator 2 fails, the system is wired for Alternator 1 to run everything while still charging Battery 1 and 2.  No big deal.

    In my experience, turning off Battery 1 to conserve battery power is just a simpler solution when shedding load in the event of a Cirrus Alternator Failure.

Leave a Reply

Your email address will not be published. Required fields are marked *