Cirrus Tow Bar For Sale
In the market for a tow-bar? This one is basically brand new and hasn’t been used all that much. It has the Cirrus connections on it as well.
For more information, contact Texas Top Aviation.
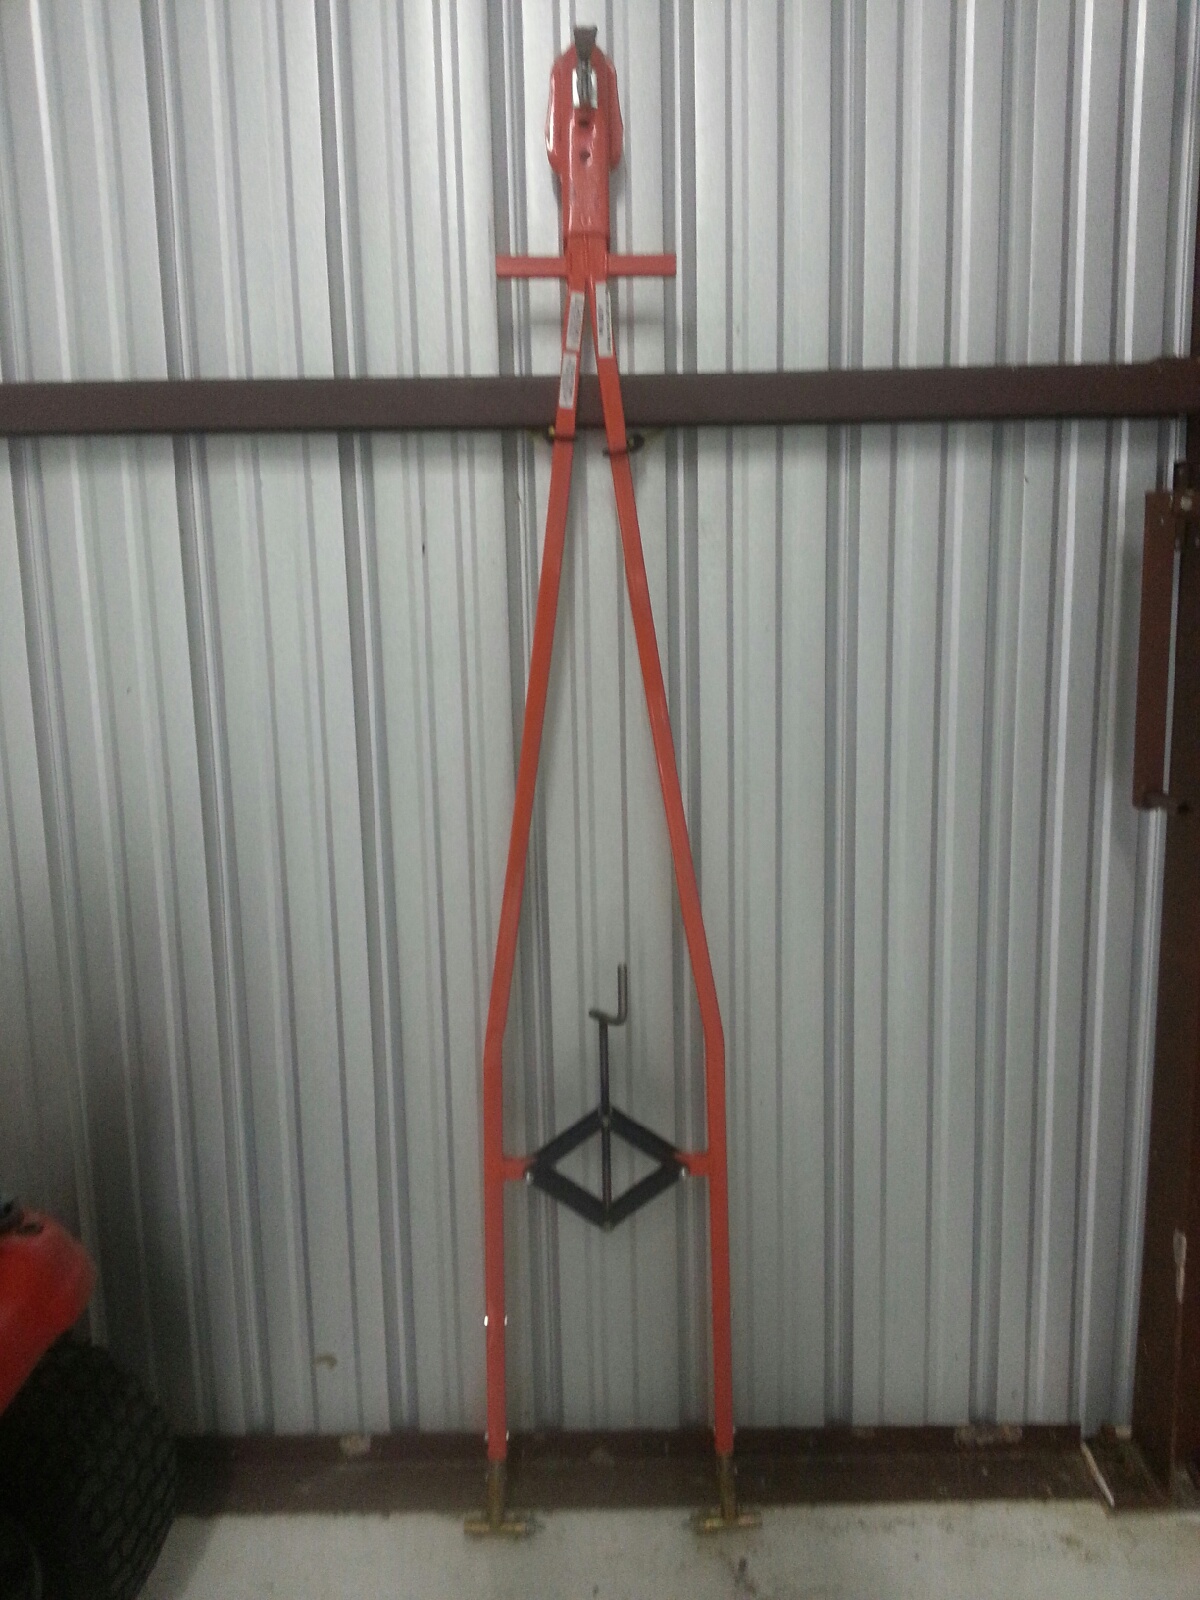

In the market for a tow-bar? This one is basically brand new and hasn’t been used all that much. It has the Cirrus connections on it as well.
For more information, contact Texas Top Aviation.
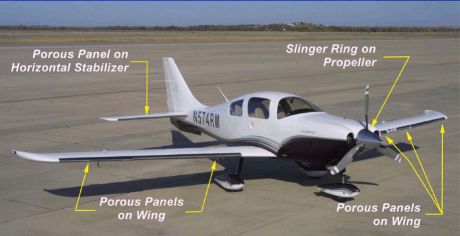
When cleaning airplanes, the majority of people don’t know how to properly maintain their TKS panels. TKS panels provide wing leading edge, horizontal stabilizer leading edge, and, in the case of FIKI airplanes, vertical stabilizer leading edge de-icing protection. For those not familiar with them, they are metal strips that have thousands of holes drilled into them where the TKS fluid seeps out. They have become quite prevalent on Cirrus aircraft, the Cessna TTx, and Mooney aircraft manufactured in the last decade or so. The system is also known as a weeping wing system.
Being on the leading edges, these panels pick up bugs very easily. For the uninitiated, it would make sense to just use normal airplane cleaner to spray the panels and scrub the bugs. Don’t!
Using anything that contains Methyl Ethyl Ketone (MEK) as that can harm the TKS bladders behind the panels. Any aircraft cleaner containing wax could cause the pores to clog, preventing the TKS fluid from properly seeping onto the wing.
What’s the best thing to do? Soap and water with a soft cloth is a good start (again, make sure it doesn’t have wax in it. Dish soap would be suitable). No hose available? Just simply turn the TKS system on, let it run till you start to see fluid drip off the wings onto the ground, and use the fluid to clean the panels.
A soft cloth would work fine, but, if the panels are really buggy, take a green scouring pad to do some scrubbing. Just make sure the scrubbing motion is up and down with the grain, not side to side. You can find the green scouring sponges on the dishwashing aisle in the grocery store. Just leave one in the hangar for when you need it.
If you’ve ever been to Nantucket Airport during the summer, you’ll understand when I say that it is a crazy place. During the summer months, especially on weekends, the airport is visited by an endless parade of airplanes ranging from the smallest GA airplanes to the biggest private jets.
One sunny Sunday afternoon I was standing in line at the front desk of the Nantucket FBO when the ramp door opened and a very grumpy and entitled man walked in. The man marched right up to the front desk and barked a fuel order at the girl working there, which she mistakenly read back wrong. After yelling at her for her wrongdoing, he announced that he had flown in to go to the restaurant and stormed off to drown his sorrows in fish and chips. Although he was a jerk, his attitude got me thinking about FBO’s and everything that the people who work at them do for us pilots.
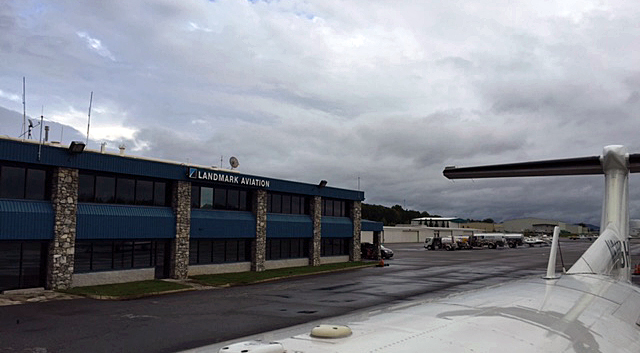
For anyone who may not know, FBO stands for Fixed Base Operator. FBO’s can be found at airports everywhere and their business is to provide services such as fuel, hangar space, and tie downs. Bigger FBO’s can offer more services including rental cars, food, maintenance, flight instruction, etc. FBO workers have the ability to make life really good or really miserable for pilots, and, it seems to me, we pilots have the same power over them. Based on my personal experiences and the experiences of some friends who have worked at airports around the country, here are some things to think about next time you taxi onto an FBO ramp.
I’ve divided this article into two sections:
Everyone I talked to about their time working at an FBO said that simply by being friendly and polite is one of the biggest ways we can help. Most of the people that work at the FBOs love aviation and likely are working there to be around the industry in hopes of eventually being more involved. The girl working the desk at Nantucket didn’t deserve to be yelled at just for reading a tail number back wrong; don’t forget that “please” and “thank you” are still magic words.
Whether you are flying to the airport, or you left your airplane at the FBO and you need them to pull it out or fuel it, calling ahead is greatly appreciated. Most FBO’s have a radio at the front desk and have their frequency listed online and in foreflight. Call ahead and tell them that you’re coming, when you’ll be arriving, and what you’ll need when you get there (gas, rental car, taxi..etc). That way they wont feel rushed and you may get what you’re looking for more expediently upon arrival.
If your fuel order is difficult or confusing (example: 6.54 gallons in the right side and 4.32 in the left) you may be better off just to do it yourself at the self serve. One of the guys I talked to said that he would have pilots ask for extremely specific numbers and then stand there watching, ready to pounce when it wasn’t fueled exactly right. Its also worth noting that fuelers do make mistakes. Its highly recommended to watch and make sure that the correct truck (Jet A or 100LL) is the one pulling up to dispense your gas. Make sure you check that the fuel caps are properly installed before departing.
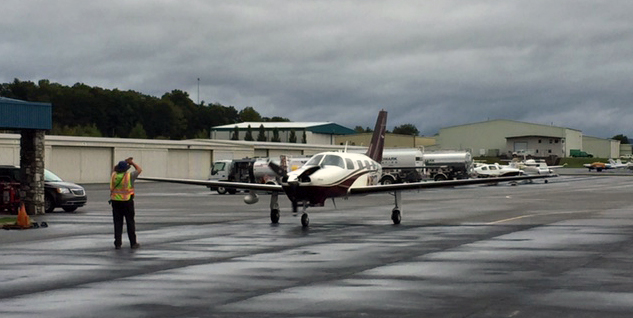
Taxiing onto the ramp is not the right time to be doing your after landing and shutdown checklists. Wait until the airplane is stopped before taking your eyes off the person marshaling you to your parking spot. I’ve been told that it isn’t uncommon for a pilot to be looking inside while taxiing and it makes the linemen very nervous as they are motioning to the pilot to stop (For those unfamiliar, with lineman hand signals, here’s a helpful link).
Unless you have talked to them and get the okay, don’t leave the parking brake on when leaving your airplane at an FBO. Often the lineman will direct you to park upfront to make loading and unloading easy, but if you’re going to stay for a long period, the airplane will need to be towed and parked out of the way. Leaving the parking brake on can make serious headaches for the people trying to organize the ramp after you leave.
Don’t blind the poor guy parking you by leaving all your landing, taxi, and recognition lights on as you’re pulling into your spot at night. Likewise, when you are ready to leave your parking space, its courteous to signal the person waiting in front of your airplane by flashing one of your lights at them so they know you are ready to be directed off of the ramp.
This one is pretty basic. I’ve heard through the grapevine that you may get parked in the boondocks as punishment for being rude to the FBO staff. However, if asked, much of the time they can pull your airplane right up front and may even let you pull a vehicle onto the ramp to load people and bags more easily.
Some FBO’s have special rates with hotel and rental car companies around in the area. Although it varies from place to place, you may be surprised with the amount you can save on these travel essentials. I had a flight last week where I called and was given a quote of 185 dollars for a rental car…after telling them that I was parking at the local FBO, I got the special price of 125. Check with the FBO you will be stopping at for any of their current offerings.
Sometimes the price of fuel or the minimum uptake to waive the fees can be negotiated. Sometimes, the fees may be forgotten entirely. If you are unable to take the minimum amount of fuel to waive the landing or ramp charges, tell them what you can take and you may be pleasantly surprised with the response. Its not uncommon with our Bonanza that even though the “minimum” may be 20, I can waive the fees by up-taking 10 or 12 gallons instead.
Some FBO’s offer incentives to pilots for buying gas. Many of the rewards programs are free to sign up for and will pay the fuel purchaser cash based on how much fuel they buy over a specified time period. I am a member of the Avtrip program which rewards fuel purchases at Avfuel airports with points that are redeemable for money. Avtrip is just one example of an FBO fuel rewards program; if you fly regularly, it may be worth looking into whether or not there is a fuel rewards program you can take advantage of.
Most FBO’s have cars designated for use by the pilots. They are extremely nice for going to get lunch or taking care of whatever short errands you may need to run around town. Most crew cars are limited to about 1-2 hours of use, but they can often be loaned out longer based on the discretion of the people working the desk. On a few occasions, I’ve had the cars loaned to me for longer, even over night, by the nice people at the FBO (They always appreciate pilots splashing a few gallons of auto gas into the cars while they are out, too).
FBOs and the services that they provide are invaluable to pilots, both commercial and private. If we as pilots are willing to work with the linemen and service reps we can make both our lives and their lives easier. Remember to be polite and don’t be afraid to ask if you need something….that’s what they’re there for!
Andrew Robinson is a 135 Charter Pilot and flight instructor who lives with his wife and 2 daughters in Pennsylvania. He flies Pilatus PC-12s and instructs in Beechcraft Bonanzas.
by Lance Stick & Hank Gibson
A couple of months ago, I had a life-threatening experience while flying. Thankfully, with my flight training, along with a lot of luck, I am here to talk about it.
One of my many piloting jobs is as a glider tow pilot. For those not familiar with gliding, since a glider doesn’t have an engine, every time a glider pilot goes and flies, it’s a team effort. A powered airplane (anything from a Super Cub to a turbine powered Air Tractor) is attached to the glider via a tow rope, which is about 200 feet long. Once the glider pilot gives the go ahead over the airport’s CTAF, then the tow plane begins it’s takeoff roll, pulling the glider along behind it.
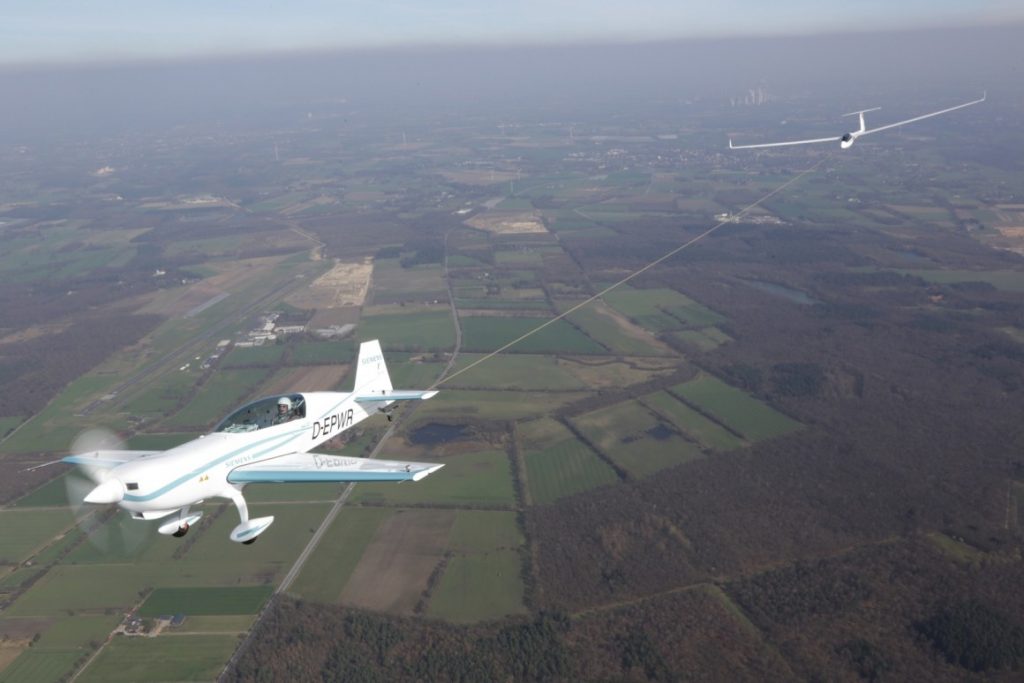
The glider becomes airborne prior to the tow plane, then the tow plane will circle the airport environment till it get’s to the pre-determined altitude to release the glider. Some tows are pattern tows and some are higher (not usually above 3,000 AGL), depending on the request from the glider pilot. Once the altitude is reached, the glider pilot pulls a handle in the glider to release the tow rope, then begins his glide. The rope stays attached to the tail of the tow plane, which in turn descends back down to the runway and lands. The tow plane also has a tow rope release handle in case of emergency.
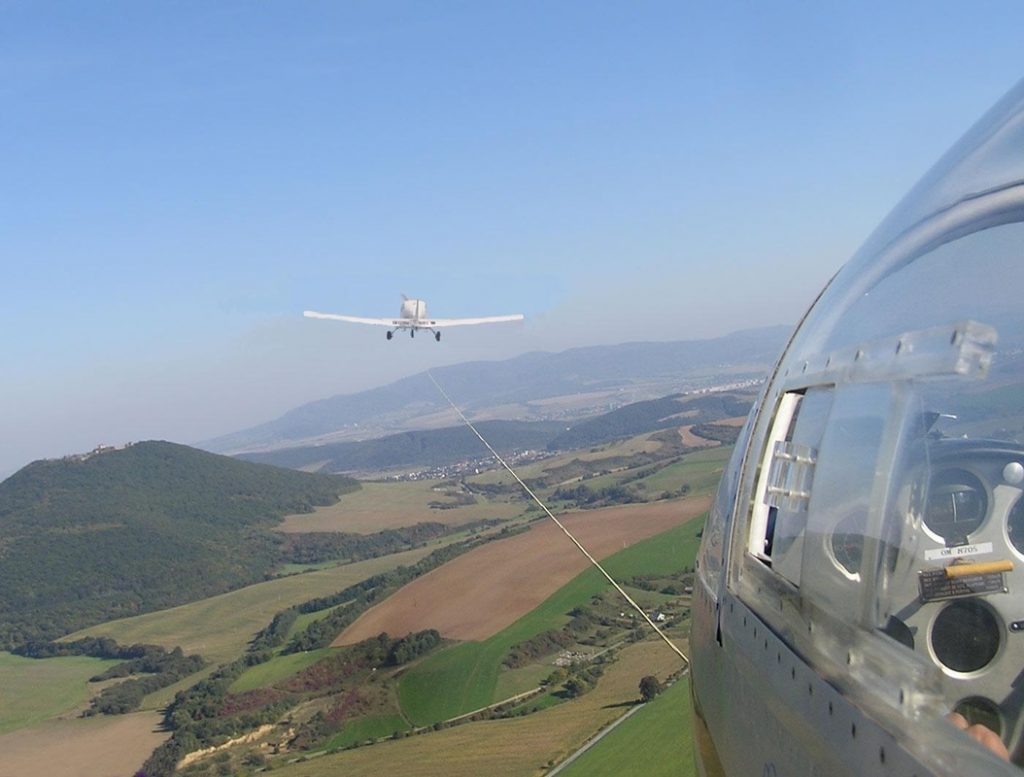
On this particular tow, the plan was to tow the glider up to 3,000 AGL. Upon reaching 2,500 AGL, the glider pilot called me on the radio and stated that his rear canopy had opened up. I looked over my shoulder and sure enough, the rear canopy was fully opened while he was still in level flight behind me. I asked him if he wanted me to tow him closer to the field, but he didn’t reply.
Now, as an experienced tow pilot, I know a glider canopy popping open should not be an emergency situation. It’s definitely abnormal, but would be similar to a door or window popping open in a powered airplane. Not a big deal. If too much force from the relative wind is applied to the canopy, it would snap off; however, a glider can easily land without a rear canopy.
About 5 seconds after I radioed the pilot (and received no reply), I felt my tail instantaneously lift up into a completely vertical position, which caused my nose to go straight down. The next thing I knew, a whole lot of earth suddenly filled my windscreen and I was in what’s known as a graveyard spiral.
A graveyard spiral (as defined from the Airplane Flying Handbook pg 4-23), “is a descending turn during which airspeed and G-load can increase rapidly….the airplane is flying very tight circles, in a nearly vertical attitude and will be accelerating since it isn’t stalled.” It’s also known as a spiral dive.
Back to the story. At this point, I tried to reach for the glider release handle. Unfortunately, due to the shoulder straps holding me against the seat, plus the g’s, and also the quart of oil and tow bar that flew forward and hit me in the back of the head, I couldn’t reach it. I was semi-upside down at a certain point, which dislodged the oil and tow bar from the floor of the baggage compartment. They sailed over the seat and nearly gave me a concussion.
At this point, 2,500 feet above the ground, I had a choice to either fight for my life at a very low altitude or to sit back and become part of a big explosion.
I decided to fight for my life.
As I was spiraling to the ground, I felt the tow rope snap. Up to this point, I had still been attached to the glider. The rope snapping was a good thing, as my airplane was now under my control, not attached to, and being affected by, a glider (more on that later). I now had a lifeline, no pun intended.
After I felt the rope snap, my instincts and training kicked in. I initiated the spin recovery procedure using the PARE acronym. This task was difficult to do as I had a lot of debris flying from the rear of the plane to the front, blocking my view out of the windshield. There was also debris around my feet, hampering my ability to use the rudder pedals. The spiral finally stopped and I recovered approximately 500 feet above the tree tops. It took my heart a lot longer to stop spinning.
After barely regaining my emotions, I tried to evaluate the condition of the plane. Were all the pieces of the plane still there, was the engine damaged, did my control surfaces still work?
Once I advanced the throttle and saw an increase in my engine RPM, I started an immediate climb to give me altitude to get back to the airport. I had engine power but I wasn’t sure how long it would last if I had damage. Now, what they don’t teach you during spin training is that when this happens unexpectedly, you will become very disorientated. You have just been spiraling unexpectedly and your equilibrium will be out of whack. As I leveled out just over the tree tops, I was too low to visually see any landmarks, nor could I see the airport. Once I was able to climb, I was able to orient myself and figure out where the airport was.
I had to be very careful getting back to the airport and landing without radio communication, since my radio was knocked out with all of the FOD from the baggage area. Thankfully, the landing was uneventful. After I landed, I saw the glider limp in over the trees. The rear canopy was totally gone, while the front canopy and other parts of the glider had suffered major damage. Miraculously, my airplane wasn’t damaged, except for the wire from the radio which came loose during the spiral.
So, how did all this happen, you ask? Well, the glider pilot made 2 huge mistakes. First, in gliding, the moment the glider pilot loses visual sight of the tow plane, you are supposed to release the tow rope. He did not do that and almost killed both of us.
Second, as pilots we are taught to always fly the airplane first. Everything else, no matter what it is, always comes after flying the airplane. As I stated previously, the loose canopy is not an emergency situation, but since the glider pilot did not aviate first and was distracted, it was almost a fatal day for 2 people and 2 airframes.
So, what caused this chain of events? By getting distracted by the open canopy, the glider pilot inadvertently pulled back on the stick while trying to close the canopy. Then, by not releasing the glider from the tow plane, the glider pilot climbed rapidly with an excessive rate of climb while still being attached to me. The rapid climb is what pulled my tail up, causing my nose to drop and put me into the spiral. The tow rope snapping set into motion my recovery, since up till that point, I literally had no control. An extremely high lift wing was attached to my tail, pulling it up, and there was absolutely nothing I could do about it.
We all spend time practicing and demonstrating emergency maneuvers during our flight training and during flight reviews. Many times you might think, I’ll never need to use this stuff. Thankfully, some of the procedures I learned in the past kicked in at a time of need, even though my heart was beating out of my chest.
At some point in every pilot’s career, some type of spin training or Upset Recovery Training would be highly recommended. Then, when things go wrong, remember to always aviate first, then handle all the other things that need to be handled.
Interested in spin training or Upset Recovery Training (UPRT)? Check out the list of Malibu & M-Class Owner’s and Pilot’s Association (MMOPA) approved UPRT vendors and schedule UPRT training today.
I love cross country flights. Airplanes are designed to travel. When I was instructing private students, my favorite lessons were always the first cross country flights. I looked forward to getting my students out of the pattern, away from the practice area, and showing them what they could really look forward to as a private pilot.
When I was in college, my friend and I borrowed his dad’s Cessna 150, did a cross country flight in it from Indianapolis to Kitty Hawk, then down the coast to Florida. We camped in the grass next to the airplane wherever the airport managers would let us and had our own aviation adventure complete with mechanical problems, unexpected weather, and interesting people along the way. These types of trips have produced some of the best memories and experiences that I’ve acquired during my aviation career so far.
Unfortunately, I know many people whose only cross country flight experience is what was necessary to satisfy their Private and Instrument training requirements. Some of them are nervous about the idea of venturing away from the familiarity of their home airport, while others are relatively new pilots who simply don’t know where to start planning a long cross country flight.
I’ve taken some notes on my preparations for an upcoming cross country flight that I’ll be flying in my dad’s Bonanza. I’m hoping this checklist might help others feel a little more confident that they have everything they need to get going.
Its always a good idea to bring a few extra quarts of oil. If you stop somewhere and find you need some, its nice to have the right kind on hand. Never assume that the airport you’ll be landing at next will have oil available.
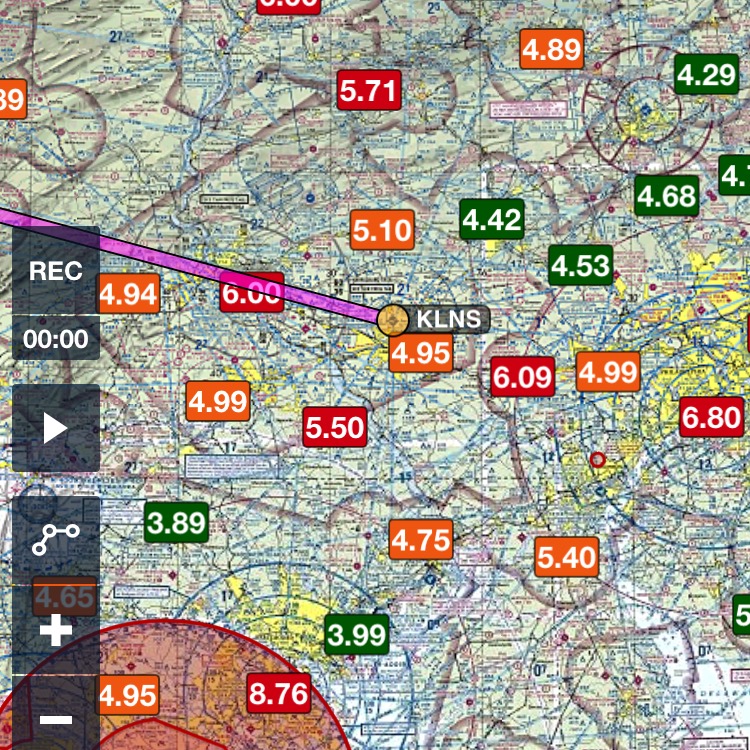
I’ve learned the hard way that calling ahead to verify fuel availability can be extremely important. I landed at an airport in Ohio one beautiful Sunday morning to find that the FBO wouldn’t be open until much later in the day. Naturally, there was no other fuel available on the field. I hadn’t called ahead to verify the hours of fuel availability (I assumed they had Self Serve) and had only 2 options: wait a while for the FBO to open, or try and find somewhere else nearby that had gas. As far as price, www.100LL.com is a valuable tool for finding cheap fuel. Foreflight also has posted prices for 100LL and Jet A, but it’s still a good idea to call ahead and verify price and availability.
It’s miserable to run out of batteries for a noise canceling headset with hours remaining in your flight. Bring spares, not only for your headset, but for your flashlight and other gadgets as well. Make sure your hand held GPS, iPad, and Stratus are charged (if you have them). I like to carry a charge cable and adapter as a backup so that I can plug things into the cigarette lighter.
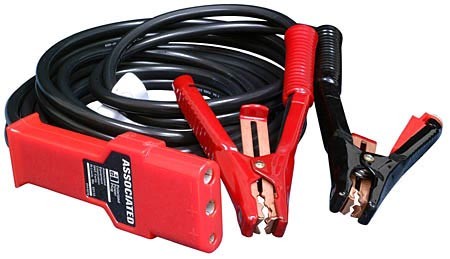
We always carry the ground power cable in the back of the Bonanza just in case we ever need a jump. Last month, when I was flying down to Texas, I was glad I had them; we had a dead battery after our fuel stop and had to borrow some power from an FBO worker’s pick up truck. Don’t assume that wherever you are stopping will have the correct cable to jump your airplane, especially if it requires a specific plug.
Every airport is different. I like to call ahead and find out how much the FBO is going to make me pay in landing/overnight fees. When I flew up to Buffalo last summer, I paid 25 dollars for parking at Niagara International (IAG). Had I parked at Buffalo (BUF), they would have charged me over $200.
Make sure you have current approach plates and charts either physically available or downloaded before you blast off. Having a copy of an AFD is a good idea as well, be it digital or paper.
If you arrange it beforehand, many FBO’s will have the car ready for you upon arrival. You may also be able to drop the car off at the FBO when are finished, instead of taking it back to the rental agency. It sure is nice to have the car pulled up next to the airplane when it’s time to unload.
Bigger FBO’s may have discounted rates with local hotels. If you call the desk and explain your needs they may offer to book it for you, or at least point you in the right direction. It may be worth picking an airport with more expensive fuel if it puts you closer to the hotels or restaurants you want to go to.
Come back next month for Part 2!
Andrew Robinson is a 135 Charter Pilot and flight instructor who lives with his wife and 2 daughters in Pennsylvania. He flies Pilatus PC-12s and instructs in Beechcraft Bonanzas.
Most of us who have been through instrument training are familiar with the traditional view limiting devices. There is the original hood, which does a decent job of blocking a pilot’s view of outside, but there are still gaps that allow “peeking”, though that peeking doesn’t really help a pilot fly an approach. It does help them figure out which way is up, so it’s not a true simulation.
The other problem with a hood is the process of putting it on to begin simulating IFR conditions, then taking it off when it’s time to land. This process takes time and the instructor has to take the controls (or the autopilot flies), losing some of the realism of the simulation.
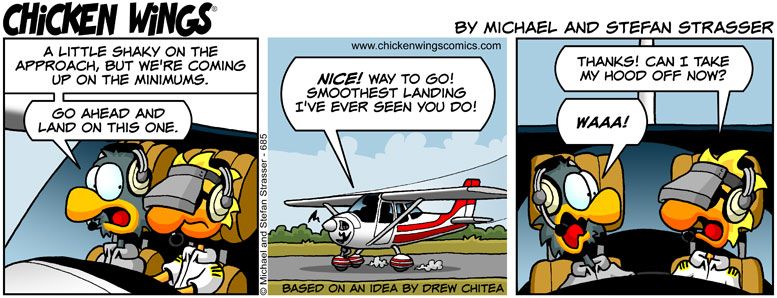
Overall, an IFR hood is relatively comfortable. The elastic band sits under your headset, doesn’t squeeze your heard, and doesn’t press underneath your ear cups of the headset, giving you a headache. Hoods are large and somewhat unwieldy.
Foggles are another way to simulate IFR conditions for training. Most of the time, these are safety glasses that have most of the lens blacked out or fogged out, leaving little slits at the bottom for the pilot’s eyes to see the instruments.
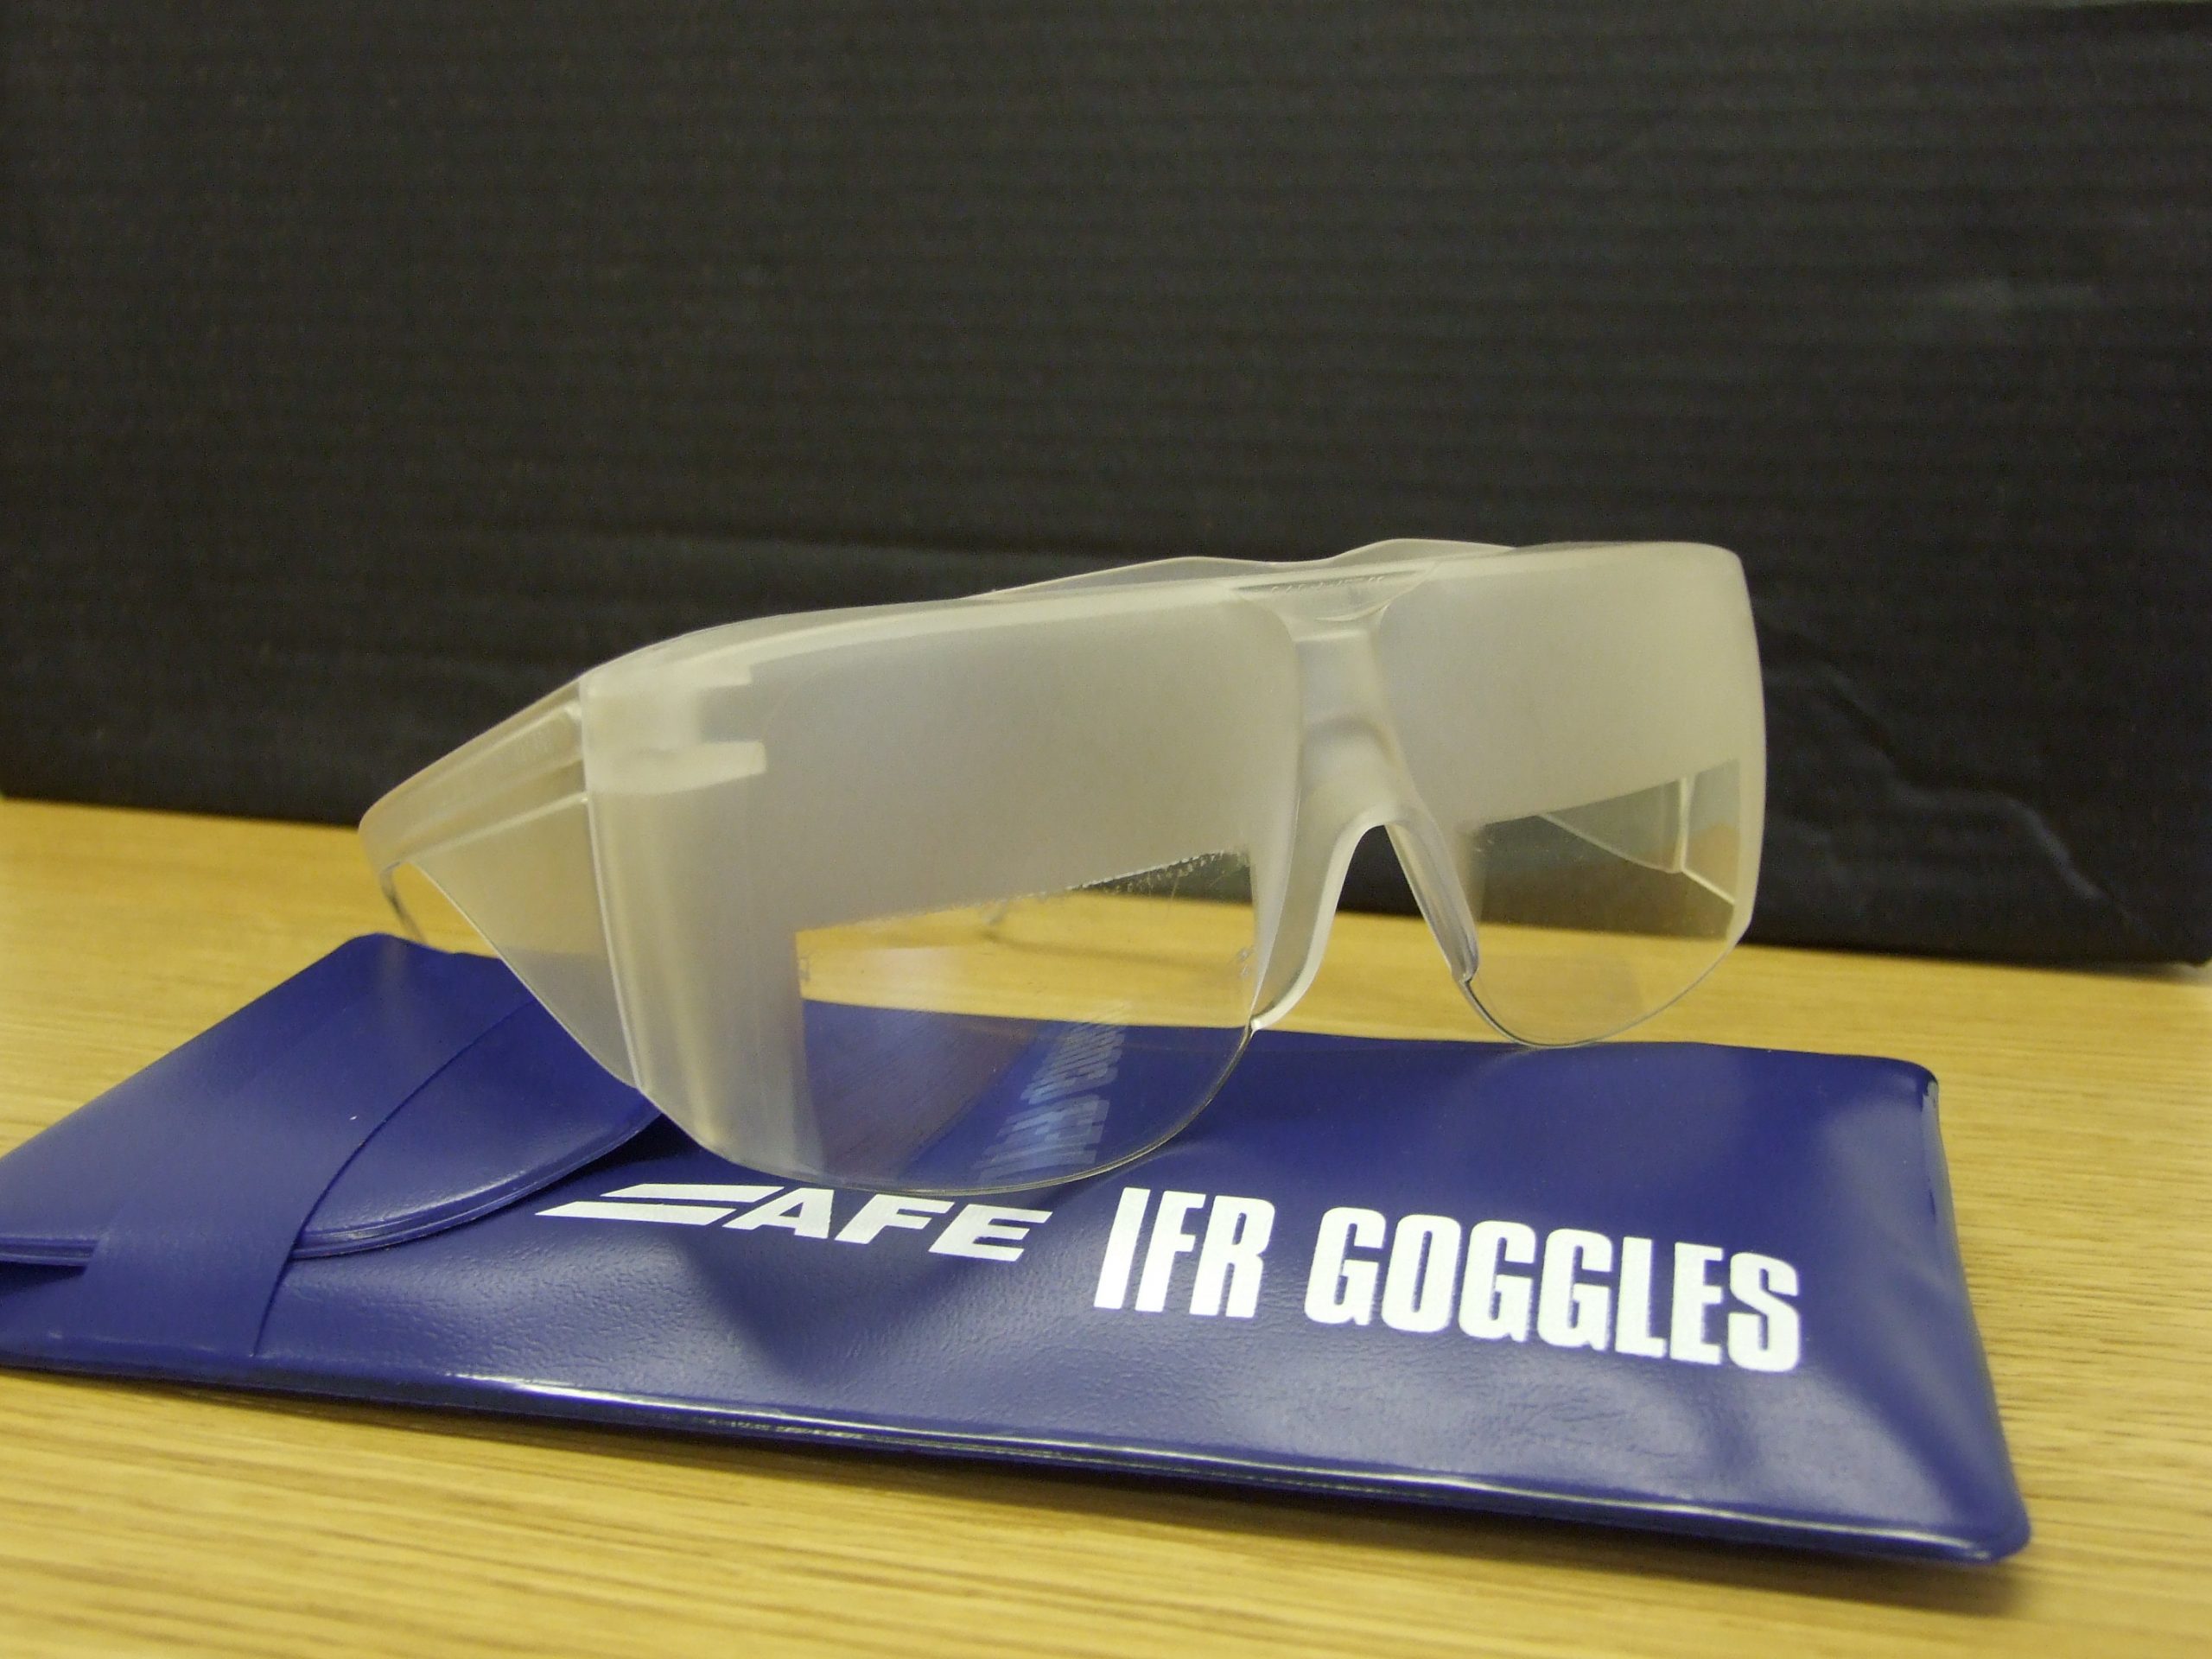
Foggles aren’t quite as good as an IFR hood at blocking the outside. Due to their shape, there are often cracks that allow more “peeking” then a hood. The process of beginning to simulate IFR conditions and ending the simulated IFR conditions is easier though, since all the pilot has to do is put the foggles on or slip them off, which can often be done one handed (putting them on can be more difficult one handed since they have to fit underneath your headset). Wearing them for a long period of time can get painful as your headset is probably going to start crushing them against the side of your head.
The best comfort and view limiting combination I have found, so far, is called the ViBAN. It’s very comfortable and does a really good job of simulating IFR by blocking a view of the outside.
What’s the whole goal behind a view limiting device? When a pilot starts instrument training, ideally, all the training would take place in the clouds, since that is why someone get’s an instrument rating. As we all know, this isn’t possible, hence the need to simulate IFR conditions. The problem with simulating IFR is, it’s not true IFR. True IFR conditions are different then what a hood or a set of foggles can simulate. This can lead to spatial disorientation if a fresh instrument pilot enters the clouds for the first time, having done all his training in simulated conditions.
I’ve even heard a story of a pilot who did all his IFR training with a hood, passed his check ride, went into the clouds the first time, and put the hood on because he was getting disoriented since he hadn’t ever experienced true IFR.
What about full motion simulators? How I wish every airport had a full motion simulator for instrument training. Full motion sims are truly the best way to simulate IFR conditions. A pilot can easily get spatially disoriented in a sim if he or she isn’t careful. It’s a great way to simulate IFR conditions, but, alas, this just isn’t possible.
Are we doomed to just do an okay job of training instrument pilots in simulated IFR conditions with a hood or foggles?
Nope, at least not anymore.
Enter the ICARUS Device. The ICARUS Device, which stands for Instrument Conditions Awareness Recognition and Understanding System, is an amazing piece of equipment which truly simulates IFR conditions in the training environment. The ICARUS is a plastic shield that uses a Polymer Dispersed Liquid Crystal film that allows the degradation of a pilot’s visibility. It clips on to a baseball cap and is attached to a battery. That battery is then bluetoothed to an iPad or iPhone App that allows the instructor to put the pilot into and take him out of simulated IFR conditions.
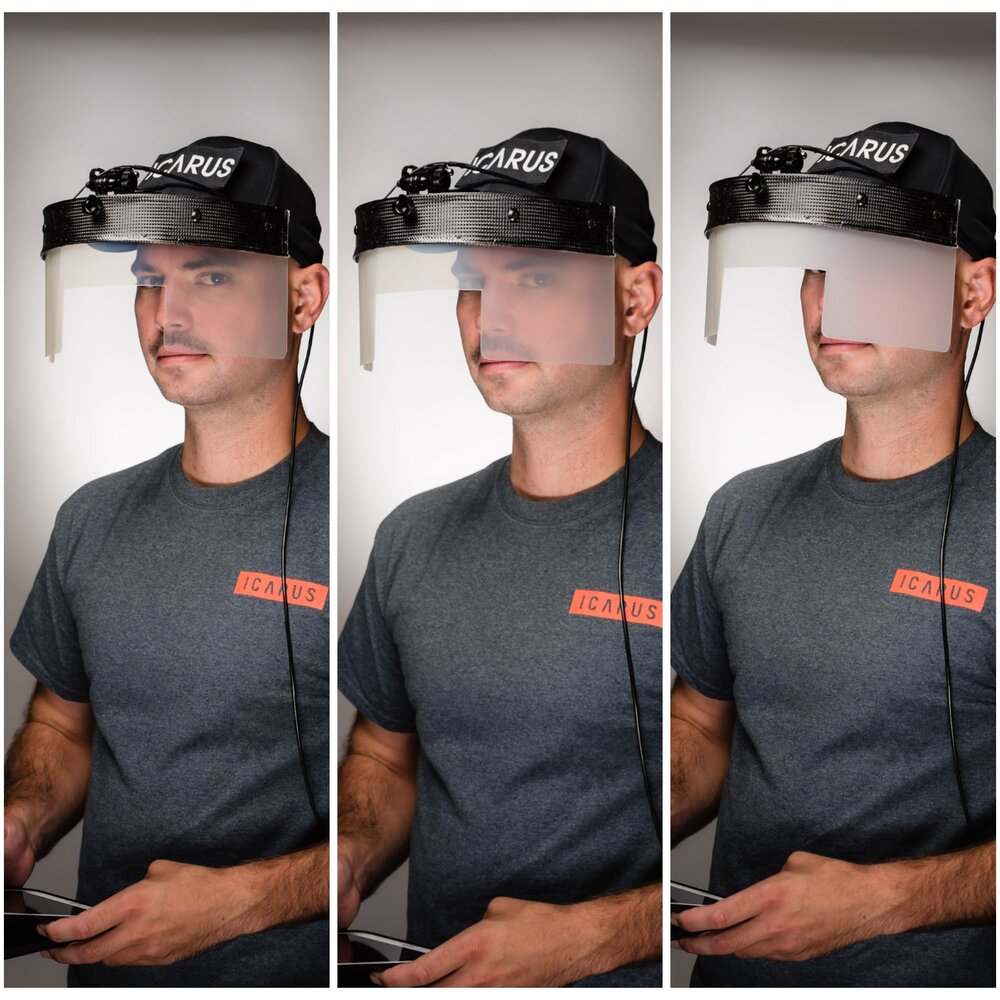
Originally designed for helicopter training, it’s an excellent tool for fixed wing IFR training too. I’ve been using it for the last month and a half and I am hooked. The customer’s that I have used it with truly say that they cannot see a thing outside. Because the plastic shield turns white, it really does give the view that the pilot is in the clouds. The inner ear certainly believes it. The curve of it fits the glare shield in most planes nicely (there is some custom cutting that would have to take place for specifically rounded glare shields, but it fits Cirrus and Piper Saratogas nicely, the two planes I have used it in), and it sits away from the pilot’s face, blocking out all windows, which is what clouds do.
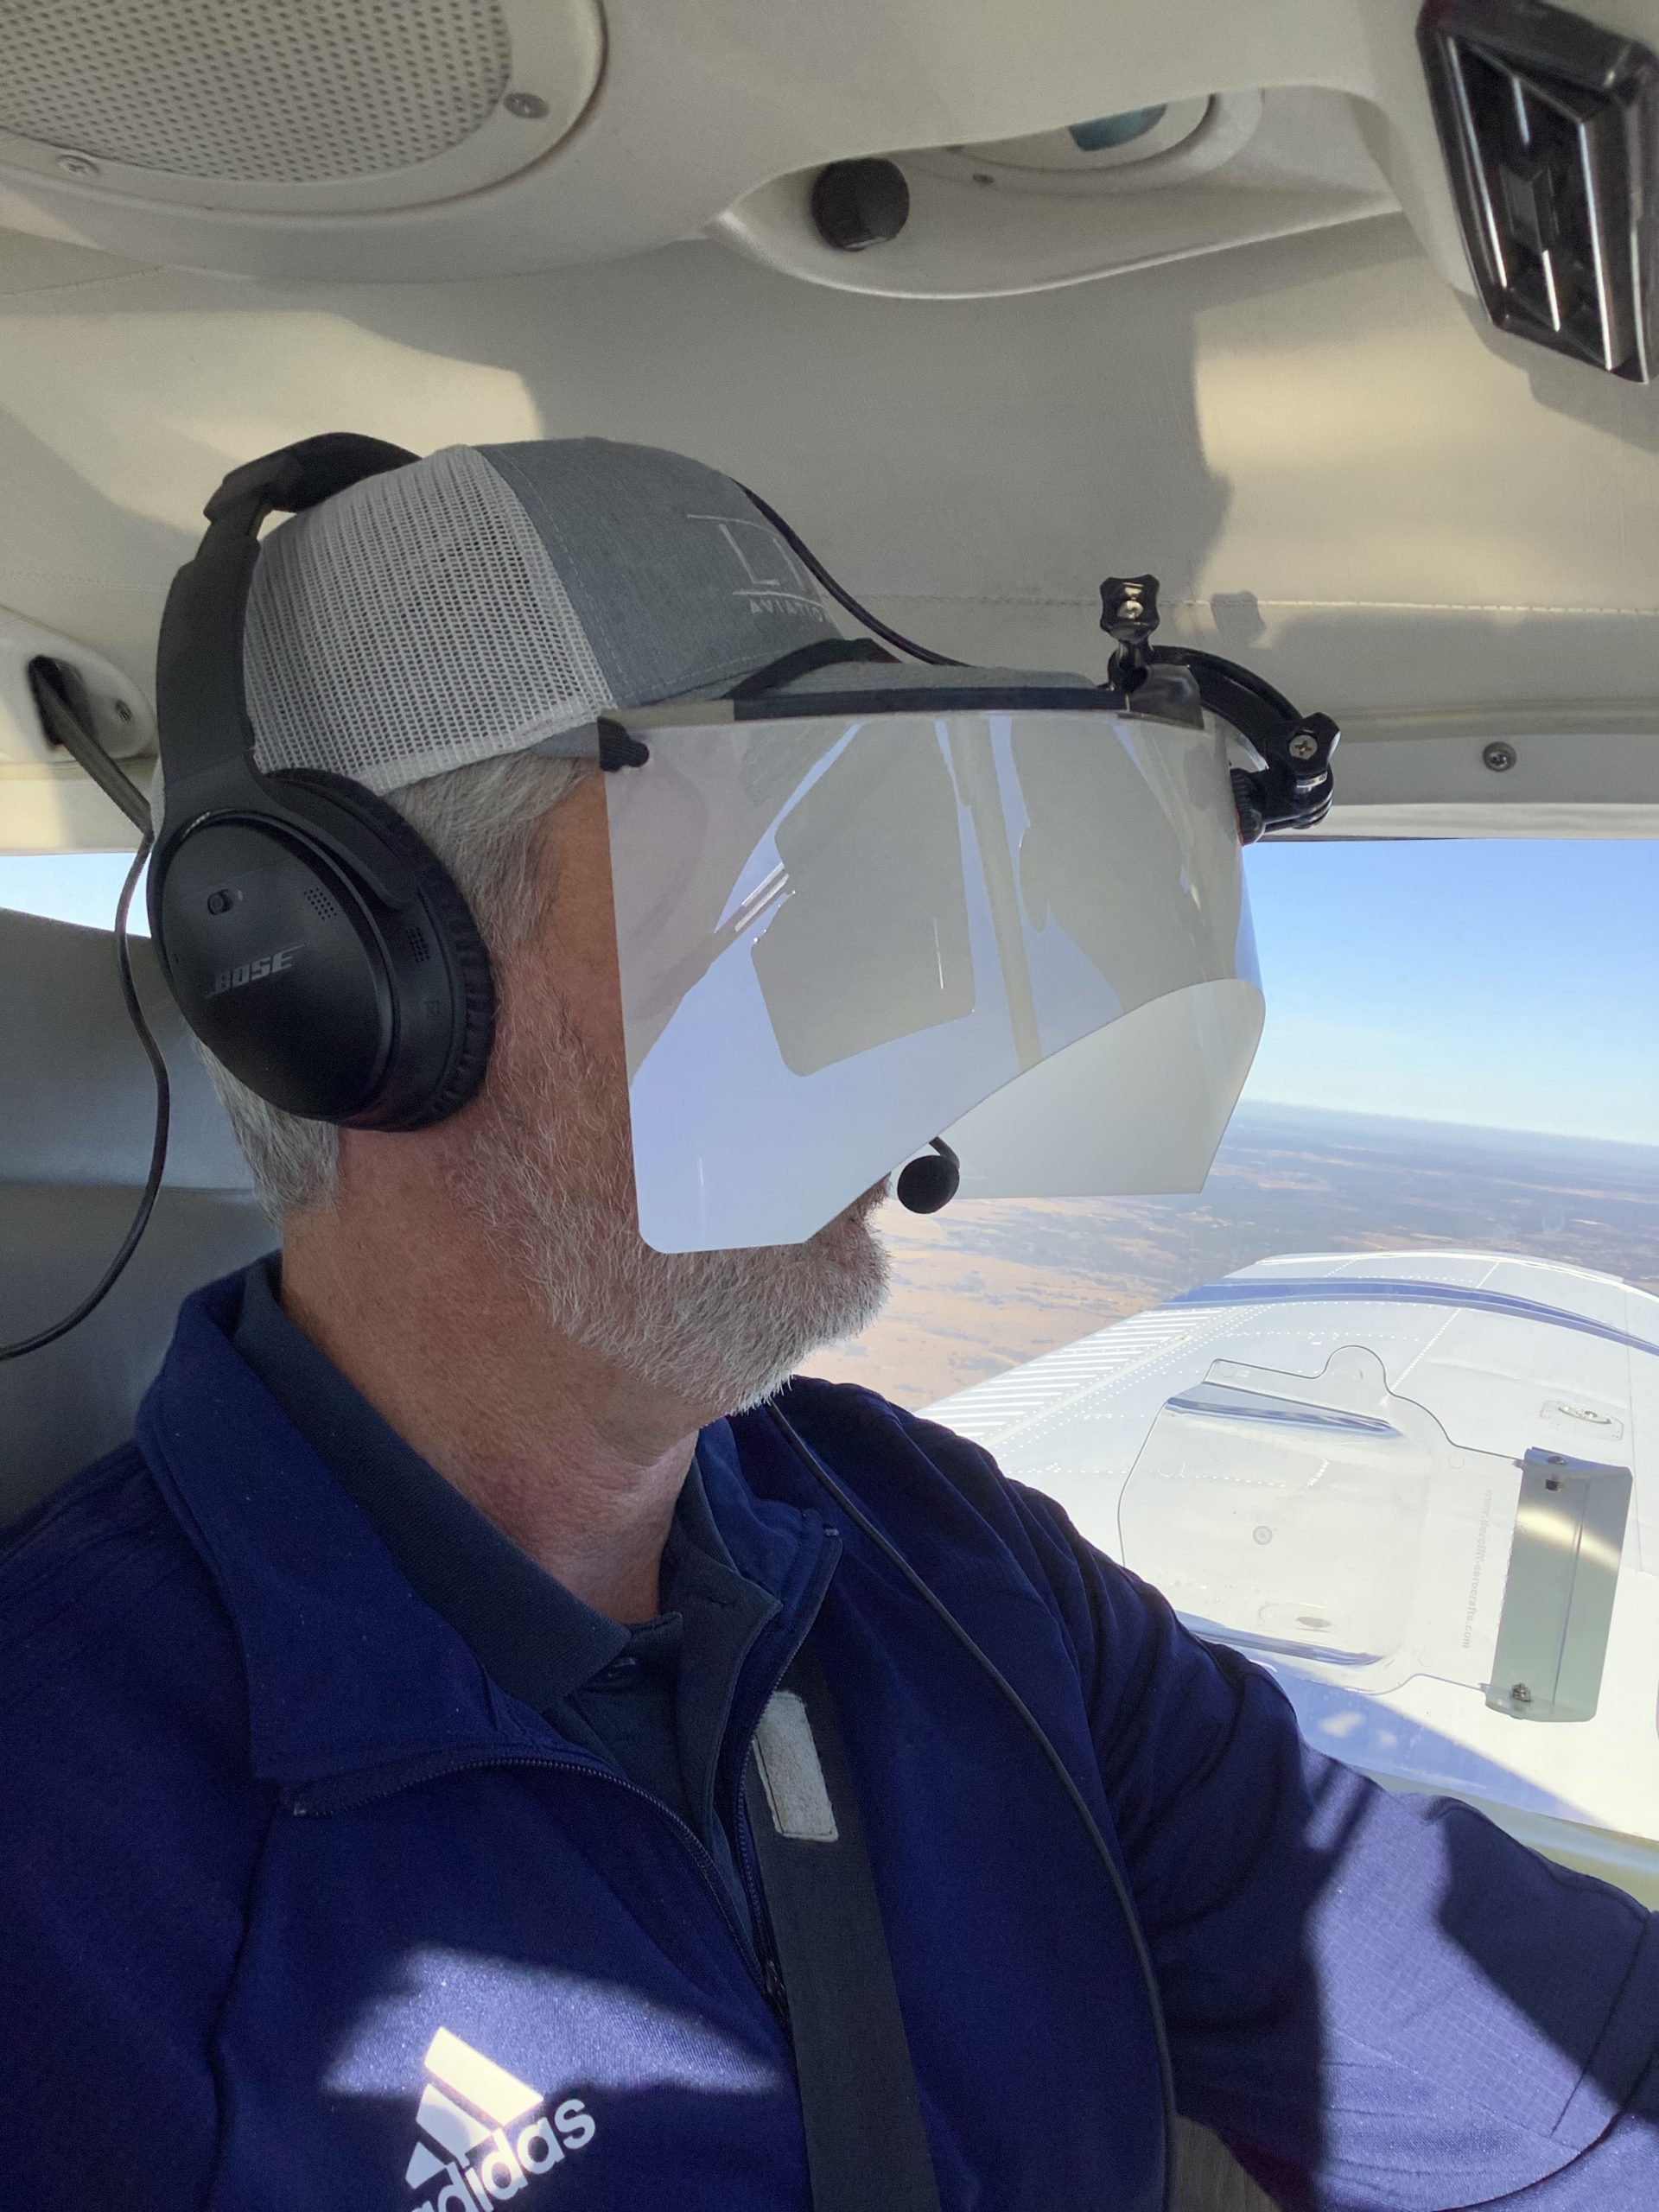
The greatest thing from an instructor’s standpoint is the ICARUS Device app. The pilot puts the device on before taxi and I set the app to VMC. This completely clears the ICARUS Device so the pilot can see just fine for taxi and takeoff. Then, at about 400 AGL, I tap the <1/2 VIS button on the app, and boom, the pilot is in the clouds. I even have a time delay to slowly make the ICARUS Device opaque to simulate slowly entering the clouds. I do the same thing on an approach, except in the reverse order, simulating we are slowly exiting the clouds.
The ICARUS Device is a game changer for IFR training. It’s comfortable, easy to use, the battery lasts for a long time (though bring a standard USB charging cord with you in the plane because the battery failure mode makes the ICARUS Device opaque instead of transparent. You don’t want that to happen at 200 AGL!), and, most important, it truly simulates IFR conditions.
After using it, I believe all flight schools and CFII should get one of these, both in the fixed wing and helicopter world. It’s the best option for simulating IFR conditions.
Checkout the ICARUS Device website for more information and to hear the story of the company.
Texas Top Aviation, LLC was given an ICARUS Device by the ICARUS Device company to test. Texas Top Aviation, LLC was not paid for our above opinion on the ICARUS Device (trust me, if it was terrible, I would have told you!).
I am an iPad user, but I have an Android phone. I had been using a junky aviation weather app that just gave meters and TAFs, but seemed to have been programmed in a foreign language (un-decoded TAFs notwithstanding). I wanted something more robust, but didn’t see the need to pay for a Garmin Pilot subscription since Foreflight on my iPad was my main EFB (Electronic Flight Bag) I use in the airplane.
When I upgraded my phone, I decided I had to find something better. I have a WIFI only iPad, so I utilize my phone to take quick glances at weather reports or when I want to see the radar without having to tether my iPad to my phone. The app I had wasn’t cutting it.
That’s when I found FltPlan Go. We are all familiar with FltPlan.com. It’s what a lot of corporate pilots use to file flight plans. I’ve used it some, but there is a large amount of data it needs to set up an airplane. Since I already have all the airplanes I need in Foreflight, I don’t use it that much since I didn’t want to do the setup. It is rather handy as it spits out flight logs and has a lot of pre-loaded performance numbers for different makes and models.

FltPlan Go is FltPlan.com‘s app. It is very user friendly, easy to use, and, most importantly, free! You can get METARs, TAFs, NOTAMs, Airport Diagrams, approach plates, full weather reports for airports including radar, maps, and a whole lot more. As far as I can tell, it is a full fledged EFB. I haven’t really scratched the surface on all the features in using mine, but it is quite robust from the little bit of poking around I’ve done.
I’m still a Foreflight guy, but if you want something else or you have an Android phone and don’t want to pay for Garmin Pilot or WingXPro, check out FltPlan Go. It’s a winner.

