Oh, Deer (Part 3)

Read Part 1 & Part 2

Throughout the whole event, I learned quite a few things both about flying and about myself. Here are some of the lessons which I have taken away from the accident:

  1. No flight is routine: When I took off that morning I was about as relaxed as I could have been while going to fly. I was flying an airplane that I knew well, in beautiful weather, to familiar airports and even carrying passengers which I had taken on this exact trip more than a dozen times. The accident brought into startling clarity that anything can happen at any time. I had done everything right that morning (preflight, weather briefing, planning, etc) , and none of that did anything to stop the deer from jumping out onto the runway. All we can do is ensure the items we do have control over are covered and try to be prepared to deal with anything else that arises. This ties directly into my next point:
  2. Making sure everything is correct: When you do go fly, make sure that you have all your paperwork and personal details taken care of. I can think of a few times over the course of my flying career where something wasn’t quite right with the paperwork, or perhaps I had forgotten my wallet and I was tempted to go fly anyway. “It’s 8pm on Sunday, I’m not going to get ramp checked.” Well, I can assure you that the paperwork and questionnaires which were required to be submitted to the FAA, NTSB, and Insurance companies would have uncovered any discrepancies in my logbooks, currency, or legality. It isn’t worth the risk of flying without having everything in place just in case something happens. It isn’t just a random ramp check which can get a pilot into trouble.
  3. Ask for help: The story of my collision with a deer would have had a very different outcome if it weren’t for the help that I received from countless the people on the ground. If you’re ever in a situation where you could use a hand, don’t be afraid to ask for help. If I had simply turned around and landed back at Wings, I wouldn’t even have had any idea that my landing gear was missing! The people in the control tower, the maintenance guys, the approach controllers in Philly, the emergency responders, and many more people all played their part in orchestrating a successful outcome.
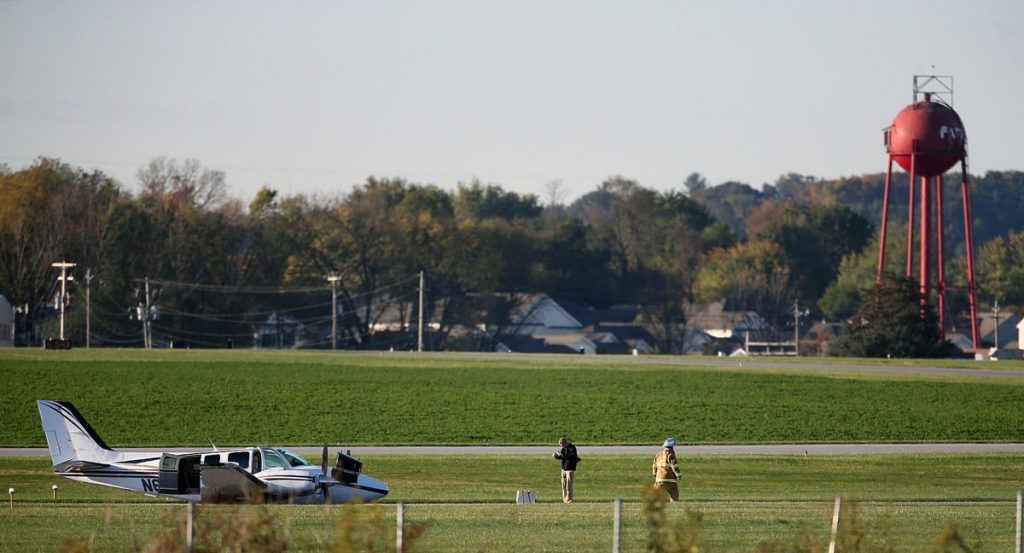
    Airplane sitting on the runway after the firefighters had checked it out
    Photo credit: www.lancasteronline.com
  4. Dealing with the Paperwork: I have had dealings with the FAA before, but never for an accident. I was afraid that the investigation would be a witch hunt and I would have to defend myself while someone poured over all my planning and paperwork looking for potential errors. But, my fears were totally unfounded. Although I did have to answer many phone calls, write many reports, and fill out much paperwork, the FAA, NTSB, and Insurance companies were very patient in waiting for my responses and even complimentary in how the situation played out. I really enjoyed working with all of them and appreciated their encouragement and help.
  5. Emotional Response: After the dust had settled and the smoke had cleared, I was left standing on the side of the runway with the passengers and my boss. I offered to fly them back to Philadelphia or continue to Pittsburgh and assured our Chief Pilot that I was feeling fine and ready to fly again. Fortunately, there wasn’t a need. Over the next week or two, I noticed a change in myself. I wasn’t fine. I have never had headaches, but shortly after I landed I developed a headache that didn’t go away for days. I had trouble focusing on anything and I had trouble finding motivation to do much but sit and stare at a wall. I wasn’t sharp and I caught myself making silly mistakes in my normally routine activities. I wasn’t depressed, or sad, it was just an unwanted mental and physiological response to the stress and shock of what happened that morning in the Baron. I didn’t feel like myself for quite some time and I even found myself a little on edge whenever I lined up for takeoff on subsequent charters for while afterward. Eventually I started to feel normal again, but it was a slow process.
  6. Feather the Props: I can’t tell you what a difference it makes when those props go from wind milling to feathered. It became clear to me that feathering a prop could make a huge difference in deciding the outcome of an emergency situation.
  7. Good training and checklists usage: This one is pretty straight forward, but it’s worth mentioning. Good training and proficiency make all the difference when the odds are against you. Make sure that you use all your resources when your back is against the wall, and that includes the checklists. Under the stress of the flight I had forgotten to close the cowl flaps and would likely have landed with them open without the aid of the Emergency Procedures Checklist. This would have resulted in unnecessary damage to the airframe.
  8. No need to rush: There is no denying that I had things stacked in my favor that day. I had nice weather, extra gas, daylight hours, and even the luxury of landing at my home airport. But, regardless of all those variables, there is no need to rush into anything. Ask questions, find answers and come up with a plan. Obviously not all emergencies present the pilot with the luxury of time, but use all time and resources you have to your advantage.
  9. Polish up those procedures: The deer accident really made me want to go out and brush up on all the emergency procedures which I hadn’t performed since my last checkride. The realization that I could need any of them at any time was really hit home after I hit that deer. Additionally, make sure you know who to call if something ever does happen.
  10. Know the systems: Familiarity with the systems on the airplane makes it easier to troubleshoot and solve issues on the fly and makes it easier to spot a problem in the first place. Knowing how systems work and what their normal indications should be helps make decisions regarding when to divert and where to land easier.
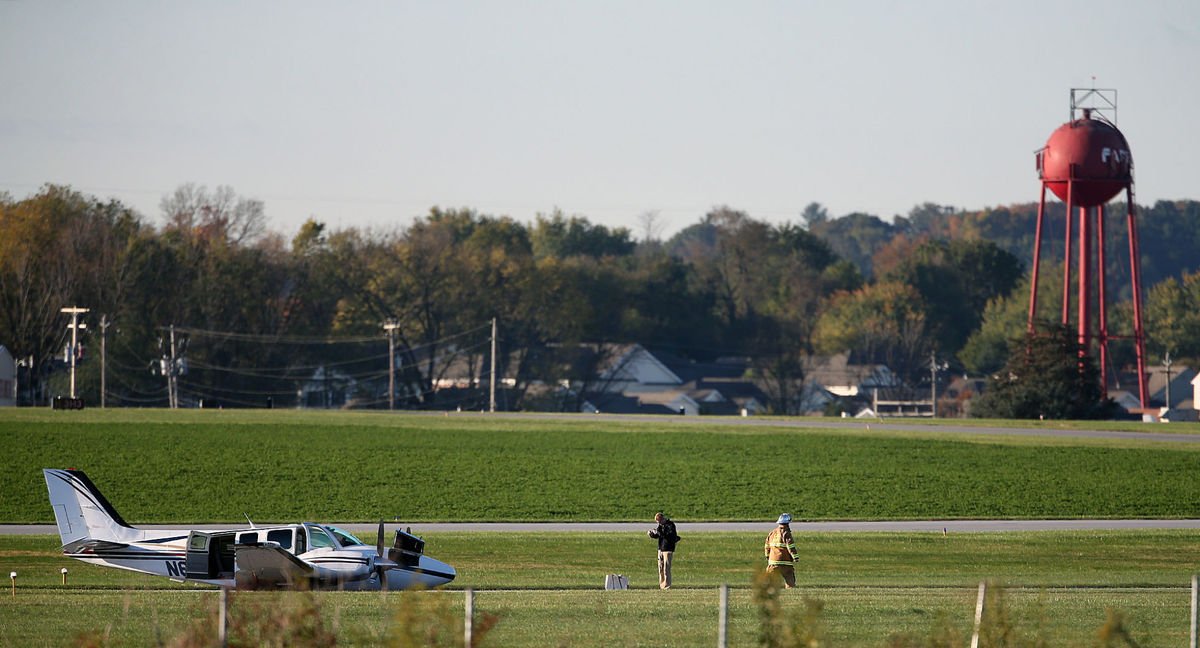
The irony isn’t lost on me that the last article that I wrote for this newsletter dealt with how to avoid making gear up landings and the high cost required to repair one. I never would have imagined when I wrote that article last fall that I would be writing one only a few months later detailing my own gear up landing.

The bottom line is that there is nothing a person can do to prepare for every situation which might arise throughout the course of a flight, and it’s also impossible to know which emergency you may have to deal with if a situation arises. All we can do is stack odds in our favor by making sure that we address the things within our control such as aircraft maintenance, careful flight planning, checking weather, and having personal minimums set in place to keep us from flying outside of our skill sets and comfort zones.

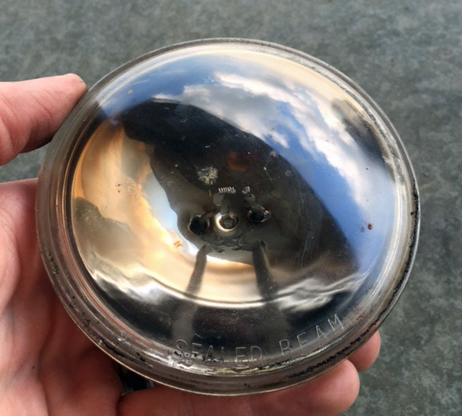
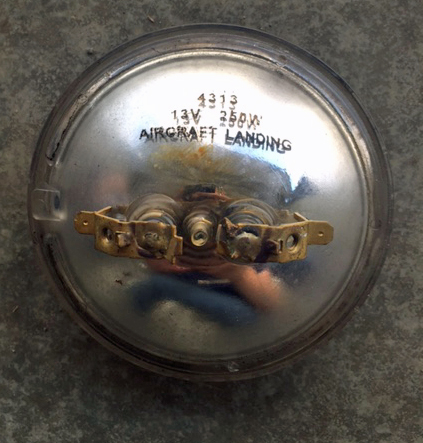
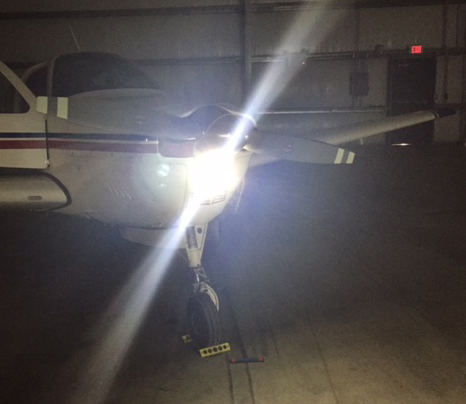
Additionally, ensuring that you are knowledgeable and proficient in your aircraft’s procedures will give you the best chance for success. When things start going wrong, keep calm, and ask for help. Work the problem instead of guessing or rushing into a less than desirable solution. No one wants to be caught in an emergency like a deer in a landing light!
Andrew Robinson is an airline pilot for Piedmont Airlines.  He is a former 135 Charter Pilot and flight instructor who lives with his wife and 2 daughters in Pennsylvania.  He instructs in Beechcraft Bonanzas.

Similar Posts

  • Cirrus Approach

    Earlier this year, Cirrus debuted it’s new Learning Management System (LMS), Cirrus Approach. For several years, Cirrus has led the way in online systems training while using several different platforms for it’s LMS. Cirrus Approach is the culmination of lots of sampling and tinkering, and boy, did Cirrus knock it out of the park.

    For those of you unfamiliar with the Cirrus training program, here is the quick rundown. When a pilot who has no Cirrus time buys a Cirrus aircraft, initial transition training is required to familiarize the pilot with the aircraft systems, speeds to fly, power settings, etc. The Cirrus Transition Course is a 3 day that gets a VFR pilot up to speed in the airplane. Under the Cirrus Embark program, those 3 days of training are covered by Cirrus and free to the new owner.

    If the pilot is an IFR pilot, then the 5 day Cirrus Advanced Transition Training Course is required. If the pilot has Cirrus experience, but with a different engine or avionics configuration, there are courses for that too. The Cirrus Embark program covers 3 days of training for most courses for a new Cirrus owner.

    As part of the aforementioned courses, there are systems to learn about and procedures to understand. This is where the Cirrus Approach LMS excels. Cirrus has done a great job of putting together lots of good videos (that are actually interesting but not annoying) on the airplane, systems, how to fly it, etc. for each course. It cuts down greatly on the time that the training instructor has to spend on the ground with the pilot since the pilot has already compiled knowledge through Cirrus Approach.

    Cirrus Approach is accessible online at learning.cirrusapproach.com. To get access to the courses, create an account, then select the Learning Catalog. The courses are categorized based on the type of training (Transition, Advanced Transition, Avionics Differences, Airframe & Powerplant Differences, Recurrent, and Specialty), then further broken down into the type of airplane, engine and avionics (eg. SR22T G6 Perspective+). Make sure the correct engine and avionics configuration is selected! Notice, there is a difference between the SR22T and SR22 (Turbo & Non-Turbo).

    Anyone can do the specialty courses. I would highly recommend for everyone to take the Engine Management course as well as the Icing Awareness Course for you TKS and FIKI operators. The Takeoff & Landing course is a good refresher course for a pilot who hasn’t done any training in a while.

    The Recurrent Training courses are encouraged for all Cirrus pilots. There is an IFR Refresher, a VFR Refresher, and a Skills Refresher. These are recommended to rotate through with a CSIP (Cirrus Standardized Instructor Pilot) on a yearly basis. With a little extra ground, a Flight Review and an IPC can be accomplished yearly using these courses.


    Interested in Initial or Recurrent training in your Cirrus using Cirrus Approach? Contact Texas Top Aviation today!

  • Jeppesen vs. Aeroservices Charts

    Many people ask, which set of charts is better? Should I use the FAA Aeroservices charts on Foreflight or pay extra for the Jeppesen charts? Since you have to pay for Jeppesen, they are probably better, right?

    I am not here to say which one is better as a chart preference is just that, a preference for one over the other or for certain features. After a while, muscle memory and routine take over and you probably wont even notice the difference.

    History

    In 1934, Elroy Jeppesen began making his own charts and sold them to other pilots. His little company grew into the giant Boeing chart company we know today. Jeppesen charts are used internationally and therefore include information that might otherwise seem common knowledge, like transition altitudes. The key is, you cannot get FAA Aeroservices charts for international destinations. Jeppesen is the only option for outside the US.

    National Aerospace Charting Office (NACO), or the new(er) name “Aeroservices” or FAA chart, whatever you decide to call them, are United States government issued charts. In addition to civilian use, Aeroservices charts are used by the military so there will be some terminology that does not apply to civilians. The best part about FAA Aeroservices charts are… they’re free!

    If you are in the middle of a transition or trying to decide which charts to use, you have come to the right place. Here are a few key differences.

    Obstacle Departure Procedure Chart
    KAXX (Angel Fire, New Mexico) ODP

    1. Frequencies: FAA Chart provides the AWOS so you have all departure frequencies in once place.
    2. Airport: Jeppesen highlight the airport, which is a nice feature so you can easily see the flow from the airport.
    3. Notes and Remarks: Jeppesen bolds the speed restriction all over the chart so you won’t miss it. All other requirements are in the top right corner. Note the transition altitude 18,000′. Since Jeppesen is used internationally, it is published on the chart since other countries have different transition altitudes. It takes up a chunk of chart real estate, but it’s clear, easy to read, and always in the same place. The FAA charts post all the requirements and restrictions as notes off to the side. Since it’s in the same space as the chart graphic, it’s easy for the eyes to catch while studying the plate.
    4. Take off Minimums: NOT APPLICABLE for PART 91 – however, it’s wise for all pilots to look and abide by them. Jeppesen displays the standard take off minimums table, as well as the rate of climb table, which is nice to have all in one place. The FAA chart gives the non standard information but you need to know/look up the rest in the Digital Terminal Procedures Supplemental document. (Hint: It’s in the Documents section of Foreflight)
    5. Take Off Obstacles: About the same on both charts
    6. Route Description: Similar on both charts, but larger font and clearer description on the FAA chart. When there are different routes from different runways, the FAA chart layout is really helpful.
    7. Graphic Layout: Jeppesen and FAA use the same graphics for all their different charts and plates which makes it easy to read once you are familiar with the respective charts. FAA charts are easy to read and distractions are kept to a minimum. Jeppesen charts make things bold and enlarge pertinent information so you won’t miss it.
    8. Airport altitude: This is only on the Jeppesen chart (the FAA chart doesn’t include it), but it is very helpful for situational awareness. As you brief the arrival altitudes, I think it’s important to have an idea what AGL you are at.

    Approach Charts

    One thing pilots love about Jeppesen approach charts is the clear set up for an approach brief. The top section is created as a “briefing strip” starting with the frequencies, then navigation frequencies, minimums, airport elevation and the missed approach. It’s very natural and user friendly.

    FAA charts have a slightly bigger picture of the approach planview, but the profile view and minimums section can get a bit cluttered. It can feel a little discontinuous when briefing the approach to bounce all over the page. However, some pilots really like the small airport diagram in the corner, which I find really helpful for situational awareness (particularly for students learning circle approaches). Non- standard alternate and takeoff minimums are also clearly noted, but unfortunately we must hunt elsewhere to find them. The Jeppesen alternate minimums and takeoff minimums will both be on the airport diagram

    1. Frequencies: Getting weather and tuning radios is easy on the Jeppesen charts – just follow the briefing strip. The frequency section on the FAA charts is still easy to read, but closer to the center of the page. It’s split up from the nav frequencies and other important briefing information.
      a. FAA charts are created by the government and have military specific information, which are the odd looking frequencies and channels on the chart.
    2. Approach Navigation: On a Jeppesen chart, you will continue to the next line to verify your frequency, course and set minimums (assuming you are straight in on the ILS). On the FAA chart, you will then have to skip to the top of the chart to get the frequency and course, and then scan to the bottom of the page to input your minimums. However, since you could be flying a localizer approach or a circle to land, it’s a good reminder that not everyone using this approach chart will be using the same Decision Altitude (DA). The FAA chart also includes runway distance information so pilots can make determinations of approach speeds and stopping distance if the runway is wet or icy.
    3. Missed Approach – Textual
    4. Approach Lighting
    5. Missed Approach- Graphical: The missed approach information is the same on both charts. The lighting information is key for determining a missed approach and is next to the missed approach text on the FAA chart. It’s found next to the missed approach graphic on the Jeppesen chart. Personally, I find it easier to find and read the lighting information on the Jeppesen chart. Remember, on both charts, the placement of the PAPI on the chart indicates the physical location of the lights (left or right of the runway).
    6. Notes: Both charts have a notes box, but they use them a little differently. Once again, remember that Jeppesen charts are used internationally and include the transition altitudes and altimeter setting info. On both charts, the notes section will be where other critical information will be shared which isn’t really applicable for this airport. On the FAA chart, the tower frequency is starred to note that there are operating hours (you’ll have to check the chart supplement AF/D to find out what those hours are). There is also an L next to the frequency to indicate it is the pilot controlled lighting frequency. You will also find the note about the VGSI and the Approach Glide path next to the profile view on the FAA chart, whereas the Jeppesen chart has that note in the notes section at the top. The FAA chart also has the T and an A in black triangles to note that this airport has non- standard alternate and take off minimums. Again, those are found in separate documents when using FAA charts and on the Airport Diagram when using Jeppesen charts.
    7. Minimum Sector Altitude: Similar on both charts, but in different locations (reminder: ATC vector altitudes may be lower. It is the pilot’s responsibility for safety of flight to maintain safe obstacle clearance, so if you are ever concerned about going below the MSA – just ask ATC).
    8. Planview: Other then differences in size, visuals, and text, the information displayed on both is very similar.
    9. Profile View: Again, the displays look different and pilots will have their preference, but the information is the same.
    10. Minimums: Jeppesen charts not only note the category for each approach with its designated letter, but also displays it in knots. It is recommended that if you increase your approach speed (based on flaps or gusty winds or perhaps a faster speed for a circle to land approach) that you should use the higher category minimums. The reference guide makes that easy to look up. The other benefit of the Jeppesen charts is right the table that contains the time from the final approach fix to the missed approach point for a localizer approach, it also shows the rate of descent with the associated ground speed to maintain a 3 degree glideslope. Now there is no excuse not to set pitch and power! The minimums posted in parenthesis are for the military, but RVR in statute miles is also included.
    11. Airport diagram: Only on the FAA charts, this particular feature is particularly useful for situational awareness. The arrow pointing to the runway shows the direction the approach is arriving from so planning a circle to land is a cinch. There is also a lot of other information that can be gathered from the airport diagram for quick reference or to help a disoriented pilot: lighting, displaced thresholds, closed taxiways, and runway placement and lengths. This is easily one of the best perks of an FAA chart.

    Arrival/ Departure Charts: Sewzy 5 Arrival KAUS

    The Jeppesen lay out is very attractive and draws the pilots eye in a clear way to all the important information. The colors pop out, so the required altitudes and speeds are easy to read and remember. The chart, which is the proper scale, shows MORAs , easy to find airports (and runway layouts) and is over all easy to follow. However, the texts, while very clearly laid out, are small and difficult to read and pushed to the very edges of the chart. FAA charts are simple and fairly easy to read, but the airports are not as obvious and the flow to the airport requires a good look. The table on the Jeppesen chart is a really nice format, but the text and Notes for arrivals on the FAA chart are easy to find and much easier to read quickly.

    1. Frequency: FAA charts include the approach frequency on the arrival, which is helpful for having radios tuned. During a busy time when the controller changes your frequency, all you have to do is verify the frequency you already set, rather then totally stop what you’re doing to switch it. The Jeppesen charts add the airport elevation next to the ATIS, which really aids situational awareness.
    2. Notes: Jeppesen notes are clearly numbered and tucked away nicely in a box, but the FAA chart notes pop out in the middle of the page and are easy to skim for pertinent information.
    3. Planview: I think Jeppesen is the clear winner here- it is so easy to read, it only takes one glance to know where the primary airport is and how the arrival flows. The chart being at the proper scale offers the pilot important geographical information and over all is a clean look. Notice the small series of arrows after SMRFF on the the Jeppesen chart; those indicate the pilot should expect radar vectors. The FAA charts include those instructions in the text, but I find the visual reference on the chart helpful. The FAA charts are equally clean, with altitude and speed restrictions easy to read even if they don’t jump out. When there are multiple airports that the arrival serves, the airports are clearly marked, though, I think it would be nice to have a little more information surrounding the primary airport for better situational awareness.
    4. MSA: only on the Jeppesen chart
    5. Primary airport: The runway alignment and grey highlight on the Jeppesen chart stands out very clearly, while the FAA airports are a little more obscure.
    6. Arrival route description: The table on the Jeppesen chart is easy to follow but the text is very small and pushed to the bottom. The route description is much easier to find and read on the FAA chart.

    Airport Diagram

    The Jeppesen Airport Diagram page has it all: frequencies, airport diagram, runway info, take-off minimums, departure procedures and alternate minimums. It’s a one-stop shop. It makes preflight planning easy when its all at your fingertips.

    The FAA charts usually require a little more searching for different pieces of airport information. The Airport Diagram itself is just the airport layout. Above, you will see a simple FAA Airport diagram. It’s clean and simple, perfect for a knee board print out.

    In the flight planning process, as you look at what approaches you will be using for the airport, you might see an A or T inside a triangle. Those indicate that you will need to look in the Alternate Minimum or Take off minimum documents for more information. The Takeoff Minimums document (see below) is also where you will find any obstacle departure procedures for that airport. Apps like Foreflight help you out by posting the take off minimums under the departure tab. Even though it’s a little more difficult to read, I didn’t crop out the airport information so you can see what it looks like in context.

    FAA Alternate Minimums on the Left and Takeoff Minimums and Obstacle Departure Procedures on the Right
  • Cirrus SR22T, Cirrus Vision Jet, or Diamond DA62?

    Diamond DA62 twin-engine aircraft parked on the ramp, a Cirrus SR22T alternative offered by Texas Top Aviation

    If you have been searching “Cirrus SR22T for sale” or reading up on the Cirrus Vision Jet, you are looking at genuinely excellent airplanes. Both have earned their reputations. This is not an article about why you should not buy one. It is about a third airplane that almost never shows up in a Cirrus search — and what the numbers look like when you set it next to the two you are already considering.

    190 ktDA62 Cruise
    762 lbFull-Fuel Payload
    648 nmRange, 4 Adults + Bags
    1 WeekTraining, No Travel

    What the Cirrus SR22T Gets Right

    Let us start where we should. The SR22T is one of the most successful piston singles ever built, and for good reason. Turbo-normalized power that holds performance up high. A Perspective+ flight deck that is about as good as glass gets in a single. Side-yoke handling most pilots fall for inside ten minutes. And CAPS — the whole-airframe parachute that changed how our whole industry talks about safety.

    Add strong resale, a deep service network, and one of the best owner communities in aviation, and you have an airplane that is very hard to argue with. If you fly two people and light bags on 300 to 500 nautical mile legs, we would tell you to go buy one — and we would help you find the right one. We also teach Cirrus SR20, SR22 and SR22T training here in Texas, so this is not an outsider’s opinion of the airplane.

    The conversation changes when the mission grows.

    Cirrus SR22T vs. Diamond DA62: The Numbers Side by Side

    Diamond DA62 on the hangar ramp, the twin-engine alternative pilots shopping a Cirrus SR22T rarely consider

    The Diamond DA62 is a seven-seat, twin-engine, Jet-A-burning composite airplane that most Cirrus shoppers have never sat in — usually because it simply never came up in the search. Here is how the two line up on the numbers that matter.

    SpecificationCirrus SR22TDiamond DA62
    Cruise speed184 KTAS @ 85% power / 10,000 ft190 KTAS @ 90% power / 10,000 ft
    Fuel burn18.3 GPH @ 85% (16.4 GPH @ 75%)19 GPH total (9.5 GPH per engine)
    Fuel type100LL AvGasJet-A (~$1.75/gal cheaper)
    Seats / rows5 seats, 2 rows7 seats, 3 rows
    Useful load~1,125 lb (3,600 lb MTOW)1,341 lb (5,071 lb MTOW)
    Full-fuel payload~575 lb762 lb
    Range, 4 adults + 75 lb bags (835 lb)~320–350 nm~648 nm (45-min reserve)
    Takeoff over 50-ft obstacle2,080 ft1,575 ft
    Landing over 50-ft obstacle2,535 ft1,447 ft
    Single-engine service ceiling11,000 ft
    Engine-out redundancyCAPS parachuteSecond engine
    Recurring safety-system cost~$20,000 CAPS repack / 10 yrNone
    Rating requiredHigh-performance endorsementMulti-engine (~1 week, at home)

    Cirrus SR22T figures are taken from the Cirrus SR22T G6 Pilot’s Operating Handbook (P/N 13772-007, Reissue A): cruise at ISA and 3,400 lb, takeoff and landing over a 50-ft obstacle at sea level, ISA and 3,600 lb max gross.

    Read that speed line carefully, because it is closer than the marketing on either side suggests. At 10,000 feet the DA62 has about six knots on the SR22T — real, but hardly decisive. Climb higher and the advantage flips outright: the SR22T is turbo-normalized, so at 18,000 feet the POH shows 198 KTAS on the same 18.3 gallons an hour, comfortably faster than the DA62. If raw speed is what you are buying, the Cirrus has a genuine answer.

    Where the DA62 separates itself is everything around the speed. It burns Jet-A, which runs roughly $1.75 a gallon under 100LL at most FBOs and is available at airports where AvGas gets harder to find every year. And the full-fuel payload gap is 187 pounds. Payload is where light-airplane trip plans quietly fall apart.

    Four Adults, Bags, and the Range That Actually Matters

    Spec sheets get written for two people. Real trips are not flown that way.

    Load four adults and 75 pounds of luggage — call it 835 pounds — and the SR22T has to leave fuel on the ramp. On a typical G6 empty weight that leaves room for roughly 48 of its 92 usable gallons, and realistic range lands around 320 to 350 nautical miles with IFR reserves. Put that same 835 pounds into a DA62 and you are looking at roughly 648 nautical miles with a 45-minute reserve.

    To be fair to the airplane: with full fuel and two people aboard, the SR22T is genuinely long-legged. The POH shows 763 nm at 10,000 feet and 791 nm at 18,000 feet on a 45-minute reserve. The range only collapses when you fill the seats — which is precisely the mission this comparison is about.

    That is not a rounding error. That is one fuel stop versus none on a Texas-to-Colorado weekend. And the DA62 does it across three rows, with two seats still open behind you.

    Diamond DA62 cabin interior showing the second and third row seating that gives it a 762 lb full-fuel payload

    About the Cirrus Vision Jet G1

    If your search has moved from the SR22T up to the Vision Jet, that airplane deserves real credit too. Cirrus did something nobody else managed: a single-pilot personal jet, with CAPS, delivered in volume, flown successfully by owner-operators. That is a genuine achievement in this industry, and we teach Cirrus Vision Jet training ourselves.

    The G1 specifically, though, asks for a level of commitment that surprises a lot of first-time jet buyers.

    Cirrus Vision Jet G1: What Ownership Actually Asks Of You

    • Acquisition: approximately $1.8 million.
    • Fuel burn: 60–70 GPH of Jet-A.
    • Full-fuel payload: only 300–400 lb — roughly two adults and a soft bag.
    • Range: about 800 nm on paper, but heavily payload-limited in practice.
    • Type rating: a full FAA type rating is required — roughly two weeks of initial training in Knoxville, Tennessee.
    • Insurance dual: 25+ hours of additional dual instruction beyond the type rating.
    • Recurrent: annual simulator recurrent training back in Knoxville, at $15,000–$25,000 per year, every year.
    • Runway: 3,192 ft takeoff / 3,011 ft landing over a 50-ft obstacle.
    • Climb: drops to 1,100–1,200 fpm at heavier weights, and loses thrust at high density altitude airports — exactly where you want margin.
    Worth saying plainly: the G2 and G2+ are meaningfully more capable airplanes — better payload, better hot-and-high performance, updated flight deck. That is a different and more interesting conversation, and one we are glad to have. Everything above is specific to the G1, because the G1 is the airplane most often cross-shopped at DA62 money.

    Compare that training path to the DA62. A multi-engine rating is all that is required — roughly one week, typically at your home airport, with no hotel and no travel. There is no annual sim requirement in another state, and no recurring five-figure training line item on the budget.

    Runway Numbers Open Up the Map

    Diamond DA62 on a short field runway, clearing a 50-foot obstacle in about 1,575 feet on takeoff

    Performance over a 50-foot obstacle is where your airport list gets long or short. The DA62 clears it in about 1,575 feet on takeoff and 1,447 feet on landing. The SR22T needs 2,080 and 2,535 feet. The Vision Jet G1 needs 3,192 and 3,011 feet.

    That is roughly 500 feet less than the SR22T on departure and nearly 1,100 feet less on arrival — and against the G1 the gap is wider still. Practically, that difference is what gets you into the shorter ranch, lake and mountain-adjacent strips that a lot of the best flying runs on. That is not a spec. That is a different set of weekends.

    The Parachute and the Second Engine

    CAPS is a real safety system and we will not say otherwise. It has saved lives, and it deserves the respect it gets. It also carries a cost most buyers do not budget for: the rocket and canopy repack runs about $20,000 every ten years, and it is not optional.

    The DA62 answers the same question a different way. Lose an engine and you still have one making power, turning counter-rotating props, managed by a FADEC that keeps it to a single lever per side. One number to know either way: the DA62 single-engine service ceiling is 11,000 feet, so on one engine it will hold altitude over most terrain but not over the high country. Neither answer is wrong — they are two philosophies about the same risk. The DA62 version just does not come with a recurring five-figure bill.

    Frequently Asked Questions

    Is the Diamond DA62 faster than a Cirrus SR22T?

    Only down low, and only slightly. At 10,000 feet the Diamond DA62 cruises at 190 KTAS at 90% power on 19 GPH of Jet-A total, while the Cirrus SR22T G6 POH shows 184 KTAS at 85% power on 18.3 GPH of 100LL. Higher up the SR22T is the faster airplane — its turbo-normalized engine holds 198 KTAS at 18,000 feet on the same fuel flow. The DA62 advantage is fuel cost, payload and runway, not raw speed.

    How much can a Diamond DA62 carry compared to a Cirrus SR22T?

    The DA62 carries a 762 lb full-fuel payload across seven seats in three rows. The Cirrus SR22T has a useful load of about 1,125 lb and a full-fuel payload of roughly 575 lb. Loaded with four adults and 75 lb of bags — 835 lb total — the DA62 flies about 648 nm with a 45-minute reserve, while the SR22T is closer to 350 nm.

    What training does a Cirrus Vision Jet G1 require compared to a Diamond DA62?

    The Vision Jet G1 requires a full FAA type rating: about two weeks of initial training in Knoxville, Tennessee, plus 25+ hours of additional dual for insurance, plus annual simulator recurrent back in Knoxville that runs $15,000–$25,000 per year on an ongoing basis. The Diamond DA62 requires only a multi-engine rating — about one week, usually at your home airport, with no travel.

    Can a Diamond DA62 use shorter runways than a Cirrus SR22T or Vision Jet?

    Yes. Over a 50-foot obstacle the DA62 takes off in about 1,575 ft and lands in about 1,447 ft. The Cirrus SR22T needs about 2,080 ft and 2,535 ft, and the Cirrus Vision Jet G1 needs about 3,192 ft and 3,011 ft. The Vision Jet G1 also sees climb rate fall to 1,100–1,200 fpm at heavier weights and loses thrust at higher density altitude airports.

    Does the Diamond DA62 have a whole-airframe parachute like Cirrus CAPS?

    No. The DA62 redundancy is a second engine rather than a parachute. One practical difference in ownership cost: the Cirrus CAPS repack runs about $20,000 every ten years and is mandatory, while the DA62 has no equivalent recurring safety-system expense.

    Current Diamond DA62 market listings are aggregated on Controller: browse the Diamond DA62 inventory.

  • Avidyne Vantage

    For years, Cirrus owners who have the Avidyne Entegra PFD and MFD have been clamoring for Avidyne to come up with some sort of upgrade. The Entegra, or EX 5000 system, is late ’90s technology and, though it still works, there will be a certain point in the future when it gives up the ghost. Avidyne still supports the Entegra system, but it’s hard for a Cirrus owner to see all this new technology coming on the market while not being able to upgrade the original Avidyne screens.

    Avidyne gave it a go in the late 2000s with a panel upgrade known as the R9. The R9 was a good system, but Avidyne was very slow on the release (rumors were the company wanted it to be absolutely perfect before releasing it, which frustrated Cirrus, who then switched to the Garmin Perspective panel, leaving Avidyne behind) which led to the R9 only being available as a very expensive retrofit to the Entegra system ($80,000-$90,000 for the system and install). Needless to say, there weren’t that many takers.

    Late in 2020, Garmin announced it had received certification to retrofit Avidyne Entegra equipped Cirrus Aircraft with the company’s G500 TXi displays, which gave new hope to G1, G2, and G3 Cirrus owners. The price tag wasn’t outrageous, coming in at $16,000 apiece for each display. The G500 TXi works with any possible GPS that can be installed in a Cirrus (GNS 430Ws, GTN 650s, GTN750, or the Avidyne IFD 540/440) and with the DFC 90 Autopilot (if the Cirrus is still equipped with an STEC 55x, the Autopilot would need to be changed to either a DFC 90 or a Garmin GFC 500).

    Fast forward to June of 2021 and Avidyne re-enters the game with the Avidyne Vantage. After the R9 debacle, Avidyne has opted this time to go for a more simple approach. The Avidyne Vantage system changes out the Entegra PFD and MFD with bigger screens (12″; Garmin’s TXi units are only 10.6″) with high quality pixelation, synthetic vision, engine gauges, checklists, charts, a hybrid touch interface, and all the other information that was offered on the Entegra system, just all more modern and updated. The best news is that the system provides redundant reversionary mode, which was one of the biggest complaints about the Entegra system.

    The price tag comes in lower than Garmin, with each screen being priced at $12,500. The units will work seamlessly with the Avidyne IFD Series GPS units, though, as of this writing, it isn’t clear if the Avidyne Vantage will work with Garmin GTN 430Ws or the GTN 750/650. I would assume that the integration would be there, but I haven’t found any documentation stating that yet. DFC 90 Autopilot integration would be seamless, but not sure the integration with the STEC 55x or Garmin GFC 500.

    Avidyne says the Vantage will be fully certified in early 2022, but the company is taking orders now. Visit the Avidyne Website for more information.

  • Need To Breath


    I got a call today from a friend asking me about oxygen requirements.  That got my brain pondering about the different items the FAA would like all pilots to know. I did a little refreshing and found several other tidbits directly from the FAA that I thought worth sharing. No matter what you’re flying, I think these apply to all of us. 

    First off, what are our general oxygen requirements? If you jump on over to the FAR’s and take a look at 91.211 you’ll see: 

    1. At cabin pressure altitudes above 12,500ft MSL to 14,000ft MSL, pilots
    required to use oxygen unless the segment is less than 30 minutes of flight.

    2. At cabin pressure altitudes above 14,000ft MSL, the crew is required to use
    oxygen.

    3. At cabin pressure altitudes above 15,000ft MSL, each occupant must be
    provided the use of oxygen. This doesn’t necessarily mean they have to use it.


    Things get a little more in depth when you get to pressurized aircraft.

    These requirements are also listed in 91.211: 

    1. If you’re flying above Flight Level 250, a 10 minute supply of oxygen is
    required for each person onboard.

    2. If you’re flying above Flight Level 350-410, and one pilot leaves their seat, the other pilot will be required to wear an oxygen mask, unless both seats are equipped with quick-donning oxygen masks.


    There are three basic components to any oxygen system in an aircraft:  the storage system, the delivery system, and the mask or cannula. First, there are several types of storage systems. 

    Gaseous aviators breathing oxygen is the first. This is the standard green tank that everyone is familiar with. There are two types of tanks. Either the high- pressure with 1800-2200 psi or the low pressure tank with 400-450 psi. The major issue with these and General Aviation aircraft is weight. Some of these tanks can get bulky and heavy and therefore don’t work for everyone. 

    Liquid aviators breathing oxygen or LOX is another form of storage. The major advantage of LOX is that it has a 900 to 1 expansion ratio, meaning that 1 liter of liquid oxygen can be expanded into 900 gaseous liters of Aviators Breathing Oxygen. The disadvantages of LOX are they are extremely volatile and have to be stored at -197F. If it comes in contact with exposed skin, severe frost bite can occur. 

    Sodium chlorate candles or oxygen generators have a weight advantage like LOX. They’re essentially a canister that when activated mix sodium chloride and iron powder and produce oxygen. They general have a 600 to 1 expansion ratio, which goes back to the weight savings. However, once these are started they are very hard to stop. Another disadvantage is these devices produce a fair amount of heat, so proper precautions need to be taken. 

    Next are the delivery systems. The main systems are Continuous Flow, Diluter Demand, and Pressure Demand. Continuous Flow, is exactly as it sounds. The oxygen is allowed to flow continuously from the tank to the user. The benefits of continuous flow are you don’t need a complicated mask or regulator. The downside to this system is since it continuously pumps oxygen, you’re wasting oxygen when you exhale. Most of continuous flow systems are used on aircraft that generally fly below 28,000 feet. 

    Diluter Demand was designed to fix the negative of the Continuous Flow systems. Diluter Demand only sends oxygen to the user when the user inhales. The system also allows cabin air to be introduced in, sending the perfect mixture of oxygen to the user when needed. These systems are very efficient and generally tend to be used up to 40,000 feet. 

    Pressure Demand is designed to essentially “over inflate” the users lungs. This will basically pressurize the the users lugs and allow the user to fly above 40,000 feet. This is needed at flights above FL400 because 100% oxygen without positive pressure will not suffice. 

    The final portion of the oxygen system is the mask or cannula. Nasal cannulas generally are more comfortable and are regulated to 18,000 feet service altitude. Masks come in a couple different variants. From re-breathers to quick-donning, most masks accomplish the same task with a few small differences. Quick-donning must be able to be put on within five seconds and are rated up to FL400. 

    Since that was a lot of information, what does all of it mean to you? Most fair weather flyers will never run into any of this. However, the high performance owner/operator will run into oxygen use situations a fair amount. Taking the family up to Colorado on a ski trip, jumping up to 12,500 feet to get above some weather, or flying above 5,000 feet at night on a long xc are all situations where you may want to have oxygen on board. 

    If you are planning on doing any of this type of flying or are currently doing these types of flights, training is a must. If you’ve never been in an altitude chamber, I would highly recommend it. In college, I went with a group to Oklahoma City to the FAA’s headquarters where they hold a class on Hypoxia and High Altitude flying. It’s very informative to be in the chamber as it simulates being oxygen deprived. You get to see how you’ll react and what kind of symptoms you’ll have when in a loss of oxygen situation. Each person has different symptoms, so it’s important to see how you will react.

    It’s also good to fly with an experienced instructor. Finding an instructor who will allow you to learn in a safe environment is worth its weight in gold. 


    Ryne Bergren is currently a First Officer with Mesa Airlines in the CRJ 900. Ryne has experience in many different areas of aviation, from corporate to airlines to teaching to ferrying across the Atlantic Ocean. His passion is for all things that travel across the big blue sky.

  • Removing a Hold on Foreflight Approach

    I’m a big fan of having my Foreflight map always match up exactly with the way I am flying. Having a Flight Stream in the airplane helps a lot with that as it always prompts me to load the new flight plan from the GPS into my Foreflight map. When I load an approach in the GPS flight plan, Foreflight will put it into my Foreflight flight plan via the Flight Stream.

    The problem I run into on Foreflight is when there is a published hold at the Initial Approach Fix (IAF), but ATC has told me to fly the straight in approach and skip the hold. Up until recently, I didn’t think there was a way to set up a straight in approach on Foreflight, so I just settled for the hold staying on there.

    Not anymore! There is a simple trick that I discovered that allows you to remove the hold from the Foreflight flight plan. Here’s how to do it.

    Load the Approach

    The first step is still to load the approach into your Foreflight flight plan on the Map page. In this scenario, we are flying from KAQO, the Llano Airport, to KHYI, the San Marcos Airport. Austin Approach has told us to expect the straight in RNAV 17 KHYI via PUKIY. So, on Foreflight, we have KAQO and KHYI in our flight plan. Then, I tap the Procedures button on the upper right hand corner of the screen. I then tap Approach, then RNAV 17 KHYI. Then I select my transition.

    The options given are either PUKIY with the hold, seen below;

    Or Vectors to Final, which lines me up inside of PUKIY. Neither of these are what I want.

    But, to get this to work, I select PUKIY, then tap add to route. Now we have our approach loaded into our flight plan.

    Removing the Hold

    The RNAV 17 is now in the Foreflight flight plan, but the hold is displayed at PUKIY. To remove the hold, the first step is to tap the approach in green and a menu pops up.

    The 7th option down is “Remove Hold in lieu of PT.” Eureka! Tap that, then the approach is displayed without the hold. Houston, we have success! It even says “NoPT” in the flight plan.

Leave a Reply

Your email address will not be published. Required fields are marked *