|

Rudder Use

I have the blessing (same say it’s a curse) of being a tailwheel pilot. I did my tailwheel training in a Citabria and have gathered about 400 hours over the years in Citabrias, Super Cubs, and Maules (don’t judge all tailwheel airplanes by a Maule, by the way. The Maule is it’s own unique animal). The blessing of being a tailwheel pilot is that it greatly enhances my stick and rudder skills for all airplanes.

No matter what airplane you fly, basic stick and rudder skills are always important. At some point during a flight, the rudder will need to be used, even if you have an airplane that has a yaw damper. Rudder use is vitally important in the takeoff and landing phase, especially if you fly an airplane that generates a lot of torque on the takeoff roll. Rudder in that phase of flight is pretty evident, because if the rudder isn’t used, you’ll go off the left side of the runway.

Where I want to focus is rudder use in the landing phase. As an airplane comes down final, there are several forces that are be acting on the airplane. When it’s bumpy, updrafts and downdrafts are moving the plane up and down and all around. To correct for a bump that sends the airplane into a roll, aileron is added in the opposite direction of the roll. That aileron input also induces adverse yaw, pulling the nose of the airplane in the opposite direction that the pilot is moving the ailerons.
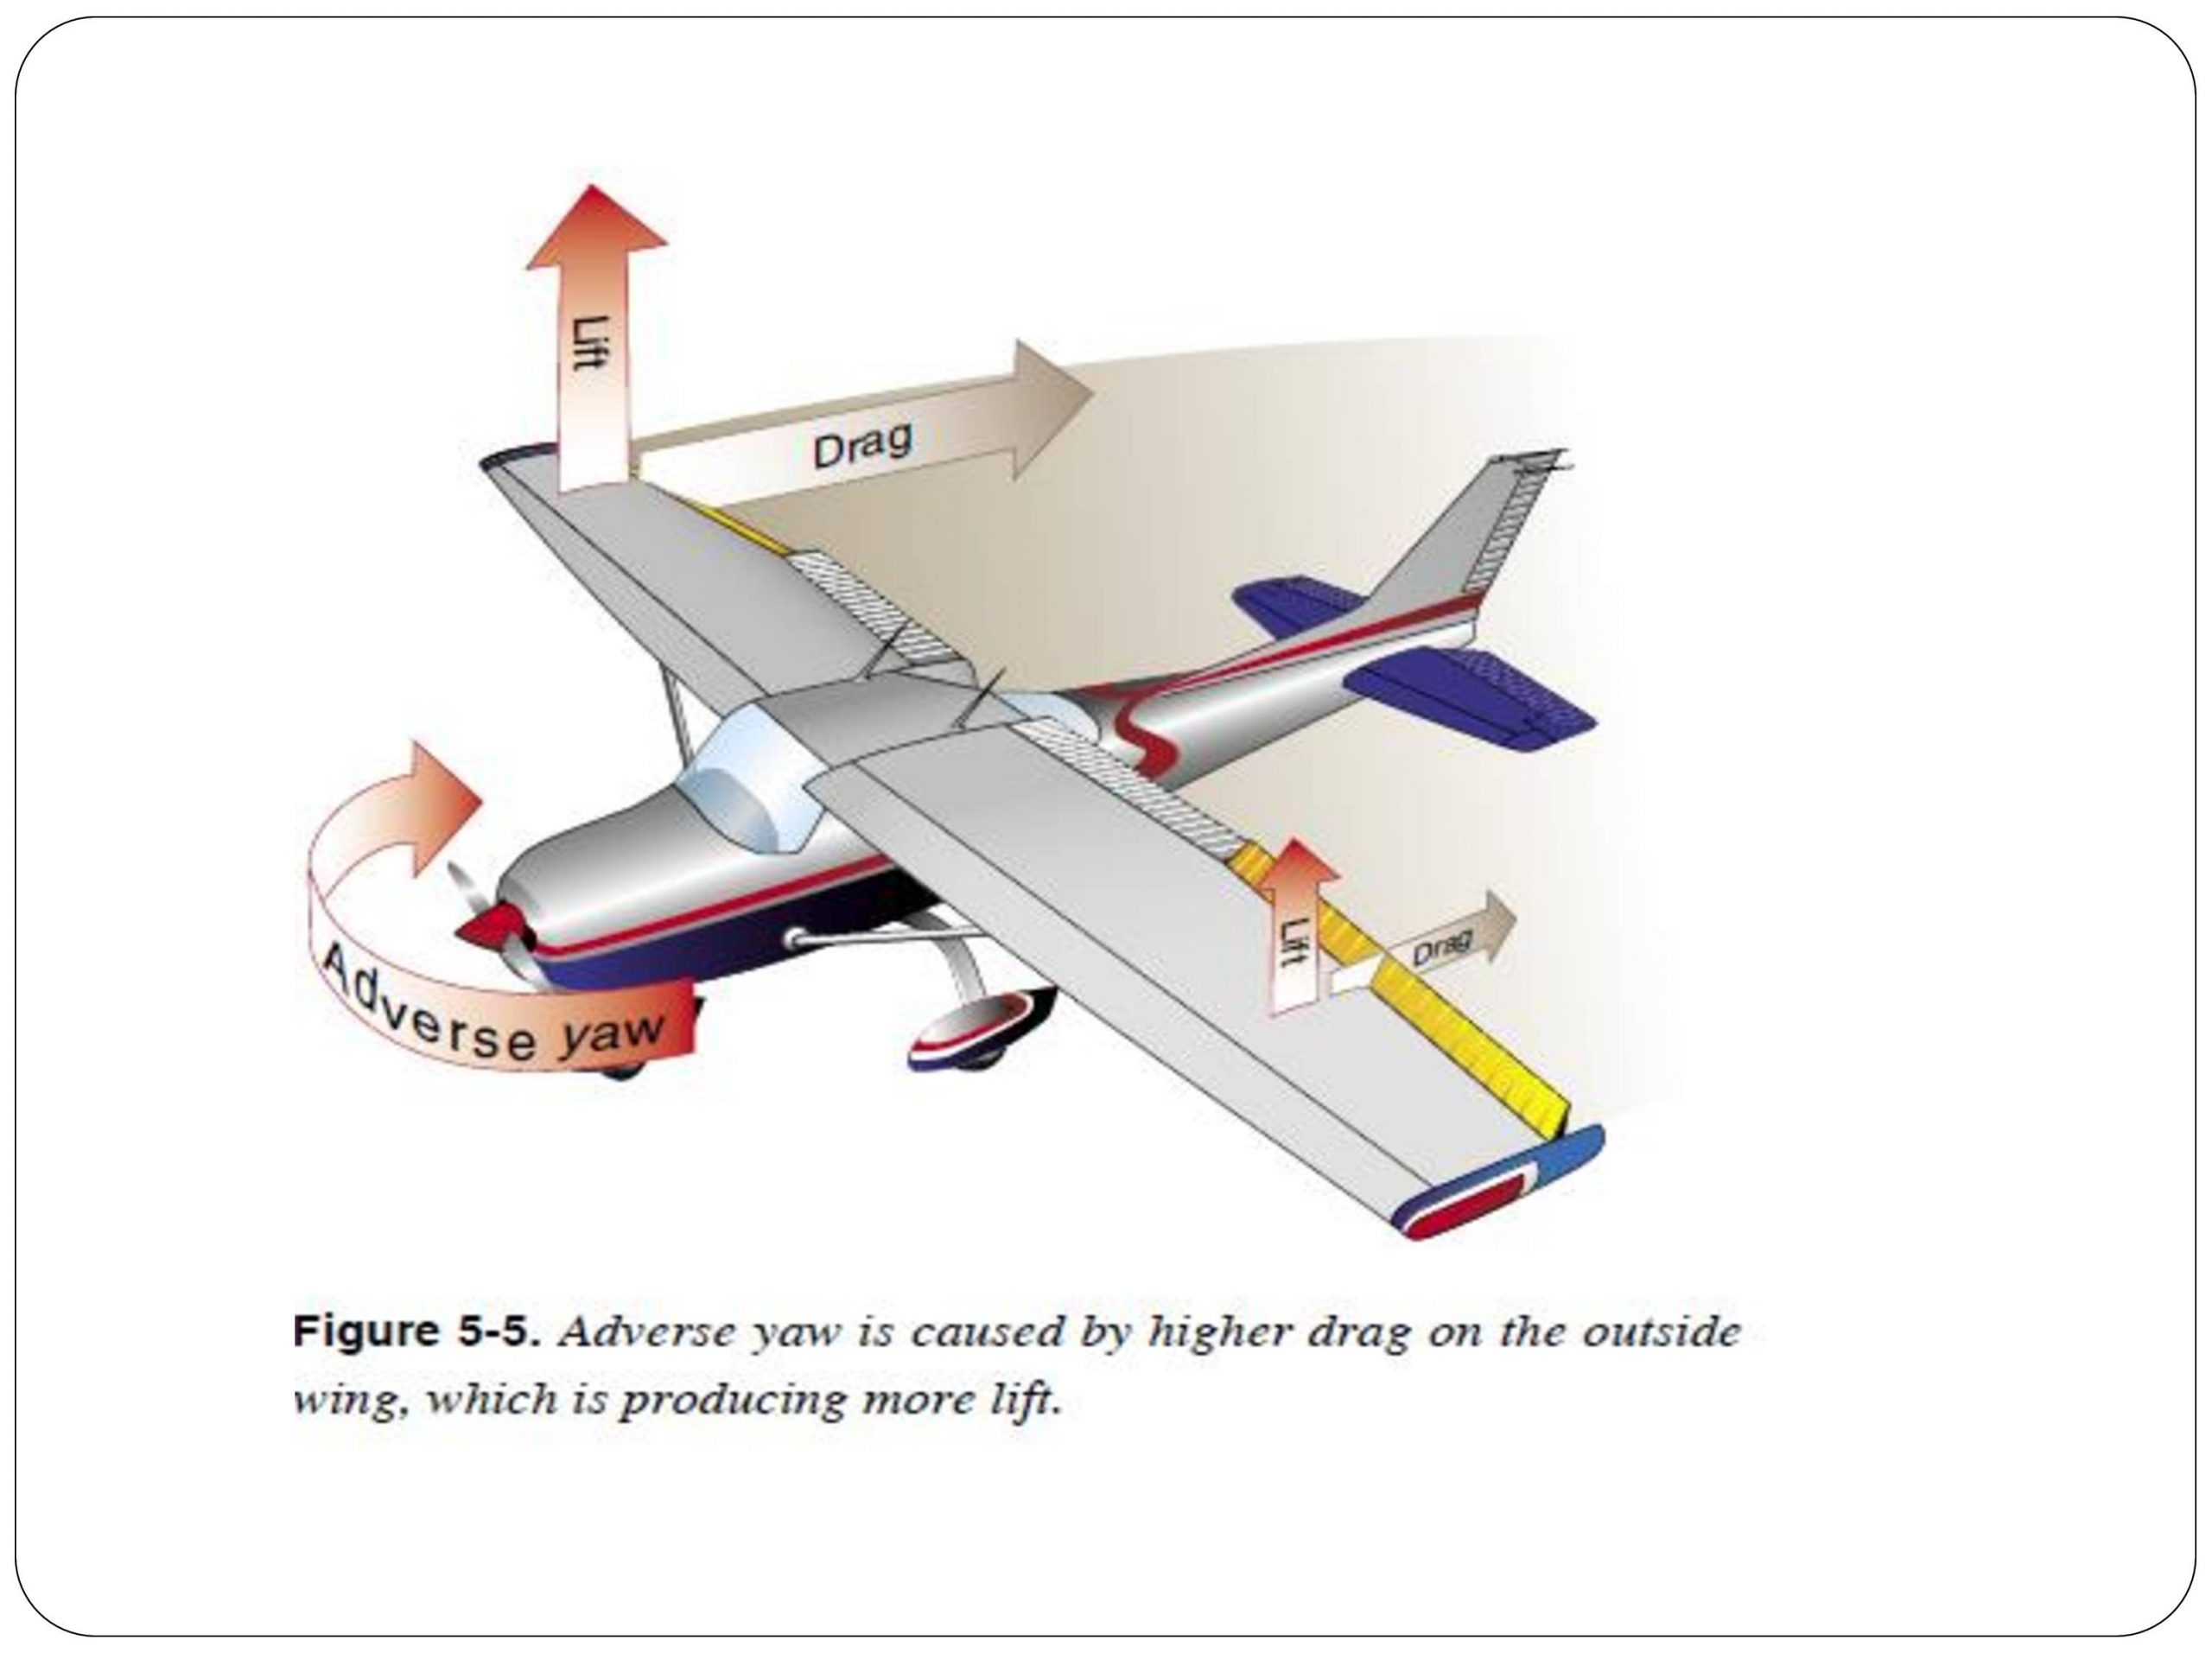
If a pilot isn’t using his feet correctly, then the nose of the airplane will wallow around through the air as aileron inputs are used. The tail is also moving around quite a bit, so the pilot might not “feel” the yawing moment, but the passengers in the back seat certainly will.

The other advantage that comes with proper rudder usage on short final is the airplane is more responsive to control inputs. When utilizing both the ailerons and the rudder, a pilot is able to fly the airplane much more precisely and control it much better.

This doesn’t mean you have to be staring at the turn coordinator the whole time down final. In fact, that’s exactly what you don’t want to do. Your eyes need to be outside the airplane. Just get in the habit of stepping on the rudder whenever you move the ailerons on final and eventually, you will feel what your airplane is doing. Don’t step on the rudder as hard as you can, but slight pedal pressure in the direction of aileron input will make a big difference.

Rudder is also vitally important for landing in a crosswind no matter that airplane. Crosswind landings are a learned skill that take a lot of practice to perfect. There is also a lot of confusion as to what control input does what during the landing.

Here is the simplest way to picture a crosswind landing and what the controls do:

  • Aileron-When performing a crosswind landing, the ailerons keep the airplane over the centerline. If the airplane is drifting to the right of the centerline, add left aileron to bring it back to centerline, then keep enough aileron control pressure in to keep the airplane over centerline. In a perfect crosswind landing, the main tire on the windward side will touch down first. Left crosswind means left tire touching first.
  • Rudder-When performing a crosswind landing, the job of the rudder is to straighten the nose to point down the runway. You will not be coordinated in a crosswind landing, you will be slipping, which is the goal. So, with a left crosswind, you will be inputting left aileron to remain over the centerline and you will also need right rudder to straighten the nose. This also prevents the airplane from actually rolling in the direction of the aileron input.

If you remember for a crosswind landing: “Aileron into the wind to stay over centerline, opposite rudder to straighten the nose.” Too much aileron and the plane will drift into the wind. Too much rudder and the nose will yaw in the opposite direction.

Rudder is very important, even in our day and age where a lot of general aviation airplanes have yaw dampers. Our feet only have a job for a short period of time, but that is the most critical time. An excellent way to get more proficient in rudder use is to go get a tailwheel endorsement. If you are in the central Texas area, check out TacAreo in Fredericksburg, T82.

Don’t let your feet fall asleep!

Similar Posts

  • Flight Watch to be Discontinued

    The FAA has decided to discontinue the dedicated En Route Flight Advisory (EFAS or Flight Watch) frequency 122.0.  The effective date will be September 24th, but Flight Service will continue to monitor the frequency for an additional six months to direct pilots to Flight Service Station frequencies.

    EFAS services will still be provided by Flight Service, though, on the published Flight Service Station frequencies (and 122.2).

    To me, this makes some sense.  In the past, if I accidentally contacted Flight Service on one of their frequencies to issue a pilot report or get a weather update, they would send me over to Flight Watch on 122.0.  More than likely, the Flight Watch operator was sitting right next to the Flight Service operator, but I had to flip frequencies.  This will help alleviate some confusion for pilots.

    The deactivation of Flight Watch had been coming for years since the advent of Foreflight and other iPad and tablet apps giving pilots much easier access to weather, both in flight and on the ground.  With Nexrad and Stratus, there isn’t much need for Flight Watch anymore (though you still can’t file a PIREP over the XM Weather!).

    For more information, check out AOPA’s website.

  • Casey Aviation Makes Piper PA46 Systems Videos Free

    The safest pilots are the ones who attempt to gain as much knowledge and learning about their airplane and environment as possible. These pilots are the ones who enjoy learning, going to seminars and conventions, and soak up all the MMOPA magazine articles in each issue. These pilots are the ones who get as much training as they can, above and beyond what the minimum requirements are.

    If you are one of these pilots and you own a Piper PA46, then this blog is for you.

    Casey Aviation, one of the best Piper PA46 training companies out there, recently released all of their Malibu, Mirage, Matrix, Meridian, and JetProp systems training videos for free. These are some fantastic videos that Casey Aviation created which go much more in depth than any power point presentation could.

    The great thing about the videos is they give the viewer an all access “inside look” to the specific airplane. Joe Casey, owner of Casey Aviation, takes off cowlings, crawls under the nose gear compartment, and even shows an airplane with the interior out so all the flap cables and environmental systems can be seen.

    I have started referring all of my PA46 customers to the Casey Aviation videos as part of the prep work for our training sessions.

    To access the videos, check out the Casey Aviation website.

  • Non-Standard Alternate Minimums

    When filing an IFR flight plan, part of the process is determining whether or not an alternate airport is required.  An alternate airport is required when the following conditions exist(as is outlined by the FAA in 91.169 (b)):

    The weather conditions at the destination airport

    • From 1 hour before your arrival time to 1 hour after your estimated time of arrival, the weather conditions are forecast to be below
    • 2,000 Feet AGL and/or
    • 3 statute miles visibility

    Let’s paint a scenario.  You are traveling from KSAT (San Antonio International Airport) to KHBV (Jim Hogg County Airport in Hebbronville, TX).  You start to file your flight plan and get down to the space where you put your alternate in.  Since Laredo (KLRD) is the closest airport with a TAF, you check Laredo’s TAF and see that the forecast conditions there at your ETA are ceilings 1,500 and visibility of 2sm.

    Based on this information, you need an alternate airport.  Now, the process of finding one.  In Part 91.169 (c), the forecast conditions at the alternate airport must be at or above:

    • 600 Feet AGL and 2sm visibility for a precision approach, or
    • 800 Feet AGL and 2sm visibility for a non-precision approach

    Alright, now we have some guidance.  Laredo is the nearest airport to KHBV, and we know the forecast from the above TAF showing the conditions are forecast to be above the alternate minimums outlined in Part 91, so let’s pick Laredo.  All done?

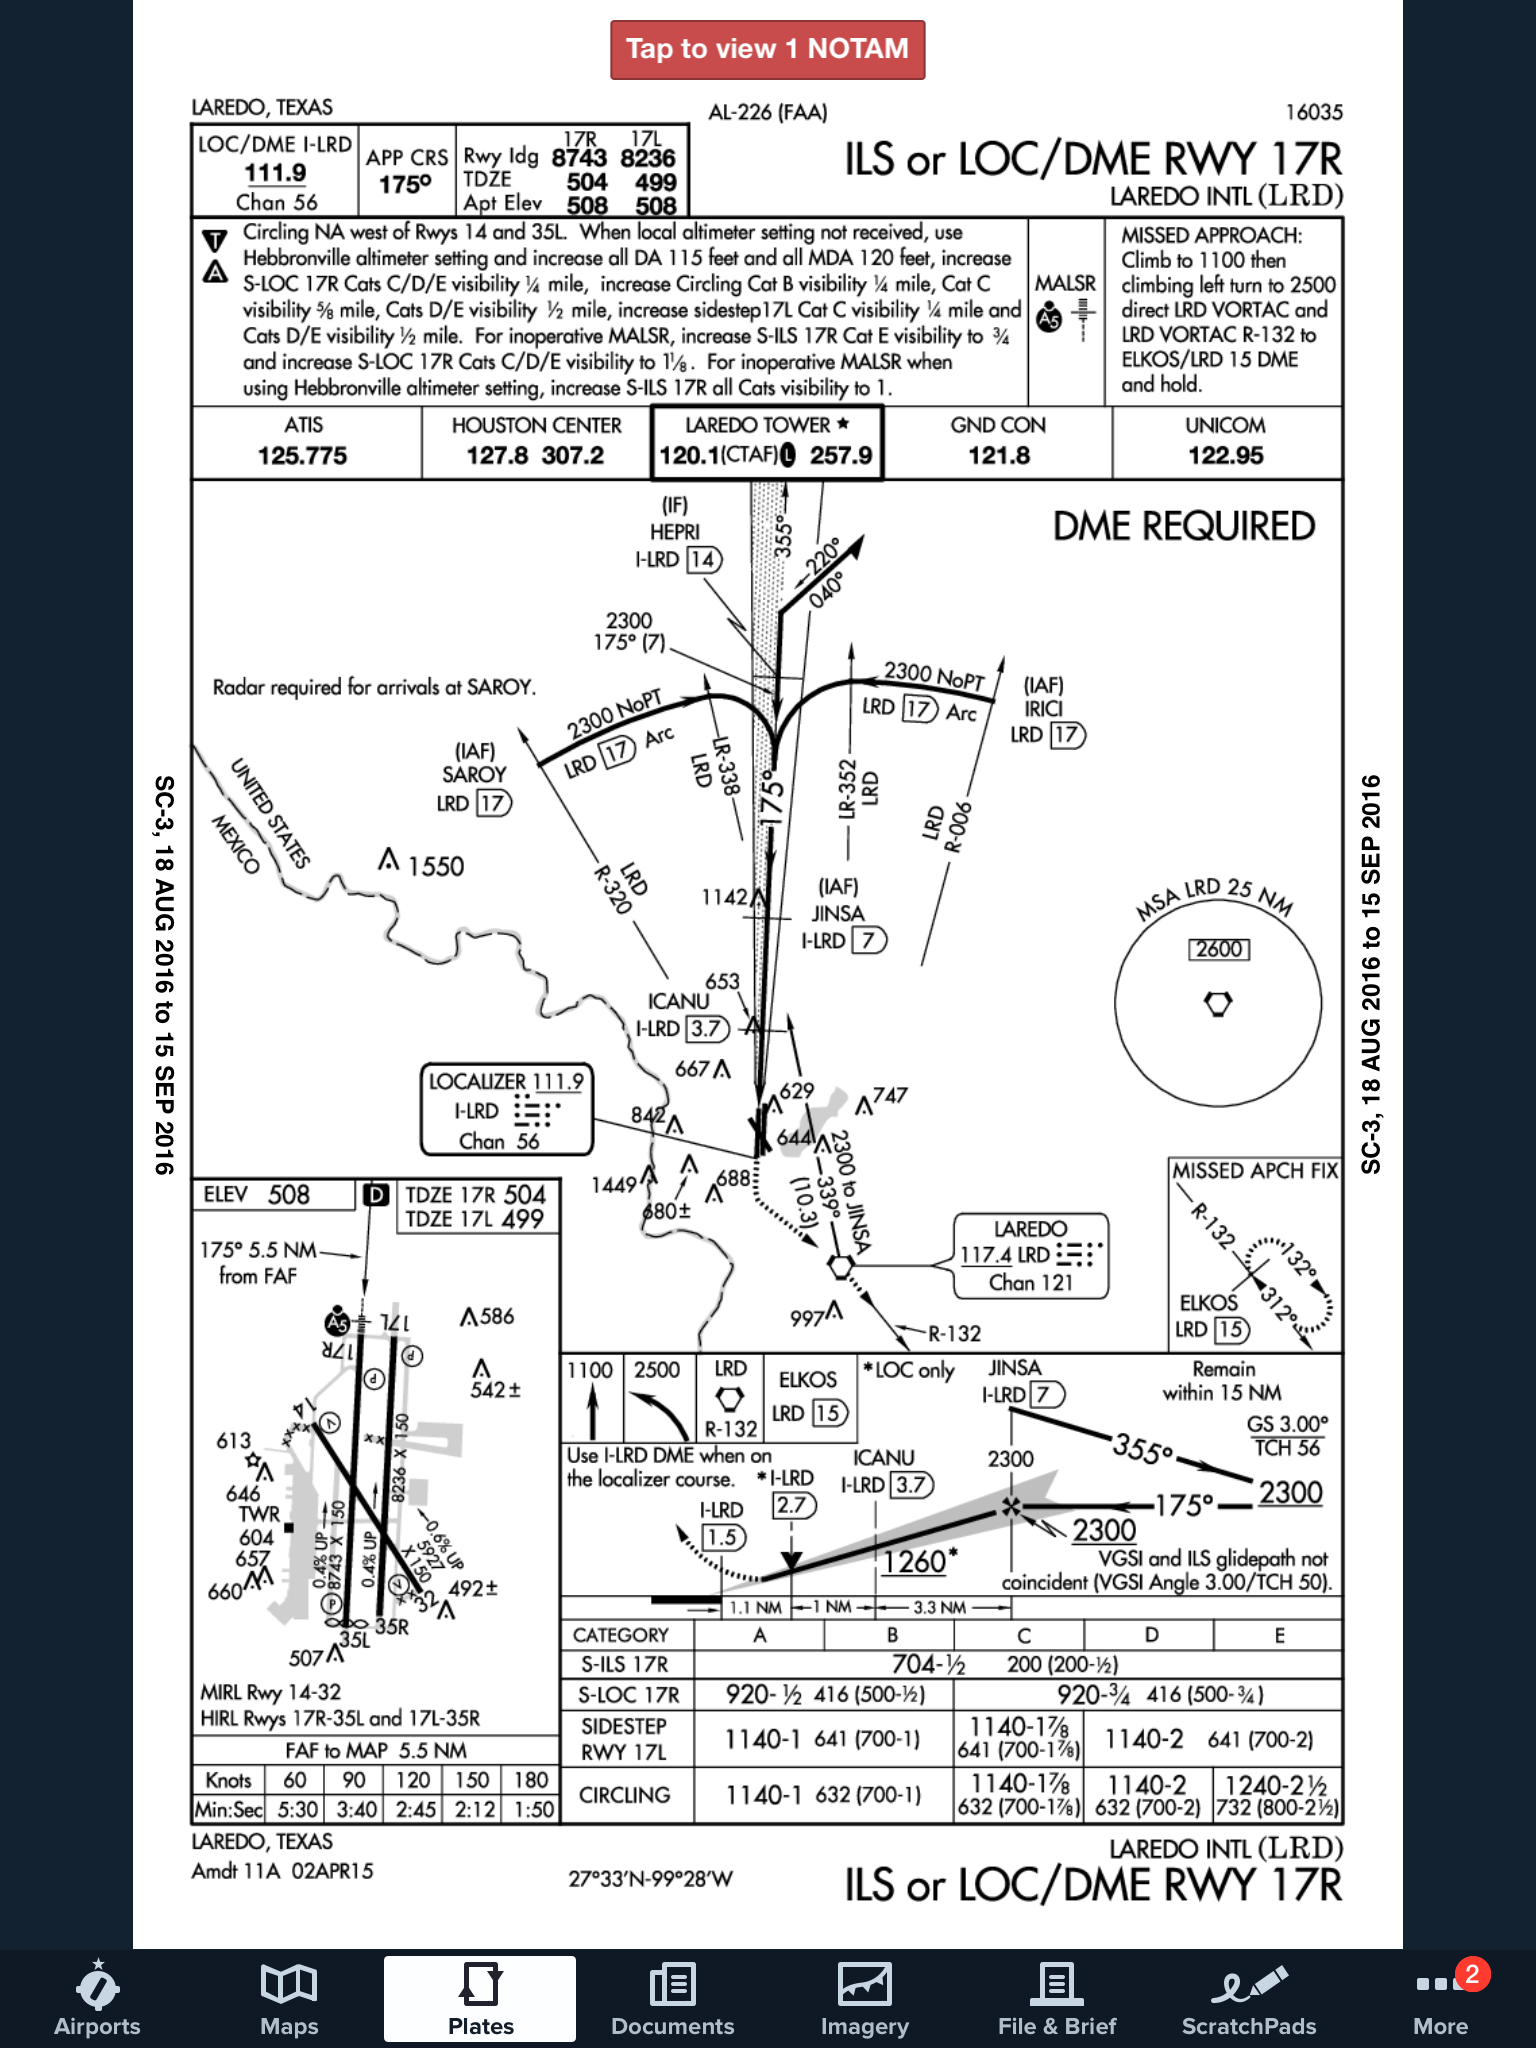
    Not quite.  A lot of airports have Non-Standard Alternate Minimums.  How do you figure out if they do?  The easiest way is to look at any approach plate for the airport.  In the notes section of the government plates, there will be a black triangle with an A in it.  That means there are non-standard alternate minimums published for that airport (in layman’s terms, different than the ones stated above in Part 91).

    ILS 17R KLRD

    Now the question is, where do you find those non-standard alternate minimums?  On Foreflight:

    • Go to the Airports page
    • Tap the Procedures button
    • Tap the Arrival button
    • Tap the Alternate Minimums option

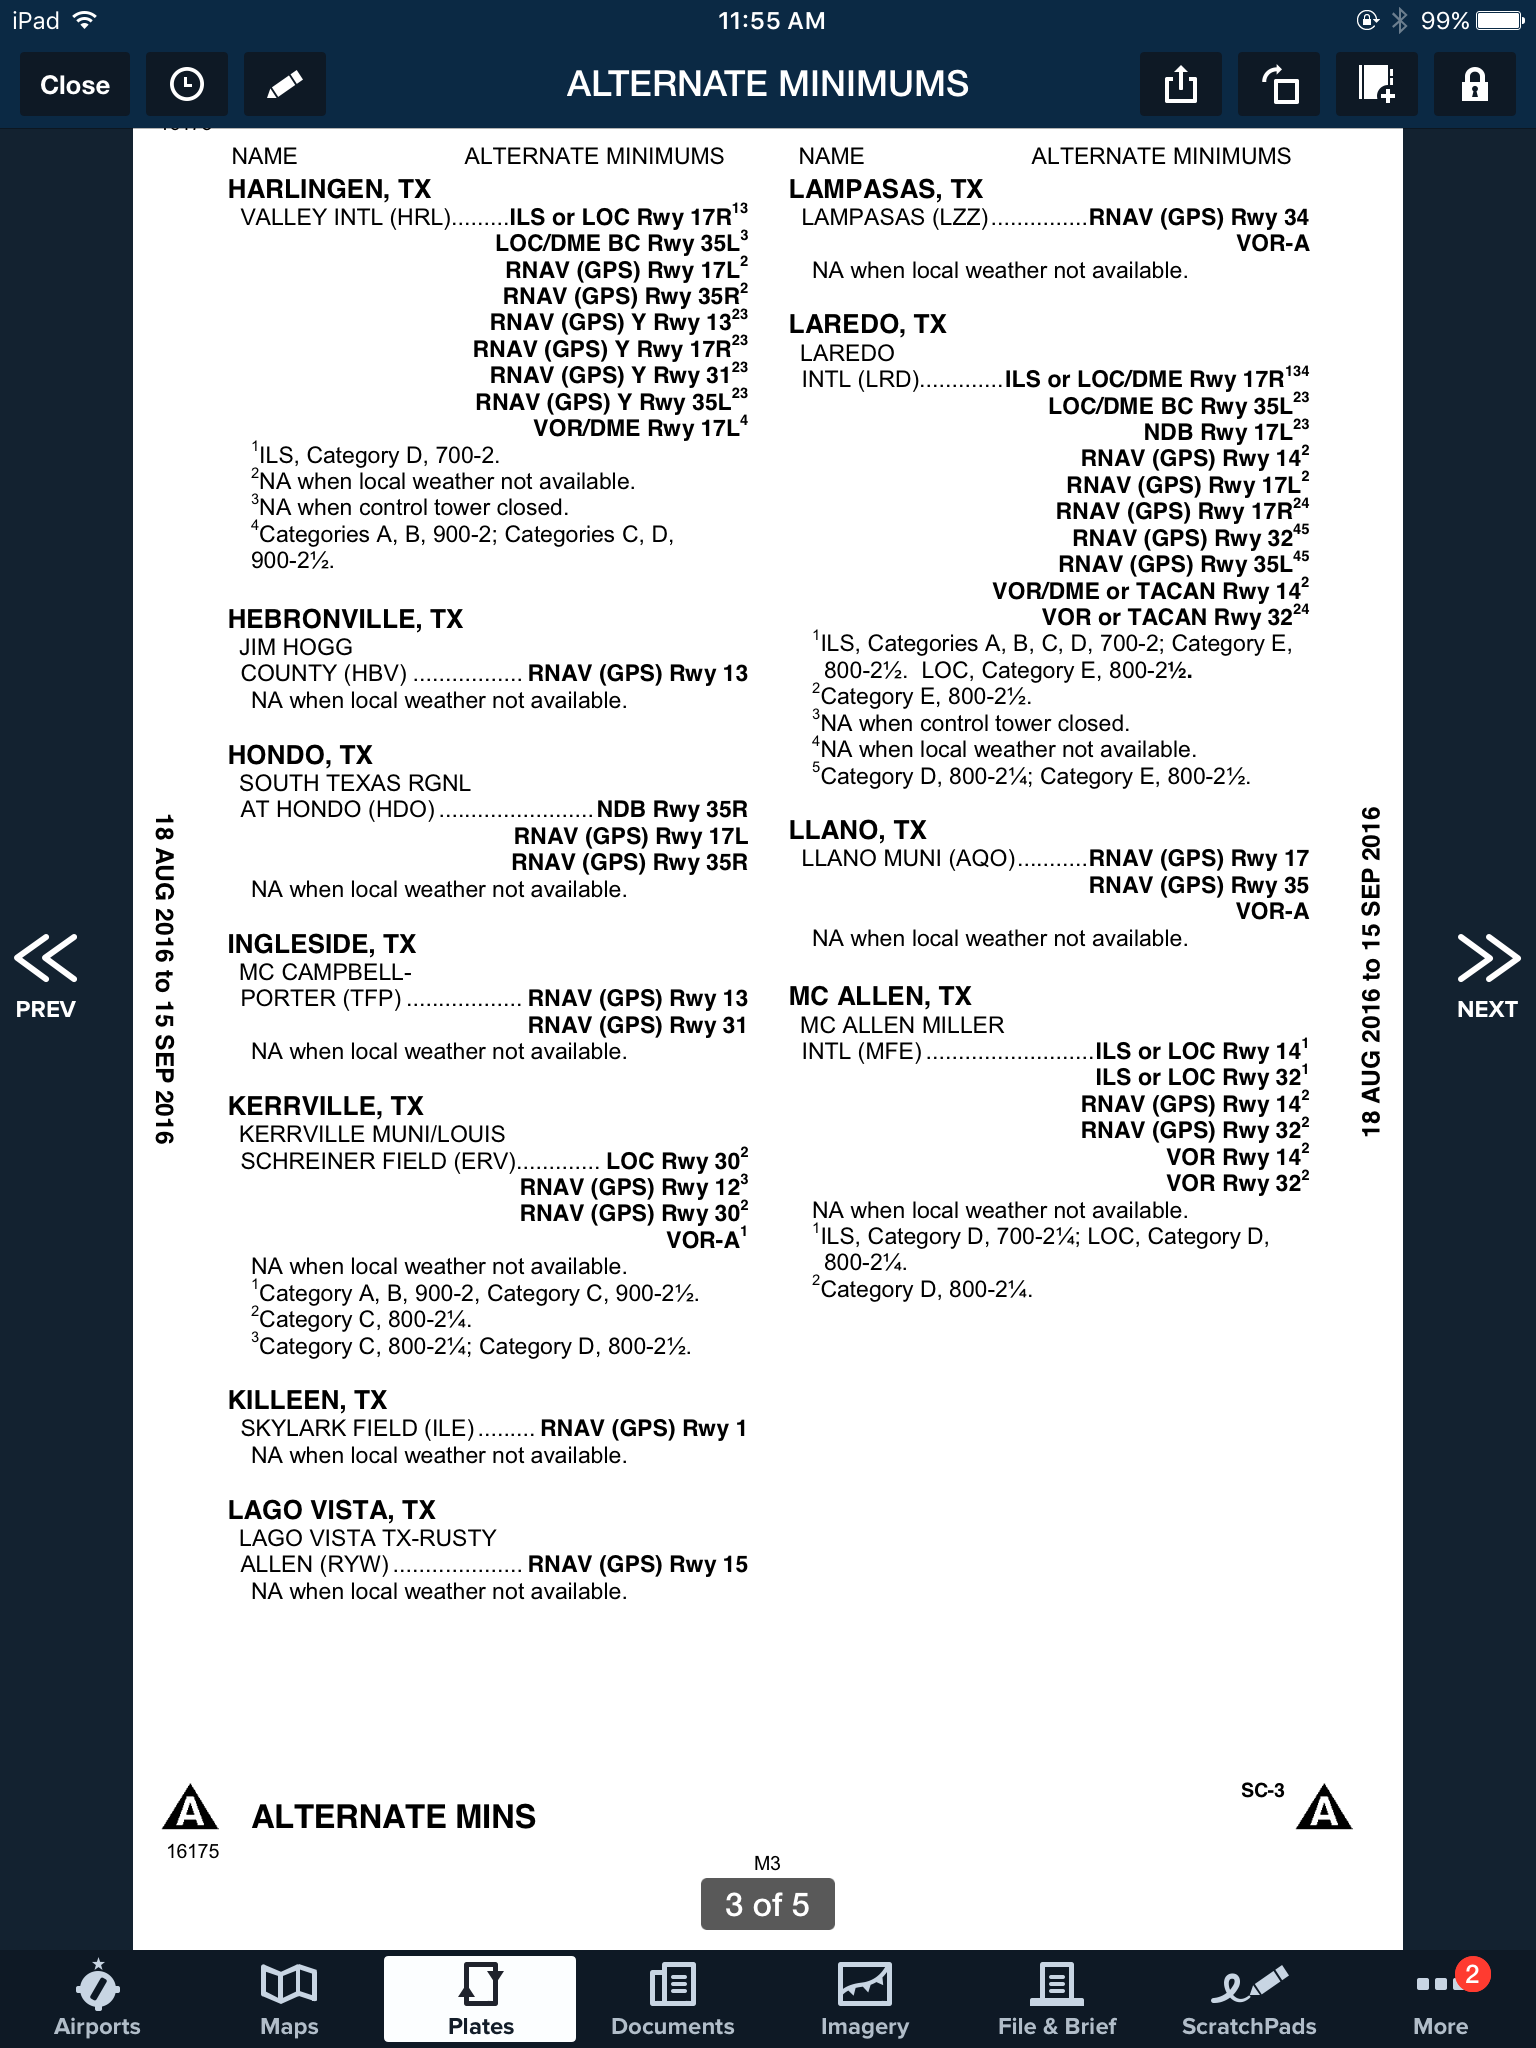
    This brings up the IFR Alternate Minimums document for all the airports with non-standard alternate minimums in that area.  Scroll through to find Laredo.

    Non-Standard Alternate Minimums

    As you can see, there are several notes there concerning the different approaches into Laredo.  For our example, we’ll say the winds are out of the south and we are planning on flying the ILS 17R if we cannot get into KHBV and have to come to Laredo.  The note there is that the Alternate Minimums for the ILS 17R are actually 700 AGL ceilings and 2sm instead of the above state 600 AGL ceilings and 2sm, the procedure is NA if the tower is closed, and NA if the local weather isn’t received.

    What does this tell us?  If the forecasted ceilings at Laredo were below 600 AGL instead of 700 AGL, we would not be able to use LRD as an alternate airport if we were planning on flying the ILS 17R.  The RNAV approaches are all fair game, so a GPS equipped aircraft would have no problem.

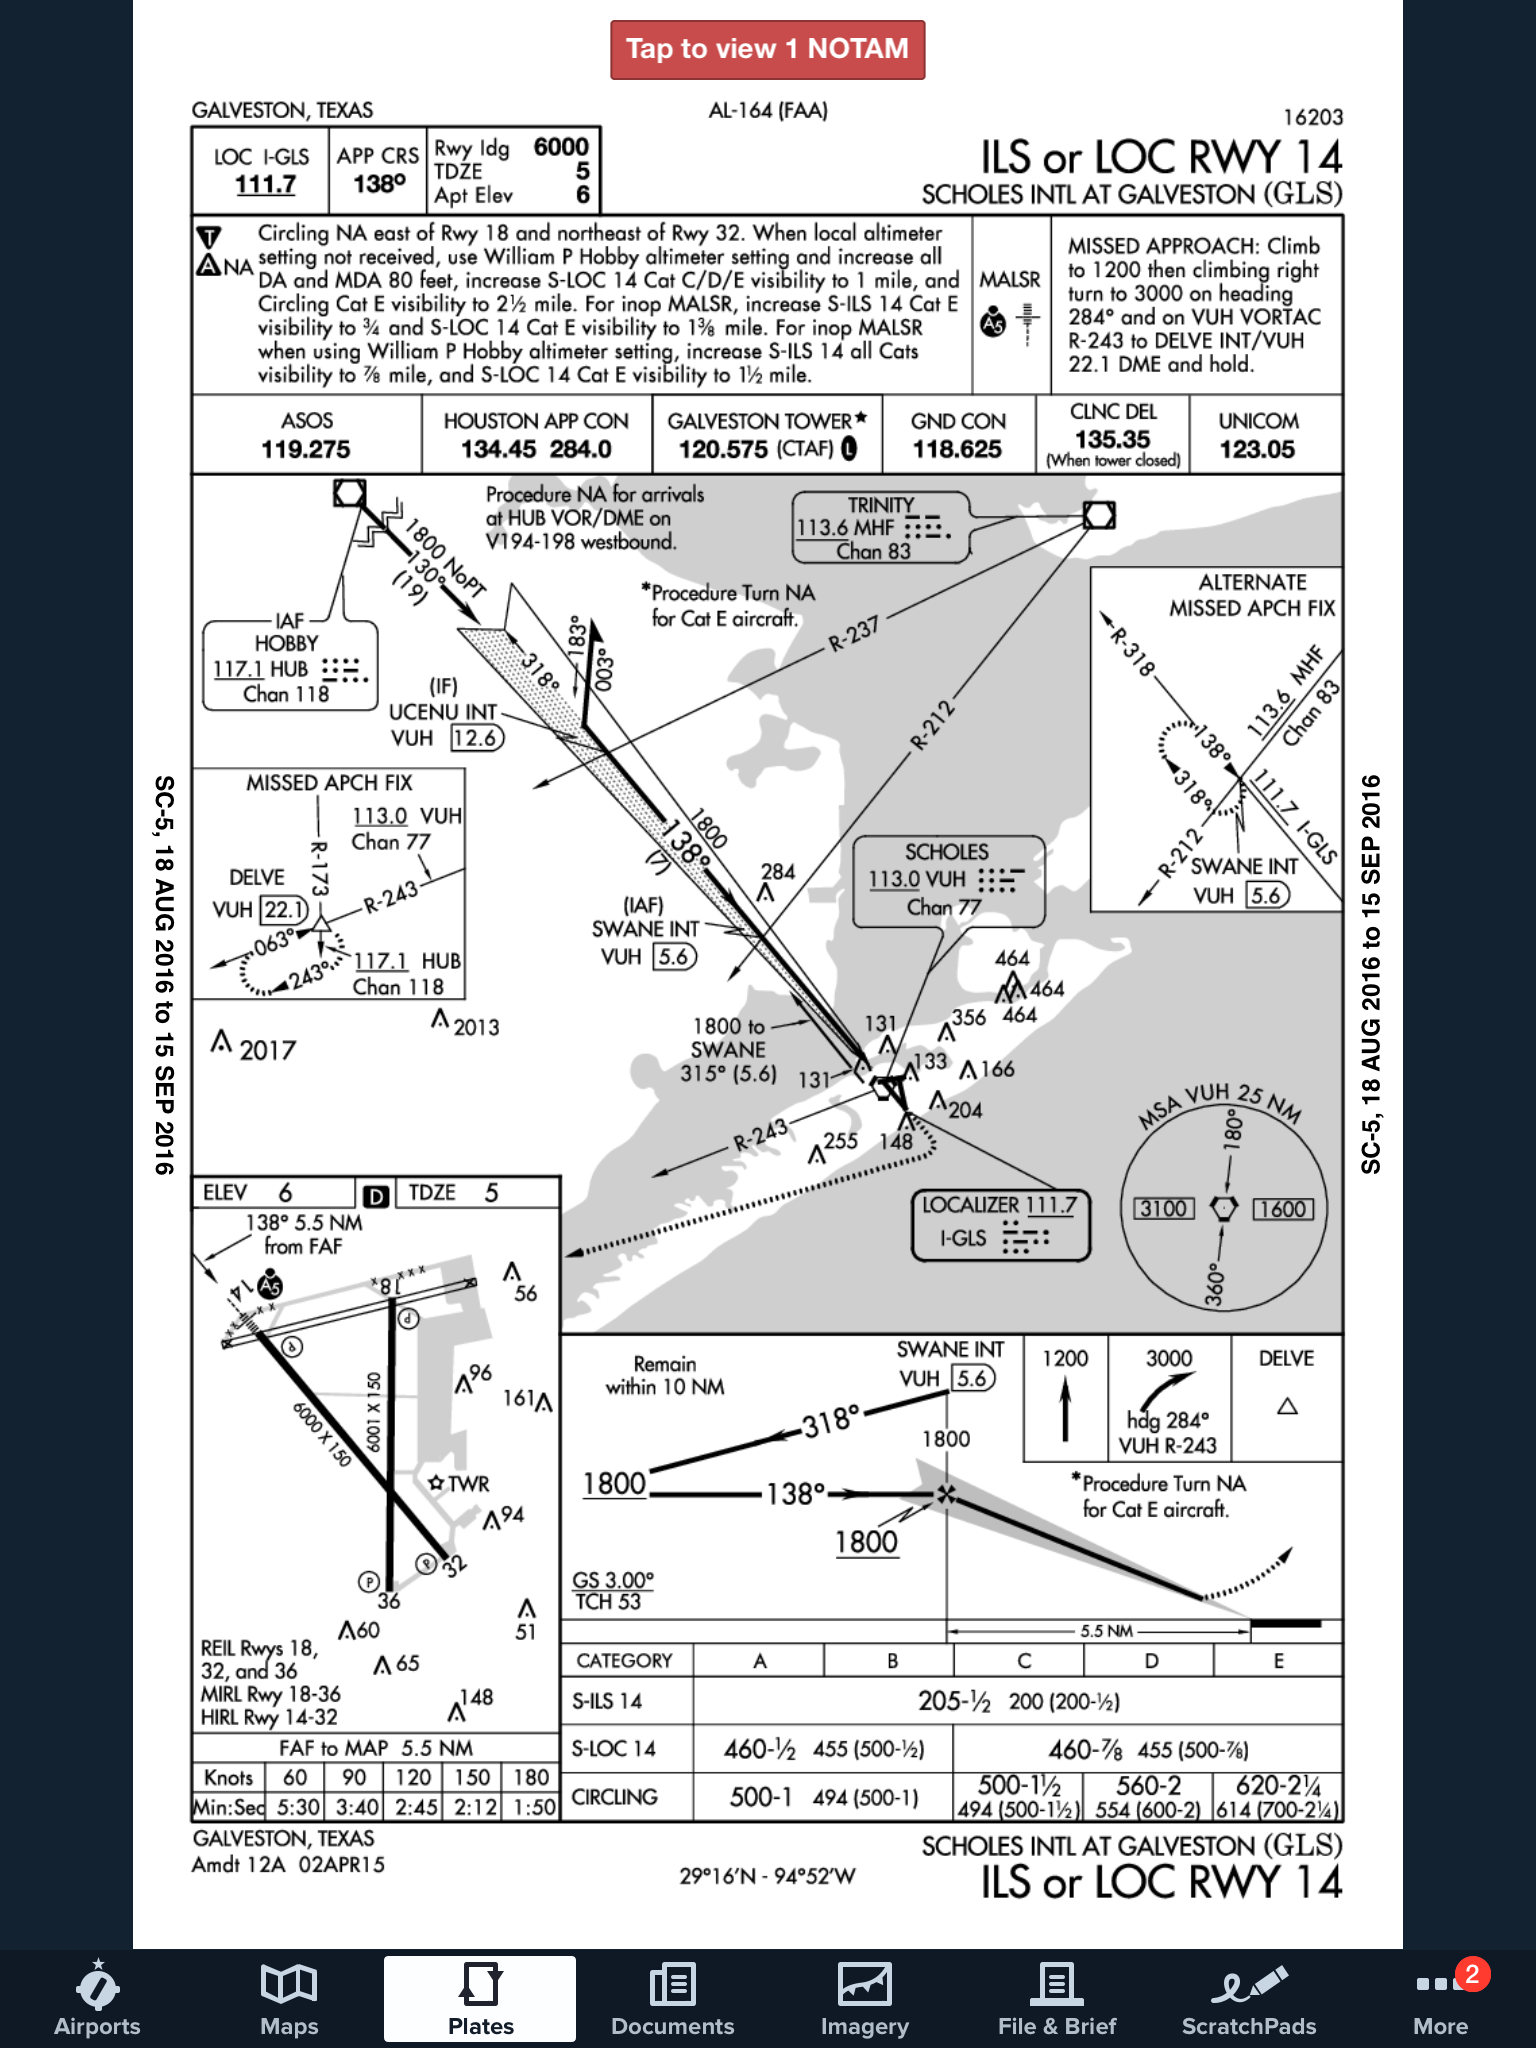
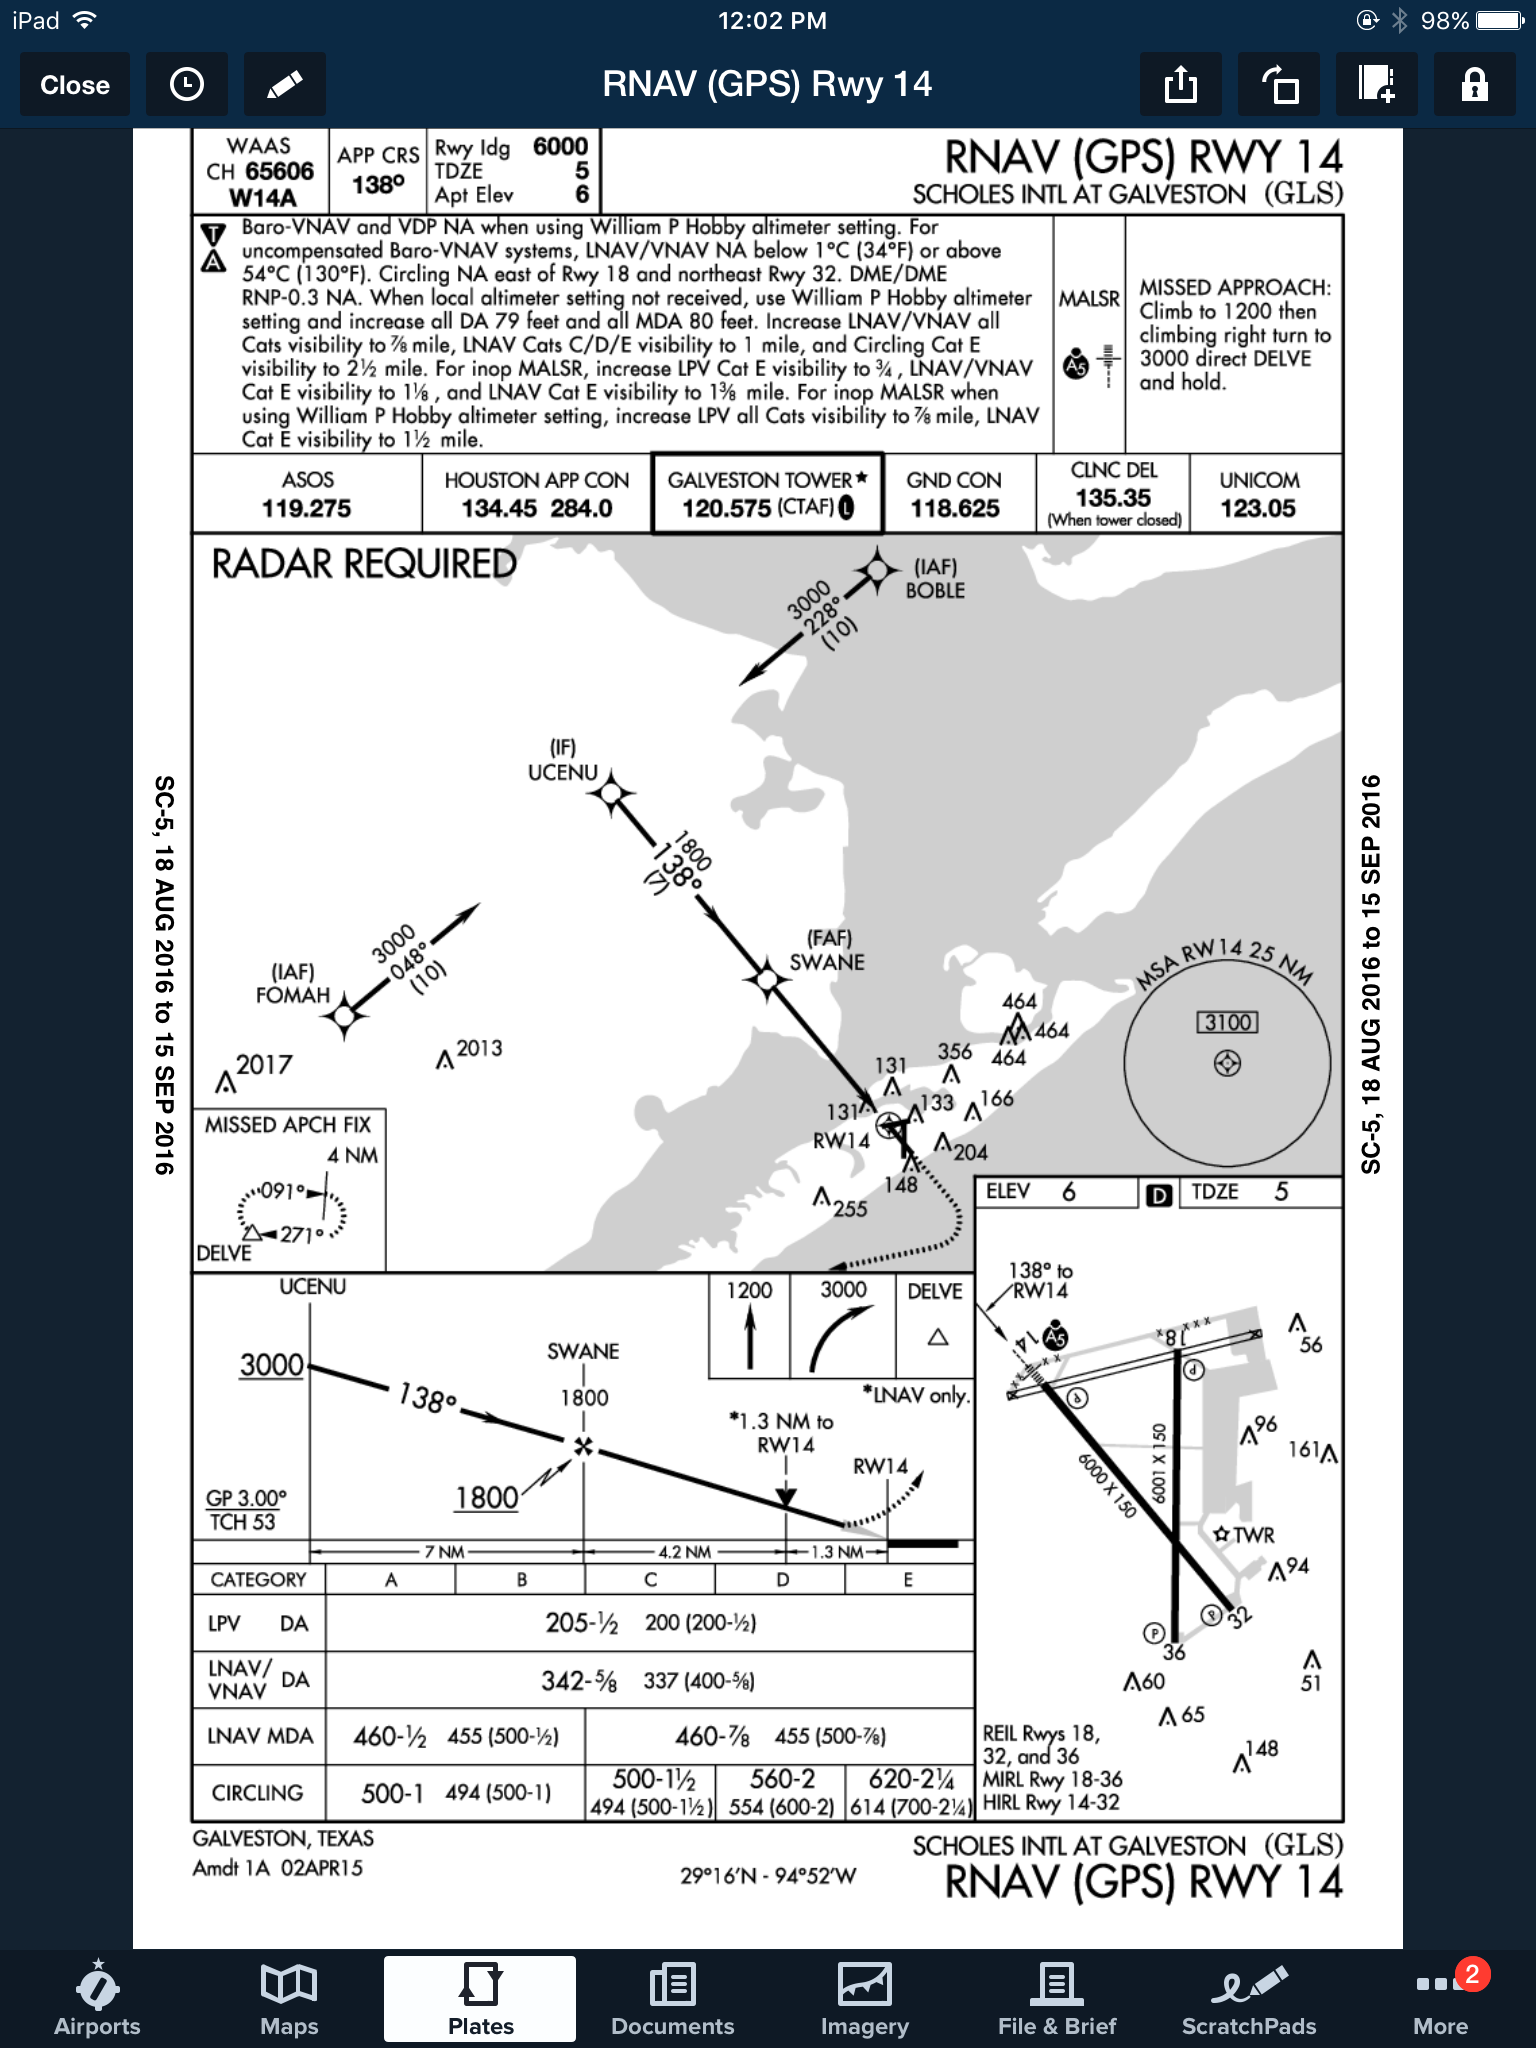
    On top of that, some approaches at a certain airport are not authorized to be used in the case of the airport being used as an alternate.  At the Galveston airport (KGLS), the ILS 14 is NA as an alternate procedure, but all the RNAV approaches are available.


    Picking an alternate seems simple at first, but there are actually a lot of things to consider in the process.

    Need help remember all this stuff?  AOPA has put out a kneeboard sheet that helps all IFR pilots remember those important things when it comes to IFR flying.  Check it out here.

  • AOPA Rusty Pilot Seminar in San Marcos

    “AOPA Rusty Pilot presented by AOPA Ambassador Pat Brown at Tempus Training Solutions”
    Topic: A Rusty Pilots Seminar
    On Saturday, July 16, 2016 at 09:00 Central Daylight Time
    Location:
    Tempus Training Solutions
    2080 Airport Dr.

    San Marcos, TX 78666

    Select Number:
    EA2769634

    Description:

    Life may have gotten in the way, but the dream of flight can be yours again. Returning to the skies is not as difficult as most rusty pilot think. We’re inviting you back in the cockpit and will help you get there. Come and participate in a FREE Rusty Pilot program with fellow lapsed pilots. We will help you understand what’s changed in aviation since you’ve last took the controls and brush up on your aviation knowledge. The Rusty Pilot program is developed by AOPA in partnership with local flight training providers in order to create the best environment for getting you back in the air and a part of the general aviation community.

    It is easier than most people think:

    • No FAA checkride or test
    • Medical may not be required

    As a Bonus, by attending, you get two to three hours of free ground instruction towards your flight review!

    Register Now!

    https://ww2.eventrebels.com/er/Registration/StepRegInfo.jsp?ActivityID=16910&StepNumber=1

    To view further details and registration information for this seminar, click here.

  • Have You Got Your FAA WINGS?

    The FAA started their Pilot Proficiency Award Program (commonly known as FAA WINGS) in 1996.  It is run by the FAA Safety Team, or the FAASTeam.  The intent of the program was, and is, to “improve the nation’s accident rate by conveying safety principles and practices through training, outreach, and education” (taken from faasafety.gov).  The FAA WINGS program, free of charge, encourages pilots to pursue recurrent training to enhance their overall knowledge of all the aspects of aviation.

    FAASTeam Logo FAA WINGS

    The FAA WINGS program has evolved over the years, but with the current structure, pilot’s accomplish tasks, both knowledge and flying, for credit that adds up to the equivalent of a flight review.  Pilot’s must accrue three knowledge credits and three flight credits to complete a phase, and each phase acts as a flight review.

    FAA WINGS has three levels, the basic, advanced, and master level.  Under each level, you accomplish different phases.  The basic level is “designed for pilot’s [desiring] a higher level of proficiency than … a normal flight review” (faasafety.gov).  The flying tasks in the basic phase are based on the private or commercial pilot PTS, depending on the airman’s certificate level.  The knowledge courses revolve around many different areas, all of which can be viewed on the FAASafety Team’s website.    Most are free, but there are some courses that have a cost associated with them.  In the advanced and master phases of the FAA WINGS program, the tasks have higher standards, challenging pilots to hold themselves to those higher standards.

    One unique aspect of the FAA WINGS program is the opportunity to attend a safety seminar for credit. Throughout the year, there are many different safety seminars that take place in the different FSDO areas. The FAA WINGS seminars range from a study of accidents, to GPS usage and anything in between.  You can even get FAA WINGS credit for attending the Bonanza BPPP or the Cirrus CPPP programs.

    As an instructor, I highly recommend to all my customers to enroll in the FAA WINGS program and use it. This keeps pilot proficiency at a high level, which in turn keeps safety at a high level as well.  Plus, you get to learn a lot too!

    If you’d like to enroll in the FAA WINGS program, visit faasafety.gov to create an account.  Then, find a good instructor and start working on those phases!

  • MMOPA Operating Practices for the Piper PA46

    I have the privilege of serving on the Malibu & M-Class Owners and Pilot’s Association Safety Committee.  Along with 6 other Piper PA46 instructors, we were tasked with two things last year leading up to the MMOPA Convention in Colorado Springs last October.  The first was to develop a Master Aviator Program (more on that in a later article).  The second was to develop Operating Practices for the Piper PA46 fleet that we as instructors could all get on board with to teach the same thing, allowing everyone in the fleet to fly approaches and patterns the same way.

    When I started instructing in the piston Piper PA46 line (the Malibu, Mirage, and Matrix), I was surprised to find that there were no recommendations anywhere that I could find for approach and pattern power settings and airspeeds.  This led to some experimentation on my part trying to find out what works well for the airplane.  I had originally been given good training in a Malibu, but hadn’t flown one for several years, so my numbers were a bit rusty.

    I have been in the Cirrus world for a very long time.  One thing I greatly appreciated from an instructing point of view about Cirrus was the abundance of guidance the factory gives instructors and pilots on how the airplane is supposed to be flown.  All CSIPs and all Cirrus pilots should (theoretically) be teaching and flying the exact same way.

    I was quite surprised that Piper didn’t put out similar information.  I wasn’t as familiar with MMOPA at the time, but was surprised they didn’t have any information either.

    I apparently wasn’t the only one with a desire to have a little bit more standardization.

    So, without further ado, here are the MMOPA Operating Practices that the Safety Committee put together.  If you are a new Piper PA46 pilot, these numbers are what you will expect to use when you do your Initial training.  If you are a seasoned Piper PA46 pilot, you probably fly these numbers, or pretty close to them already.

    These are tried and true power settings and speeds for the approach phase and landing phase.  They work. That was the goal of the Safety Committee:  put down in writing something repeatable to enhance safety.  I believe we have accomplished that.

Leave a Reply

Your email address will not be published. Required fields are marked *