The 2022 Fly In Season kicks off March 4th-5th with the US Aircraft Expo at the Addison, TX Airport (KADS). Cutter Aviation at KADS will be the host for the event. All the major and minor aviation manufacturers will have static aircraft displays. Come see all the new Cirrus innovations, the Piper M600, and the Diamond DA62. All the latest and greatest technology will be available for your viewing enjoyment.
If you are planning on flying in, the FBOs at ADS are Million Air and Atlantic.
The event will run from 10am-3pm on both days, March 4th and March 5th.
Texas Top Aviation wants to express our heartfelt concerns and prayers for those affected by Hurricane Harvey along the Texas Gulf Coast and in Houston. We have several customers in Houston and hope and pray that they are all safe.
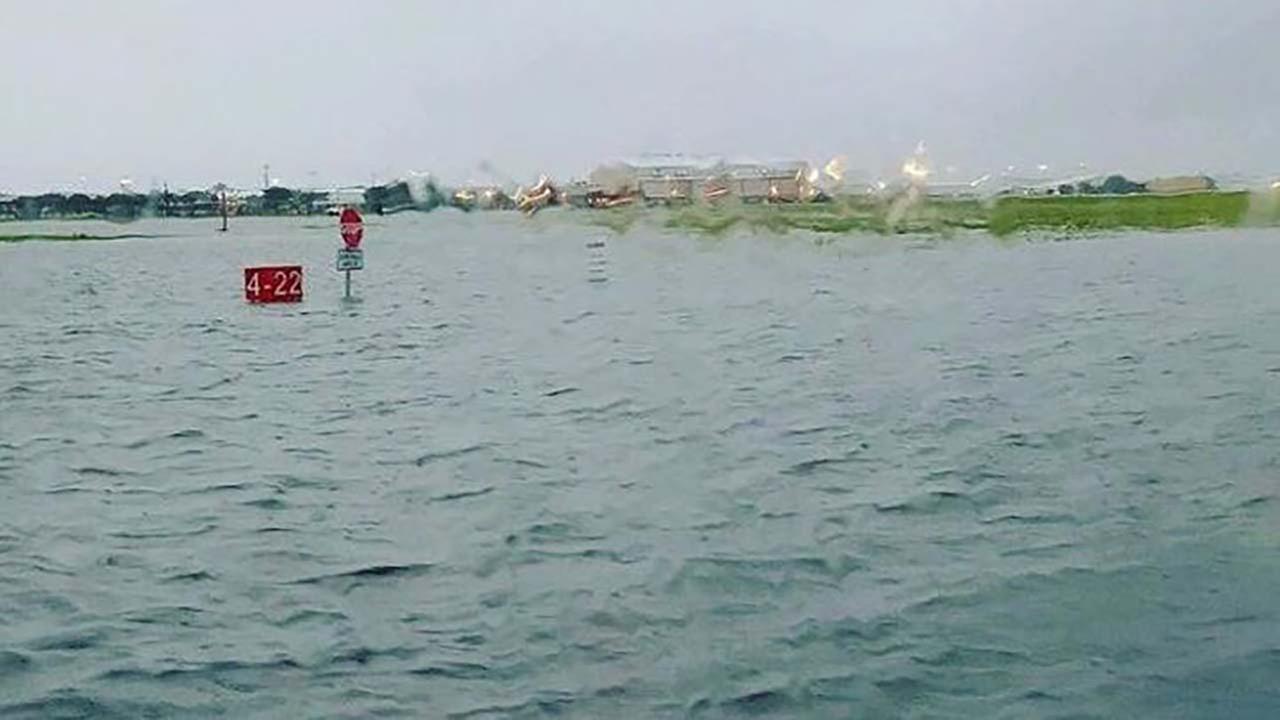
The Houston Hobby Airport after Hurricane Harvey’s Torrential downpour
If you would like to donate to the relief effort, there are several organizations that are accepting support. A few are below.
Texas Top Aviation wants to express our heartfelt concerns and prayers for those affected by Hurricane Harvey along the Texas Gulf Coast and in Houston. We have several customers in Houston and hope and pray that they are all safe. If you would like to donate to the relief effort, there are several organizations that…
Randy Vanstory, a long-time customer of Texas Top Aviation, decided in early 2017 to build his own airplane. Randy currently owns a Mooney M20J and has been active in aviation for a number of years. He took on the Vans RV 10, starting in February 2017. He’s about halfway through right now, with an estimated completion of mid-2020.
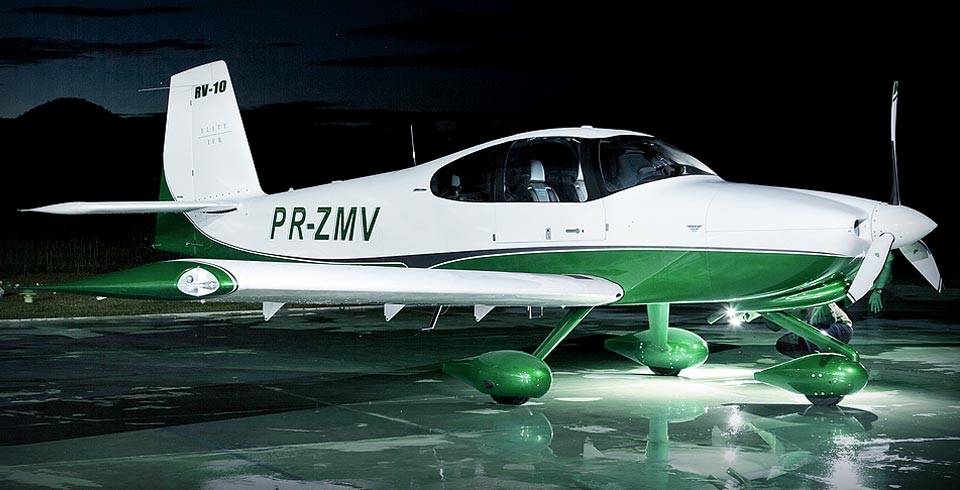
A completed Vans RV 10
I asked Randy what gave him the desire to build his own plane. “I love building things, learning new things, and working on things” he said. “This satisfies those desires all in one project.” Randy had a desire to work with his hands, to create something of his own, and building an airplane put several of his passions together in one project.
Lots of pilots out there dream of building their own airplane in their garage. There is a certain cool factor to putting together an RV or a Lancair in a garage, then trucking it out to an airport, attaching the wings, then flying a personal creation for the first time. An airplane unique to you, since there isn’t one quite like it any where else.
Randy Vanstory, a long-time customer of Texas Top Aviation, decided in early 2017 to build his own airplane. Randy currently owns a Mooney M20J and has been active in aviation for a number of years. He took on the Vans RV 10, starting in February 2017. He’s about halfway through right now, with an estimated…
Recently, I was training a customer who had a brand new instrument panel installed in his TBM 700. The avionics shop that did the work (Abilene Aero, who I highly recommend for any panel installs, located at KABI) told us when we picked the plane up that the new Garmin GTN 750Xi had the most recent software update, which included the Garmin Smart Glide.
I had never used the Garmin Smart Glide before, so I was eager to check it out during our training. When we got to engine failures, we pushed the Emergency button on the Home page of the GTN 750Xi, and then the magic happened.
The plane was also equipped with a Garmin G600TXi PFD and the Garmin GFC 600 Autopilot. In order for Smart Glide to work, there has to be either a GTN 750Xi or GTN 650Xi installed, along with a G500TXi or G600TXi and a Garmin Autopilot. Garmin is working on getting the legacy G500 as well as the GI 275 and G5 to work with the above GPS units for Smart Glide as well.
Here’s what happens. The plane loses it’s engine. The pilot’s workload and stress level suddenly goes way up. Trim the airplane for best glide, find the nearest airport, attempt restart. Do it quickly so you have time to focus on the glide. Oh yeah, squawk 7700 and declare your emergency. All the while plummeting toward the ground in a somewhat controlled crash. Yikes.
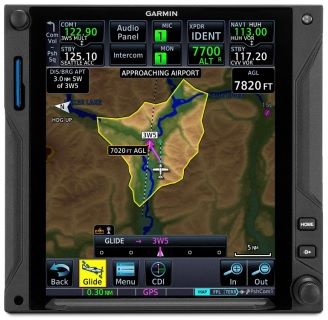
Garmin Smart Glide takes over the flying part, allowing the pilot to handle the restart, while making it much easier to squawk, talk and plan the engine out landing. On the home page of the GTN 750Xi/650Xi, the pilot simply taps the Emergency icon on the bottom of the screen. The Autopilot comes on and goes into IAS mode and maintains best glide while descending. The GPS immediately analyzes the Glide Advisor, and turns to the nearest airport in the glide ring (if there is no airport within gliding distance, the GTN 750Xi advises the pilot). Then, the Autopilot flies directly to the Nearest airport, allowing the pilot the ability to take attempt a restart.
Once it is determined that the engine won’t start, the Garmin Smart Glide has excellent situation awareness tools. On all screens, the pilot is constantly being advised of how high AGL the plane is currently, while advising also of how high AGL the plane will be over the airport that the glide is set up for. There is also a short cut on the screen to tap to squawk 7700 as well as runway length information at the airport.
The Garmin Smart Glide Button wasn’t installed yet in the TBM, but that will make things even easier when it is (it will be certified in January). This is amazing technology that all Garmin GTN 750Xi pilots should have their software updated to. Remember, you have to have a Garmin Autopilot and a Garmin PFD for it all to work.
Recently, I was training a customer who had a brand new instrument panel installed in his TBM 700. The avionics shop that did the work (Abilene Aero, who I highly recommend for any panel installs, located at KABI) told us when we picked the plane up that the new Garmin GTN 750Xi had the most…
This is a re-post from Assured Partners Aerospace’s 2nd quarter Newsletter. The full newsletter can be found on Assured Partners website.
Until the war in Ukraine, the aviation insurance market could be described as “stabilizing” after a couple years of volatility with higher premiums and tighter underwriting. However, and hopefully perhaps only for the short-term, the Ukrainian war immediately brought uncertainty back into the worldwide aviation insurance market.
According to Business Insurance, “the impact of Russia’s invasion of Ukraine represents the biggest potential loss to the aviation war market since 9/11.” One leasing firm alone has reportedly already filed a claim of approximately $3.5B for aircraft and engines they say have effectively been seized by Russia. And, because the aviation insurance arena is so small, what happens around the world at this magnitude can have cascading, detrimental effects on the US aviation insurance market.
In addition, the well-publicized spike in fuel prices could have another cooling effect on aviation operations. Generally, less air activity combined with higher operating costs equates to more frequent requests for reduced coverage, taking premium dollars away from an already-small market.
Aviation insurance buyers should therefore remain on the alert throughout 2022 for potentially quick changes to the aviation insurance marketplace that might affect either their current insurance program or their next renewal.
This is a re-post from Assured Partners Aerospace’s 2nd quarter Newsletter. The full newsletter can be found on Assured Partners website. Until the war in Ukraine, the aviation insurance market could be described as “stabilizing” after a couple years of volatility with higher premiums and tighter underwriting. However, and hopefully perhaps only for the short-term,…
In instrument flying, I am all about keeping things simple. There is a ton of detail that an instrument pilot can get bogged down in. When an instrument pilot gets bogged down, he gets distracted from flying the airplane. When he gets distracted from flying the airplane, dangerous circumstances can happen.
I like to keep things simple. When I first started instructing, I developed a very simple instrument approach briefing that captures everything that is necessary on an approach plate, but prevents getting bogged down in the details.
I call it the BBC instrument approach briefing. Here it is:
Brief
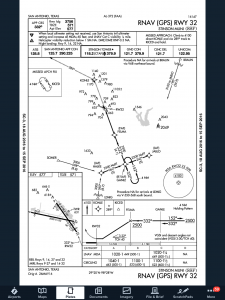
First things first. The first step of an instrument approach briefing is to brief the approach plate. There are a bunch of acronyms out there that instructors tell their students to memorize that only cause confusion instead of helping get the plate briefed. To keep it simple, just work your way across the plate and you’ll get all the information you need.
Start in the top left hand corner of the plate, with the approach course, then work your way right and down, as follows:
Approach Course (or Nav frequency if flying a VOR/ILS/LOC)
Runway information
Notes (these are good to brief the night before as a lot are irrelevant to GA pilots
Missed approach
Frequencies
Planview and MSA
Profile View and Minimums
Simple enough, right?
Build
Now that you know what you are planning on doing, you can now take the second step in the instrument approach briefing and build the approach in your GPS. You know your approach type, you know your transition, and you know what your minimums are. Taking all that information, you can now build it in to your system.
Checklists
Once everything else is done, don’t forget the checklists. The descent and before landing checklists still need to be done as part of an approach. The best time to do these is before joining the approach so that you don’t have to worry about flying the approach and looking at a checklist at the same time. Even better, memorize the checklist and you don’t have to look at anything!
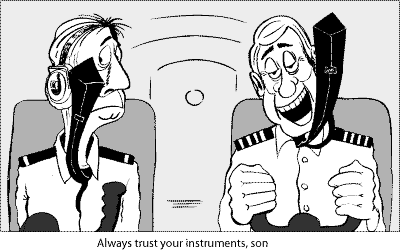
Most importantly, you want to be configured properly for the approach by the final approach fix. Gear, flaps set, power set, so all you have to worry about at that point is following the needles and trusting your instruments.
In instrument flying, I am all about keeping things simple. There is a ton of detail that an instrument pilot can get bogged down in. When an instrument pilot gets bogged down, he gets distracted from flying the airplane. When he gets distracted from flying the airplane, dangerous circumstances can happen. I like to keep…
You are at cruising altitude and your flight is going just as planned. All of that can change, sometimes without much warning, and you, the non-pilot, are now in charge. Would you know what to do?
This was a scary thought for me until I attended a seminar developed for the non-flyer at a Cirrus Owners Pilot Association (COPA) fly-in. Cirrus is the only small plane with a parachute as standard, so I thought all I had to do in an emergency was pull the chute. It’s a little more complicated than that!
I learned the vast majority of pilot incapacitation happens when the plane is at cruising altitude, so there is time to find a solution.
I was taught ten basic steps to follow to bring the plane safely to the ground.
First attempt to revive the pilot. If he is choking, it is possible to do a Heimlich maneuver from the side. This may dislodge whatever is blocking his airway and solve the problem. If he is experiencing hypoxia, turn off the heat, open all vents, and, if you have on board oxygen, use it. Also, if you can, get instructions on how to descend to a lower altitude. If the pilot is unconscious due to a heart attack or other medical emergency, there are still things you can do from the right seat.
Engage the autopilot if it isn’t already on and move the pilot off the controls. *
Ensure you are connected to the radio. If you hear ATC or other pilots, you are.
Send an electronic trouble message. Set the transponder to 7-7-0-0 to identify your plane to ATC. This will cause your plane to be highlighted on ATC radar screens.
ATC will most likely contact you asking what is your emergency. If this does not happen, you will need to transmit a Mayday call. All non-pilot passengers should know how to use the radio to get help, if they know nothing else.
With help from ATC, decide where you want to go.
Use the autopilot to fly in the direction suggested by ATC. I was taught that ultimately the choice of where to deploy the parachute is up to me because I am now the PIC, pilot in command.
Ensure that seat belts are secure and the emergency hammer is between your legs (so you have it to break a window to escape if needed).
Pull the parachute handle.
On the way down, shut down the engine and brace for impact.
After landing, move away from the plane, into the wind. Stay nearby and wait for help.
The seminar covered specific procedures to accomplish these basic steps, what to do if you don’t get a response from ATC, what to say in a Mayday transmission, how to fly a heading, how to check fuel levels, shut down the engine, etc. After the seminar, I felt much more comfortable about what to do if my pilot suddenly lost consciousness.
I was also told to practice what I had learned to avoid panicking in an emergency situation. There are so many things the person in the right seat can do under normal circumstances to practice. Learn how to set heading bugs, learn where the plane’s Electronic Locator Transmitter (ELT) is located and how to activate it. This will help rescuers locate the airplane. Learn how to assess your fuel levels. Practice making routine radio transmissions. Observe what your pilot does and ask questions if you don’t understand something.
Knowing what to do in an emergency situation will give you a sense of control over what will happen to you, your pilot, and any passengers on board your plane. If you have never considered taking a lesson or two for the non-pilot, find yourself an instructor, and learn what you need to know for your plane. Hopefully you will never have to use it, but if you do, you will be ready to be the PIC who lands the plane.
Anne and her husband Stephen are the proud owners of a Cirrus SR20. They plan to put the airplane to better use once Stephen retires. Anne has a background in desktop publishing and writing.
You are at cruising altitude and your flight is going just as planned. All of that can change, sometimes without much warning, and you, the non-pilot, are now in charge. Would you know what to do? This was a scary thought for me until I attended a seminar developed for the non-flyer at a Cirrus…



 First things first. The first step of an instrument approach briefing is to brief the approach plate. There are a bunch of acronyms out there that instructors tell their students to memorize that only cause confusion instead of helping get the plate briefed. To keep it simple, just work your way across the plate and you’ll get all the information you need.