| |

Casey Aviation Makes Piper PA46 Systems Videos Free

The safest pilots are the ones who attempt to gain as much knowledge and learning about their airplane and environment as possible. These pilots are the ones who enjoy learning, going to seminars and conventions, and soak up all the MMOPA magazine articles in each issue. These pilots are the ones who get as much training as they can, above and beyond what the minimum requirements are.

If you are one of these pilots and you own a Piper PA46, then this blog is for you.

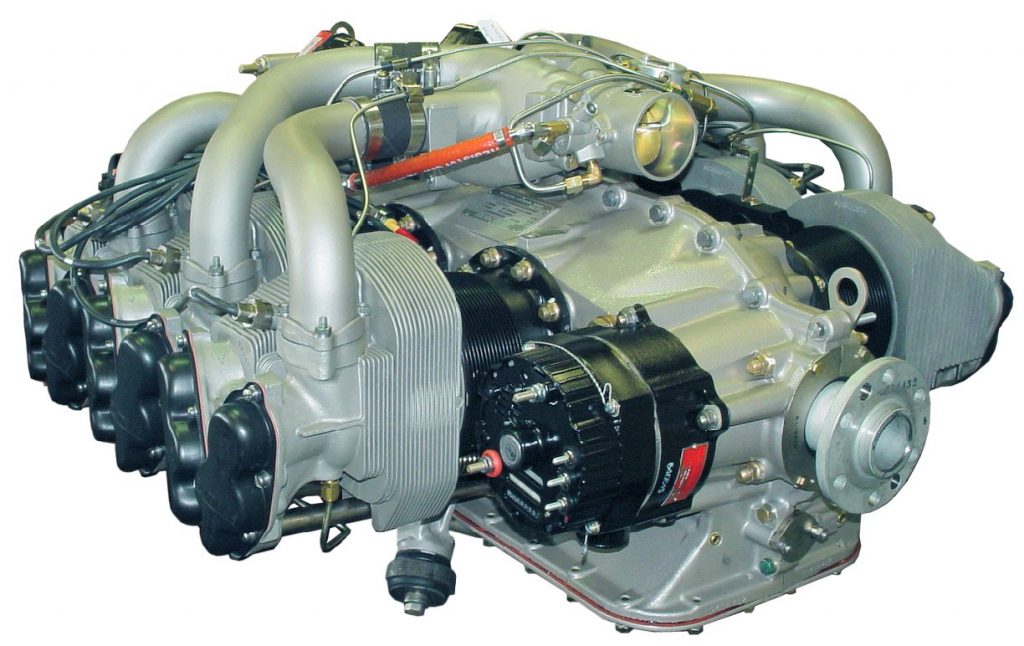
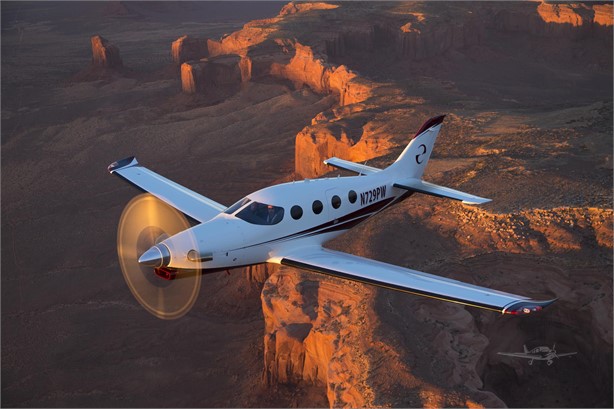
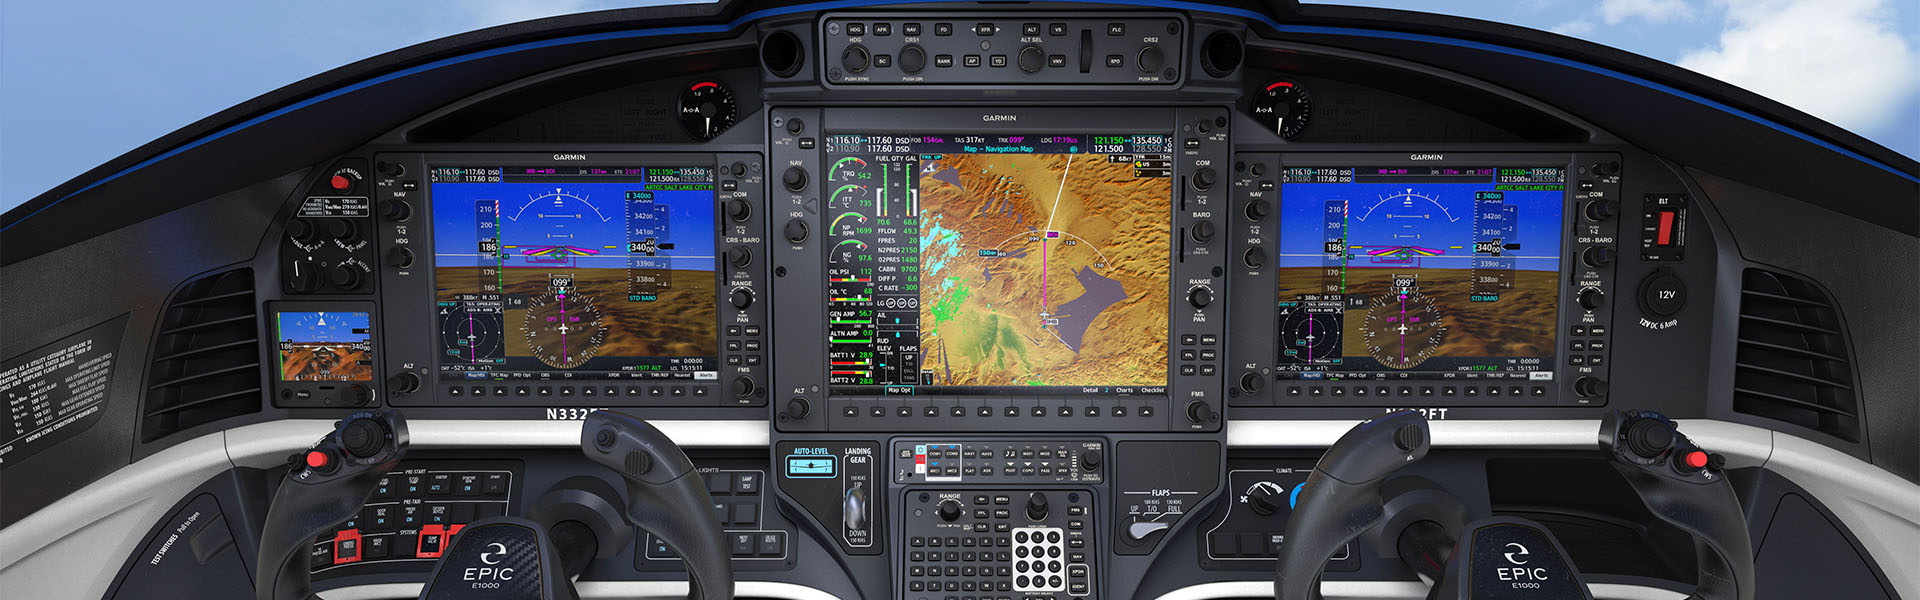
Casey Aviation, one of the best Piper PA46 training companies out there, recently released all of their Malibu, Mirage, Matrix, Meridian, and JetProp systems training videos for free. These are some fantastic videos that Casey Aviation created which go much more in depth than any power point presentation could.

The great thing about the videos is they give the viewer an all access “inside look” to the specific airplane. Joe Casey, owner of Casey Aviation, takes off cowlings, crawls under the nose gear compartment, and even shows an airplane with the interior out so all the flap cables and environmental systems can be seen.

I have started referring all of my PA46 customers to the Casey Aviation videos as part of the prep work for our training sessions.

To access the videos, check out the Casey Aviation website.

Similar Posts

  • Utilizing Personal Minimums

    The FAA defines personal minimums “as an individual pilot’s set of procedures, rules, criteria, and guidelines for deciding whether and under what conditions to operate (or continue operating) in the National Airspace System.” Have you actually given thought as to why we choose the personal minimums we do? From the beginning of initial pilot training, weather minimums were established for day-to-day training and during solo flight. I didn’t realize it at first, but I later learned these limits were not just an insurance mandate, but these minimums were set at the time to safely operate an aircraft based on my “then” current experience.

    So here’s the question: what are your personal minimums and WHY do YOU have them? Do you ever lower or raise your minimums? Are your minimums based solely on your overall experience level or do they take into account other variables such as advanced avionics? For pilots that fly multiple aircraft like I do, can and do your minimums change in regard to category or type of aircraft you are flying? It’s a judgment decision on how you chose your minimums. However, it’s important that time is taken before you strap into the cockpit for each flight to critically think about the different risk factors and variables which may affect your decision for the minimums you choose.

    To guide us, let’s try briefly apply the FAA’s Personal Minimums Checklist to see how risk factors might shape what personal minimums or decisions we make for the day. Remember, just because you have been flying with a certain set of minimums one day, doesn’t mean you can’t adjust your minimums to a higher value given an ever-changing situation.

    The acronym most pilots have heard is PAVE:

    Pilot– We all should be familiar with the acronym IMSAFE associated with this. It addresses variables such as Illness, Medication, Stress, Alcohol, Fatigue, and Emotion. But how do you adjust your personal minimums using this guideline? Have you ever thought about raising your minimums for a training flight if you only got 4-6 hours of sleep, instead of 8? Or if you anticipate a hard IFR flight with a long day, maybe taking a safety pilot to mitigate the chance of a mistake if you’re forecasting having to shoot an approach to your weather planning minimums.

    Aircraft– Personally, this is a really important factor for me when deciding what minimums to apply. I often spend a large majority of my time asking myself; is this aircraft properly equipped for the flight? This question goes beyond just looking at the logbook for a properly equipped and legal aircraft. A professional pilot should think further. Am I flying a traditional 6-pack “steam gauge” layout, non-slaved compass card, with a separate OBS gauge for course guidance? What if the aircraft doesn’t have an auto-pilot? What if I’m flying an aircraft equipped with a dual auto-pilot, dual GPS with an integrated glass cockpit? I can comfortably say my personal minimums change depending on the equipment I have available.

    A pilot should also look at his/her recency with the aircraft. For example, if you are qualified to fly both airplanes and helicopters, maybe you should choose to have higher personal minimums in one particular airframe or if you haven’t flown that airframe within 30, 60 or 90 days. This is a very important factor for the owner/pilot.

    EnVironment– Most of the time, when we think of environment, we ask ourselves, is the weather legal for me to take off and, more importantly, can I conduct this flight safely? Basic flight planning should have taught us to take into consideration crosswind limits, day versus night, and the type of airspace the flight is conducted in. Thought should also be given to how you set your personal minimums in regards to the particular type of environment you might rarely encounter. Flying an approach to your minimums in the flat plains of Texas during the day is one thing, but how would you adjust your weather minimums flying to a new airport, at night, with no moon illumination, in the mountains of Colorado? Could you reduce the risk and adjust your minimums in this scenario with two pilots?

    External Pressures – What external pressures are affecting your flight? Passengers, the owner, “get-there-it is”, the desire to impress someone? Although external pressures should never be a factor when conducting a flight, they almost always play a role in your decision whether to conduct the flight or not. For example, a professional pilot gets hired to do a flight and the weather is below their personal minimums. The pilot could be tempted to lower their minimums by 100 feet to take the flight for a paying customer. This scenario plays out every day across the country whether it’s a professional pilot or owner/pilot. It would be foolish not to consider this type of pressure. Always make sure you have a plan if and when you encounter this situation. Planning your flight and having a plan to deal with these potential scenarios ahead of time ensures you stick to your minimums. It can be as simple as telling your passengers, or the owner, well ahead of your flight what your personal minimums are to accept the flight, and to ensure they, or you, have a back-up plan!

    Most pilots will never break a hard limitation such as an airframe cross wind limitation, or engine limit, but the chances of breaking a personal minimum are realistic. Think about the last time you went on a diet and broke your plan because you were tempted by your friends or family during an outing. Self-imposed personal minimums can be hard to enforce and we need to acknowledge this as humans. Here are a few techniques that you can use to assist in making a decision using personal minimums and help reduce the influence of external pressures.

    Step 1: Sit down with your CFI/CFII and fill out a personal minimums worksheet. Filling one out by yourself is a good start but having an outside objective view will help in making sure your personal minimums are realistic. Remember, it is easy to convince ourselves that we can do something even though we have set personal minimums. Talk with other pilots to see if you have set realistic expectations.

    Step 2: Preflight planning must start a few days in advanced. It can be as easy as checking what the forecast might be and looking at the projected route, near-by alternate airports, and various approaches. This can be done quickly and will give you a heads up on whether the flight can be safely conducted or not. By alerting the passengers or owner early enough, alternate plans can be developed. An extra pilot can be added, the passengers can fly commercial, bring along a CFI, or cancel the trip altogether and seek alternate transportation. The main point is the decision was made well ahead of the flight when conditions didn’t look favorable. This helps in removing external pressures and ensures you don’t go below your personal minimums.

    Step 3: Never be afraid to ask for a second opinion. Part 135 operators have set procedures for conducting flights which assist the pilots in making decisions. These set procedures help remove external pressures by allowing the pilot to say, “The rules don’t allow for this, or this is how we will conduct the flight!” However, under Part 91, the pilot has to take ownership for all phases of the flight. This is where talking it out with another pilot helps with mitigating external factors and the environment. Ideally, this person should have more experience and be able to talk through the situation. For instance, if I’m flying to a new destination, I often seek the advice from another pilot who’s familiar with the area. They may have key insights into weather patterns, preferred approaches, or hazards to avoid. In certain situations, asking for another pilot’s opinion might be what influences your go/no-go decision! You’ll be amazed how much you can learn just from talking to other pilots.

    Step 4: Continue to build your experience and knowledge base. Building experience requires us to push our abilities, and sometimes this may be to the limit. However, this can be done in a controlled training environment or just going out and experiencing it. Get a new license, fly regularly with a CFI/CFII, and always try and take advantage of training opportunities. For example on your next flight from point A to point B, practice hand flying an approach, do a short field landing, a quick steep turn, etc. Quality flight time is always better than quantity. Continue to challenge yourself and try not to become complacent.

    Personal minimums are a tool to assist in every pilot’s aeronautical decision making process. Use your personal minimums to guide your final go/no-go decision and remember to stick to the plan. I encourage you to review the FAA’s Risk Management Handbook (FAA-H-8083-2). Appendix B has Sample Risk Management Scenarios and reviewing them will give a better understanding how to apply the techniques discussed to your everyday flying.


    Pedro Vargas-Lebron is a King Air 200 and uH-60 Blackhawk Instructor pilot with the Texas Army National Guard. Pedro is a CFI/CFII/MEI both in airplanes and helicopters with over 4000 hours of flight time, half as an instructor pilot.

  • Shock Cooling in a PA46

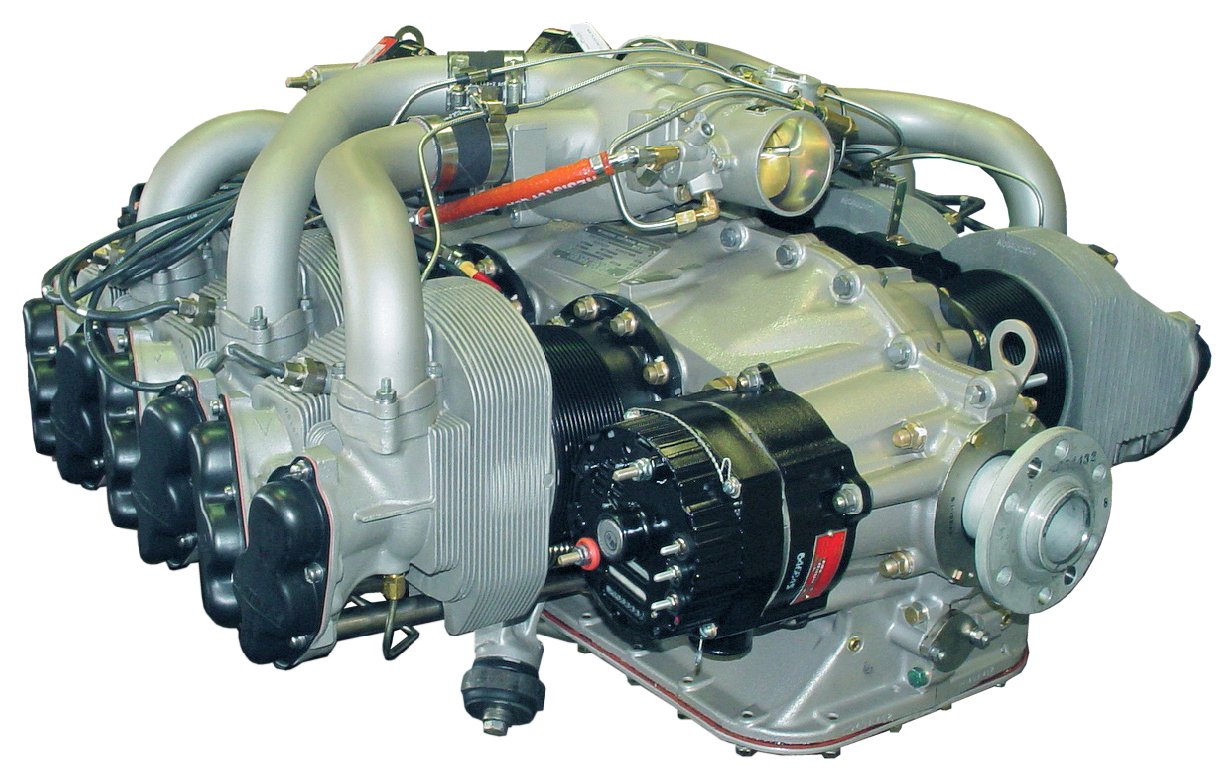
    We’ve all heard it said…”reduce the throttle by no more than 1-inch every minutes to ensure you don’t shock-cool your engine”. Does this advice apply to a PA46 engine? Can a PA46 engine (Lycoming 540 or Continental 520/550) really be shock-cooled? How should the engine temperature be managed?

    Metals expand and contract with temperature, and the various metals in an air-cooled aviation engine expand and contract at a different rates. Shock-cooling supposedly occurs when the engine changes temperature quickly and the different metals in the engine cool (and therefore change shape) at different rates. When the change occurs dramatically supposed scoring, rubbing, and marking of the metal can occur, which can cause catastrophic results.

    So, let’s back to the original question…can a PA46 engine suffer shock-cooling and should a pilot operate the engine so as to avoid shock cooling? Simply put, I’ve never seen nor heard of any piston PA46 engine suffer shock-cooling. In 5000+ hours flying the piston PA46 and 16 years of flying/managing/training in the Malibu/Mirage/Matrix, it simply has not happened to me nor anyone I know. Does it mean that it cannot happen or has never happened? No. But, it is certainly not a prolific threat to our fleet.

    Should the owner/pilot operate the engine with a cautious eye cast toward the potential of shock cooling? Well, sort of…but, let’s flesh this out. My suggestion is that a pilot should operate the engine with conservatism in movement of temperature, but only because this is a good operating practice with any machine, and any flying machine is (by definition) not “overbuilt”. And, there are many ways to change the temperature of the engine…not just by reducing power. Here’s a partial list of ways to cool your PA46 engine:

    • Reduce power: Obvious…yes. When the engine produces less power, less heat is generated. Reducing power in a piston engine will almost always result in less temperature.
    • Lower the nose: By descending (and leaving power in a cruise setting) the airspeed will increase and cool the engine.
    • Enrichen the mixture: Fuel has a cooling effect on the engine, so the richer the mixture the cooler the engine.
    • Lower the landing gear: Yes…you read that right…engine cooling will occur when you lower the landing gear because more air will flow over the cylinders. Notice the landing gear doors on the PA46 have air louvers. Air flows into the engine nacelle on the front, passes down through the cylinders (along with the oil cooler, intercoolers, and other components) and then out the louvers of the closed gear doors. When the landing gear is lowered the “back door is opened” and a LOT more airflows over the cylinders.

    My suggestion is that a pilot only perform ONE of these actions at a time when beginning a descent. This suggestion was presented to me by Chad Menne (Owner, Malibu Aerospace) some time ago and I’ve operated engines this way ever since. If you are at a higher altitude and simultaneously reduced the power, lowered the landing gear, started a big descent, and enrichened the mixture in one flail swoop, I think there’s a chance that your engine would suffer some negative effects that could be called “shock cooling”. So, when you do start a descent, pick one “cooling action” to accomplish at a time. I’m sure you’ll not hurt your engine.

    Simply put, shock cooling is not a huge factor in the PA46 community, and a PA46 pilot does not need to be overly cautious. The “one inch per minute” rule may apply in some other airframes, but in the PA46 world it is not applicable.

    Joe Casey’s aviation story began in 1990 with his first flight near Nacogdoches, TX in a Cessna 172. From lift-off, Joe knew he would have a lifetime passion flying just about anything that will leave the ground…He was completely hooked.

    Along with being an FAA Designated Pilot Examiner (DPE), Joe is an ATP/CFI-AHMG and Commercial Rotorcraft/Glider Pilot in the civilian world and also a UH-60/AH-64 Pilot-in-Command/Instructor/Examiner Pilot in the US Army Reserves.  His passion for the last 19 years, however, has been the PA-46 Malibu/Mirage/Matrix/Jetprop/Meridian. Has has amassed over 6,500 hours in various PA-46 airframes and believe it to be one of the finest flying machines available for the serious cross-country pilot with an eye for efficiency.

    Now, Joe has flown more than 12,200 hours in just about every imaginable environment. Whether providing initial/recurrent training in the PA-46’s, TBM’s, instructing in NVG’s in a UH-60 Blackhawk, flying the King Air series of airplanes, giving tailwheel endorsements, or taking kids flying for the first time, he simply loves flying machines and the people who fly them.

  • Removing a Hold on Foreflight Approach

    I’m a big fan of having my Foreflight map always match up exactly with the way I am flying. Having a Flight Stream in the airplane helps a lot with that as it always prompts me to load the new flight plan from the GPS into my Foreflight map. When I load an approach in the GPS flight plan, Foreflight will put it into my Foreflight flight plan via the Flight Stream.

    The problem I run into on Foreflight is when there is a published hold at the Initial Approach Fix (IAF), but ATC has told me to fly the straight in approach and skip the hold. Up until recently, I didn’t think there was a way to set up a straight in approach on Foreflight, so I just settled for the hold staying on there.

    Not anymore! There is a simple trick that I discovered that allows you to remove the hold from the Foreflight flight plan. Here’s how to do it.

    Load the Approach

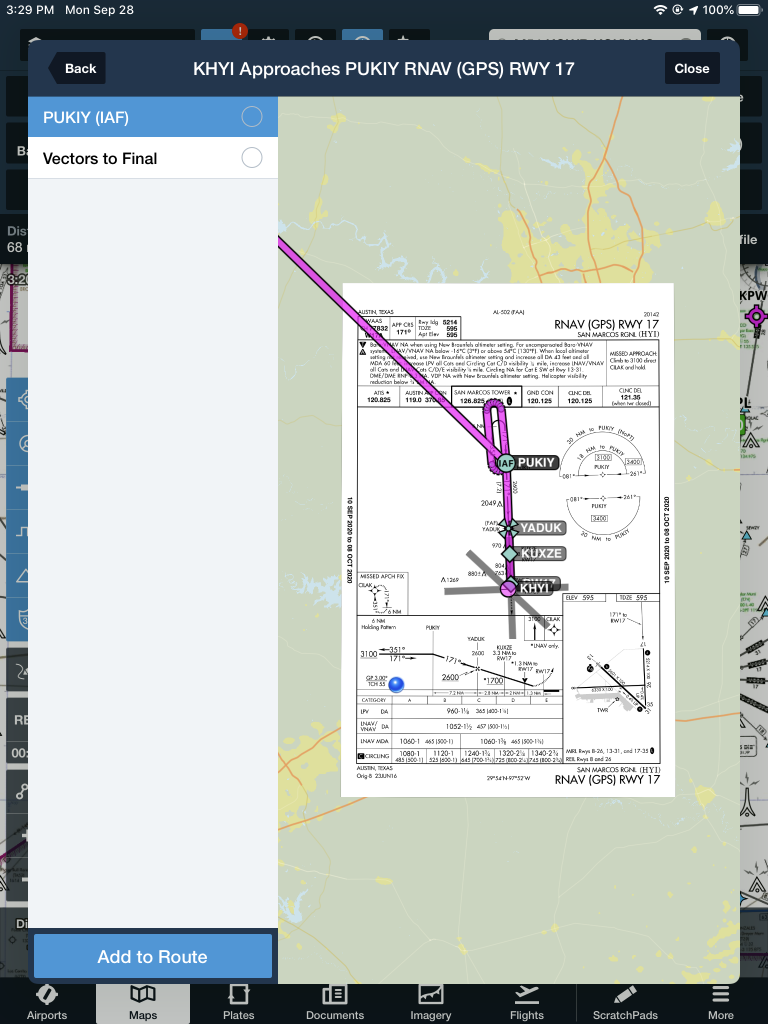
    The first step is still to load the approach into your Foreflight flight plan on the Map page. In this scenario, we are flying from KAQO, the Llano Airport, to KHYI, the San Marcos Airport. Austin Approach has told us to expect the straight in RNAV 17 KHYI via PUKIY. So, on Foreflight, we have KAQO and KHYI in our flight plan. Then, I tap the Procedures button on the upper right hand corner of the screen. I then tap Approach, then RNAV 17 KHYI. Then I select my transition.

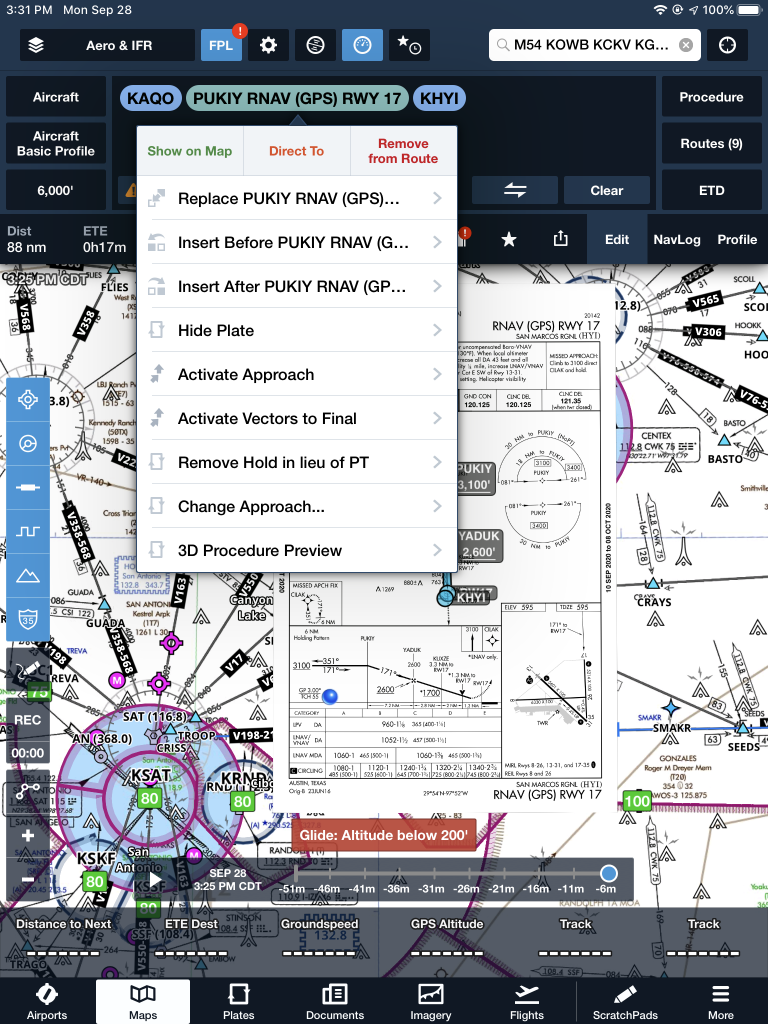
    The options given are either PUKIY with the hold, seen below;

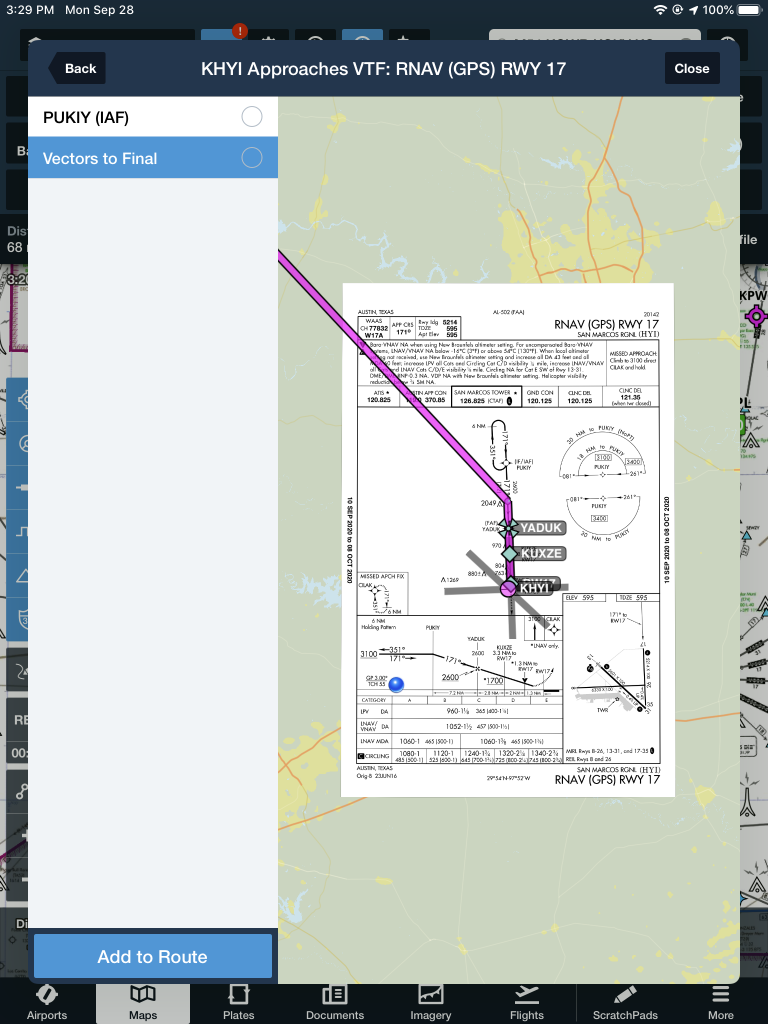
    Or Vectors to Final, which lines me up inside of PUKIY. Neither of these are what I want.

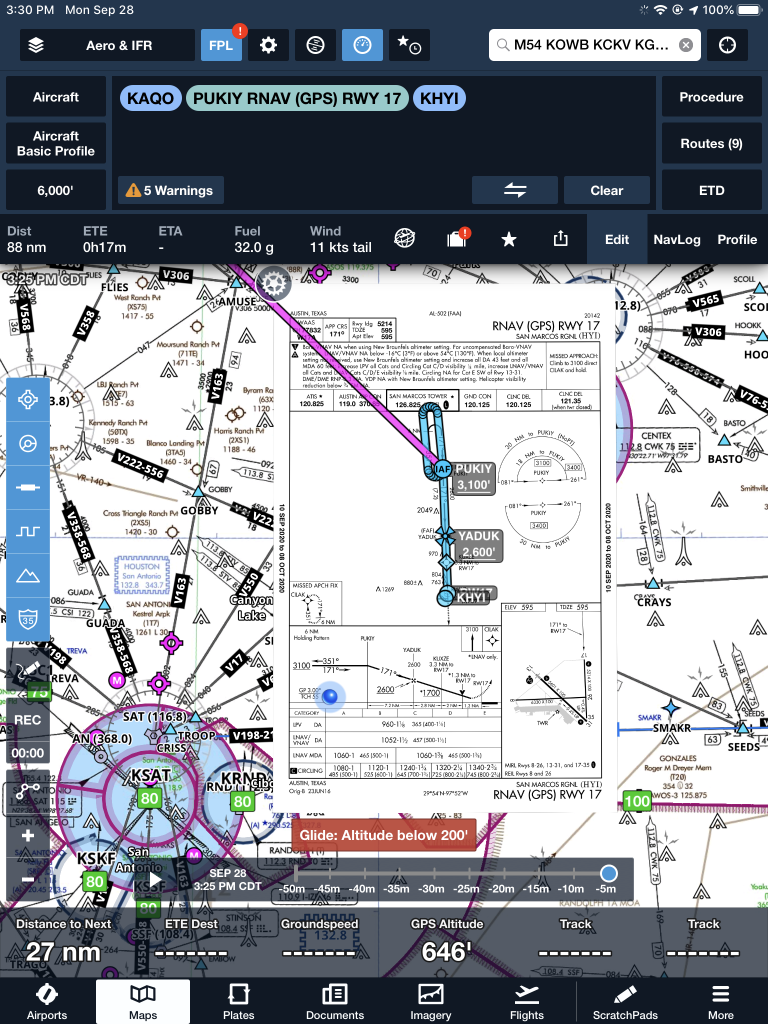
    But, to get this to work, I select PUKIY, then tap add to route. Now we have our approach loaded into our flight plan.

    Removing the Hold

    The RNAV 17 is now in the Foreflight flight plan, but the hold is displayed at PUKIY. To remove the hold, the first step is to tap the approach in green and a menu pops up.

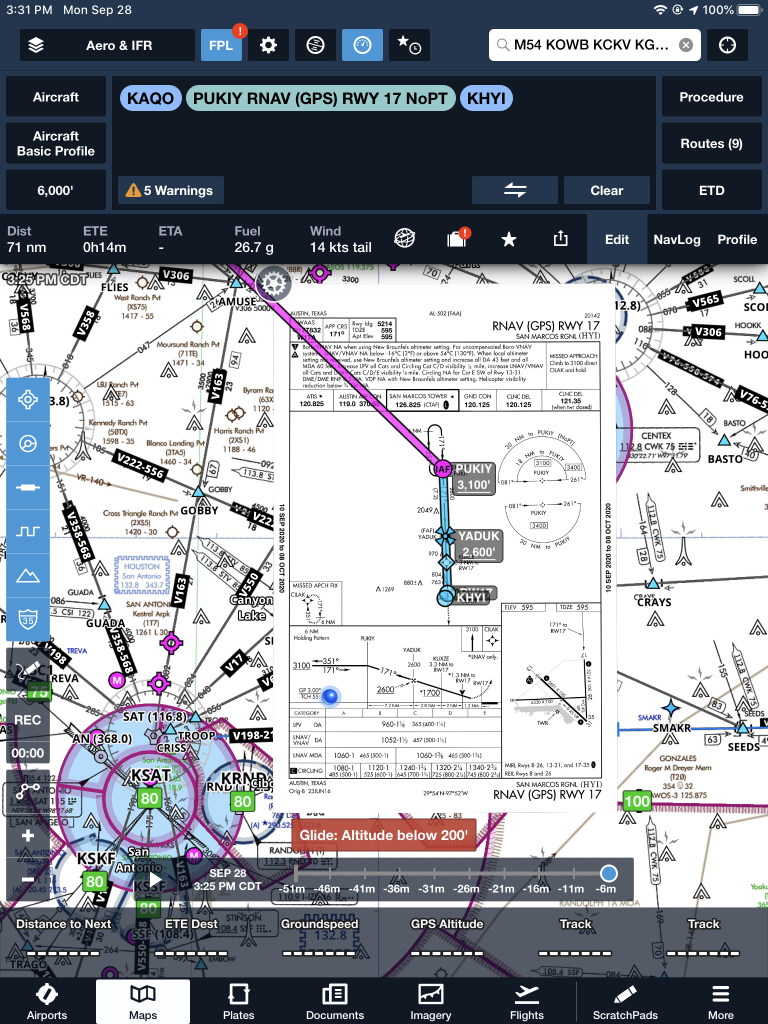
    The 7th option down is “Remove Hold in lieu of PT.” Eureka! Tap that, then the approach is displayed without the hold. Houston, we have success! It even says “NoPT” in the flight plan.

  • Non-Standard Alternate Minimums

    When filing an IFR flight plan, part of the process is determining whether or not an alternate airport is required.  An alternate airport is required when the following conditions exist(as is outlined by the FAA in 91.169 (b)):

    The weather conditions at the destination airport

    • From 1 hour before your arrival time to 1 hour after your estimated time of arrival, the weather conditions are forecast to be below
    • 2,000 Feet AGL and/or
    • 3 statute miles visibility

    Let’s paint a scenario.  You are traveling from KSAT (San Antonio International Airport) to KHBV (Jim Hogg County Airport in Hebbronville, TX).  You start to file your flight plan and get down to the space where you put your alternate in.  Since Laredo (KLRD) is the closest airport with a TAF, you check Laredo’s TAF and see that the forecast conditions there at your ETA are ceilings 1,500 and visibility of 2sm.

    Based on this information, you need an alternate airport.  Now, the process of finding one.  In Part 91.169 (c), the forecast conditions at the alternate airport must be at or above:

    • 600 Feet AGL and 2sm visibility for a precision approach, or
    • 800 Feet AGL and 2sm visibility for a non-precision approach

    Alright, now we have some guidance.  Laredo is the nearest airport to KHBV, and we know the forecast from the above TAF showing the conditions are forecast to be above the alternate minimums outlined in Part 91, so let’s pick Laredo.  All done?

    Not quite.  A lot of airports have Non-Standard Alternate Minimums.  How do you figure out if they do?  The easiest way is to look at any approach plate for the airport.  In the notes section of the government plates, there will be a black triangle with an A in it.  That means there are non-standard alternate minimums published for that airport (in layman’s terms, different than the ones stated above in Part 91).

    ILS 17R KLRD

    Now the question is, where do you find those non-standard alternate minimums?  On Foreflight:

    • Go to the Airports page
    • Tap the Procedures button
    • Tap the Arrival button
    • Tap the Alternate Minimums option

    This brings up the IFR Alternate Minimums document for all the airports with non-standard alternate minimums in that area.  Scroll through to find Laredo.

    Non-Standard Alternate Minimums

    As you can see, there are several notes there concerning the different approaches into Laredo.  For our example, we’ll say the winds are out of the south and we are planning on flying the ILS 17R if we cannot get into KHBV and have to come to Laredo.  The note there is that the Alternate Minimums for the ILS 17R are actually 700 AGL ceilings and 2sm instead of the above state 600 AGL ceilings and 2sm, the procedure is NA if the tower is closed, and NA if the local weather isn’t received.

    What does this tell us?  If the forecasted ceilings at Laredo were below 600 AGL instead of 700 AGL, we would not be able to use LRD as an alternate airport if we were planning on flying the ILS 17R.  The RNAV approaches are all fair game, so a GPS equipped aircraft would have no problem.

    On top of that, some approaches at a certain airport are not authorized to be used in the case of the airport being used as an alternate.  At the Galveston airport (KGLS), the ILS 14 is NA as an alternate procedure, but all the RNAV approaches are available.


    Picking an alternate seems simple at first, but there are actually a lot of things to consider in the process.

    Need help remember all this stuff?  AOPA has put out a kneeboard sheet that helps all IFR pilots remember those important things when it comes to IFR flying.  Check it out here.

  • Introducing…The Aviator’s Academy

    Imagine this …

    You have plans to fly to an airport 218 miles north for a business meeting. Your window is tight; you have an early morning meeting at your office you can’t miss prior to leaving for the airport. The colleagues you are flying to meet must catch another flight within two hours of your target arrival time. 

    You’re comfortable flying in the current weather conditions, but a small southward-moving storm north of your destination might threaten your approach. Additionally, given the time of day, you can expect ATC delays due to vectors and know you’ll have to adjust on the fly.

    Are you confident you can make the meeting in time?

    If the answer isn’t immediately clear, you’re not alone. Good aeronautical decision making is of utmost importance in the air. External pressures, unexpected challenges, and your level of instrument proficiency are among the many factors to consider when considering an IFR flight. 

    While we can’t remove the external pressures or control the weather, we CAN help with instrument proficiency!

    Introducing … The Aviator’s Academy – advanced online pilot training. 

    During my time training hundreds of capable and competent pilots at Texas Top Aviation, my most common observation with seasoned and rookie pilots alike is that the pilot is often aware of knowledge gaps with the airplane’s avionics after initial flight training or after upgrading to a more advanced airplane, but aren’t sure where to get answers.  Simply put – expert glass panel flight training is hard to find.

    They know enough to have earned their license, but still feel uneasy anticipating unexpected challenges. This leaves them feeling at best, uncomfortable, or worse, on edge and unsafe. When you’re not as proficient as you could be, an easy flight can become stressful quickly in unexpected scenarios, and things spiral from there. It doesn’t have to be this way.

    That’s why The Aviator’s Academy offers online courses with real-life scenarios using glass panel avionics. You’ll gain more confidence in the air and be equipped with better aeronautical decision-making skills after learning from the best in the business.

    We understand the pressures you face in the air. We get it because we have been providing expert, personalized, owner/pilot instruction since 2014 at Texas Top Aviation. With over 8000 hours of instruction given in Technically Advanced Aircraft and over 13,000 hours in total flight time, The Aviator’s Academy instructors are qualified to fly and instruct most single-engine aircraft to a level that far exceeds what a flight school can provide. Nowhere else can you get expert glass panel online instruction for Technically Advanced Aircraft.

    If you’re in need of an instrument proficiency check and fly a technically advanced aircraft with glass panel instruments, this is the place to get your ground school training. Conveniently online. Expertly taught. 

    Mastering your glass panel avionics isn’t impossible. You just need a guide. Enroll in the course you need to take your skill to the next level. You’ll receive expert, specialized online training. Then you’ll fly with confidence.

    LAUNCHING AT OSHKOSH! Visit www.aviatorsacademy.com and leave us your email to be notified when our first course drops. Come visit us at booth 3004 at Osh Kosh, July 25th-July 31st, 2022.

  • Cirrus Braking Systems: A Hot Topic

    You just bought your Cirrus SR22. You do some flying, and soon find yourself with a brake temp sticker that isn’t white anymore. You remember from your transition training that any color other than white is a no go. You now ponder…. I don’t remember getting on the brakes hard, or riding the brakes while taxiing, but sure enough they aren’t white anymore. You now start thinking that all the horrible rumors of Cirrus brakes are true. They overheat so fast!

    I would like to share some little-known facts about the Cirrus factory equipped braking system. Following the procedures below can help make the brakes last a little longer. There is also a very popular STC that allows upgraded brakes to be installed on all SR series aircraft. More to come on that.

    Notice the Top Yellow sticker is far darker than the Bottom. The Yellow temperature indicator turns at 300 Degrees, while the bottom Blue indicator turns at 330 Degrees. This is an indication to the pilot that if the bottom sticker has turned colors, that the braking system has exceeded 330 degrees and is in need of servicing.

    Above is a photograph of an SR22 G1 braking system with turned brake temp stickers. The first things you may notice is that there are in fact two brake temperature stickers. We can only see the bottom blue sticker from the inspection port on the wheel pants. The other is higher on the caliper; in order to see it, the wheel pant must be removed. This isn’t common knowledge because there is no mention of this additional indicator in the POH.

    Now you may be asking yourself, what can I do to extend the service life of my factory equipped Cirrus brakes? Here are some tips. First, always taxi at 1000 RPM and use the rudder as much as you can while only tapping the brakes. This is not fool proof, since sometimes, depending on the grade, you will have no choice but to utilize brake tapping to keep the aircraft going straight. Taxiing is not typically where the brakes get overheated, though, but this is still a good practice to follow.

    What we tend to see is that the Cleveland brakes are generally overheated on landing. We always recommend to make sure your final approach speed is not excessive, land in the first 1/3 of the runway, and let the aircraft rollout to a smooth stop. What tends to happen is that the aircraft is too fast, and the pilot tries to exit at a certain taxi way, or brakes hard and continues to ride the brakes after landing during taxi. If you do your best to avoid these habits, it will serve you well.

    This braking system remained unchanged all the way until the 2016 G5 Cirrus SR series. Starting in 2016, the factory equipped G5 and G6 Cirrus SR series all now come standard with a single piston hydraulic braking system from Beringer. The Cirrus Beringer brakes far exceed the braking power and durability of the old system. The new system is more robust, withstands heat better, and is is very well built. There is also an option for an upgraded dual caliper system to increase durability and stopping power. A braking system STC for the older Cirrus G1 through early G5 models was created to upgrade those airplanes to the better stopping power and cooling of the Cirrus Beringer brakes.

    Seen above is a page from a Beringer catalog highlighting the Cirrus SR series STC kits. Your local Cirrus service center will be able to quote prices for the kits. We have over 1000Hrs spent behind Beringer equipped Cirrus aircraft and the difference is quite apparent. The pilot has better control of the aircraft, no spongy pedal, and the confidence to get the plane stopped without possibly overheating the braking system. This, in our opinion, is one of the best upgrades you can do to your Cirrus.
    Above is what an STC upgraded braking kit from Beringer looks like, as well as the new temperature indicator for the pre/post flight inspection. Notice the black spot on the left hand picture. These brakes have been overheated.

    One other difference for a pilot to note is that once upgraded to the Cirrus Beringer brakes, there is only one temperature indicator and it changes color at a whopping 450 Degrees Fahrenheit! Needless to say, it can handle some heat! The new temperature indicator is now Orange in color and turns grey/black when overheated.

    On the left are the original Cirrus factory brakes. On the right is the caliper to the new Beringer brakes for a Cirrus.
    Dual Caliper Cirrus Beringer Brakes

    The Cirrus Beringer brakes upgrade is quite a step up in the world of slowing down. However, this doesn’t mean that they are completely issue free. There is one little-known problem with Beringer brakes that is not that big of a deal and can be fixed with relative ease.

    The rotor on the Beringer braking systems is “free floating,” meaning it is not necessarily “fixed” in position when secured down to the spindle. It is “keyed” into the wheel rim with the male and female side interlocking.

    The brakes occasionally will get noisy, causing a “knocking” noise when brakes are applied. This noise is caused by the small metal tabs that tighten up the space between the wheel and the brake rotor. This is so the small tabs wear with use instead of the aluminum rim that they are fixed to. So, if your Beringers are making a knocking noise when brakes applied, this is most likely your culprit.

    These gaps above are the “keyed” position where the rotor finds home in the rim. Without these tabs that wear with use, we would be replacing the rim more often than the much cheaper replaceable tabs.

    It is highly recommended to upgrade your original Cirrus factory brakes to the new Beringer braking system. You will deal with less maintenance, less chance of a brake overheat, and less confusion on whether or not your brakes are airworthy. For more info, you can check out the Cirrus website for the single or dual caliper Beringer brakes.


    Zach Anderson is a Cirrus Standardized Instructor Pilot (CSIP) for Texas Top Aviation. Zach comes from a auto mechanic background and is very familiar with the ins and outs of maintenance. He started working for Texas Top Aviation in December 2020.

Leave a Reply

Your email address will not be published. Required fields are marked *