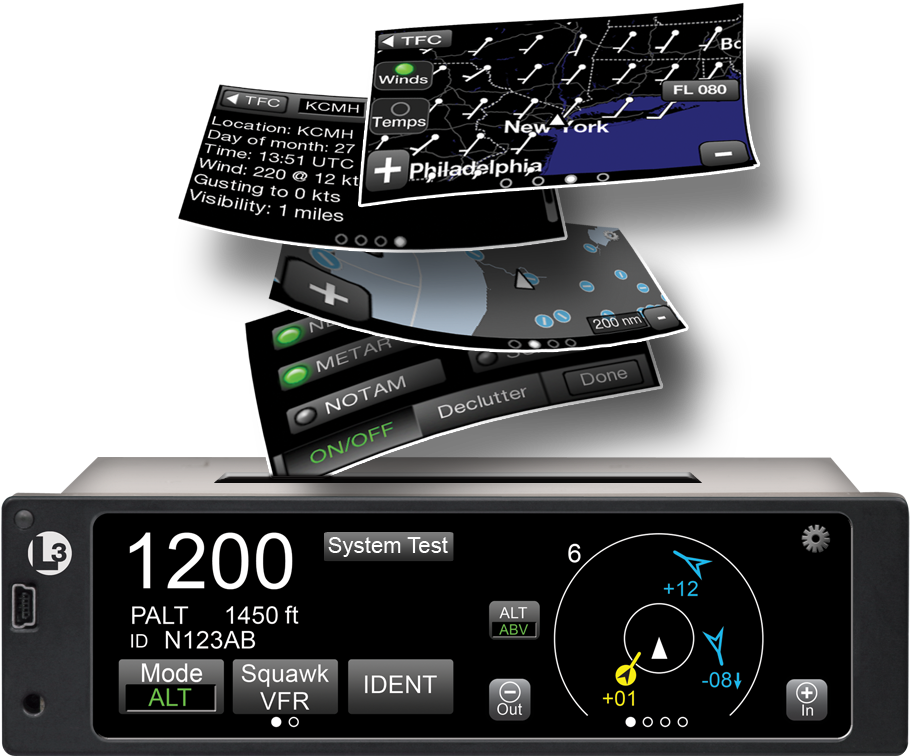
L-3 has jumped into the ADS-B transponder game with their Lynx line of products. Aircraft owners have a myriad of options with the Lynx line, from simply becoming ADS-B compliant with the NGT-1000 ($2,100, with ADS-B out that works with the GTX 327 and GTX 330), or going all in with the NGT-9000 touch screen transponder complete with ADS-B In, a traffic screen and NEXRAD ($6,800).
The NGT 1000/2000/2500 line works with the existing transponder in the airplane (as long as it’s a Garmin GTX 327 or 330). The 2000 gives ADS-B In capability, allowing the pilot to access NEXRAD and traffic, plus has a Wifi source to broadcast all the information to an iPad. The 2500 includes all of that, plus gives the pilot MFD capability as well. An optional control panel is available if the airplane is not equipped with one of the aforementioned Garmin transponders.
The L-3 Lynx NGT-9000 is an actual transponder replacement. It is a touch screen device that has a multitude of ADS-B features that, quite frankly, are really cool on a transponder. The ADS-B traffic is displayed on the unit itself and can also be sent, via the optional Wifi connection, to an iPad on the WingXPro or SkyRadar apps. The optional L-3 NextGen Active Traffic can also be installed to receive traffic callouts (this does not include resolution advisories). Already have SkyWatch? The L-3 Lynx can use the equipment.
The L-3 Lynx NGT-9000 is also capable of displaying NEXRAD as well as METARs, TAFs, NOTAMs, and TFRs and a myriad of other weather products, all on it’s moving map. It seems that L-3 has taken the transponder and turned it into something awesome.
To read more about the L-3 Lynx line of transponders, you can visit their website.
When a pilot thinks of an engine runup in a single engine piston airplane, typically it is let’s find out if the engine is running rough or not, meaning a spark plug is fouled. Believe it or not, there is a little more to learn from a runup than just checking the spark plugs.
A distinct advantage to having an engine monitor that monitors all EGTs and CHTs is you get a better idea of engine health. When switching to one magneto or the other during the runup, all the EGTs should rise, showing that the temperature of the exhaust gas is going up from each cylinder. This occurs because when running on only one magneto and one set of spark plugs in each cylinder, the mixture takes longer to burn, so, when the exhaust valve in the cylinder opens, the burn is still on going and this hits the EGT probe, causing a temperature rise. An indication of a magneto failure in flight would be a rise in all the cylinders EGT without a change in mixture setting.
Now that we know what to look for when checking each magneto, what would one look for to show that there is a problem? The basic that each student pilot is taught still applies. The engine manufacturer puts a limit on RPM drop during the runup. When checking one magneto or the other, watch for an excessive RPM drop. If the RPM drops past the limit, this usually will be accompanied by engine roughness.
Why is that? Let’s look at the cause for the excessive RPM drop. For this, we need to go back to our EGT indicators. Let’s say we have a 6 cylinder engine. When the key is turned to the right magneto, the RPM drops 250 RPM and the engine gets very rough. Look at the EGT gauge. The cylinders where the spark plugs are firing normally will all show a temperature. The cylinder (or cylinders) where there is no combustion, meaning a bad plug, will show no temperature. This is because the mixture is just sitting in the cylinder and not igniting, therefore, no exhaust gases will be pushed out so there will be no EGT indication for that cylinder. This is also how you tell a mechanic which cylinder to check for the bad plug.
It could also be a bad magneto. If multiple cylinders EGT all drop, or the engine wants to quit entirely, you have a bad magneto or bad ignition harness.
What else can you learn during the runup? Electrical system health is key, especially in all electric airplanes (meaning no vacuum system). It’s a very good idea to turn on all the lights and pitot heat to ensure that a rise is indicated on the ammeter. This means the alternator is carrying the load and working properly.
The next time you do your runup, keep an eye on your EGT to see the rise during a magneto check.
One evening this summer, my wife and I were flying down the southern shore of Long Island in my father’s E33 Bonanza. We enjoyed the sunset as we flew westbound and our plan was to fly the New York Hudson corridor, where we would arrive just after dark. As we approached New York’s airspace, two voices in my head started having a debate.
The first voice said: “You should turn on your landing light when you get to New York to make the airplane more visible.”
The other voice said: “That’s true, but I bet you’ll burn the landing light out”
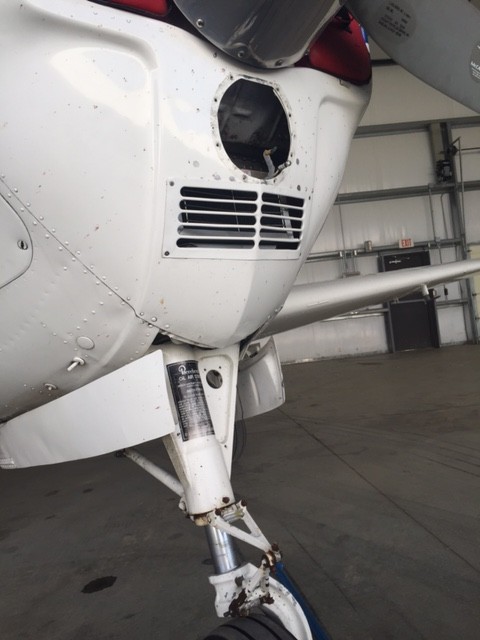
Well, as it turned out, both voices were right. My landing light fired right up when I needed it to fly the Hudson, but when it came time to land back home I had no such luck. Unfortunately, this was not the first time that I had been given the chance to practice my blackout landings. This Bonanza model has only one landing/ taxi light which is mounted in the lower cowling behind the propeller. This location is less than ideal because the filament in the bulb is fragile and can be damaged by engine vibration.
We landed uneventfully and after putting the airplane away, I decided it was time to look into upgrading the lighting to something a little more modern. I was unsure of my options, but seeing as the airplane needed a replacement bulb regardless, it seemed like a good opportunity to make a change.
After doing a little reading, I learned that HID or LED landing lights would be the best solution to my problem. I was familiar with LED aircraft lights, but had never heard of HID before.
Here is what I learned:
HID Landing Lights
HID, or High Intensity Discharge landing lights, create light by arcing electricity through a sealed gas capsule. They are brighter than LED and traditional incandescent, and the light created more closely resembles the look and feel of sunlight. HID installations require a ballast to carefully regulate the flow of electricity to the gas capsule and also require a “warm up” period after being turned on in order to reach their full brightness.
Fitting an aircraft with HID landing lights tends to be more expensive and time consuming than installing an LED light and would likely require involvement by an A&P/ IA. However, if you want the brightest light available, HID is probably the best bet.
Pros
Brighter, more natural looking light
Draws less power than standard bulbs
Long bulb life
Does not generate much heat
Cons
More expensive than other lighting options
Lights must “warm up” after being turned on
Cannot be pulsed easily
Cost/complexity of installations
LED Landing Lights
LED, or Light Emitting Diode landing lights, have no filament and work by moving electricity through diodes which are connected into a circuit. These lights have become very popular for many uses due to their simplicity, low cost, and brightness.
While not as bright as HID light, the LED lights require no “warm up period” and can be easily pulsed. LED lights draw much less power from the aircraft’s electrical system than traditional bulbs and boast incredible life length. LED bulb installation is very simple and can often serve as a direct replacement for the original lights.
Pros
Instant light (no warm up)
Incredible life length (>5,000 hours)
Low Cost
Simplicity of installation
Can be pulsed easily
Low power draw
Cons
Not as bright as HID lighting
After weighing the options, I decided to replace the incandescent bulb in the Bonanza with an LED bulb. I read the reviews online and talked to some of my friends who work in aviation and eventually decided on the Lycoming Alphabeam. The Alphabeam is FAA/PMA approved and is available through Aircraft Spruce and other aviation parts vendors. The bulb cost around 250-300 dollars and I was able to install it as a direct replacement for our old light. All I had to do was take the old one out, put the new one in, and make a logbook entry.
Below are some pictures of the installation:
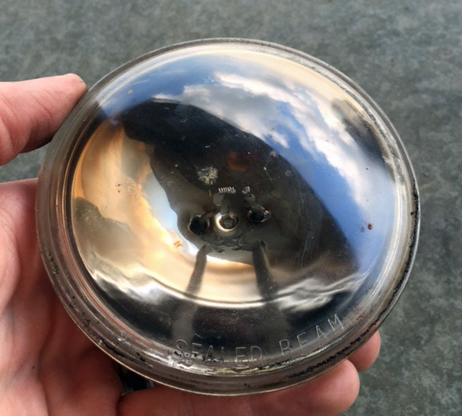
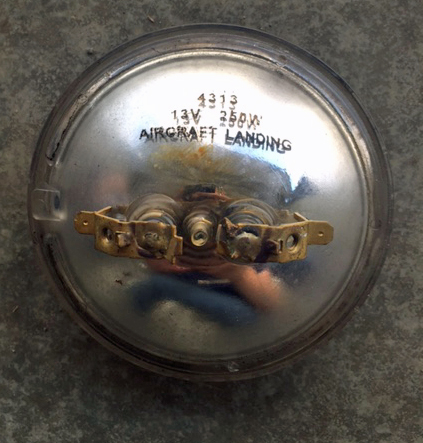
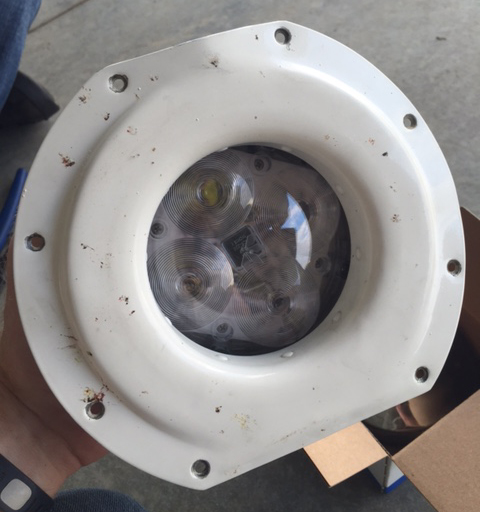
After removing the old bulb, I double checked the information on the back to be sure I ordered the correct LED replacement.
You can see that the bulb is a 13V, 250W landing light, #4313.
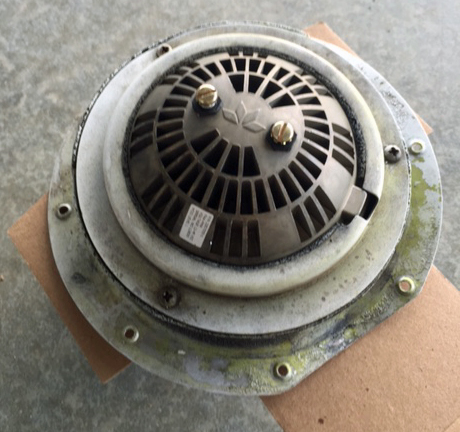
The new light mounted easily into the existing bracket with no modification.
After mounting the new bulb, I reconnected the wiring and installed the bracket back into the nose bowl.
It works!
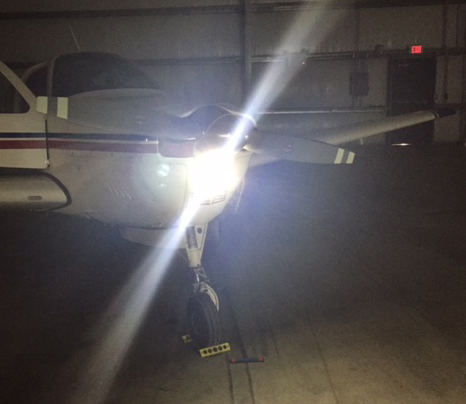
Last weekend I finally had an opportunity to take the airplane out after dark and see how the new light compared to the old one. I am pleased to say that it did a wonderful job and exceeded my expectations.
If you are interested in seeing a side by side comparison of the different lighting options, a quick Google search should provide what you are looking for. In my own experience, I would say that the LED light was brighter than the old light and did a very good job illuminating the taxiway and runway. It was extremely nice not to be concerned that my light wouldn’t work as I was setting up for landing at an unfamiliar field after dark. I also enjoyed feeling that I had the option to leave it on during climb and cruise in order to increase my visibility to other aircraft.
Many models of aircraft have multiple landing/ taxi lights installed which greatly reduces the likelihood of having to land without one. In our case, spending the extra money to upgrade to the LED bulb made sense because of the desire for increased reliability. If you are looking for a relatively inexpensive way to upgrade your airplane, LED or HID lighting may be something to consider.
Andrew Robinson is a 135 Charter Pilot and flight instructor who lives with his wife and 2 daughters in Pennsylvania. He flies Pilatus PC-12s and instructs in Beechcraft Bonanzas.
A brand-new event for Lancair owners, the 2018 Great American Lancair Rally will be a multi-stage “grand tour” of the Western US. Starting and ending in Central Texas, the Rally will take place September 24th through October 5th 2018.
The Rally will begin in Uvalde, TX (KUVA) on September 24th at the Lancair headquarters. There will be 6 legs, with stops at:
Sedona, Arizona (KSEZ)
Paso Robles, California (KPRB)
Redmond, Oregon (KRDM)
Spanish Fork, Utah (KSPK)
Taos, New Mexico (KSKX)
San Marcos, TX (KHYI)
At each stop, there will be food, drinks, and fun for everyone.
Lancair plans on making instructors available to pilots who would like any kind of training along the way. Hank Gibson from Texas Top Aviation will be one of the instructors available.
Lancair plan to make the Great American Lancair Rally an annual event, with the 2019 Rally spanning the eastern half of the country.
The Great American Lancair Rally is open to all Lancair owners, potential owners and interested aviators. Fly a different airplane? All makes and models are welcome!
For more information & to register, check out the 2018 Great American Lancair Rally’s website.
This is Part 2 of the Proper Cross Country Flight Checklist article. To read Part 1, click here.
Airplane Covers
If you’re going to be leaving your airplane outside at your destination, make sure you have proper covers and plugs to protect it while you are gone. A friend of mine forgot to put his pitot cover on his airplane while it was parked outside and had his departure delayed because of a mud dauber which had moved in while the airplane sat on the ramp.
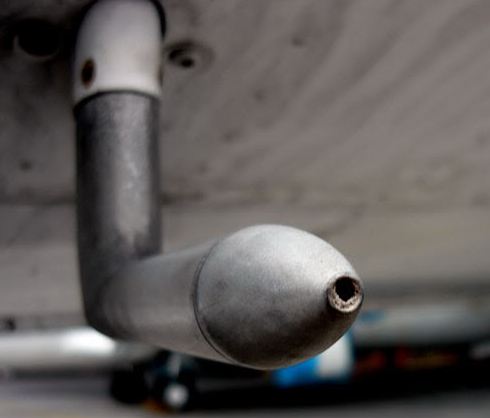
An example of a pitot tube blockage taken from www.student-pilots.com
Tie-Down Ropes
Depending on your destination airport/FBO, there may or may not be tie down ropes available on the ramp. It isn’t uncommon for there to be tie down loops, but no ropes. I generally try to carry a set of ropes in the airplane and even my own set of chocks. If you are going to a fly-in or landing at a private strip, steaks with tie down ropes can be very useful as well. Don’t forget to take your ropes and chocks with you when you leave, though. Ropes and chocks which are left unattended can cause problems for airport machinery (plows) and other airplanes.
Paper and a Pen
Back to basics! Don’t forget to bring a pen/ pencil and something to write on to keep track of clearances and frequencies.
EAPIS/ Boarder Crossing Procedures
If you are planning to fly across the U.S. Border, you will need to have filed the proper paperwork and make sure to bring along your passport/greencard. If you want to fly into Canada everyone on board the airplane is required to have a passport.
Basic Tools
You never know when you may need a screwdriver or some pliers. Having a small toolbox which you can throw in the airplane could be a life saver.
GPS
If you have a GPS, make sure that your data base is up to date.
Camera
Pretty self explanatory…but, don’t forget the camera charger!
Currency
Look through your pilot logbook and the airplane logbook and make sure that everything is up to date. If you need to get an IPC or a BFR done before you leave, give yourself some buffer time in case you have to reschedule.
Other Considerations
Sometimes it makes sense to go to a larger airport despite having to pay additional fees and higher gas prices. Often, if I am traveling at night or after regular business hours, it is worth the extra expense to know that there will be assistance available should I need it. It also isn’t always necessary to get a hotel…there are airports such as Noble County, Ohio (I10) that have beautiful campsites available on the airport. If you like camping, it can be a fun alternative to shelling out the cash for a hotel and rental car.
Camping out next to the airplane can be a fun way to spend the night.
Finally, I like to take the airplane out for a short flight and make sure that everything is working properly before I bring the family and get everything loaded up. (Plus, it’s a perfect excuse to go for a little joyride.) I’d much rather find out that the battery is dead or the plugs are fouled when I have time to fix the issues. If possible, do your test flight on a day when your maintenance shop is open so you can get any problems addressed immediately. If you haven’t done much cross country flying or if you are a little rusty, ask a flight instructor or another pilot to look over your planning. There is also nothing wrong with having an instructor or experienced friend come along on the first few trips until you become more comfortable doing it on your own.
An approach into Farmer’s Cay in the Bahamas.
In my opinion, cross country flying is one of the most rewarding things a pilot can do with their certificate. The view available from the window of a general aviation airplane is so different than the one you get out the window of a car or a commercial airliner. If you’re willing to invest the time and money, you’ll get a lot more out of your trip than a few hours in your logbook. So, what are you waiting for….haven’t you always wanted to go to Oshkosh?
Andrew Robinson is a 135 Charter Pilot and flight instructor who lives with his wife and 2 daughters in Pennsylvania. He flies Pilatus PC-12s and instructs in Beechcraft Bonanzas.
When a pilot first glances at the title of this article, the first thought that probably goes through that pilot’s head is, well that’s easy.
And it is, if you are flying a high wing Cessna. On other airplanes, there are a few tricks to checking the stall warning horn. If you get them wrong, you’re liable to get a bill from your maintenance shop for an hour of labor for a problem they couldn’t duplicate.
Cirrus SR22
Let’s start with the Cirrus. On the pre-FIKI Cirrus aircraft, there was a small little hole in the wing that contained a diaphragm. That diaphragm sensed a change in airflow at a certain angle of attack just below the critical angle of attack and set off the stall warning horn. Unfortunately, the only way to check that is to suck on the hole during pre-flight.
I don’t. I verify the hole is clear and that’s about it.
On the FIKI Cirrus aircraft, there is actually a stall warning vane. It looks like a high wing Cessna vane, but if you turn the batteries on and try and get it to come on during your light and pitot heat check, nada.
Here’s the trick, and the checklist doesn’t do a good job of describing this.
Turn on the Avionics Master
Turn on the speaker
Put the flaps to full
Then move the stall warning vane and you’ll hear the horn
The speaker and the Avionics Master are so you can actually hear the horn (if you had the headset on while you were doing this, the speaker would be unnecessary). The flaps have to be full because the pitch attitude for the critical angle of attack is lower with the flaps down, so the horn goes off when at a different angle. You then don’t have to use as much force to push the vane.
Piper PA46
The early -310P Malibus are pretty simple and straight forward. Move the vane, get the horn.
In the -350P, you can’t get the horn to come on by moving the vane. So, Piper put a stall test button that’s hidden underneath the upper left side of the instrument panel. Push that to test the horn. On the G1000 PA46, it is located directly above the PFD. On the Avidyne, it’s below and to the left of the pilot’s yoke.
Testing the stall warning horn is a very important part of pre-flight. A pilot needs to know if the aircraft is close to a stall. The advent of Angle of Attack indicators in small, GA aircraft, have added a greater awareness to the angle of attack during all phases of flight to avoid those stall spins.
If the stall warning horn goes off or the AOA shows yellow, lower that nose immediately.
Texas Top Aviation has added a new member to our instructing team. Stephanie Mertz was hired in March 2019 and will be specializing in G1000 & Instrument instruction.
Stephanie graduated from LeTourneau University in Longview, Texas with a degree in Aeronautical Science, earning her commercial single and multi ratings while there. She began her aviation career in Ontario, California flying a Pilatus PC-12 for charter and medical trips. While operating the PC-12, she gained valuable experience flying all over the US and Mexico.
In 2013, Stephanie moved back to East Texas with her husband where she worked as a contract pilot flying a variety of Citations as well as a Falcon 10. A few years later, she became involved in her local Ninety-Nines chapter and joined their mentorship program.
After earning her CFI, CFII, and MEI, Stephanie returned to her alma mater to pass on her flying passions to college students through flight instructing. After a year of teaching at LeTourneau, she and her husband, with their first baby in tow, moved to the Austin area. Now she is instructing with Texas Top Aviation while acting as a mentor for other women working on achieving their flying dreams.