Landing Light Replacement

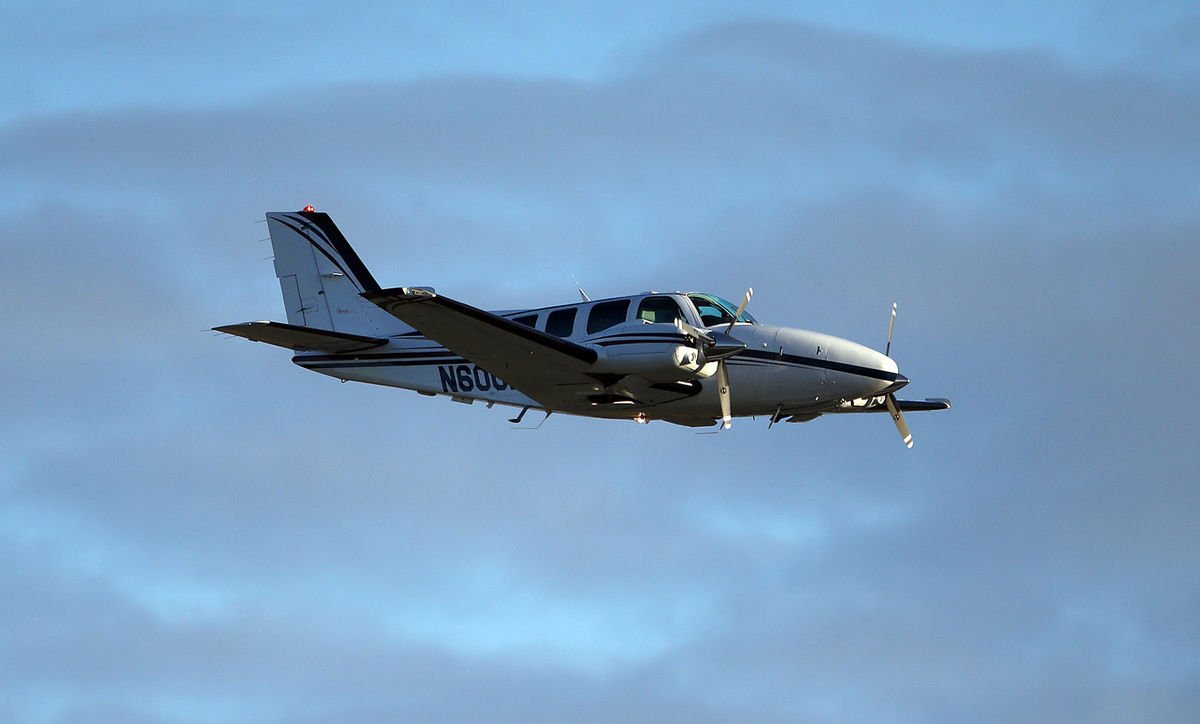
One evening this summer, my wife and I were flying down the southern shore of Long Island in my father’s E33 Bonanza. We enjoyed the sunset as we flew westbound and our plan was to fly the New York Hudson corridor, where we would arrive just after dark. As we approached New York’s airspace, two voices in my head started having a debate.

The first voice said: “You should turn on your landing light when you get to New York to make the airplane more visible.”

The other voice said: “That’s true, but I bet you’ll burn the landing light out”

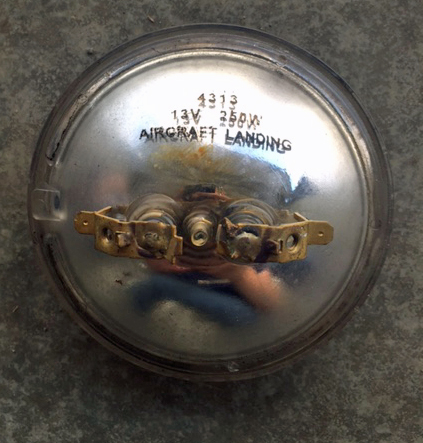
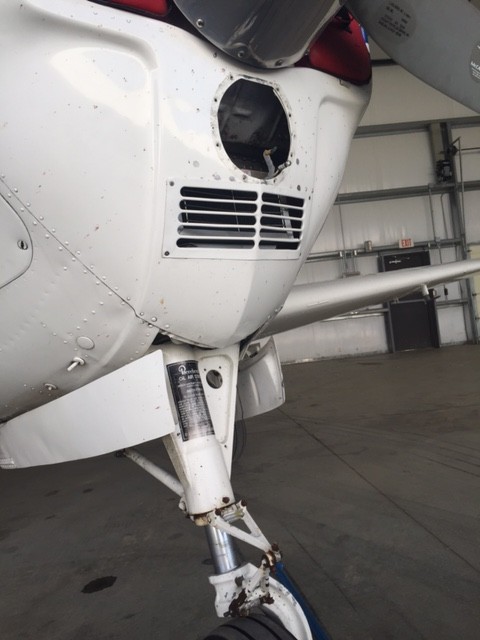
Well, as it turned out, both voices were right. My landing light fired right up when I needed it to fly the Hudson, but when it came time to land back home I had no such luck. Unfortunately, this was not the first time that I had been given the chance to practice my blackout landings. This Bonanza model has only one landing/ taxi light which is mounted in the lower cowling behind the propeller. This location is less than ideal because the filament in the bulb is fragile and can be damaged by engine vibration.

We landed uneventfully and after putting the airplane away, I decided it was time to look into upgrading the lighting to something a little more modern. I was unsure of my options, but seeing as the airplane needed a replacement bulb regardless, it seemed like a good opportunity to make a change.

After doing a little reading, I learned that HID or LED landing lights would be the best solution to my problem. I was familiar with LED aircraft lights, but had never heard of HID before.

Here is what I learned:

HID Landing Lights

HID, or High Intensity Discharge landing lights, create light by arcing electricity through a sealed gas capsule. They are brighter than LED and traditional incandescent, and the light created more closely resembles the look and feel of sunlight. HID installations require a ballast to carefully regulate the flow of electricity to the gas capsule and also require a “warm up” period after being turned on in order to reach their full brightness.

Fitting an aircraft with HID landing lights tends to be more expensive and time consuming than installing an LED light and would likely require involvement by an A&P/ IA. However, if you want the brightest light available, HID is probably the best bet.

Pros

  • Brighter, more natural looking light
  • Draws less power than standard bulbs
  • Long bulb life
  • Does not generate much heat

Cons

  • More expensive than other lighting options
  • Lights must “warm up” after being turned on
  • Cannot be pulsed easily
  • Cost/complexity of installations

LED Landing Lights

LED, or Light Emitting Diode landing lights, have no filament and work by moving electricity through diodes which are connected into a circuit. These lights have become very popular for many uses due to their simplicity, low cost, and brightness.

While not as bright as HID light, the LED lights require no “warm up period” and can be easily pulsed. LED lights draw much less power from the aircraft’s electrical system than traditional bulbs and boast incredible life length. LED bulb installation is very simple and can often serve as a direct replacement for the original lights.

Pros

  • Instant light (no warm up)
  • Incredible life length (>5,000 hours)
  • Low Cost
  • Simplicity of installation
  • Can be pulsed easily
  • Low power draw

Cons

  • Not as bright as HID lighting


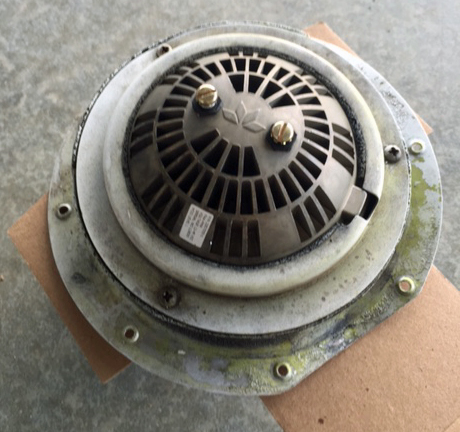
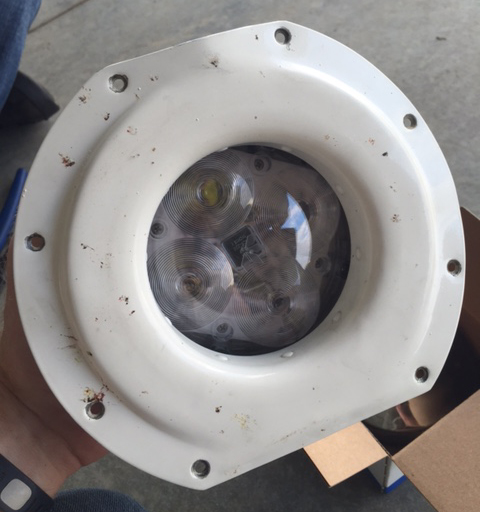
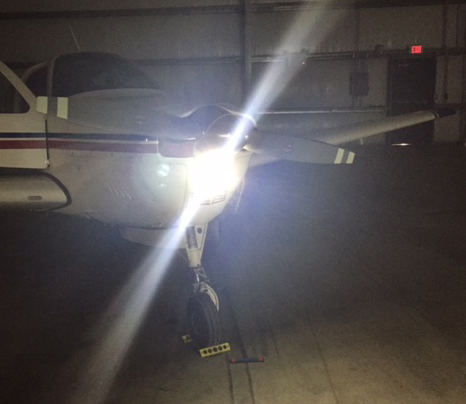
After weighing the options, I decided to replace the incandescent bulb in the Bonanza with an LED bulb. I read the reviews online and talked to some of my friends who work in aviation and eventually decided on the Lycoming Alphabeam. The Alphabeam is FAA/PMA approved and is available through Aircraft Spruce and other aviation parts vendors. The bulb cost around 250-300 dollars and I was able to install it as a direct replacement for our old light. All I had to do was take the old one out, put the new one in, and make a logbook entry.

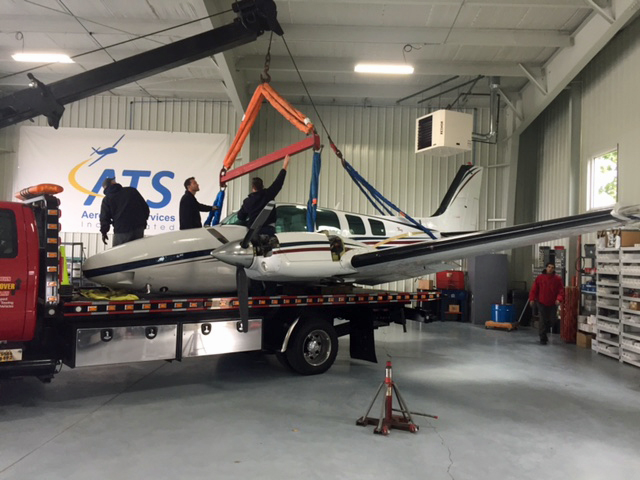
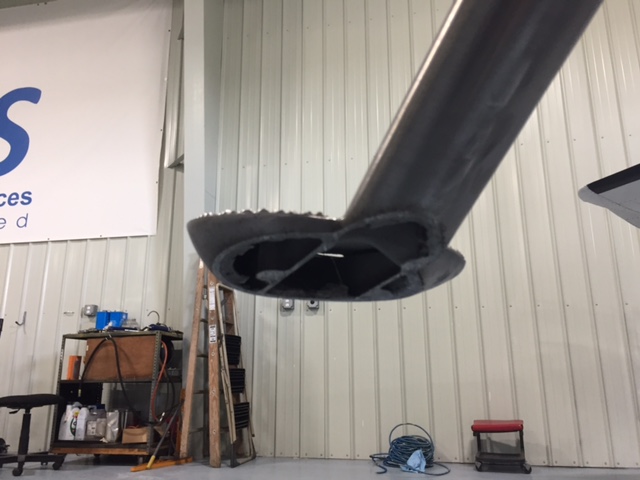
Below are some pictures of the installation:
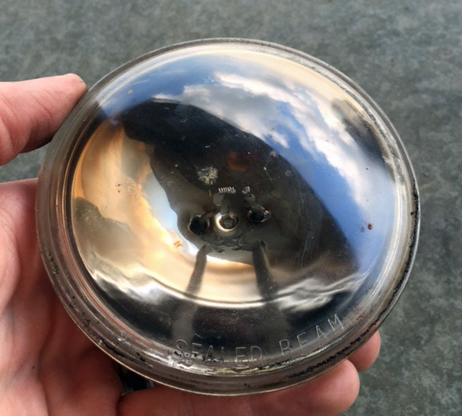
Last weekend I finally had an opportunity to take the airplane out after dark and see how the new light compared to the old one. I am pleased to say that it did a wonderful job and exceeded my expectations.

If you are interested in seeing a side by side comparison of the different lighting options, a quick Google search should provide what you are looking for. In my own experience, I would say that the LED light was brighter than the old light and did a very good job illuminating the taxiway and runway. It was extremely nice not to be concerned that my light wouldn’t work as I was setting up for landing at an unfamiliar field after dark. I also enjoyed feeling that I had the option to leave it on during climb and cruise in order to increase my visibility to other aircraft.

Many models of aircraft have multiple landing/ taxi lights installed which greatly reduces the likelihood of having to land without one. In our case, spending the extra money to upgrade to the LED bulb made sense because of the desire for increased reliability. If you are looking for a relatively inexpensive way to upgrade your airplane, LED or HID lighting may be something to consider.

Andrew Robinson is a 135 Charter Pilot and flight instructor who lives with his wife and 2 daughters in Pennsylvania.  He flies Pilatus PC-12s and instructs in Beechcraft Bonanzas.

Similar Posts

  • Oh, Deer (Part 2)

    Read Part 1 Here

    Only now did I begin to realize the severity of the situation. The deer had completely broken the left main gear off of the airplane. Obviously, landing in this condition would not be ideal. Landing without a nose wheel is one thing, but landing without one of the mains would be a very dangerous and undesirable proposition.

    The company’s maintenance guys arrived on the scene while I executed a few more low passes so that they could take a look. We all came to the same conclusion that the best situation for landing would be to retract the other two wheels so I could land on the belly. Unfortunately, the landing gear wouldn’t retract. Cranking the emergency gear handle didn’t work either as it is not designed to bring the wheels up, only to put them down.

    I flew circles around the airport for a while as different options were all discussed. I owe a lot to the guys on the ground who were digging through the manuals coming up with solutions. Eventually, it was decided that I would try cranking the gear up by hand, even though the checklist in the airplane said that it could only be used to lower the gear. Even if we damaged the hand cranking mechanism, it would be worthwhile…plus, I’d already torn off the left main entirely, surely a little damage to the retraction mechanism wouldn’t be the end of the world!

    Following the checklist, I pulled the CB for the gear motor and started cranking. To my great relief, the “in transit” light illuminated and the three green indication went away. It was difficult work to crank the gear up manually. The handle is in a very poor location in Barons and Bonanzas, plus I was working against gravity. It is also possible that there was some debris from the missing wheel causing friction or binding. While I was cranking, the rescue crews were being coordinated while extra vehicles and people had been called in from the city for support.

    After some time had passed, enough to get a slightly sore arm from cranking, the lights indicated that the gear was up and locked. I lined up for one more pass hoping to verify that the landing gear was up and the landing gear doors were closed. After the final go ahead from everyone on the ground, all that was left was the landing.

    I had been doing my best to keep the passengers informed of what was happening throughout the whole flight, but I felt bad for them as the news changed from the beginning of the flight: “precautionary landing” was quite different than the briefing I ended up giving them before we landed. I informed them that I was going to be “… killing the engines and landing with the gear up….” They did an impressive job of staying calm and being responsive. Before we landed, I made sure that they were all briefed on what to expect, how to unbuckle, and how to evacuate from the airplane. It is difficult to convince someone that everything is going to be fine when there are hordes of emergency vehicles (including ambulances) waiting next to the runway in anticipation of your landing.

    Shortly before landing, I went through my flows and callouts, then verified by use of the checklist to ensure I hadn’t missed anything. I distinctly remember sitting in the airplane preparing for the landing, all the while being in complete disbelief that this was a real situation. I never imagined that I could be flying an airplane that was missing a wheel strut. Previously, my assumption had been that if there was an event serious enough to shear off one of my mains, the airplane wouldn’t continue flying. It all seemed like a bad dream.

    I elected to use runway 26 since it was the longest. I wanted to be able to carry extra speed in order to give myself extra time between pulling the mixtures and landing so that I could feather the props and turn the fuel shut off valves to the off position (never thought I’d have to do that!) without being rushed. As I made my final approach with the engines shut off, I went through my final memory items and couldn’t help but laugh about just how backwards everything was from normal arrival procedure. GUMPS: Gas- Off (normally on the fullest tank), Under carriage- Up (Definitely not normal), Mixtures- Idle cut off (I normally save this for when I’m parked on the ramp), Props- Feathered (Again, never thought I’d have to do that in real life), Seatbelts- On (the only one that stayed the same!).

    On final approach for runway 26 with the gear up and the props feathered.
    Photo Credit: www.lancasteronline.com

    I’ve had several remarks about how quiet the airplane must have been during the final un-powered glide to the runway, and while that is absolutely true, I must confess that I never noticed. I was so focused on the task at hand that the silence in the airplane simply wasn’t something that stuck out to me. What did make an impression on me, however, was the acceleration the airplane experienced when the props were feathered. I’ve heard it preached many times the importance of feathering the propeller on a dead engine, but never truly appreciated the importance of it until I did it myself. I remember the airplane accelerating noticeably as though I had hit a boost button which was hidden somewhere in the cockpit for just such an occasion.

    Although I didn’t notice the lack of noise upon killing the engines, the sickening, deafening noise which was produced during the touchdown and deceleration is something which I will never forget. Another thing that surprised me was the smoke which filled the cockpit and cabin as we slowed down. This was produced by the friction between the belly and the runway, although nothing was burning.

    I don’t know how long the airplane actually slid for after touching down, but it felt like an eternity. However, when the noise subsided and the motion stopped everything returned to real time. I unfastened my seat belt, opened the door and climbed out onto the wing. I helped the passengers evacuate and we retreated to a safe distance on the side of the runway while the firefighters rushed in to do their job.

    It was 8:35 am. So, from the time we took off to the time we landed was almost exactly an hour and a half. Not surprisingly, the passengers elected not to continue on to Pittsburgh and instead accepted a ride home in a car. The rest of my day was a blur of paperwork, reports, and phone calls.

    To Be Continued…

    Read Part 3 Here

    Andrew Robinson is an airline pilot for Piedmont Airlines.  He is a former 135 Charter Pilot and flight instructor who lives with his wife and 2 daughters in Pennsylvania.  He instructs in Beechcraft Bonanzas.
  • Texas Top Aviation at the AOPA Fly-In

    Where were you on April 26th?

    AOPA Fly In LogoTexas Top Aviation was at the AOPA Regional Fly-In at the San Marcos Regional Airport (KHYI).  If you weren’t there, you certainly missed out spending time with 2,500 other airplane and flying enthusiasts!

    The day began somewhat gloomy and windy with the threat of rain.  Organizers feared that weather would keep a lot of people from coming.  Boy, were they wrong!

    There were many classic airplanes, many modern and pretty nicely equipped airplanes, and everything in between.  There were aviation celebrities, Rod Machado and the Kings of King Schools fame, to name a few.  Not to mention the fabulous BBQ!

    N132BBTexas Top Aviation had several drawings for free training and 3 lucky winners.  We also had a Lancair Super ES for sale, N132BB (which made the San Marcos Record newspaper!). It definitely stood out with it’s unique paint job.  The flames on the tail drew many oohs and aahs.

    Departing the San Marcos Airport after the fly in was like battling traffic in Austin at rush hour (though, Austin doesn’t have any air traffic controllers).  The San Marcos controllers probably hadn’t seen that much traffic since the airport was an Army Air Base back during WWII.  It was quite a sight to see all the exhibitor’s airplanes lined up ready to head skyward.

    Thanks to all of you who stopped by the Texas Top Aviation booth!  It was a pleasure meeting all of you and we look forward to working with you in the future!

    Texas Top Aviation
    Hank Gibson and Russell Moore of Texas Top Aviation


  • A Takeoff Briefing

    Takeoff briefings are one of those things that most pilots are taught when they first learn how to fly, but once they get into flying themselves around, quickly fall by the wayside.  There is a reason student pilots are instructed to perform a takeoff briefing before departure.  It gets them thinking about what the plan is after they get off the ground and what to do if something goes wrong.

    Takeoff Briefing

    Takeoff briefings are a good habit to get into.  Airline crews do a takeoff briefing before every departure, even though they have performed a takeoff in that particular airplane thousands of times.  It enhances safety and provides repetition, keeping that knowledge at the forefront of the crew’s minds.

    In general aviation, a takeoff briefing should cover what the takeoff procedure is, what the abort plan is, and what the plan after takeoff is.

    Takeoff Procedure

    Most pilots fly the same airplane all the time, so the familiarity with what goes into a takeoff is there.  But, habits should be formed to brief the takeoff procedure as part of the takeoff briefing.  It doesn’t need to be extensive, just covering the basics of how the airplane is getting off the ground.  Something like this:

    • Throttle setting (if turbo charged, will full throttle cause an overboost?)
    • Rotate speed
    • Expected takeoff roll

    That’s it.  Nothing fancy for the takeoff procedure.

    Abort Plan

    What is the plan if something goes wrong?  It doesn’t have to be an engine failure, maybe the engine coughs when full power is added or maybe the engine doesn’t produce peak RPM.  Maybe the takeoff roll is longer than anticipated and something doesn’t seem right.  Maybe on climb out a door pops open.  Maybe the engine fails at 1,000 feet.  It’s good to keep the plan in the foreground for what to do if an abnormal or emergency situation takes place.

    • Brief the aborted takeoff procedure
      • Pick an abort point on the runway based on the expected ground roll
      • What is the procedure if the airplane isn’t off the ground by then?
      • What is the procedure if the engine quits on the runway?
    • Brief the engine failure procedure at low altitude
      • If the engine fails over the runway, will you try to land on the runway?
      • What altitude would you elect to turn back as opposed to landing straight ahead?
      • If the plane is too low to turn back, would you land straight ahead or aim left or right?
      • What airspeed will you aim to hold if the engine fails?
    • In a Cirrus, what is your minimum parachute deployment altitude?

    After Takeoff Plan

    After the airplane is off the ground, what’s the plan then?  Are you staying in the pattern or departing the area?  Do you need to adjust your power at a certain altitude?  What altitude are you climbing to?  What heading are you going to fly?  Is your flight plan in your GPS?  This is an excellent time to set up altitude and heading bugs if your airplane is so equipped.

    Get in the habit of doing a takeoff briefing before you call the tower or announce your departure.  It get’s your mind focused on the task at hand and then what is going to be happening next.

  • Cirrus Simulator Training

    Let’s face it: airplanes are not the best classrooms. The propeller is running, the engine is making lots of noise, the pilot is attempting to multi-task and the instructor is barking orders. That’s almost as much overstimulation as being a parent to 4 kids under 10 (I have experience in that arena!). That’s even before takeoff!

    At Texas Top Aviation, we have observed many situations where a simulator would be an excellent way to introduce different concepts and supplement training. Now, in our Austin Executive (KEDC) office, we finally have a really good simulator.

    Meet the Noble Flight Simulator, the next best thing to a Cirrus cockpit. With the Noble Flight Simulator, we can duplicate 6 different types of Cirrus aircraft (G3 SR22, G3 SR22T, G5 SR22, G5 SR22T, G6 SR22, and G6 SR22T). The Garmin Perspective panel easily swaps between the G3 and G5 configuration to the G6 configuration, so the buttons are all in the proper places.

    Having button pushing problems? The simulator is the place to practice.

    Want to experience actual emergencies? An engine failure is a lot less stressful in a simulator.

    Want to pull CAPS (Cirrus Airframe Parachute System)? The Noble Flight Simulator has a realistic CAPS handle with the same amount of pull pressure that the CAPS handle in the airplane has.

    Need an IPC or want to practice approaches? All approaches done on a Noble Flight Simulator are luggable, plus a full IPC can be accomplished.

    Want to save fuel? The Noble Flight Simulator is for you!

    To top it all off, the Noble Flight Simulator that Texas Top Aviation has is classified as an Advanced Aircraft Training Device. It is certified to the highest standards of non-motion simulators, allowing pilots working toward their private and instrument ratings to log a significant amount of time toward that certificate or rating. Up to 20 hours of IFR training is allowed to be logged in an AATD toward an instrument rating. That’s huge!

    Texas Top Aviation is also developing a CAPS specific course to expose Cirrus pilots to the many different scenarios where pulling CAPS would be necessary. This teaches Aeronautical Decision Making to Cirrus pilots who struggle with the decision of whether or not to pull CAPS. Look for CAPS course information under our Aircraft Training page later this summer.

    Interested in checking the simulator out? Contact us today!

  • Iridium Zoleo Allows In Flight Messaging

    Satellite communications company Iridium now has a really nifty little product called the Iridium Zoleo Satellite Communicator. Most pilots who fly newer Cirrus Aircraft will be familiar with the company name Iridium. Iridium manufactures the built in satellite phone that is an option in all Cirrus after 2012. The Iridium Zoleo brings messaging capability to any airplane in a cost effective and simple manner.

    The Iridium Zoleo is a device roughly the size of a walkie-talkie. It links up with the Iridium satellite network to send and receive messages and emails anywhere in the world (or air!). To make things easier, the Iridium Zoleo links with a phone via Bluetooth to a free app that allows the user to write a message directly from the phone and send through the device.

    The Iridium Zoleo is affordable at only $200. A plan has to be purchased in order to send messages, with 3 different levels of subscription offered: 25 messages a month for $20, 250 messages a month for $35, or unlimited messages per month for $50. Each plan offers a $6 upgrade to allow unlimited worldwide breadcrumbs and tracking.

    The Iridium Zoleo has a 200 hour battery life and is designed to be shock, dust, and water resistant. Plus, the device has a built in SOS that can be used anywhere in the world. So, you can take it rafting down the Grand Canyon, hiking in the Andes, flying over the Atlantic, or SOS if you are stranded in the middle of the Indian Ocean.

    Click here to read more about Zoleo and here to read more about the Zoleo plans.

  • Calm Wind Landings

    Some of a pilot’s favorite words are heard on the ATIS:  “Winds, Calm.”  These words set off all sorts of happy bells and hallelujah choruses.  Most pilots spend their lives fighting the winds.  On those rare days when the winds are calm, great happiness ensues.

    Limp Wind Sock

    But, are calm wind landings more complicated then everyone thinks?  Well, they can be if the proper planning doesn’t go into them.

    Let’s think about wind.  We have surface wind and we have winds aloft. Sometimes the surface winds are calm.  When this happens, certain airports have preferred calm wind runways which are supposed to be used in these conditions.  Winds aloft are almost never calm.  95% of the time, there is some kind of wind even 100-200 feet above the surface.

    Here is the question pilot’s face when coming into an airport with calm winds: which runway do I use?  Do I use the calm wind runway?  Do I use the runway that is easiest to enter the pattern for?  Do I use the one with the shortest taxi?

    A lot of technologically advanced aircraft have a wind indicator on the PFD. This tool is often forgotten in calm surface wind conditions.  On the contrary, this is probably the most important tool a pilot can have when figuring out which runway to use when the winds are reported calm.

    Here’s why.  That wind indicator is showing the pilot what the winds aloft are. The winds aloft should determine what runway is going to be used.  If the wind indicator is depicting a south wind, then a south runway should be used.  Even if it is a 5 knot wind at pattern altitude, it’ll still be a headwind coming in on final approach.  If the north facing runway is used, that same 5 knot headwind can blow an airplane halfway down the runway before the ground speed drops off enough for it to land.

    So, the next time you are coming into an airport and the winds are reported calm, take a look at your wind indicator on your PFD when deciding which runway to use.  It’ll probably save a few go arounds!

Leave a Reply

Your email address will not be published. Required fields are marked *