|

Contact Approaches

Almost all IFR pilots are familiar with visual approaches and what the requirements are in order to fly a visual approach. As a refresher, the Instrument Procedures Handbook defines a Visual Approach as “an ATC authorization for an aircraft on an IFR flight plan to proceed visually to the airport of intended landing; it is not an [Instrument Approach Procedure]” (page 4-56).

For ATC to issue a Visual Approach, the pilot must have the airport or the traffic to follow in sight. Once the pilot reports the airport or the traffic in sight, ATC can clear the aircraft for a visual approach.

A limiting factor for a visual approach is ATC’s Minimum Vectoring Altitude. “This altitude, based on terrain and obstruction clearance, provides controllers with minimum altitudes to vector aircraft in and around a particular location” (Instrument Procedures Handbook page 1-42). ATC has to restrict aircraft to these MVAs, which can sometimes be quite high due to terrain or obstacles in the vicinity of the airport.

Every pilot has been in a situation with a high MVA that ATC can’t get them below, but it’s solidly MVFR or VFR at the destination airport. The MVA keeps the pilot in the clouds, so a visual approach isn’t possible since the pilot can’t see the airport or the traffic to follow. This can lead to extra time to go out and fly an approach.

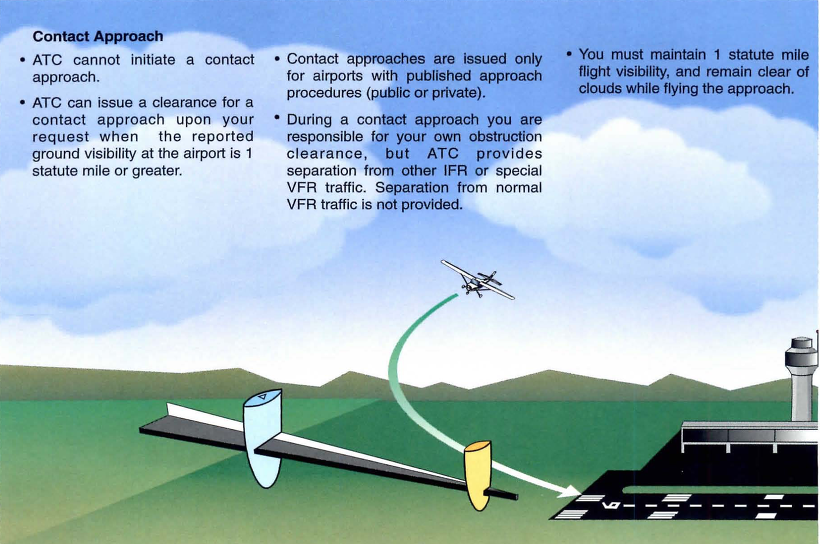
Enter a Contact Approach. A Contact Approach is different then a Visual Approach. “The main differences between a visual approach and a contact approach are: a pilot must request a contact approach, while a visual approach may be assigned by ATC or requested by the pilot; and a contact approach may be approved with 1sm visibility if the flight can remain clear of clouds, while a visual approach requires the pilot to have the airport in sight, or a preceding aircraft to be followed, and the ceiling must be at least 1,000 feet AGL with at least 3sm visibility” [Instrument Procedures Handbook page 4-57].

Here’s the simplified explanation: A pilot does not have to have the airport in sight to request a contact approach. All that is required is for the airport to be reporting at least 1sm visibility and for the pilot to remain clear of clouds.
When would this be helpful for an IFR pilot? Good question. Here’s a scenario.

Pilot Smalls is about 20 minutes from his destination, which is an uncontrolled airport with only one approach to runway 17. He is approaching from the south and the initial approach fix for the approach to 17 is about 15 miles north of the airport. The airport is under Center control. When he has arrived at this destination in the past, Center usually could only vector him down to 4,000 AGL. He is very familiar with this airport and the surrounding area as he comes to this destination at least 2-3 times a month for business.

Pilot Smalls listens to the AWOS, which is reporting a 2500 foot scattered layer and 10 miles visibility. He knows it is right traffic for 17 since there is a 2,000 foot antenna on the east side of the field. There is some hilly terrain around, but all the terrain is well below pattern altitude and doesn’t cause a safety issue.

Looking out at the clouds, Pilot Smalls observes that the cloud layer is scattered to broken, but more scattered on the west side of the airport, with several large openings that he can see the ground through. Center asks for his approach request and Pilot Smalls requests a visual approach. Center gives him a descent to 4,000 AGL, their MVA for the area. They tell him to report the airport in sight for the visual approach.

At 4,000 AGL, Pilot Smalls is going through the scattered layer of clouds, but can see the ground in between the clouds and deems he has room to maneuver safely between the clouds and stay clear of them. He can’t see the airport, so a visual approach seems unlikely. He can’t cancel IFR because then he would have to keep the VFR cloud clearance and visibility requirements in Class E airspace (1,000 feet above, 500 below and 2sm horizontally), which isn’t possible in this case.

5 miles from the airport, ATC states, “N12345, I’m going to have to send you out for the approach since you don’t have the airport in sight.” Pilot Smalls then requests a Contact Approach. ATC clears him for the Contact Approach to his destination, so Pilot Smalls descends through a break in the clouds, remaining clear of clouds, until he gets below the base of the ceiling. He maneuvers onto the right downwind, lands and cancels IFR.

Contact approaches can be useful at controlled and uncontrolled airports. The first time you request one, do so with a higher ceiling and some room to maneuver to keep your safety margins. After you’ve done a few, you can determine what your personal minimums are for a Contact Approach.

I would not recommend doing a Contact Approach at an airport you are unfamiliar with. It’s vital to know what obstacles are around since on a Contact Approach, the pilot is now responsible for traffic avoidance and terrain avoidance, whereas on a visual approach, ATC resumes that responsibility.

For more reading on Contact Approaches and another good scenario, check out Bold Method’s article on Contact Approaches.

Similar Posts

  • Cirrus Announces The New Cirrus G6 SR20 & SR22

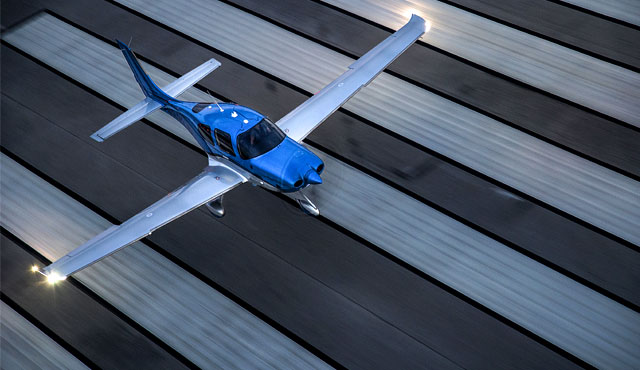
    Earlier this month, Cirrus announced the new Cirrus G6 SR20 and SR22.  To the naked eye, they look like incredible airplanes.  There is new lighting and the updated Cirrus Perspective+ avionics in both models, plus the SR20 is now a Lycoming powered airplane.

    The Perspective+ in the Cirrus G6 is based on Garmin’s G1000 NXi platform.  The keypad is updated to a QWERTY keypad, allowing for quicker inputting of data since our fingers are already used to the setup.  A home button was added to the center stack to get back to the map page without having to hold down the CLR key.  The bug knobs were moved down to the autopilot, while the display of the GFC 700 was altered slightly to match the Vision Jet setup.

    Cirrus G6 Perspective+

    The Perspective+ also boasts a 10-fold increase in processor speed, allowing the system to move quicker than the standard Perspective.  The ability to wirelessly update databases has also been included.

    The exterior of the Cirrus G6 SR22 and SR20 models has changed as well.  Cirrus has added the Spectra wing tip lighting system to the Cirrus G6.  It incorporates an entire light panel that runs the length of the wing tip.  The LED dual strobe setup helps with aircraft visibility and ramp appeal.

    Cirrus G6

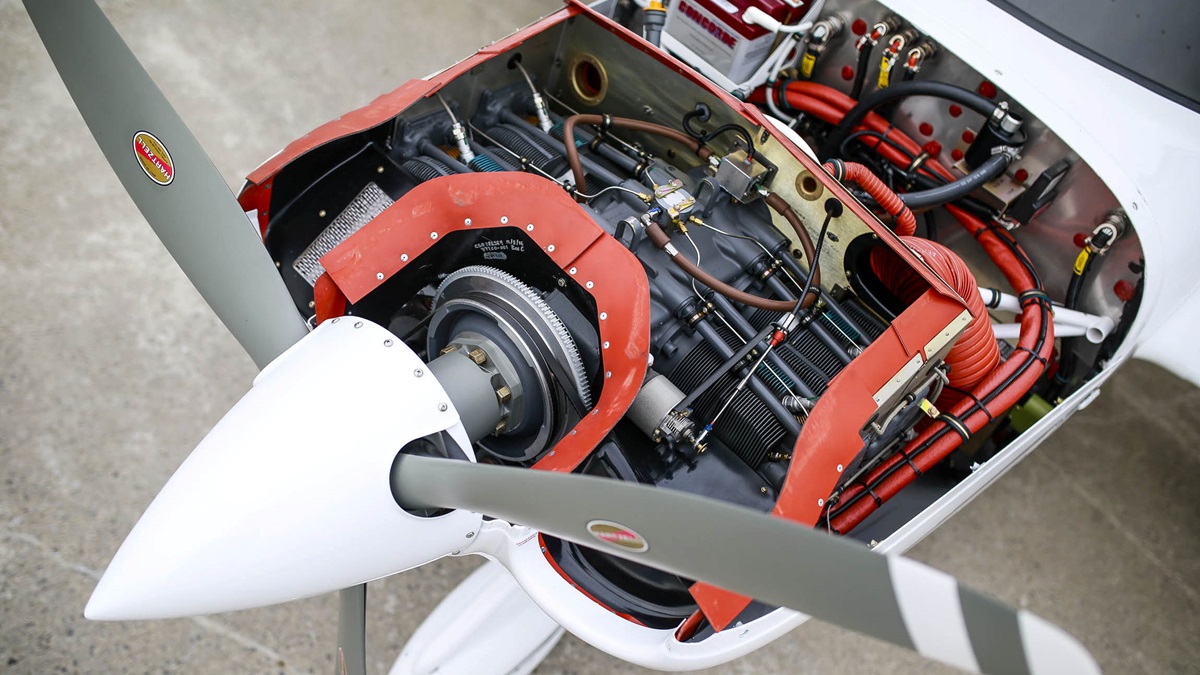
    The SR20 engine has been changed to the Lycoming IO-390, 215 HP engine.  The Continental IO-360-ES 6 cylinder engine comes out of the SR20 and the 4 cylinder Lycoming goes in.  2 less cylinders will help with useful load and the extra 15 HP will help with takeoff and climb performance.

    SR20 Lycoming

    The new Cirrus G6 is available for order and delivery immediately.  To read all the details and specs on the Cirrus G6, you can check out Cirrus’ website.

    Earlier this month, Cirrus announced the new Cirrus G6 SR20 and SR22.  To the naked eye, they look like incredible airplanes.  There is new lighting and the updated Cirrus Perspective+ avionics in both models, plus the SR20 is now a Lycoming powered airplane. The Perspective+ in the Cirrus G6 is based on Garmin’s G1000 NXi…

  • Upgrading Avionics

    There are many different ways to upgrade an instrument panel.  Putting in a 696 here, a JPI engine monitoring system there, even an Electronic HSI.  But, if you want to swing for the fences and get a serious upgrade, you have to go for a complete glass instrument panel.  For good measure, you might as well throw in a touch screen GPS while you are at it.

    Which panel to go with?  There are two mainstream options (Garmin and Aspen) and a handful of other companies that make glass panel replacements (Avidyne being one, King for a short period of time at the end of the last decade being another with the KFD 840).  Around 2010, there were a lot of companies trying to get into the glass panel retrofit game, but many of the products didn’t gain a whole lot of popularity, leaving Garmin and Aspen at the top of the heap.

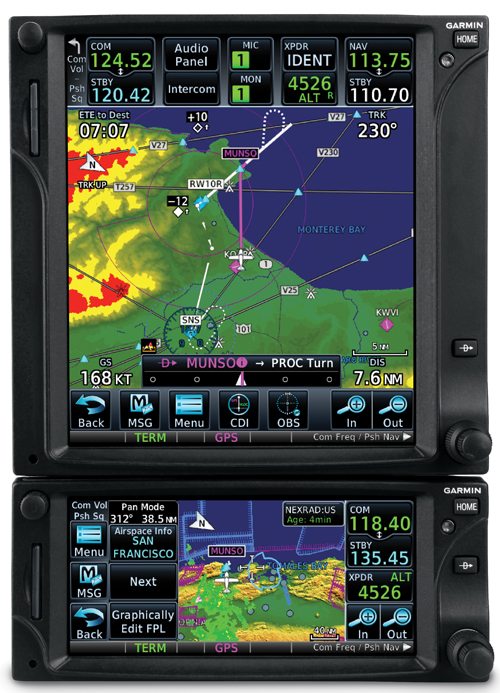
    What about the touch screen GPS market?  Garmin has this pretty much cornered as well, with Avidyne and King just getting into the game.  The gap between Garmin’s GTN series and Avidyne and King is pretty wide.

    Garmin GTN Series

    The answer is pretty easy when it comes to the GPS (go with Garmin!), but not so easy when it comes to the panel.  The G500 and the Aspen Evolution series are both excellent interfaces with strong reliability, so which one do you go with?  Feature-wise, both have a lot of the same features: traffic, weather, terrain, synthetic vision, to name a few.  The presentation for each feature is a little different between the two interfaces.  It just depends on what you like better.

    The nice thing about the Aspen system is you can go glass, but you have options on how much glass you want:  1 screen, 2 screens, or 3 screens?  With the single screen PFD, you have all your instrumentation, traffic, weather, and optional synthetic vision.  You don’t need the synthetic vision for the traffic and weather, as it shows up behind your HSI.  It is an honest to goodness glass panel retrofit.

    When you decide to upgrade to 2 screens, this is where Aspen has a leg up.  The second screen is a completely redundant PFD and, if you get the 2 hour emergency backup battery installed, acts as the backup instrumentation to the main PFD.  This means you can take out the old steam gauge standby instruments.  This helps clean the panel up.

    I personally don’t see the need for 3 screens, but maybe there is someone out there who needs it.

    One selling point that Aspen has over Garmin is the wide variety of autopilots and GPS units that Aspen units are compatible with.  The G500 is only compatible with King autopilots, it’s own GFC 700 autopilot (which would be a retrofit), some Collins autopilots, and the Century 21, 31, 41, and 2000.  This does cover a wide array of autopilots, but it keeps some on the outside.  Aspen, on the other hand, is compatible with most autopilots on the market.

    Finally, let’s talk price.  Going with an Aspen EFD 1000 PFD (this is the single screen Aspen) will run you somewhere in the area of $12,000.  The price will vary based on the shop and the airplane.  When you want to add a screen, it’s an additional $6,000.  This is for the base, so if you want to add weather or synthetic vision, it’ll run you a little more.

    The Garmin G500 comes in around $20,000, again depending on the shop and the airplane.  The screens are bigger on the G500, which is kind of nice, and you are buying a Garmin product, which has a fabulous track record in the aviation industry.

    Decisions, decisions.  There really is no wrong answer here.  Both are excellent products with very good track records.  Both have really nice features and don’t hardly fail.  Really, the choice comes down to what you want.

    Need training on your upgraded GPS or glass panel retrofit?  Contact Texas Top Aviation for thorough training on your new avionics today.

    There are many different ways to upgrade an instrument panel.  Putting in a 696 here, a JPI engine monitoring system there, even an Electronic HSI.  But, if you want to swing for the fences and get a serious upgrade, you have to go for a complete glass instrument panel.  For good measure, you might as…

  • PopSocket iPad Yoke Mount

    I was recently clued in to a really cool (and very cost efficient) iPad yoke mount.

    It’s called a PopSocket and you won’t find it on any aviation website (I have to credit Joe Casey of Casey Aviation with this nifty find).

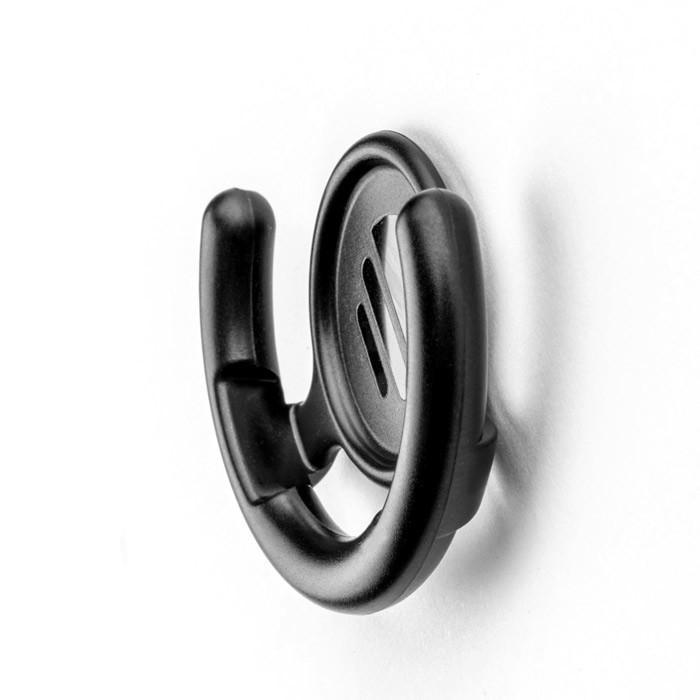
    It’s very simple.  You take the mount (see right) and stick it to your yoke.  Then you pick one of a ton of designs from PopSocket and stick it to the back of your iPad (you can even create your own design!  B2 Bomber anyone?).

    It’s low profile, doesn’t get in the way of anything, and is easily removable.  The PopSocket mounts are $10 apiece (depending on the size of your iPad, you may want to get 2).  The PopSocket is $10, so at the most, you’ll be in $40 plus tax and shipping.  Most mounts on Sporty’s are upwards of $50 and require a lot of installation, are big and bulky, and usually require lots of juggling to get the iPad in and out of the mount.

    Give the PopSocket a try.

    I was recently clued in to a really cool (and very cost efficient) iPad yoke mount. It’s called a PopSocket and you won’t find it on any aviation website (I have to credit Joe Casey of Casey Aviation with this nifty find). It’s very simple.  You take the mount (see right) and stick it to…

  • Bruce’s Custom Covers

    I have used a few different sun shields in airplanes in my flying career.  I have found one that I really like. Bruce’s Custom Covers knocks it out of the park for usability and ease of storage.

    Let’s start off with functionality.  Like other window sun shields, Bruce’s Custom Covers fit very nicely into the airplane glare shield and side windows. Depending on the type of airplane you have, some of the window covers use the suction cups and others don’t.  I recently had 2 customers order from Bruce’s, one that owns a P210 that uses the suction cups for all windows, including the glare shield, and the other owns a Cirrus which doesn’t use the suction cups on anything.

    They work great.  They do the job of blocking the sun and keeping the cabin much cooler while the airplane is sitting on the ramp.

    The thing I like best about Bruce’s Custom Covers is their storage.  Other sun shields require you to roll them up and lash a tie around them. Bruce’s, on the other hand, come folded very neatly in a black canvas bag.  The folded covers don’t take up nearly as much room as the rolled up covers, plus they are really easy to just fold up and store.

    Bruce’s Custom Covers also sells plugs for cowling, pitot tubes, etc., as well as aircraft exterior covers.

    Bruce’s Custom Covers gets my recommendation for anyone wanting to get some new sun shields.  For those of you in Texas, you know you need them!

    I have used a few different sun shields in airplanes in my flying career.  I have found one that I really like. Bruce’s Custom Covers knocks it out of the park for usability and ease of storage. Let’s start off with functionality.  Like other window sun shields, Bruce’s Custom Covers fit very nicely into the…

  • Circle to Land Approaches

    When I was doing my instrument and multi-engine training, we did a lot of circle to land approaches.  As a student, I could never figure out why these types of approaches would ever be practical when you could an approach straight in to another runway.  But, as a good student, I never asked my instructors the purpose of them, I just did them to the best of my ability.

    Now, having been flying in the IFR system for almost a decade, I’m finally beginning to fully understand the practical purpose of a circle to land approach.  I have actually elected to do an approach where I had to circle to land on several occasions in actual IMC conditions.

    One important note to remember on circle to land approaches is that the minimum descent altitude (MDA) is always higher than on a straight in approach.  The reason for this is that you are basically joining the pattern for a different runway and you have to be able to visually keep yourself clear of towers and other obstacles.  So, you need a higher visibility and a higher ceiling than if you were just lining up to come straight in.

    Here are a couple of practical circumstances where it would make sense to do a circle to land approach.

    Airports with only 1 straight in approach

    This one is easy.  There are a number of airports scattered around the US that have only 1 straight in instrument approach published for it.  Around my part of Texas, the first one that pops into my mind is the RNAV 31 at T85 in Yoakum, TX.  Most of the year, the prevailing wind is out of the south, so 13 is the favored runway at T85.  During the winter is when most of the IMC weather happens in South Texas, so that is why the approach is for 31.

    Of course, especially this year during the summer, there are some IMC days where an approach to T85 would be necessary.  When there is a strong wind out of the south, landing on 31 is impractical, so a pilot would fly the approach to 31, then circle to land on 13.

    Approaching from the opposite direction

    Take a look at the RNAV 19 at KBMQ, Burnet, TX.  The two initial approach fixes (IAF) are IXANY and JIBAJ.  If a flight is approaching BMQ from the west or north, this is an easy approach to join.  If a flight is coming from Austin (directly the the east and a little south) or San Antonio (almost directly south), it would be a bit of extra flying to get configured properly for the approach.  Especially coming from Austin, because the degree of turn to join at JIBAJ wouldn’t make the approach practical.

    Well, how about vectors?  Unfortunately, Houston Center doesn’t have this approach depicted so vectors aren’t a possibility.  Center can give you vectors north to make the angle a little easier to join at JIBAJ, but they can’t vector you onto the approach.

    Direct DLORA to join is another option, but again, if you are approaching from the southeast, the angle is wrong.

    Insert the RNAV 01 approach with a circle to land.  AMUSE is right on V163, so it’s really easy to join the approach there coming from the south.  Coming from Austin, joining the approach at SUBIE works out great. Fly down to the MDA, join the left downwind for 19, and everyone is happy.

    VOR Circle to Land Approaches

    Every instrument pilot has had an instructor “force” them to do a VOR A or VOR B approach and no one enjoys them.  I personally think they are good practice.  With the number of RNAV systems and RNAV approaches out there, though, VOR approaches are becoming a bit archaic.

    They do have a place in this discussion, though.  A VOR approach is given an A or B designation when the angle of the final approach course is greater than 30 degrees to the runway (VOR A KLZZ), or the final approach course is lined up with the runway, but the MDA is too high to practically descend and land (VOR A KGRK or the VOR/DME C KASE).

    So, there are practical uses for a Circle to Land approach.  The next time you do some IMC work with an instructor, ask him/her if you can include one.

    When I was doing my instrument and multi-engine training, we did a lot of circle to land approaches.  As a student, I could never figure out why these types of approaches would ever be practical when you could an approach straight in to another runway.  But, as a good student, I never asked my instructors…

  • Winter Ops

    It’s summertime and the weather is hot! Over this dry, sunny season, winter flying is probably the last thing on your mind. However, now is the perfect time to start getting things in place for winter and that includes having a plan for taking care of your airplane.

    Why are preparations for winter ops needed in the first place? Cold weather, especially during the engine start and warm up period, can be very damaging to your engine if precautions aren’t taken to ensure that safe temperatures exist inside the engine before you turn the key. I always thought that the biggest problem associated with cold weather was engine oil. The logic is since cold oil is thicker and less viscous as the temperature drops, it is not able to circulate quickly throughout the engine to provide proper lubrication upon starting.

    While cold oil may be a factor, the introduction of multi­viscocity oils has greatly reduced that issue. The real problem is created by the different ways that various parts of the engine respond to heat. Because aluminum expands more quickly when heated than steel does, the pistons (made of aluminum) expand more quickly than the cylinders (made of steel). This can lead to scuffing on the sides of the cylinder barrel. In the same way, differential heating can reduce clearances which are designed to provide cooling oil to bearings and other vital engine parts, thereby causing damage which greatly reduces the life of the engine.

    So how cold is TOO cold? Unfortunately, that is a difficult question to answer. Because there is so much variation between engines, airplanes, and environments, there really isn’t any one specific answer. An older, more worn out engine may actually be less susceptible to cold weather damage than a newer, tighter engine because its internal clearances are probably not as tight as they were a few thousand hours ago. I have heard of some people who preheat their airplanes anytime the temperature falls below about 40 degrees. For us northerners, this seems excessive. On our E33A Bonanza which has a Continental IO­520, we generally preheat the airplane when it is cold soaked in temperatures below freezing (32° F).

    Here are a few of the best ways to get your machine ready for a cold weather flight:

    • Heated Hangar:­ Nothing beats a heated hangar for warming up an airplane. The warm air is evenly distributed around the engine and in the cockpit (your avionics and gyros will thank you!). The airplane will need to be in the hangar for a while in order to warm up the guts of the engine. Often, the easiest way is to have the airplane pulled in the evening before the planned departure and left overnight. Many FBOs will hangar airplanes overnight for a small fee and it is well worth the price. We almost always have our charter airplanes put into hangars overnight when on a winter trip to ensure that we don’t have any trouble when we depart the next day. This practice has the added benefit of keeping the airframe clear of any ice and snow that may accumulate before you are scheduled to leave.
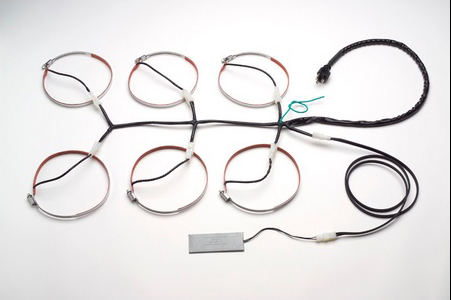
    • Electric Engine Heaters­: Multi­point electronic heaters use heating pads that are placed around the engine in order to heat up the various components such as cylinders, the oil pan and crankcase. Most of these systems are designed to be activated by being plugged into a wall outlet with an extension cord. Preheating for a winter flight is as simple as going to the airport the night before and plugging it in. Two well ­known manufacturers of multi­point engine heaters are Reiff and Tanis. These systems are relatively inexpensive and can be a life saver if you regularly travel in colder climates. If an engine heater is the right choice for you, it is recommended to avoid less ­expensive models that heat only the oil pan.


    Reiff system
    Pictured above is the Reiff system. The heated bands go around the cylinder bases and the pad at the bottom of the picture heats the oil pan. Picture Courtesy of www.reiffpreheat.com


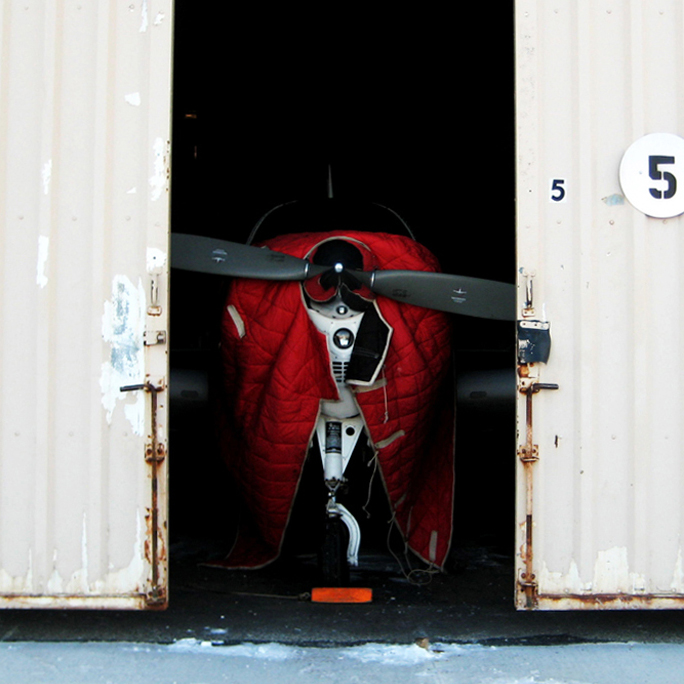
    • Covers and Blankets­: If it is especially cold or you have to preheat outside, having something to insulate the cowling and keep the wind out can be very useful. Regular blankets will work long as you can secure them in place. If you have an ongoing need for additional insulation, there are companies that make custom blankets and propeller covers to fit your airplane. If you are landing and then taking off again relatively quickly, using a few blankets and cowl plugs will work nicely to keep the engine warm while it is sitting outside. In a pinch, placing a couple of powered light bulbs in the cowling overnight with insulation on top can result in sufficient temperatures for starting the engine.


    Bonanza Cover
    Even with the multi­point electric heater, we still use a blanket while preheating to help keep everything toasty.


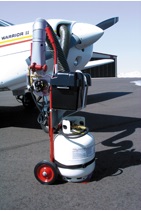
    • Forced Air:­ This method is used widely by FBO’s and flight schools. Hot air is produced in a portable heater and is then pumped into the engine compartment via the openings at the front or bottom of the cowling. This method has the benefit of not requiring any additional equipment to be installed on the aircraft beforehand and can be very effective provided there is adequate time for the engine to heat completely before removal.


    Forced Heat
    Pictured above is a Red Dragon engine preheater. Photo courtesy of Red Dragon’s website: www.flameengineering.com


    • Winter Baffles:­ When the air temperature starts to drop into the teens and lower, you may find it difficult to keep your engine temperatures warm enough in cruise flight. The problem is that the air entering the cowling inlets is so cold that it overcools the engine. The solution is to install additional baffling in the engine inlets to reduce the amount of airflow into the cowling. These additional baffles are usually just sheets of aluminum that are cut to the correct size and are bolted in and removed quickly and easily as needed. Some pilots swear by them while others complain that they can cause uneven cooling. If you have questions about winter baffling, I’d suggest talking to your mechanic about your specific airplane.

    Winter flying can be extremely rewarding. After their hands thaw from pre­flight, a pilot is often rewarded with smooth air, improved performance and outstanding views. Just don’t forget to prepare the airplane for the cold. The preparation is often as simple as plugging in an extension cord or making a phone call to the FBO. So whether you live in the north or the south, take good care of your engine so that it can keep taking good care of you.

    It’s summertime and the weather is hot! Over this dry, sunny season, winter flying is probably the last thing on your mind. However, now is the perfect time to start getting things in place for winter and that includes having a plan for taking care of your airplane. Why are preparations for winter ops needed…

Leave a Reply

Your email address will not be published. Required fields are marked *