Epic E1000 Gets the GFC 700

When the Epic E1000 was finally certified in the spring of 2020, there was much celebrating across the aviation world. Epic Aircraft expended a lot of time and energy getting the E1000 certified and into production (more information on that journey here and in Flying Magazine here).

The airplane is amazing. In the single engine, 6 seat turboprop market, it easily blows away the competition. With it’s 1,200 SHP PT6-67A, it has double the horsepower of the M600 (600 SHP), and 350 more horsepower than the TBM 940 (850 SHP). It’s 60 KTAS faster than the M600 and, even though the TBM can keep up (both airplanes have equal top cruise speeds of 330 KTAS), the Epic E1000 can carry a payload of 1,024 pounds with full fuel, while the 940 can only carry 584 pounds with full fuel. The TBM carries about 15 minutes more of fuel, but to me, that’s pretty negligible.
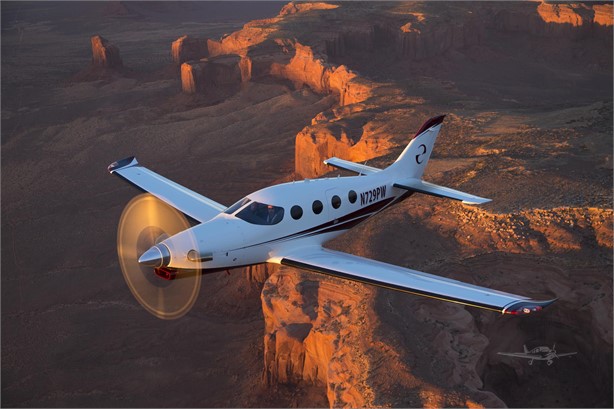
Did I mention climb rates? The E1000 climbs at an average of 1500 FPM at Vy (it’s capable of 4,000 FPM), making it to 25,000 feet in 10 minutes. The TBM climbs at 1000 FPM, taking 13 minutes to climb to the same altitude, while the M600 settles in at about 800 FPM, reaching FL250 in 21 minutes.

If you expand the comparison to include the Pilatus PC-12, the two airplanes have 1,200 SHP, but the Epic is 50 KTAS faster and they both have about the same weight carrying ability.

In the most important arena, price, the E1000 is around a million dollars cheaper than the TBM 940.

The one drawback to the Epic E1000 that immediately was noticeable was the autopilot. Epic originally installed the STEC 2100 autopilot to pair with the G1000 (and later the G1000 NXi). Epic decided to stick with the STEC 2100 through certification for the plane since that autopilot was on all of the E1000s paperwork going through all the levels of FAA approval. To change to the GFC 700 during the certification process would have been a massive undertaking that probably would have delayed certification.

The STEC 2100 is a good autopilot, but, as any G1000 pilot can tell you, the lack of integration between any STEC autopilot and Garmin panel leaves some to be desired. Not all the bugs talk, which often requires dual data entry, which can lead to forgetting to do both the bug and the autopilot when things get busy. Hello, altitude deviation.

The goal for Epic was never to leave the STEC autopilot in the airplane. The first E1000s were rolled off the line with the STEC, but Epic didn’t take long to change the autopilot to the much more integrated Garmin GFC 700. That took place this winter (2020), and the E1000 received it’s first upgrade, with Epic dubbing the airplane the Epic E1000 GX.
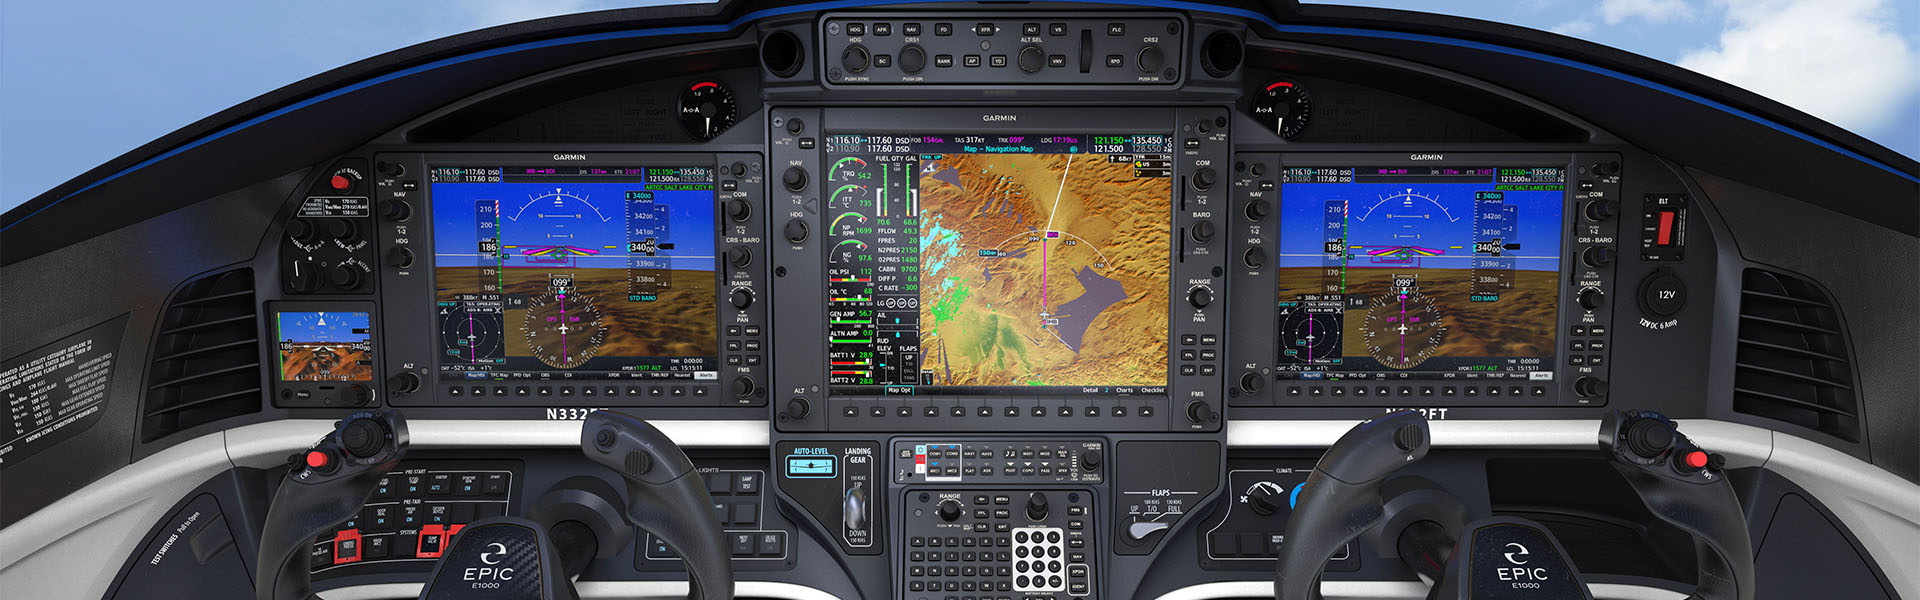
I expect the innovators in Bend, OR, where Epic is based and where tons of innovation in aviation happens (Lancair/Columbia started in Bend while RDD is based there as well), to quickly come out with more avionics upgrades for the airplane. I wouldn’t be surprised to see a G3000 version at some point, complete with auto throttles and the new Garmin Autoland. Epic would be smart to follow in the steps of Daher and offer two models, one with the G1000 and one with the G3000 (the TBM 910 has the G1000 NXi while the TBM 940 has the G3000).

I have yet to fly in an Epic E1000, but I would certainly jump at the chance to do so. Someone asked me yesterday what airplane I would buy if I had a blank check. With the GFC 700 now in the Epic, it would absolutely be the E1000 GX.

Similar Posts

  • Need To Breath


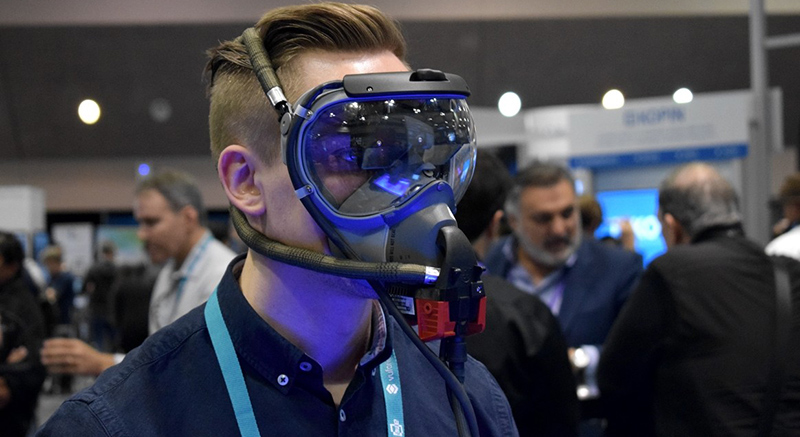
    I got a call today from a friend asking me about oxygen requirements.  That got my brain pondering about the different items the FAA would like all pilots to know. I did a little refreshing and found several other tidbits directly from the FAA that I thought worth sharing. No matter what you’re flying, I think these apply to all of us. 

    First off, what are our general oxygen requirements? If you jump on over to the FAR’s and take a look at 91.211 you’ll see: 

    1. At cabin pressure altitudes above 12,500ft MSL to 14,000ft MSL, pilots
    required to use oxygen unless the segment is less than 30 minutes of flight.

    2. At cabin pressure altitudes above 14,000ft MSL, the crew is required to use
    oxygen.

    3. At cabin pressure altitudes above 15,000ft MSL, each occupant must be
    provided the use of oxygen. This doesn’t necessarily mean they have to use it.


    Things get a little more in depth when you get to pressurized aircraft.

    These requirements are also listed in 91.211: 

    1. If you’re flying above Flight Level 250, a 10 minute supply of oxygen is
    required for each person onboard.

    2. If you’re flying above Flight Level 350-410, and one pilot leaves their seat, the other pilot will be required to wear an oxygen mask, unless both seats are equipped with quick-donning oxygen masks.


    There are three basic components to any oxygen system in an aircraft:  the storage system, the delivery system, and the mask or cannula. First, there are several types of storage systems. 

    Gaseous aviators breathing oxygen is the first. This is the standard green tank that everyone is familiar with. There are two types of tanks. Either the high- pressure with 1800-2200 psi or the low pressure tank with 400-450 psi. The major issue with these and General Aviation aircraft is weight. Some of these tanks can get bulky and heavy and therefore don’t work for everyone. 

    Liquid aviators breathing oxygen or LOX is another form of storage. The major advantage of LOX is that it has a 900 to 1 expansion ratio, meaning that 1 liter of liquid oxygen can be expanded into 900 gaseous liters of Aviators Breathing Oxygen. The disadvantages of LOX are they are extremely volatile and have to be stored at -197F. If it comes in contact with exposed skin, severe frost bite can occur. 

    Sodium chlorate candles or oxygen generators have a weight advantage like LOX. They’re essentially a canister that when activated mix sodium chloride and iron powder and produce oxygen. They general have a 600 to 1 expansion ratio, which goes back to the weight savings. However, once these are started they are very hard to stop. Another disadvantage is these devices produce a fair amount of heat, so proper precautions need to be taken. 

    Next are the delivery systems. The main systems are Continuous Flow, Diluter Demand, and Pressure Demand. Continuous Flow, is exactly as it sounds. The oxygen is allowed to flow continuously from the tank to the user. The benefits of continuous flow are you don’t need a complicated mask or regulator. The downside to this system is since it continuously pumps oxygen, you’re wasting oxygen when you exhale. Most of continuous flow systems are used on aircraft that generally fly below 28,000 feet. 

    Diluter Demand was designed to fix the negative of the Continuous Flow systems. Diluter Demand only sends oxygen to the user when the user inhales. The system also allows cabin air to be introduced in, sending the perfect mixture of oxygen to the user when needed. These systems are very efficient and generally tend to be used up to 40,000 feet. 

    Pressure Demand is designed to essentially “over inflate” the users lungs. This will basically pressurize the the users lugs and allow the user to fly above 40,000 feet. This is needed at flights above FL400 because 100% oxygen without positive pressure will not suffice. 

    The final portion of the oxygen system is the mask or cannula. Nasal cannulas generally are more comfortable and are regulated to 18,000 feet service altitude. Masks come in a couple different variants. From re-breathers to quick-donning, most masks accomplish the same task with a few small differences. Quick-donning must be able to be put on within five seconds and are rated up to FL400. 

    Since that was a lot of information, what does all of it mean to you? Most fair weather flyers will never run into any of this. However, the high performance owner/operator will run into oxygen use situations a fair amount. Taking the family up to Colorado on a ski trip, jumping up to 12,500 feet to get above some weather, or flying above 5,000 feet at night on a long xc are all situations where you may want to have oxygen on board. 

    If you are planning on doing any of this type of flying or are currently doing these types of flights, training is a must. If you’ve never been in an altitude chamber, I would highly recommend it. In college, I went with a group to Oklahoma City to the FAA’s headquarters where they hold a class on Hypoxia and High Altitude flying. It’s very informative to be in the chamber as it simulates being oxygen deprived. You get to see how you’ll react and what kind of symptoms you’ll have when in a loss of oxygen situation. Each person has different symptoms, so it’s important to see how you will react.

    It’s also good to fly with an experienced instructor. Finding an instructor who will allow you to learn in a safe environment is worth its weight in gold. 


    Ryne Bergren is currently a First Officer with Mesa Airlines in the CRJ 900. Ryne has experience in many different areas of aviation, from corporate to airlines to teaching to ferrying across the Atlantic Ocean. His passion is for all things that travel across the big blue sky.

    I got a call today from a friend asking me about oxygen requirements.  That got my brain pondering about the different items the FAA would like all pilots to know. I did a little refreshing and found several other tidbits directly from the FAA that I thought worth sharing. No matter what you’re flying, I…

  • Cirrus Autopilot Check

    In the Pre-Takeoff Checklist for any Cirrus aircraft, it calls for pilots to perform a Cirrus Autopilot Check.  It is prudent to check the autopilot before your flight to ensure that all aspects of the autopilot are working properly.  The only problem is, the checklist doesn’t spell out how to perform the Cirrus Autopilot Check.  You would have to go to the POH for the airplane, which is usually in the back seat or a bag somewhere and therefore hard to get to, in order to find the procedure.

    The procedure for checking the autopilot is slightly different depending on what autopilot is in your airplane.  The procedures for all three are below.

    S-TEC 55x

    • Sync the heading bug to your current heading
    • Activate heading mode on the autopilot
    • Twist the heading bug left and right to ensure the ailerons move left and right
    • Sync the heading bug to your current heading
    • Activate vertical speed mode on the autopilot
    • Move the vertical speed bug (or the vertical speed on the altitude pre-selector if you have a steam gauge Cirrus) up and down to ensure the elevator moves accordingly
    • Ensure you can overpower the autopilot
    • Press the autopilot disconnect switch to ensure the autopilot shuts off


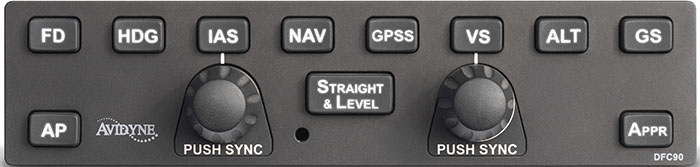
    Avidyne DFC 90

    • Press the AP button to activate the autopilot
    • Ensure AP, ROLL, and PITCH Annunciations are depicted in green on the top of the PFD
    • Set the heading bug 90 degrees from the current heading
    • Press the HDG button on the autopilot
    • Ensure the ailerons are moving in the proper direction and HDG is annunciated on the top of the PFD
    • Ensure you can overpower the autopilot
    • Press the autopilot disconnect switch on the stick and ensure the autopilot has disconnected


    DFC90

    Garmin GFC 700

    • Press the AP button to activate the autopilot
    • Ensure you can overpower the autopilot
    • Press the autopilot disconnect switch on the stick to ensure the autopilot has disconnected

    In the Pre-Takeoff Checklist for any Cirrus aircraft, it calls for pilots to perform a Cirrus Autopilot Check.  It is prudent to check the autopilot before your flight to ensure that all aspects of the autopilot are working properly.  The only problem is, the checklist doesn’t spell out how to perform the Cirrus Autopilot Check….

  • I Learn To Speak Seaplane

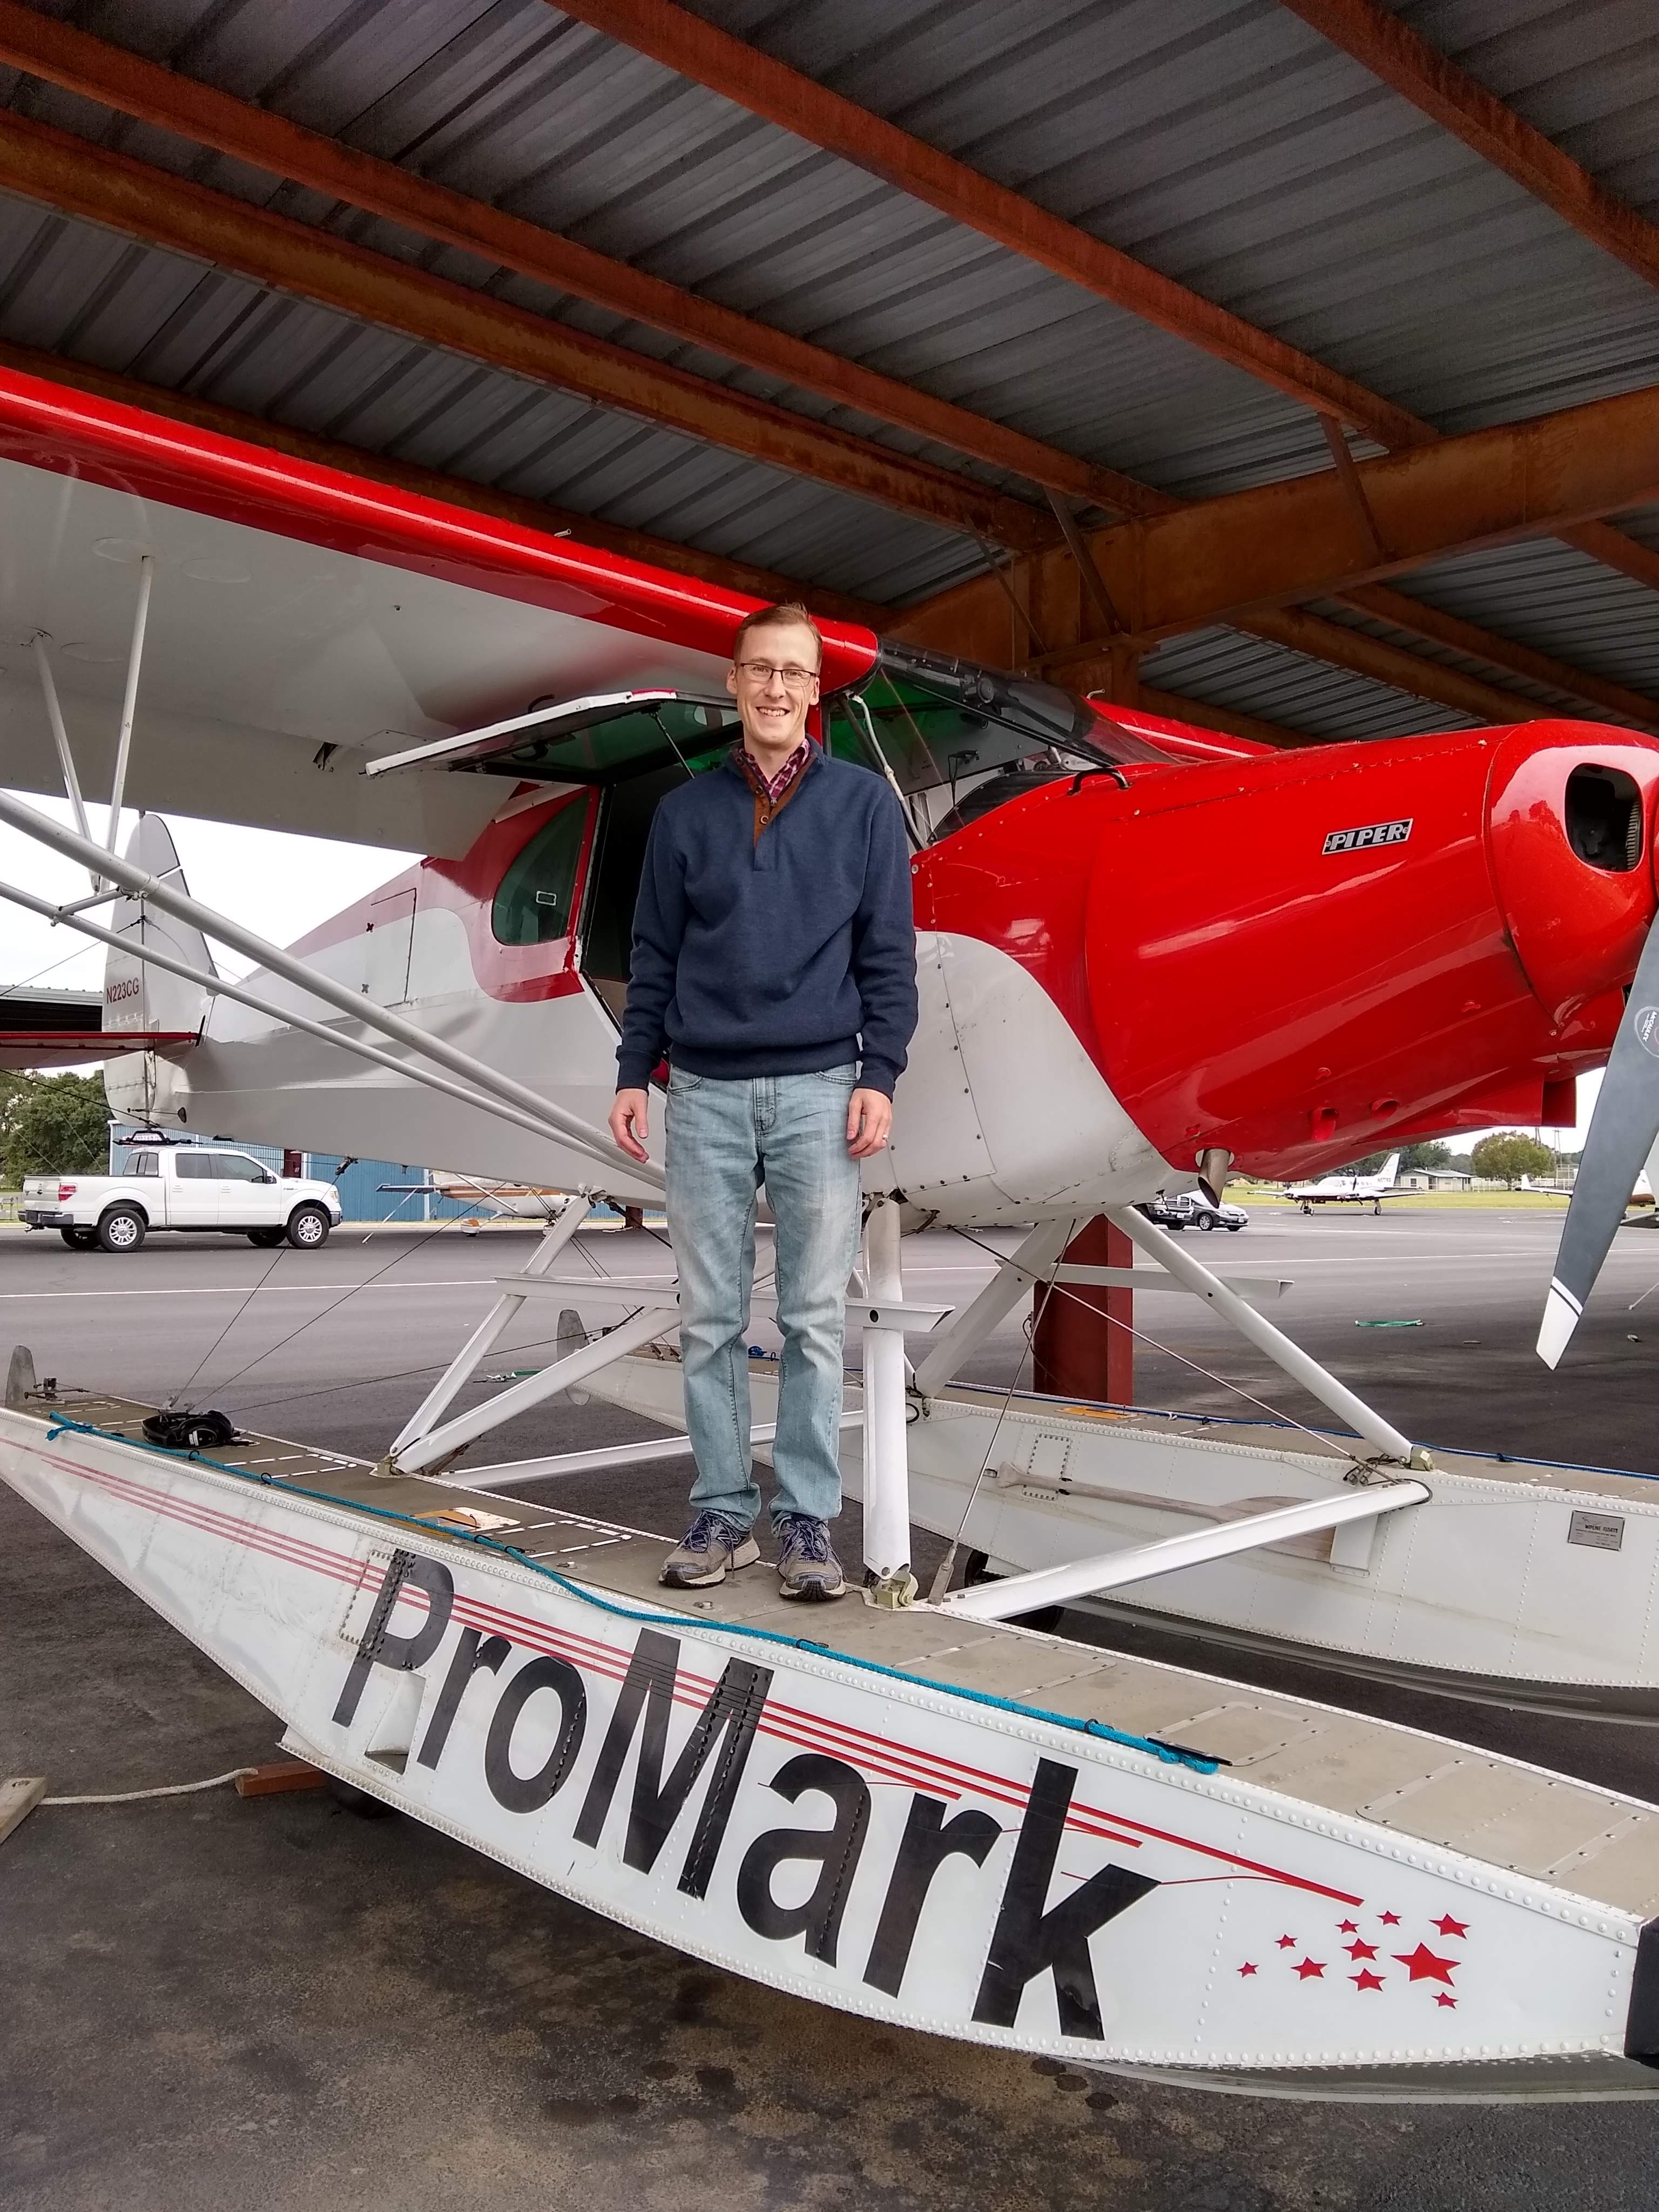
    From the time I started flying, I have always had the dream to learn how to fly a seaplane.  As I learned in November, it’s actually learning to land a seaplane, and the veterans call them floatplanes.

    ProMark Aviation at the Burnet Airport (KBMQ) offers a weekend float plane course that is high on fun and low on stress.  The school has a Piper PA12 Super Cruiser on amphibious floats (amphibs as I was corrected at one point.  I mean, if you’re going to fly a seaplane, er, floatplane, you have to know the lingo) that will land and takeoff on water, but does little else with ease and grace.  At 150 HP with those big floats and all the associated rigging hanging underneath the airplane, you are lucky to get to 500 feet before you get to your destination.

    We weren’t working on setting any speed records.  I was learning the lay of the water.  I learned about the step, the keel, pumping the floats, how to read the water, currents, ducks (yes, ducks and birds are important to know about when you are flying low on the water), buoys, docking, and ditching.  Step taxiing was fun as you are basically at 3/4 throttle screaming across the top of the water just below flying speed.  It’s the best way to taxi a seaplane (truly, it is.  You get more air in your engine, you can see better, and you are moving.  Just don’t try and turn sharp).

    Floatplanes also don’t have any shock absorbers, so the higher the wave, the more you get knocked around, so wind velocity and, in turn, wave height is very important.

    A very important nuance of an amphibious floatplane compared to a straight floatplane (one that doesn’t have wheels that come out of the floats), is at one point, you want to make sure your gear is down for landing (runway landing) and at another, you want to make absolutely sure your gear is up for landing (water landing).  If you land wheels down in the water, you will capsize, 100% of the time.  Thankfully from my good instruction, I did not capsize.

    Ken Wittekiend, my instructor, and I spent the majority of the weekend landing and taking off on Lake Buchanan (I was informed by locals it is pronounced “Buk-cannon”, not “Bue-cannon”), which is more open and therefore has more waves.  We did one landing on Inks Lake so my kids could see me land, which they thought was the best thing since cheese sticks.

    There is a check ride at the end of the training, but, as Ken reassured me, it’s the most fun check ride you’ll ever have.  I still hate check rides, but that one I think I hated least of all.

    I hope someday I can put my floatplane skills to practice, but for now, I can vouch that I now speak seaplane!

    From the time I started flying, I have always had the dream to learn how to fly a seaplane.  As I learned in November, it’s actually learning to land a seaplane, and the veterans call them floatplanes. ProMark Aviation at the Burnet Airport (KBMQ) offers a weekend float plane course that is high on fun…

  • New Houston Airspace Procedures

    If you are based in Houston, or heading into or out of the Houston airspace under IFR, have you updated your charts?  If not, you may hear a clearance stating: “N67889, cleared to Amarillo via the BORRN 1 Departure, CRGER Transition, Direct.  Climb via the departure, expect 8000 in 10 minutes.  Departure frequency 123.8, Squawk 3365.”  You manage to get the clearance written down, but have completely messed up the spelling of both BORRN and CRGER, so you have no idea where the intersections are.  After stumbling through a readback, you ask ground to spell the fixes for you.

    Then, more bad news.  You haven’t updated your GPS cards yet, so the departure isn’t in your 430.  It’s an RNAV only departure, so you can’t fly it based on the NAV Radio.  You were planning on updating your iPad when you got to Amarillo, so you don’t have the departure on there, either.

    This has probably already happened to a few people today already.

    Houston airspace got a major overhaul today.  There are 20 new DPs and 29 new STARs guiding IFR traffic into and out of Houston airspace (including one named the DOOBI 1 Arrival, named after the Dooby Brothers band).

    The FAA’s goal in all these changes, according to AOPA, is to “bring fuel efficiencies, time efficiencies, and reduce carbon emissions” (from Benet J. Wilson’s May 15th article on AOPA.com).  The FAA issued a NOTAM today valid until June 6th describing what routes for pilots to file.  The NOTAM also contains contingency plans for pilots flying without updated charts (like our example above).

    Pilots should expect these wide scale procedure additions and changes to start showing up in other Class B airspace across the country.  As always, make sure those charts are updated, GPS databases are current, and you do some studying of your route before you file your flight plan.

    If you are based in Houston, or heading into or out of the Houston airspace under IFR, have you updated your charts?  If not, you may hear a clearance stating: “N67889, cleared to Amarillo via the BORRN 1 Departure, CRGER Transition, Direct.  Climb via the departure, expect 8000 in 10 minutes.  Departure frequency 123.8, Squawk…

  • Contact Approaches

    Almost all IFR pilots are familiar with visual approaches and what the requirements are in order to fly a visual approach. As a refresher, the Instrument Procedures Handbook defines a Visual Approach as “an ATC authorization for an aircraft on an IFR flight plan to proceed visually to the airport of intended landing; it is not an [Instrument Approach Procedure]” (page 4-56).

    For ATC to issue a Visual Approach, the pilot must have the airport or the traffic to follow in sight. Once the pilot reports the airport or the traffic in sight, ATC can clear the aircraft for a visual approach.

    A limiting factor for a visual approach is ATC’s Minimum Vectoring Altitude. “This altitude, based on terrain and obstruction clearance, provides controllers with minimum altitudes to vector aircraft in and around a particular location” (Instrument Procedures Handbook page 1-42). ATC has to restrict aircraft to these MVAs, which can sometimes be quite high due to terrain or obstacles in the vicinity of the airport.

    Every pilot has been in a situation with a high MVA that ATC can’t get them below, but it’s solidly MVFR or VFR at the destination airport. The MVA keeps the pilot in the clouds, so a visual approach isn’t possible since the pilot can’t see the airport or the traffic to follow. This can lead to extra time to go out and fly an approach.

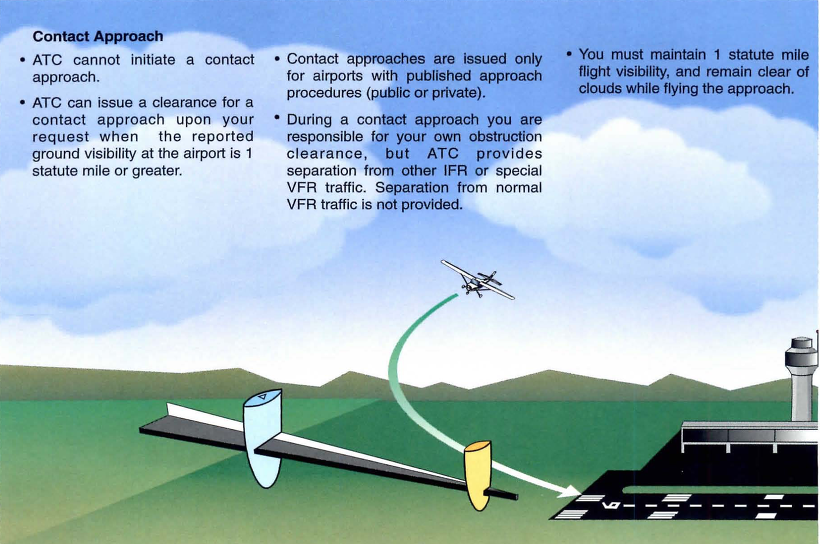
    Enter a Contact Approach. A Contact Approach is different then a Visual Approach. “The main differences between a visual approach and a contact approach are: a pilot must request a contact approach, while a visual approach may be assigned by ATC or requested by the pilot; and a contact approach may be approved with 1sm visibility if the flight can remain clear of clouds, while a visual approach requires the pilot to have the airport in sight, or a preceding aircraft to be followed, and the ceiling must be at least 1,000 feet AGL with at least 3sm visibility” [Instrument Procedures Handbook page 4-57].

    Here’s the simplified explanation: A pilot does not have to have the airport in sight to request a contact approach. All that is required is for the airport to be reporting at least 1sm visibility and for the pilot to remain clear of clouds.

    When would this be helpful for an IFR pilot? Good question. Here’s a scenario.

    Pilot Smalls is about 20 minutes from his destination, which is an uncontrolled airport with only one approach to runway 17. He is approaching from the south and the initial approach fix for the approach to 17 is about 15 miles north of the airport. The airport is under Center control. When he has arrived at this destination in the past, Center usually could only vector him down to 4,000 AGL. He is very familiar with this airport and the surrounding area as he comes to this destination at least 2-3 times a month for business.

    Pilot Smalls listens to the AWOS, which is reporting a 2500 foot scattered layer and 10 miles visibility. He knows it is right traffic for 17 since there is a 2,000 foot antenna on the east side of the field. There is some hilly terrain around, but all the terrain is well below pattern altitude and doesn’t cause a safety issue.

    Looking out at the clouds, Pilot Smalls observes that the cloud layer is scattered to broken, but more scattered on the west side of the airport, with several large openings that he can see the ground through. Center asks for his approach request and Pilot Smalls requests a visual approach. Center gives him a descent to 4,000 AGL, their MVA for the area. They tell him to report the airport in sight for the visual approach.

    At 4,000 AGL, Pilot Smalls is going through the scattered layer of clouds, but can see the ground in between the clouds and deems he has room to maneuver safely between the clouds and stay clear of them. He can’t see the airport, so a visual approach seems unlikely. He can’t cancel IFR because then he would have to keep the VFR cloud clearance and visibility requirements in Class E airspace (1,000 feet above, 500 below and 2sm horizontally), which isn’t possible in this case.

    5 miles from the airport, ATC states, “N12345, I’m going to have to send you out for the approach since you don’t have the airport in sight.” Pilot Smalls then requests a Contact Approach. ATC clears him for the Contact Approach to his destination, so Pilot Smalls descends through a break in the clouds, remaining clear of clouds, until he gets below the base of the ceiling. He maneuvers onto the right downwind, lands and cancels IFR.

    Contact approaches can be useful at controlled and uncontrolled airports. The first time you request one, do so with a higher ceiling and some room to maneuver to keep your safety margins. After you’ve done a few, you can determine what your personal minimums are for a Contact Approach.

    I would not recommend doing a Contact Approach at an airport you are unfamiliar with. It’s vital to know what obstacles are around since on a Contact Approach, the pilot is now responsible for traffic avoidance and terrain avoidance, whereas on a visual approach, ATC resumes that responsibility.

    For more reading on Contact Approaches and another good scenario, check out Bold Method’s article on Contact Approaches.

    Almost all IFR pilots are familiar with visual approaches and what the requirements are in order to fly a visual approach. As a refresher, the Instrument Procedures Handbook defines a Visual Approach as “an ATC authorization for an aircraft on an IFR flight plan to proceed visually to the airport of intended landing; it is…

  • A Complex Clearance?

    I was flying in the Rio Grande Valley in south Texas a few weeks ago and heard an IFR clearance given to a King Air that pricked my ears up.  It was a clearance from CRP to LRD, but the routing was one you don’t hear too often anymore.  Because of active military airspace, the routing was via a radial and DME off the CRP VOR (so a point defined by the radial and DME) to another radial and DME point off the LRD VOR.

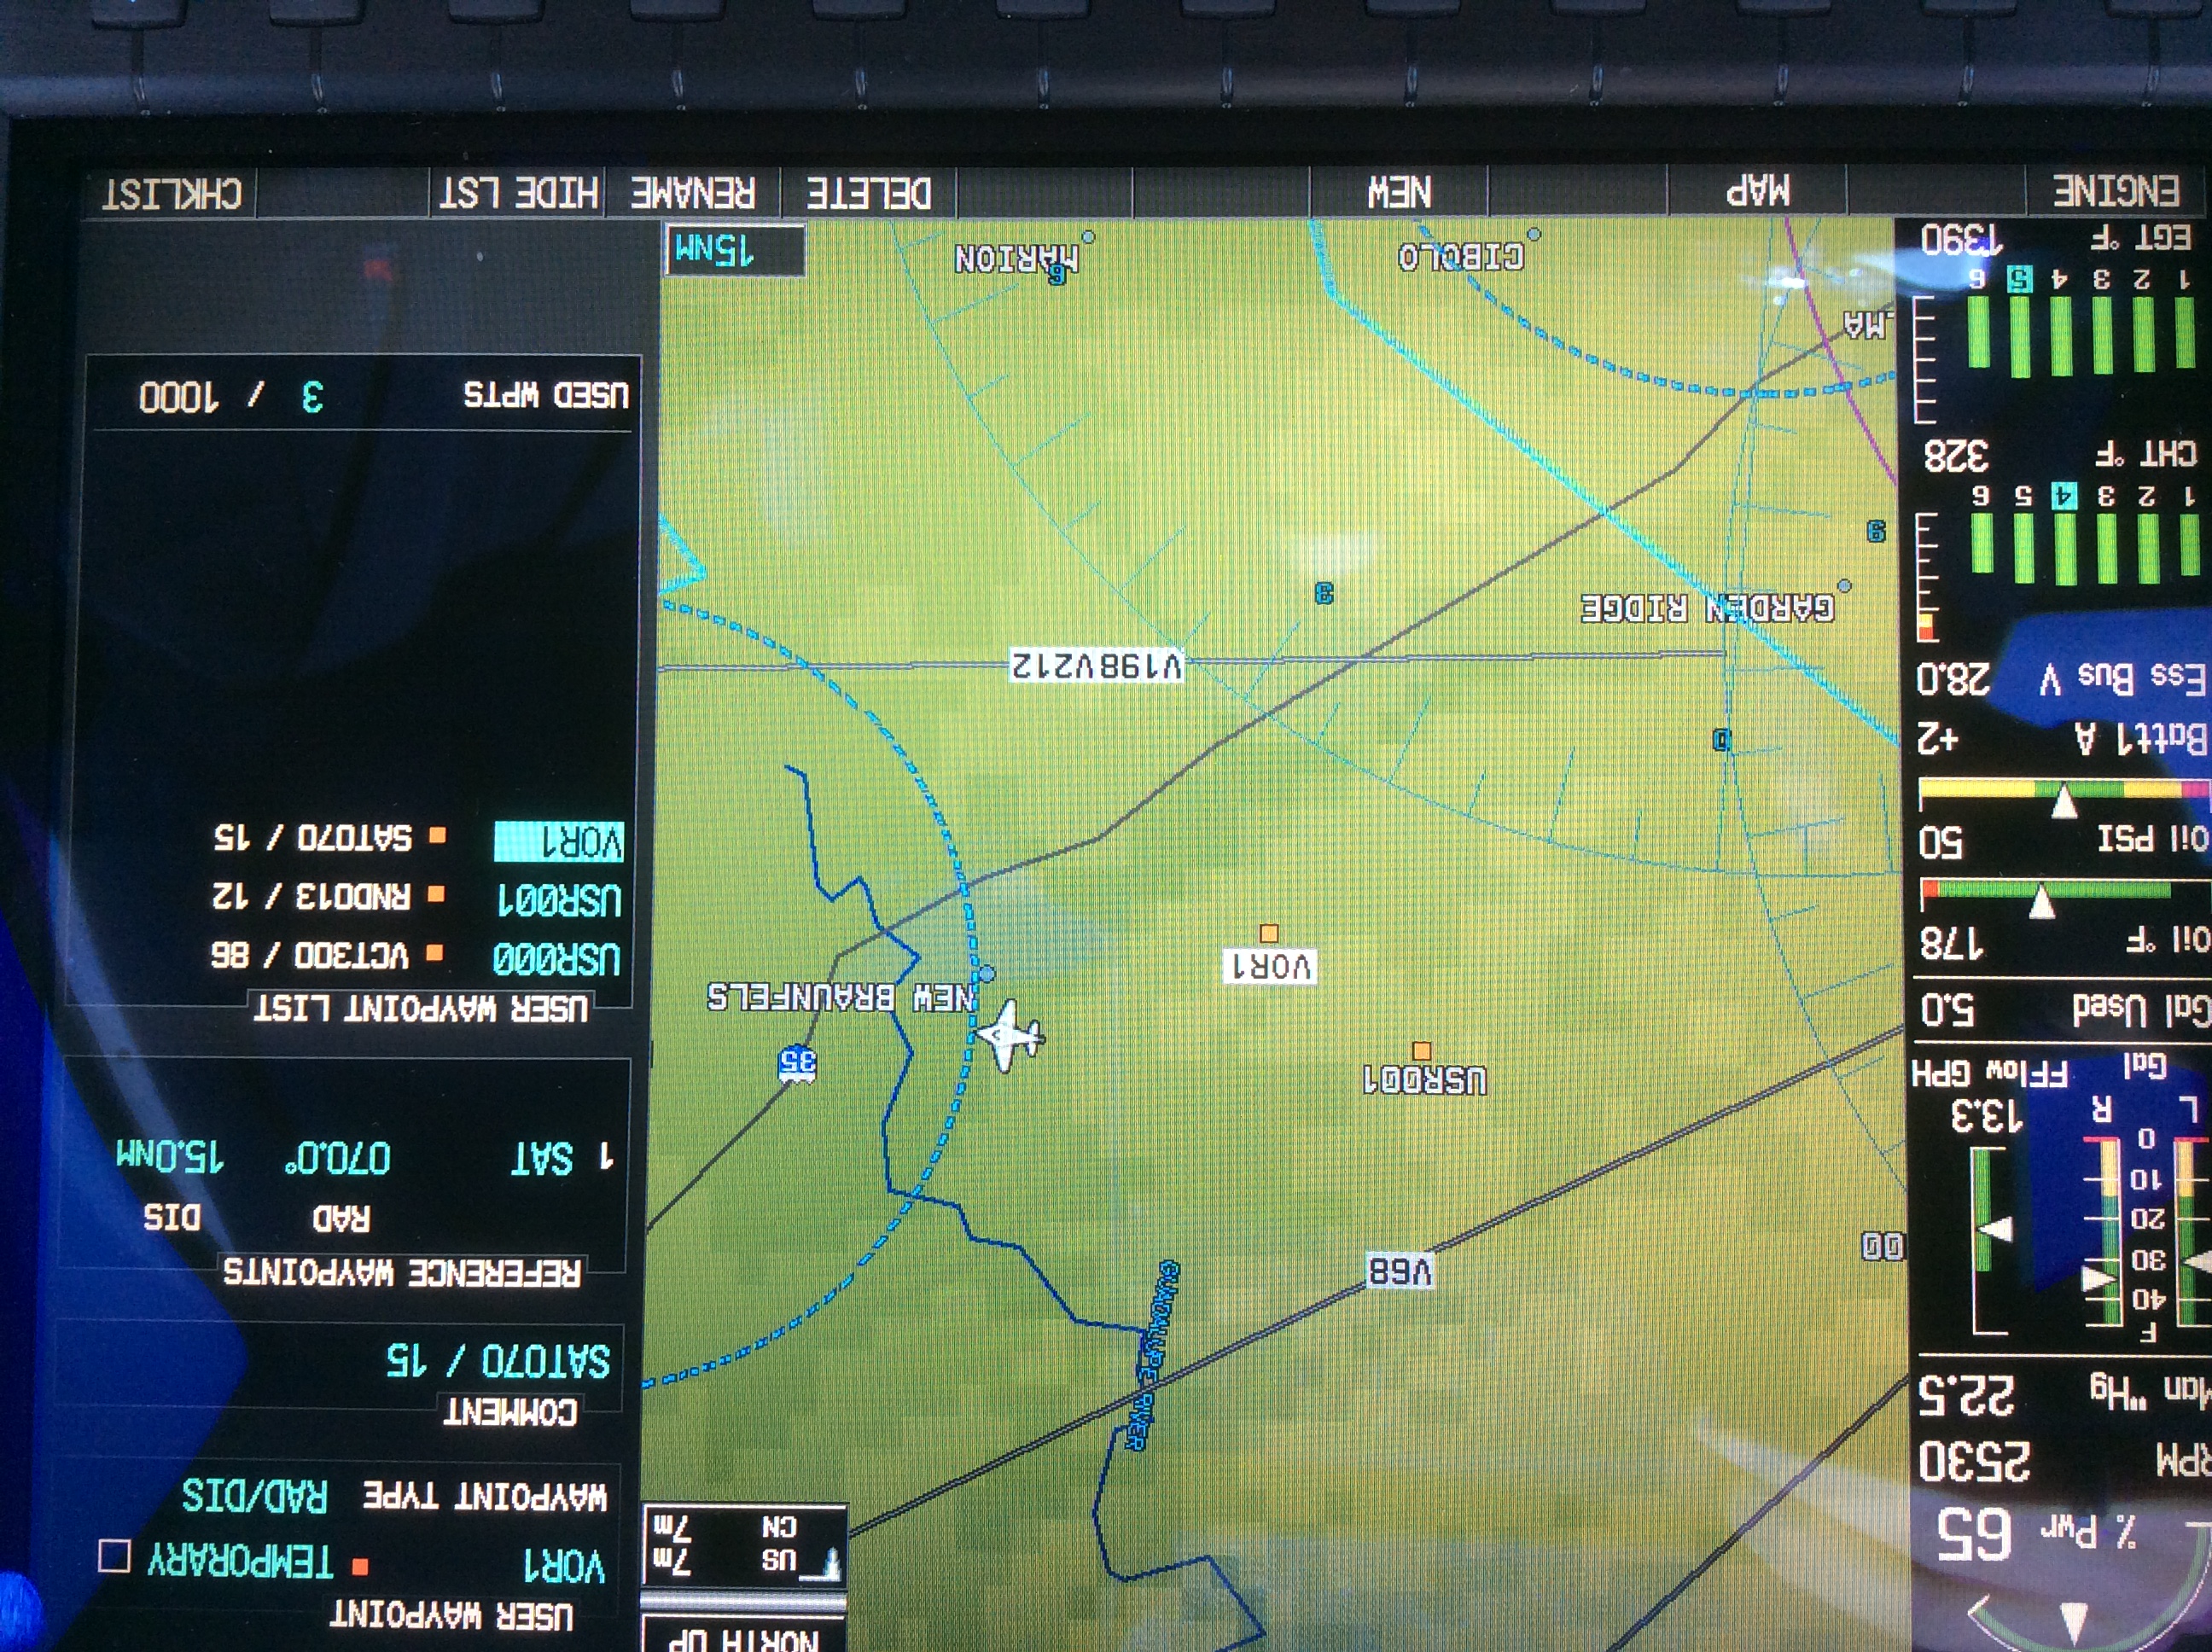
    It took me a second to think about how to do this the easiest (without setting up the VOR and watching the DME).  After a moment’s thought, it’s actually a snap with the G1000.  You create 2 user waypoints, one for each Radial/DME spot, then put those 2 user waypoints in your Flight Plan.

    Here’s how.

    Step 1

    Using the big knob, go to the Waypoint chapter.  Once there, scroll down to the User Waypoint page using the small knob.

    Step 2

    Press the New soft key.  If you want to name the waypoint something specific, you can do that at the top of the page.  If not, it will default to something like VOR 1 or VOR 2.

    Step 3

    Under Waypoint Type, use the small knob to select RAD/DIS (stands for Radial/Distance).

    Step 4

    Under Reference Waypoints, again using the small knob (or your keypad), type or dial in the VOR identifier, the radial from that VOR, and the DME distance.  Press enter and you are done.

    Once you have both User Waypoints created, then just put them in your flight plan (if you forget what you named them, you can just go back to the User Waypoint page), and off you go.

    I was flying in the Rio Grande Valley in south Texas a few weeks ago and heard an IFR clearance given to a King Air that pricked my ears up.  It was a clearance from CRP to LRD, but the routing was one you don’t hear too often anymore.  Because of active military airspace, the…

One Comment

  1. If Epic adds the g3000 and the auto land system it will be the ultimate personal aircraft.

Leave a Reply

Your email address will not be published. Required fields are marked *