Chuck’s Aircraft, the Austin Cirrus Service Center located at the Austin Executive Airport (KEDC), is celebrating it’s 10 year anniversary this month. What better what to celebrate than to fly in for Texas BBQ? That’s what they thought too!
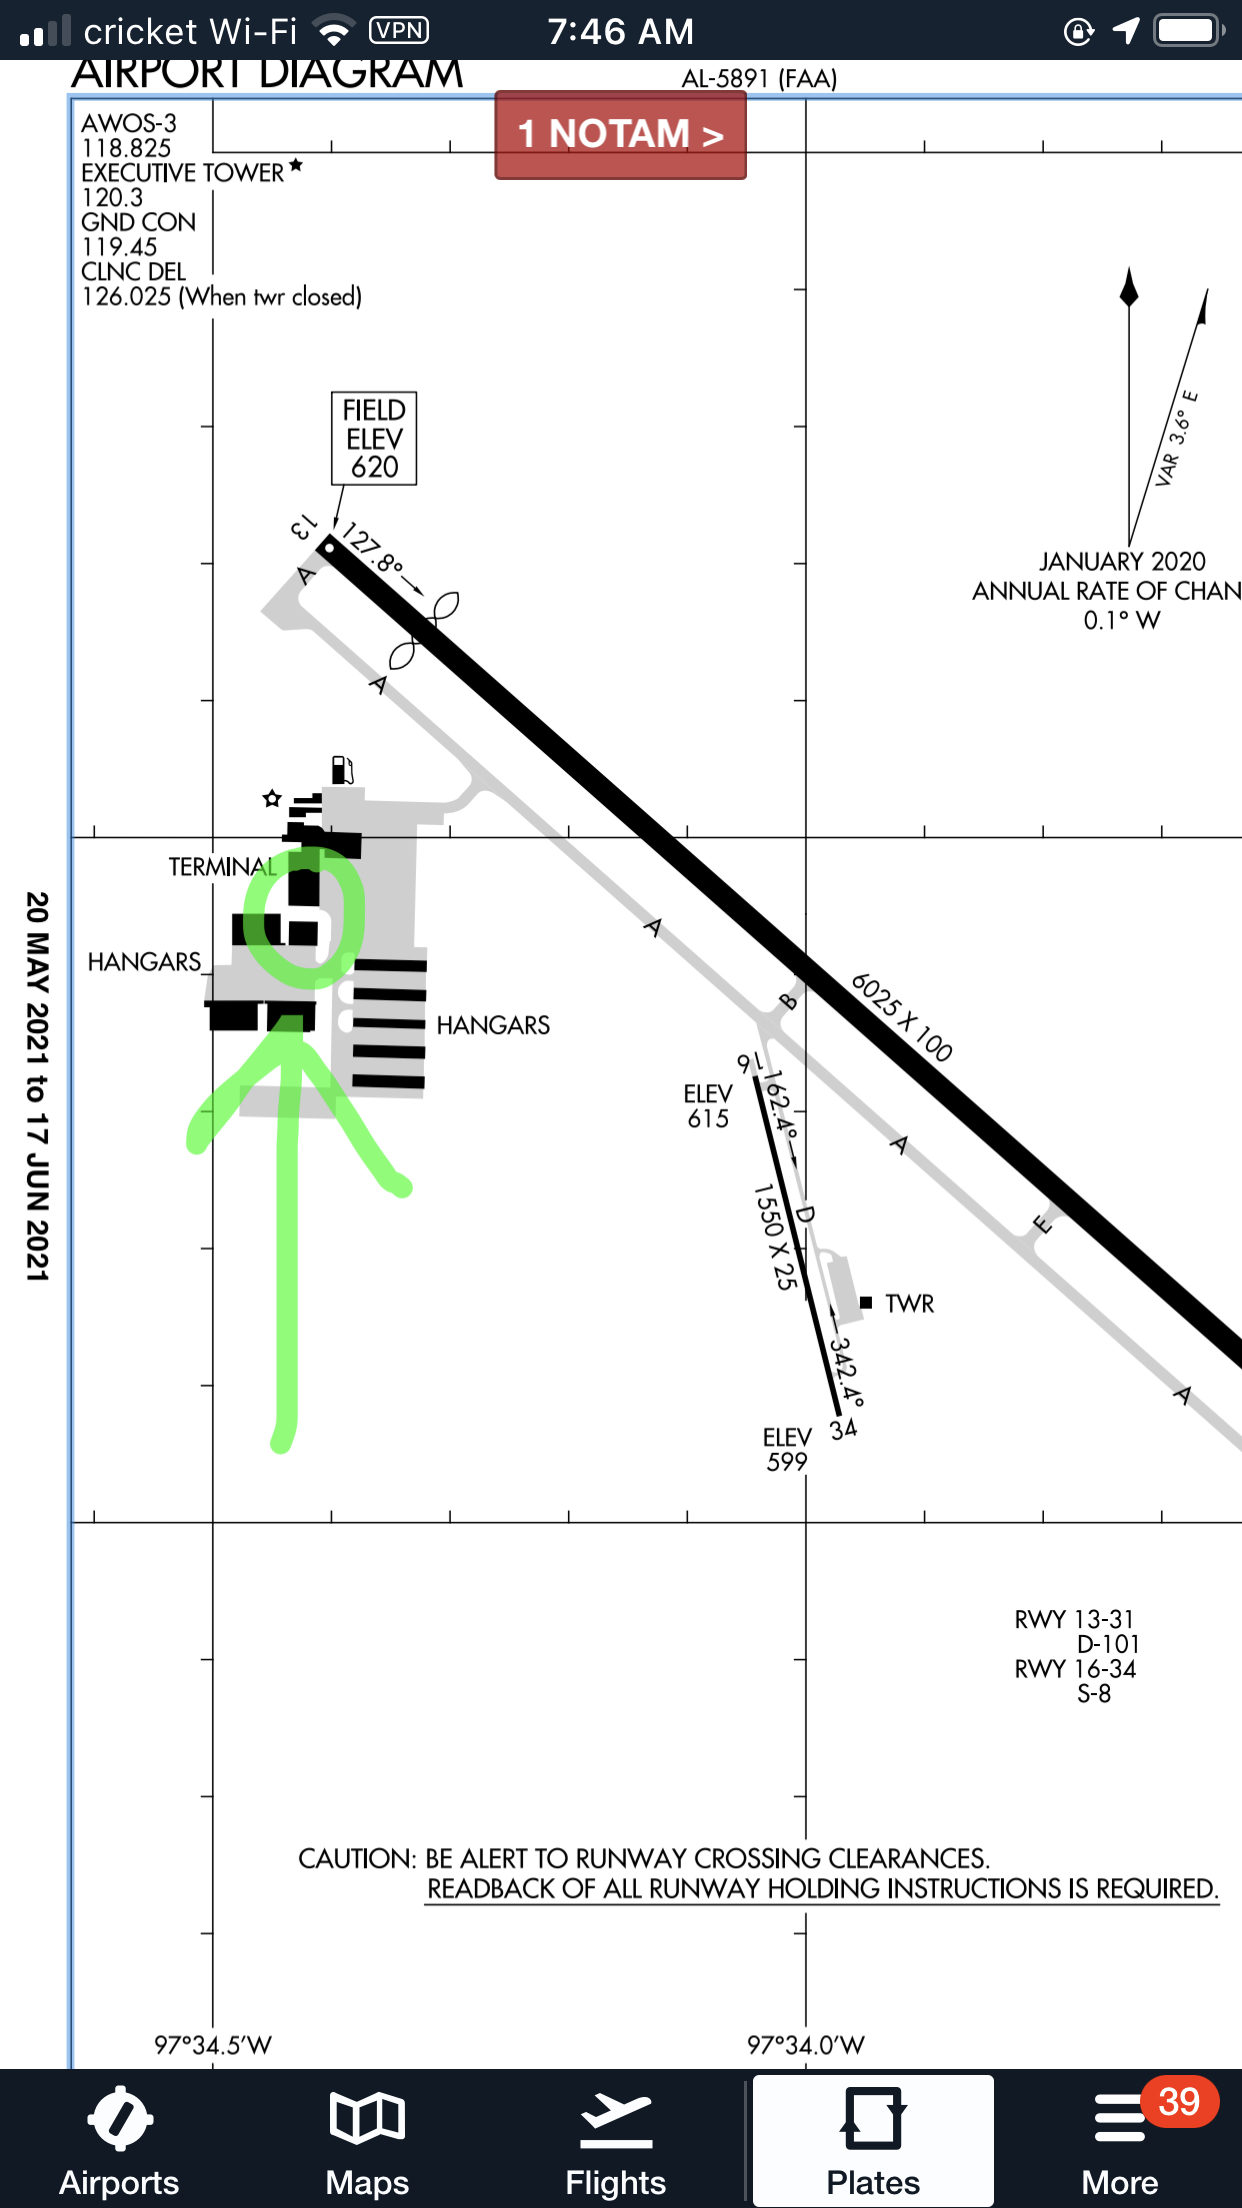
Chuck’s Aircraft will be hosting its 10 Year Anniversary Fly In on Friday, June 25th from 1pm to 5pm on their ramp at EDC (see airport diagram below). Chuck’s Aircraft always provides quality maintenance for Cirrus and other aircraft, so come show your appreciation for them.
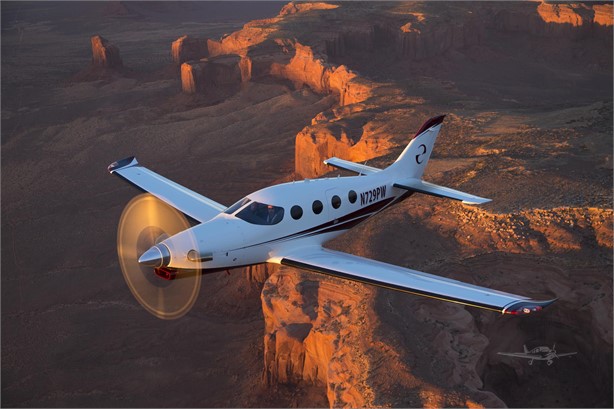
When the Epic E1000 was finally certified in the spring of 2020, there was much celebrating across the aviation world. Epic Aircraft expended a lot of time and energy getting the E1000 certified and into production (more information on that journey here and in Flying Magazine here).
The airplane is amazing. In the single engine, 6 seat turboprop market, it easily blows away the competition. With it’s 1,200 SHP PT6-67A, it has double the horsepower of the M600 (600 SHP), and 350 more horsepower than the TBM 940 (850 SHP). It’s 60 KTAS faster than the M600 and, even though the TBM can keep up (both airplanes have equal top cruise speeds of 330 KTAS), the Epic E1000 can carry a payload of 1,024 pounds with full fuel, while the 940 can only carry 584 pounds with full fuel. The TBM carries about 15 minutes more of fuel, but to me, that’s pretty negligible.
Did I mention climb rates? The E1000 climbs at an average of 1500 FPM at Vy (it’s capable of 4,000 FPM), making it to 25,000 feet in 10 minutes. The TBM climbs at 1000 FPM, taking 13 minutes to climb to the same altitude, while the M600 settles in at about 800 FPM, reaching FL250 in 21 minutes.
If you expand the comparison to include the Pilatus PC-12, the two airplanes have 1,200 SHP, but the Epic is 50 KTAS faster and they both have about the same weight carrying ability.
In the most important arena, price, the E1000 is around a million dollars cheaper than the TBM 940.
The one drawback to the Epic E1000 that immediately was noticeable was the autopilot. Epic originally installed the STEC 2100 autopilot to pair with the G1000 (and later the G1000 NXi). Epic decided to stick with the STEC 2100 through certification for the plane since that autopilot was on all of the E1000s paperwork going through all the levels of FAA approval. To change to the GFC 700 during the certification process would have been a massive undertaking that probably would have delayed certification.
The STEC 2100 is a good autopilot, but, as any G1000 pilot can tell you, the lack of integration between any STEC autopilot and Garmin panel leaves some to be desired. Not all the bugs talk, which often requires dual data entry, which can lead to forgetting to do both the bug and the autopilot when things get busy. Hello, altitude deviation.
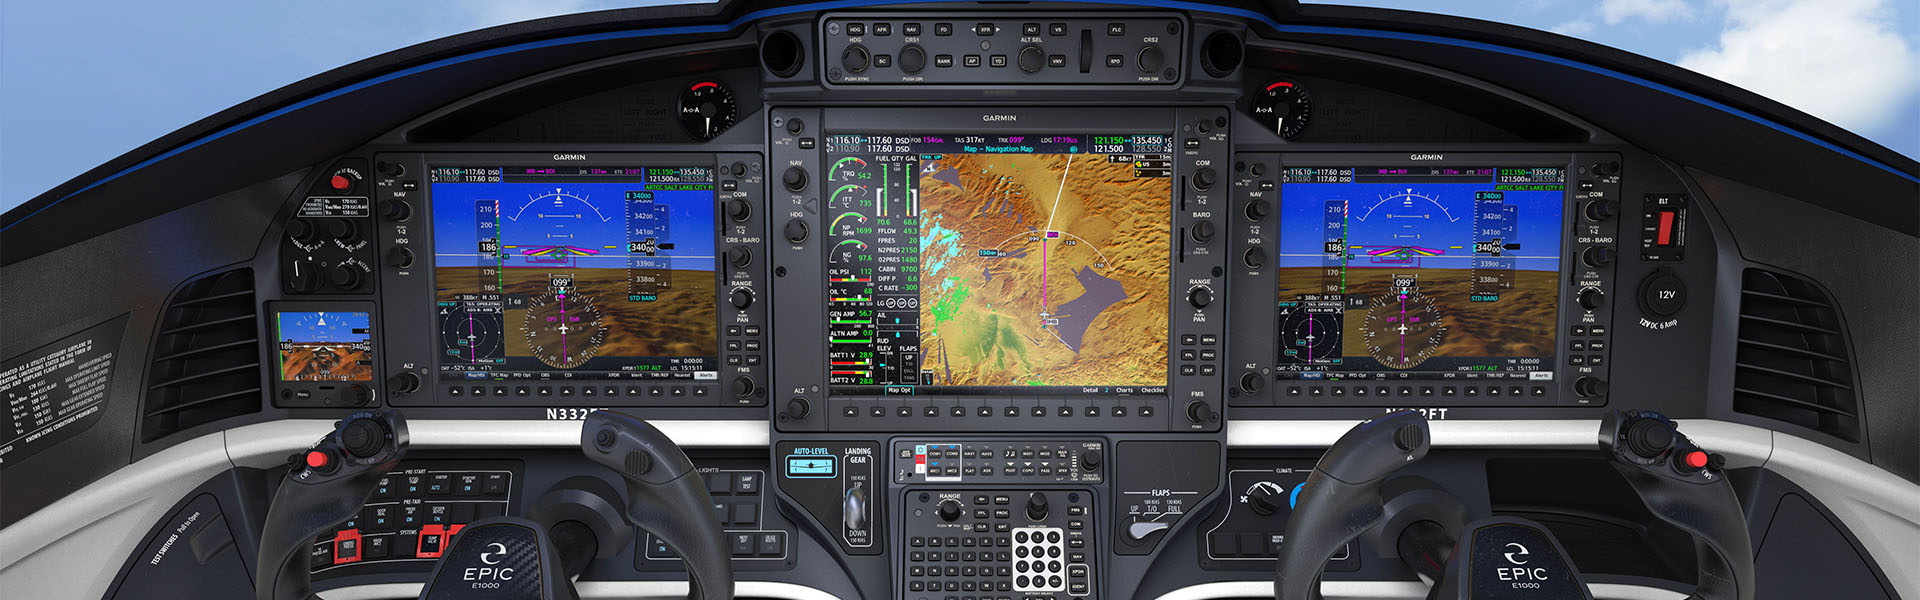
The goal for Epic was never to leave the STEC autopilot in the airplane. The first E1000s were rolled off the line with the STEC, but Epic didn’t take long to change the autopilot to the much more integrated Garmin GFC 700. That took place this winter (2020), and the E1000 received it’s first upgrade, with Epic dubbing the airplane the Epic E1000 GX.
I expect the innovators in Bend, OR, where Epic is based and where tons of innovation in aviation happens (Lancair/Columbia started in Bend while RDD is based there as well), to quickly come out with more avionics upgrades for the airplane. I wouldn’t be surprised to see a G3000 version at some point, complete with auto throttles and the new Garmin Autoland. Epic would be smart to follow in the steps of Daher and offer two models, one with the G1000 and one with the G3000 (the TBM 910 has the G1000 NXi while the TBM 940 has the G3000).
I have yet to fly in an Epic E1000, but I would certainly jump at the chance to do so. Someone asked me yesterday what airplane I would buy if I had a blank check. With the GFC 700 now in the Epic, it would absolutely be the E1000 GX.
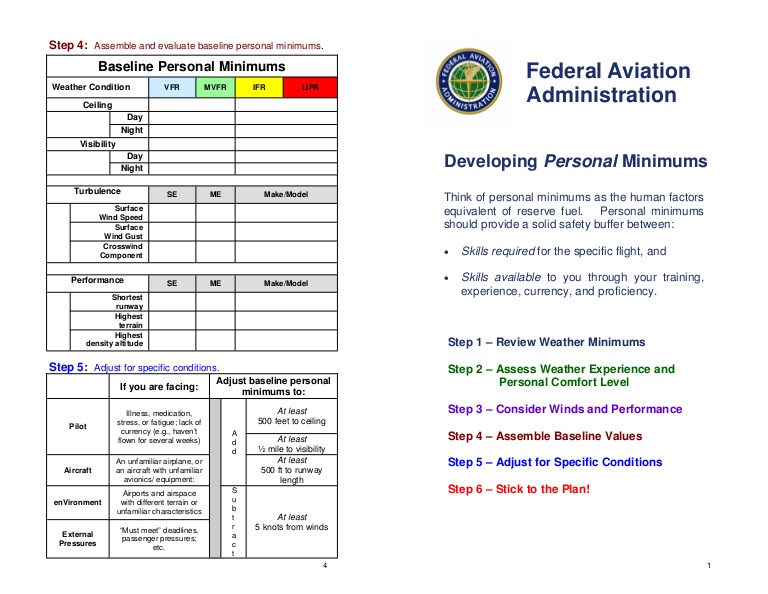
The FAA defines personal minimums “as an individual pilot’s set of procedures, rules, criteria, and guidelines for deciding whether and under what conditions to operate (or continue operating) in the National Airspace System.” Have you actually given thought as to why we choose the personal minimums we do? From the beginning of initial pilot training, weather minimums were established for day-to-day training and during solo flight. I didn’t realize it at first, but I later learned these limits were not just an insurance mandate, but these minimums were set at the time to safely operate an aircraft based on my “then” current experience.
So here’s the question: what are your personal minimums and WHY do YOU have them? Do you ever lower or raise your minimums? Are your minimums based solely on your overall experience level or do they take into account other variables such as advanced avionics? For pilots that fly multiple aircraft like I do, can and do your minimums change in regard to category or type of aircraft you are flying? It’s a judgment decision on how you chose your minimums. However, it’s important that time is taken before you strap into the cockpit for each flight to critically think about the different risk factors and variables which may affect your decision for the minimums you choose.
To guide us, let’s try briefly apply the FAA’s Personal Minimums Checklist to see how risk factors might shape what personal minimums or decisions we make for the day. Remember, just because you have been flying with a certain set of minimums one day, doesn’t mean you can’t adjust your minimums to a higher value given an ever-changing situation.
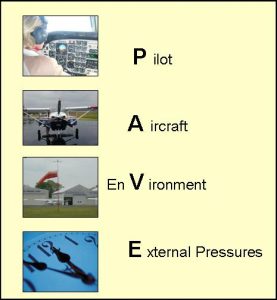
The acronym most pilots have heard is PAVE:
Pilot– We all should be familiar with the acronym IMSAFE associated with this. It addresses variables such as Illness, Medication, Stress, Alcohol, Fatigue, and Emotion. But how do you adjust your personal minimums using this guideline? Have you ever thought about raising your minimums for a training flight if you only got 4-6 hours of sleep, instead of 8? Or if you anticipate a hard IFR flight with a long day, maybe taking a safety pilot to mitigate the chance of a mistake if you’re forecasting having to shoot an approach to your weather planning minimums.
Aircraft– Personally, this is a really important factor for me when deciding what minimums to apply. I often spend a large majority of my time asking myself; is this aircraft properly equipped for the flight? This question goes beyond just looking at the logbook for a properly equipped and legal aircraft. A professional pilot should think further. Am I flying a traditional 6-pack “steam gauge” layout, non-slaved compass card, with a separate OBS gauge for course guidance? What if the aircraft doesn’t have an auto-pilot? What if I’m flying an aircraft equipped with a dual auto-pilot, dual GPS with an integrated glass cockpit? I can comfortably say my personal minimums change depending on the equipment I have available.
A pilot should also look at his/her recency with the aircraft. For example, if you are qualified to fly both airplanes and helicopters, maybe you should choose to have higher personal minimums in one particular airframe or if you haven’t flown that airframe within 30, 60 or 90 days. This is a very important factor for the owner/pilot.
EnVironment– Most of the time, when we think of environment, we ask ourselves, is the weather legal for me to take off and, more importantly, can I conduct this flight safely? Basic flight planning should have taught us to take into consideration crosswind limits, day versus night, and the type of airspace the flight is conducted in. Thought should also be given to how you set your personal minimums in regards to the particular type of environment you might rarely encounter. Flying an approach to your minimums in the flat plains of Texas during the day is one thing, but how would you adjust your weather minimums flying to a new airport, at night, with no moon illumination, in the mountains of Colorado? Could you reduce the risk and adjust your minimums in this scenario with two pilots?
External Pressures – What external pressures are affecting your flight? Passengers, the owner, “get-there-it is”, the desire to impress someone? Although external pressures should never be a factor when conducting a flight, they almost always play a role in your decision whether to conduct the flight or not. For example, a professional pilot gets hired to do a flight and the weather is below their personal minimums. The pilot could be tempted to lower their minimums by 100 feet to take the flight for a paying customer. This scenario plays out every day across the country whether it’s a professional pilot or owner/pilot. It would be foolish not to consider this type of pressure. Always make sure you have a plan if and when you encounter this situation. Planning your flight and having a plan to deal with these potential scenarios ahead of time ensures you stick to your minimums. It can be as simple as telling your passengers, or the owner, well ahead of your flight what your personal minimums are to accept the flight, and to ensure they, or you, have a back-up plan!
Most pilots will never break a hard limitation such as an airframe cross wind limitation, or engine limit, but the chances of breaking a personal minimum are realistic. Think about the last time you went on a diet and broke your plan because you were tempted by your friends or family during an outing. Self-imposed personal minimums can be hard to enforce and we need to acknowledge this as humans. Here are a few techniques that you can use to assist in making a decision using personal minimums and help reduce the influence of external pressures.
Step 1: Sit down with your CFI/CFII and fill out a personal minimums worksheet. Filling one out by yourself is a good start but having an outside objective view will help in making sure your personal minimums are realistic. Remember, it is easy to convince ourselves that we can do something even though we have set personal minimums. Talk with other pilots to see if you have set realistic expectations.
Step 2: Preflight planning must start a few days in advanced. It can be as easy as checking what the forecast might be and looking at the projected route, near-by alternate airports, and various approaches. This can be done quickly and will give you a heads up on whether the flight can be safely conducted or not. By alerting the passengers or owner early enough, alternate plans can be developed. An extra pilot can be added, the passengers can fly commercial, bring along a CFI, or cancel the trip altogether and seek alternate transportation. The main point is the decision was made well ahead of the flight when conditions didn’t look favorable. This helps in removing external pressures and ensures you don’t go below your personal minimums.
Step 3: Never be afraid to ask for a second opinion. Part 135 operators have set procedures for conducting flights which assist the pilots in making decisions. These set procedures help remove external pressures by allowing the pilot to say, “The rules don’t allow for this, or this is how we will conduct the flight!” However, under Part 91, the pilot has to take ownership for all phases of the flight. This is where talking it out with another pilot helps with mitigating external factors and the environment. Ideally, this person should have more experience and be able to talk through the situation. For instance, if I’m flying to a new destination, I often seek the advice from another pilot who’s familiar with the area. They may have key insights into weather patterns, preferred approaches, or hazards to avoid. In certain situations, asking for another pilot’s opinion might be what influences your go/no-go decision! You’ll be amazed how much you can learn just from talking to other pilots.
Step 4: Continue to build your experience and knowledge base. Building experience requires us to push our abilities, and sometimes this may be to the limit. However, this can be done in a controlled training environment or just going out and experiencing it. Get a new license, fly regularly with a CFI/CFII, and always try and take advantage of training opportunities. For example on your next flight from point A to point B, practice hand flying an approach, do a short field landing, a quick steep turn, etc. Quality flight time is always better than quantity. Continue to challenge yourself and try not to become complacent.
Personal minimums are a tool to assist in every pilot’s aeronautical decision making process. Use your personal minimums to guide your final go/no-go decision and remember to stick to the plan. I encourage you to review the FAA’s Risk Management Handbook (FAA-H-8083-2). Appendix B has Sample Risk Management Scenarios and reviewing them will give a better understanding how to apply the techniques discussed to your everyday flying.
Pedro Vargas-Lebron is a King Air 200 and uH-60 Blackhawk Instructor pilot with the Texas Army National Guard. Pedro is a CFI/CFII/MEI both in airplanes and helicopters with over 4000 hours of flight time, half as an instructor pilot.
One evening this summer, my wife and I were flying down the southern shore of Long Island in my father’s E33 Bonanza. We enjoyed the sunset as we flew westbound and our plan was to fly the New York Hudson corridor, where we would arrive just after dark. As we approached New York’s airspace, two voices in my head started having a debate.
The first voice said: “You should turn on your landing light when you get to New York to make the airplane more visible.”
The other voice said: “That’s true, but I bet you’ll burn the landing light out”
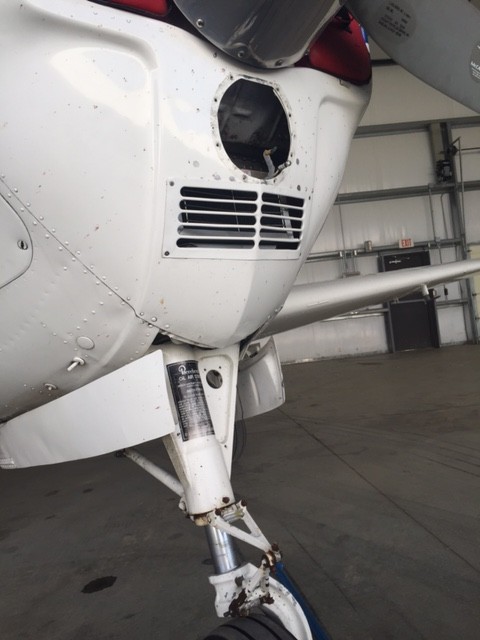
Well, as it turned out, both voices were right. My landing light fired right up when I needed it to fly the Hudson, but when it came time to land back home I had no such luck. Unfortunately, this was not the first time that I had been given the chance to practice my blackout landings. This Bonanza model has only one landing/ taxi light which is mounted in the lower cowling behind the propeller. This location is less than ideal because the filament in the bulb is fragile and can be damaged by engine vibration.
We landed uneventfully and after putting the airplane away, I decided it was time to look into upgrading the lighting to something a little more modern. I was unsure of my options, but seeing as the airplane needed a replacement bulb regardless, it seemed like a good opportunity to make a change.
After doing a little reading, I learned that HID or LED landing lights would be the best solution to my problem. I was familiar with LED aircraft lights, but had never heard of HID before.
Here is what I learned:
HID Landing Lights
HID, or High Intensity Discharge landing lights, create light by arcing electricity through a sealed gas capsule. They are brighter than LED and traditional incandescent, and the light created more closely resembles the look and feel of sunlight. HID installations require a ballast to carefully regulate the flow of electricity to the gas capsule and also require a “warm up” period after being turned on in order to reach their full brightness.
Fitting an aircraft with HID landing lights tends to be more expensive and time consuming than installing an LED light and would likely require involvement by an A&P/ IA. However, if you want the brightest light available, HID is probably the best bet.
Pros
Brighter, more natural looking light
Draws less power than standard bulbs
Long bulb life
Does not generate much heat
Cons
More expensive than other lighting options
Lights must “warm up” after being turned on
Cannot be pulsed easily
Cost/complexity of installations
LED Landing Lights
LED, or Light Emitting Diode landing lights, have no filament and work by moving electricity through diodes which are connected into a circuit. These lights have become very popular for many uses due to their simplicity, low cost, and brightness.
While not as bright as HID light, the LED lights require no “warm up period” and can be easily pulsed. LED lights draw much less power from the aircraft’s electrical system than traditional bulbs and boast incredible life length. LED bulb installation is very simple and can often serve as a direct replacement for the original lights.
Pros
Instant light (no warm up)
Incredible life length (>5,000 hours)
Low Cost
Simplicity of installation
Can be pulsed easily
Low power draw
Cons
Not as bright as HID lighting
After weighing the options, I decided to replace the incandescent bulb in the Bonanza with an LED bulb. I read the reviews online and talked to some of my friends who work in aviation and eventually decided on the Lycoming Alphabeam. The Alphabeam is FAA/PMA approved and is available through Aircraft Spruce and other aviation parts vendors. The bulb cost around 250-300 dollars and I was able to install it as a direct replacement for our old light. All I had to do was take the old one out, put the new one in, and make a logbook entry.
Below are some pictures of the installation:
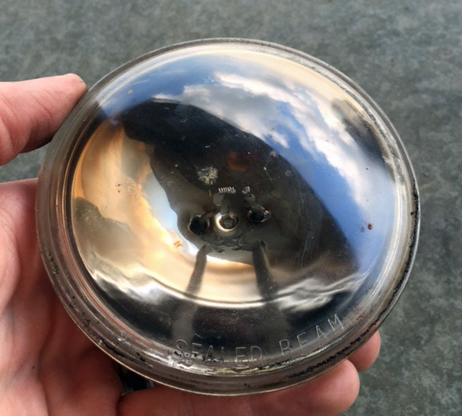
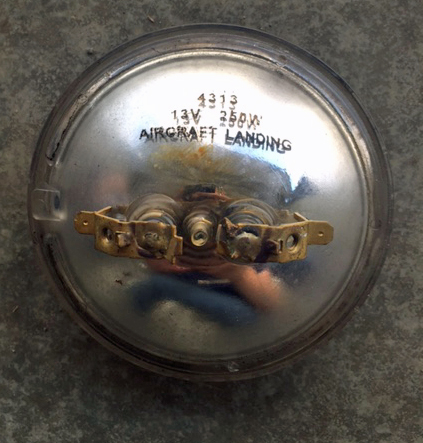
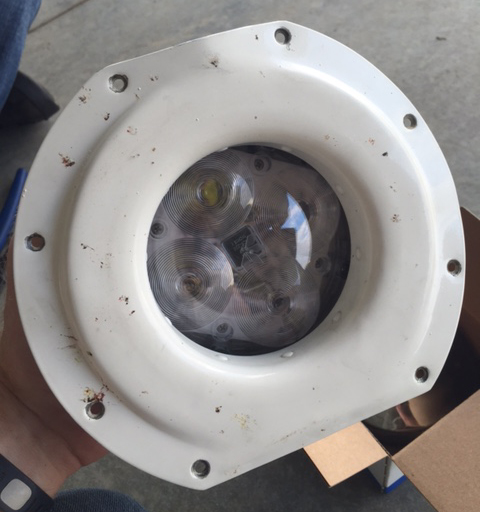
After removing the old bulb, I double checked the information on the back to be sure I ordered the correct LED replacement.
You can see that the bulb is a 13V, 250W landing light, #4313.
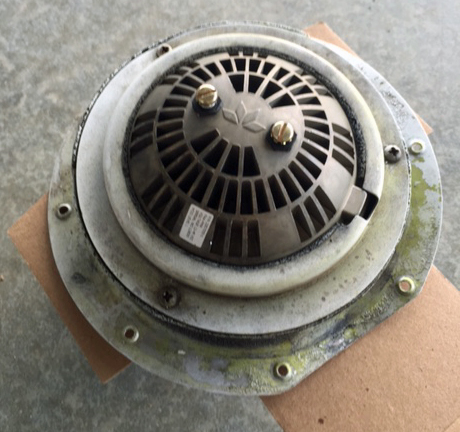
The new light mounted easily into the existing bracket with no modification.
After mounting the new bulb, I reconnected the wiring and installed the bracket back into the nose bowl.
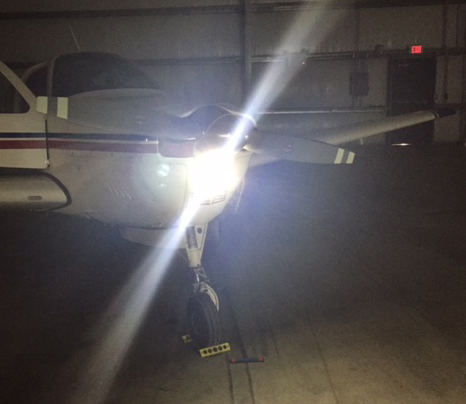
It works!
Last weekend I finally had an opportunity to take the airplane out after dark and see how the new light compared to the old one. I am pleased to say that it did a wonderful job and exceeded my expectations.
If you are interested in seeing a side by side comparison of the different lighting options, a quick Google search should provide what you are looking for. In my own experience, I would say that the LED light was brighter than the old light and did a very good job illuminating the taxiway and runway. It was extremely nice not to be concerned that my light wouldn’t work as I was setting up for landing at an unfamiliar field after dark. I also enjoyed feeling that I had the option to leave it on during climb and cruise in order to increase my visibility to other aircraft.
Many models of aircraft have multiple landing/ taxi lights installed which greatly reduces the likelihood of having to land without one. In our case, spending the extra money to upgrade to the LED bulb made sense because of the desire for increased reliability. If you are looking for a relatively inexpensive way to upgrade your airplane, LED or HID lighting may be something to consider.
Andrew Robinson is a 135 Charter Pilot and flight instructor who lives with his wife and 2 daughters in Pennsylvania. He flies Pilatus PC-12s and instructs in Beechcraft Bonanzas.
I’m a big fan of having my Foreflight map always match up exactly with the way I am flying. Having a Flight Stream in the airplane helps a lot with that as it always prompts me to load the new flight plan from the GPS into my Foreflight map. When I load an approach in the GPS flight plan, Foreflight will put it into my Foreflight flight plan via the Flight Stream.
The problem I run into on Foreflight is when there is a published hold at the Initial Approach Fix (IAF), but ATC has told me to fly the straight in approach and skip the hold. Up until recently, I didn’t think there was a way to set up a straight in approach on Foreflight, so I just settled for the hold staying on there.
Not anymore! There is a simple trick that I discovered that allows you to remove the hold from the Foreflight flight plan. Here’s how to do it.
Load the Approach
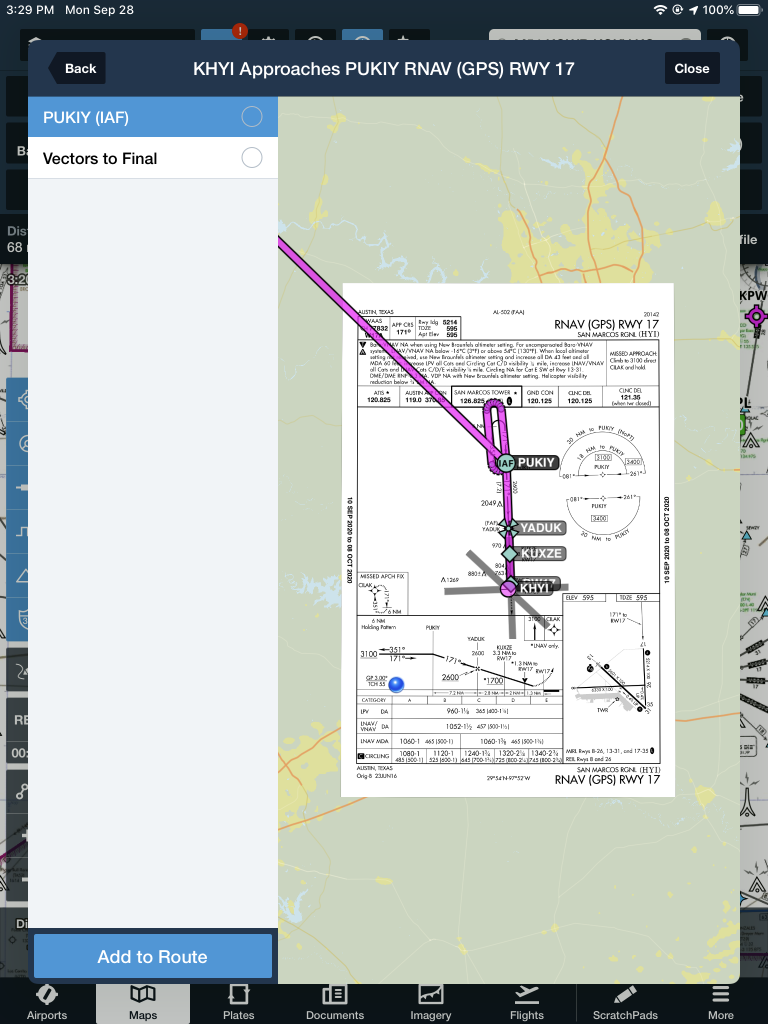
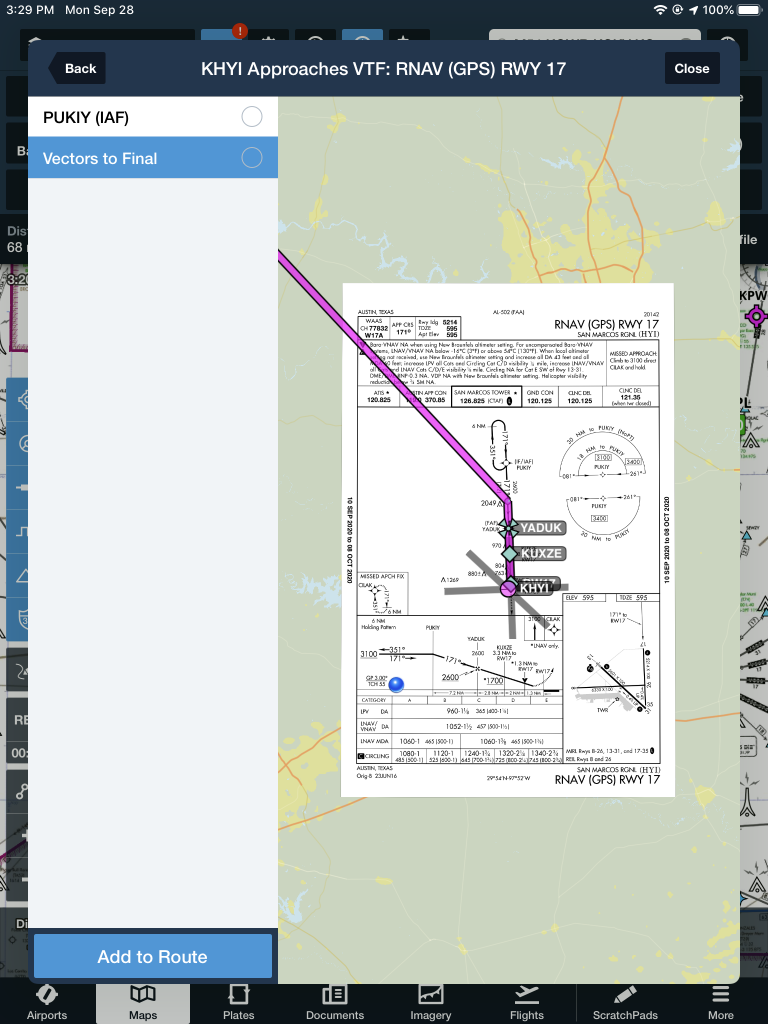
The first step is still to load the approach into your Foreflight flight plan on the Map page. In this scenario, we are flying from KAQO, the Llano Airport, to KHYI, the San Marcos Airport. Austin Approach has told us to expect the straight in RNAV 17 KHYI via PUKIY. So, on Foreflight, we have KAQO and KHYI in our flight plan. Then, I tap the Procedures button on the upper right hand corner of the screen. I then tap Approach, then RNAV 17 KHYI. Then I select my transition.
The options given are either PUKIY with the hold, seen below;
Or Vectors to Final, which lines me up inside of PUKIY. Neither of these are what I want.
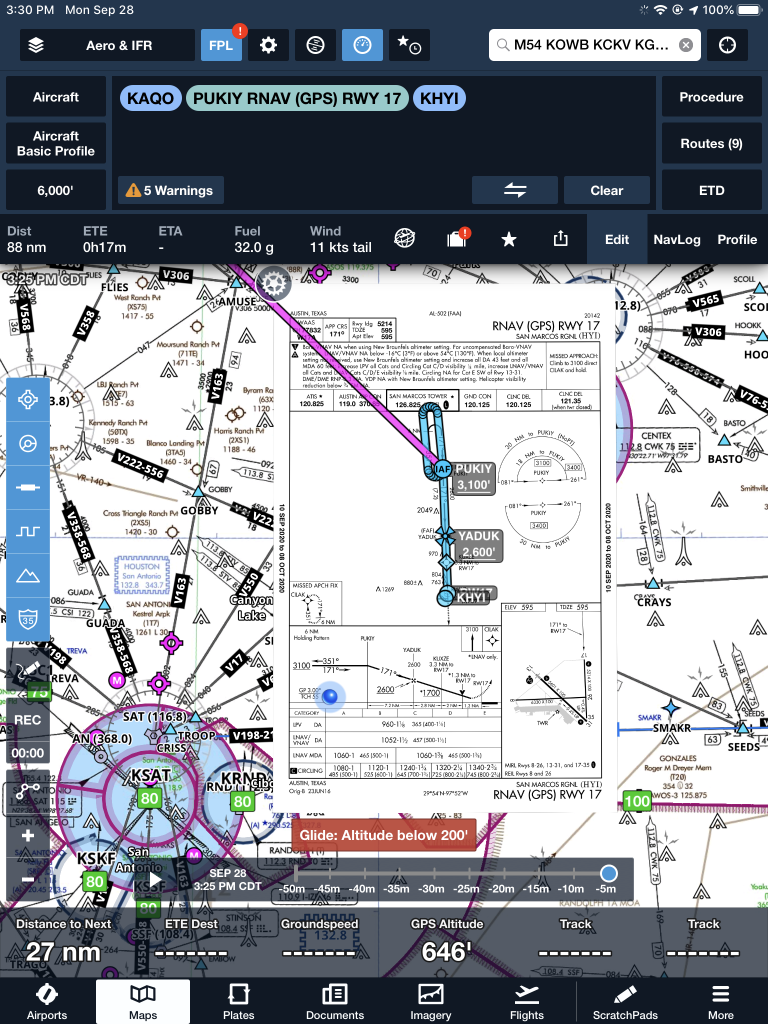
But, to get this to work, I select PUKIY, then tap add to route. Now we have our approach loaded into our flight plan.
Removing the Hold
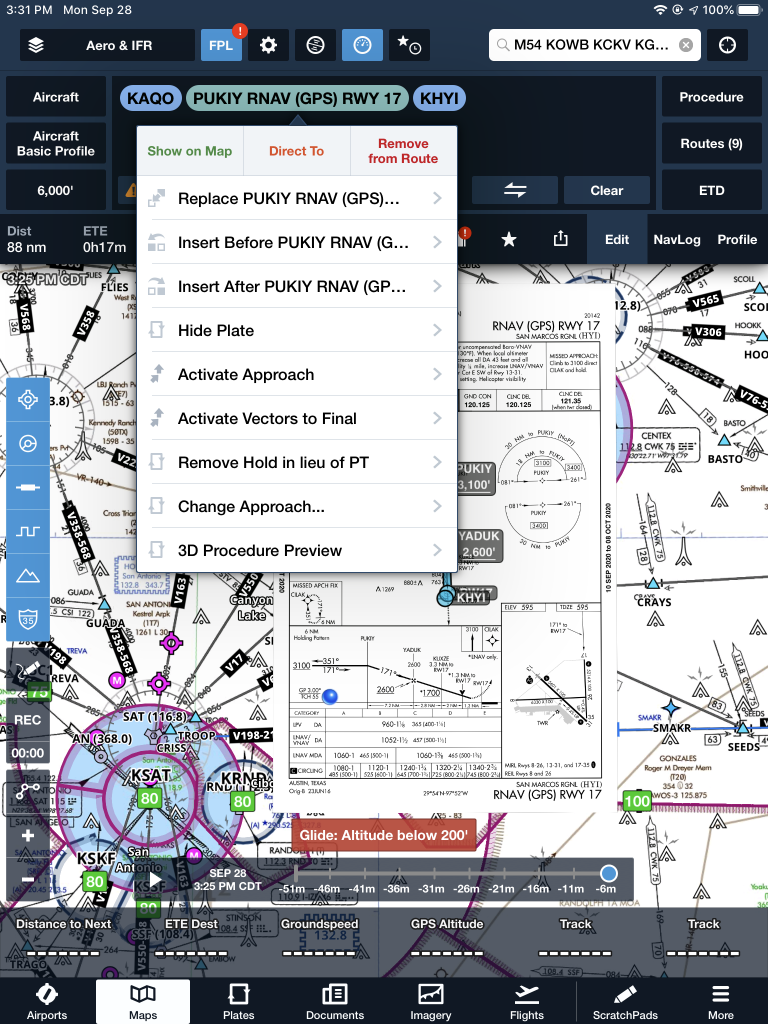
The RNAV 17 is now in the Foreflight flight plan, but the hold is displayed at PUKIY. To remove the hold, the first step is to tap the approach in green and a menu pops up.
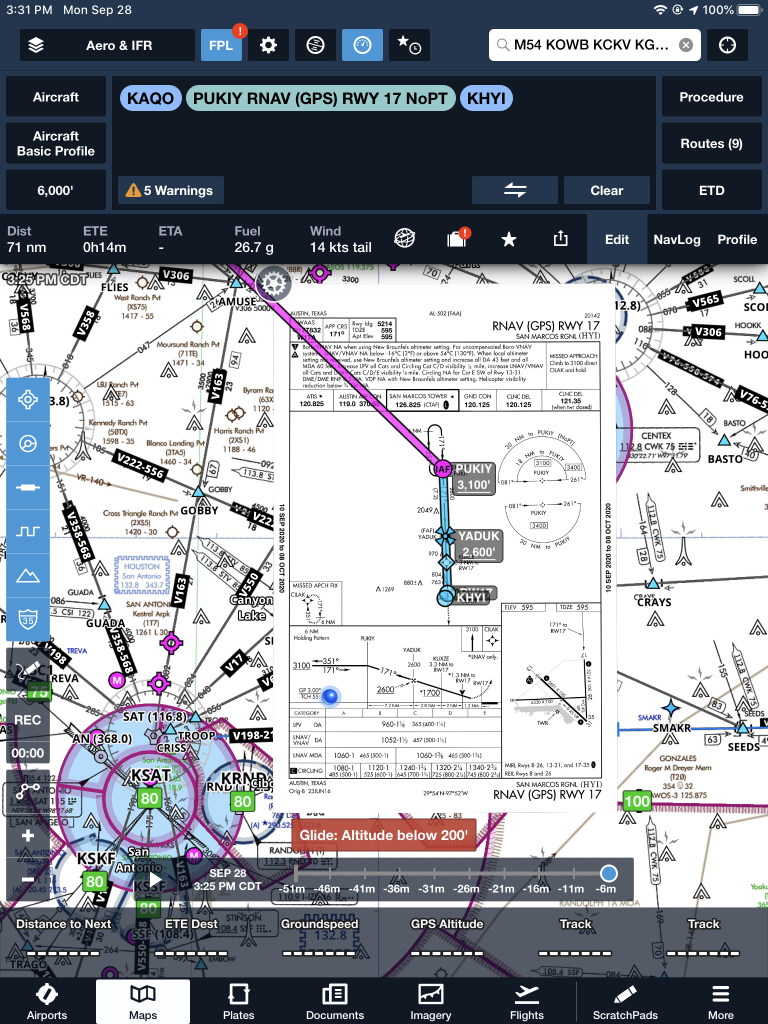
The 7th option down is “Remove Hold in lieu of PT.” Eureka! Tap that, then the approach is displayed without the hold. Houston, we have success! It even says “NoPT” in the flight plan.
April 18th, 2020 was supposed to mark the MMOPA Spring Safety Stand Down, an event held around the country for PA46 owners which counted toward the Master Aviator program. Sadly, due to the COVID-19 repercussions, the in person event had to be canceled.
Thankfully, due to modern technology, the event has been rescheduled to a nationwide webcast. The date for the Online MMOPA Safety Standdown in Saturday, August 8th. Joe Casey and Travis Holland will be hosting the MMOPA Safety Standdown.
Some of a pilot’s favorite words are heard on the ATIS: “Winds, Calm.” These words set off all sorts of happy bells and hallelujah choruses. Most pilots spend their lives fighting the winds. On those rare days when the winds are calm, great happiness ensues.
But, are calm wind landings more complicated then everyone thinks? Well, they can be if the proper planning doesn’t go into them.
Let’s think about wind. We have surface wind and we have winds aloft. Sometimes the surface winds are calm. When this happens, certain airports have preferred calm wind runways which are supposed to be used in these conditions. Winds aloft are almost never calm. 95% of the time, there is some kind of wind even 100-200 feet above the surface.
Here is the question pilot’s face when coming into an airport with calm winds: which runway do I use? Do I use the calm wind runway? Do I use the runway that is easiest to enter the pattern for? Do I use the one with the shortest taxi?
A lot of technologically advanced aircraft have a wind indicator on the PFD. This tool is often forgotten in calm surface wind conditions. On the contrary, this is probably the most important tool a pilot can have when figuring out which runway to use when the winds are reported calm.
Here’s why. That wind indicator is showing the pilot what the winds aloft are. The winds aloft should determine what runway is going to be used. If the wind indicator is depicting a south wind, then a south runway should be used. Even if it is a 5 knot wind at pattern altitude, it’ll still be a headwind coming in on final approach. If the north facing runway is used, that same 5 knot headwind can blow an airplane halfway down the runway before the ground speed drops off enough for it to land.
So, the next time you are coming into an airport and the winds are reported calm, take a look at your wind indicator on your PFD when deciding which runway to use. It’ll probably save a few go arounds!